Round 4 vs Michael Pearcy
Push at 2000 points
Night-stalkers
Scarecrow Regiment
Scarecrow Horde
Doppelgangers
Shadow Hounds Regiment
Butchers Horde
Butchers Horde
Soulflayers Regiment
Terror
Shadow-hulk
Dread-fiend
Void Lurker
This is the same list again.
Free Dwarfs
Free Dwarf Shieldbreakers Horde - Brew of Haste
Berserkers Regiment
Berserkers Regiment
Free Dwarf Rangers Regiment - Blessing of the Gods
Free Dwarf Rangers Regiment - Hearneas’ Rangers
Ironbelcher Cannon
Ironbelcher Cannon
Dwarf Lord on Large Beast - Sir Jesse’s Boots of Striding
Dwarf Lord on Large Beast - Maccwar’s Potion of the Caterpillar
Berserker Lord - Wings of Honeymaze
Sveri Egilax on Hellbrock
Speed 5 dwarfs! With some extra mobile and tough lords and a decent amount of scout and wild charge. Even if I catch the lords it will be another thing to actually put them down. Cannons are not as good against night-stalkers, but can still put that little bit of extra damage on my titans.
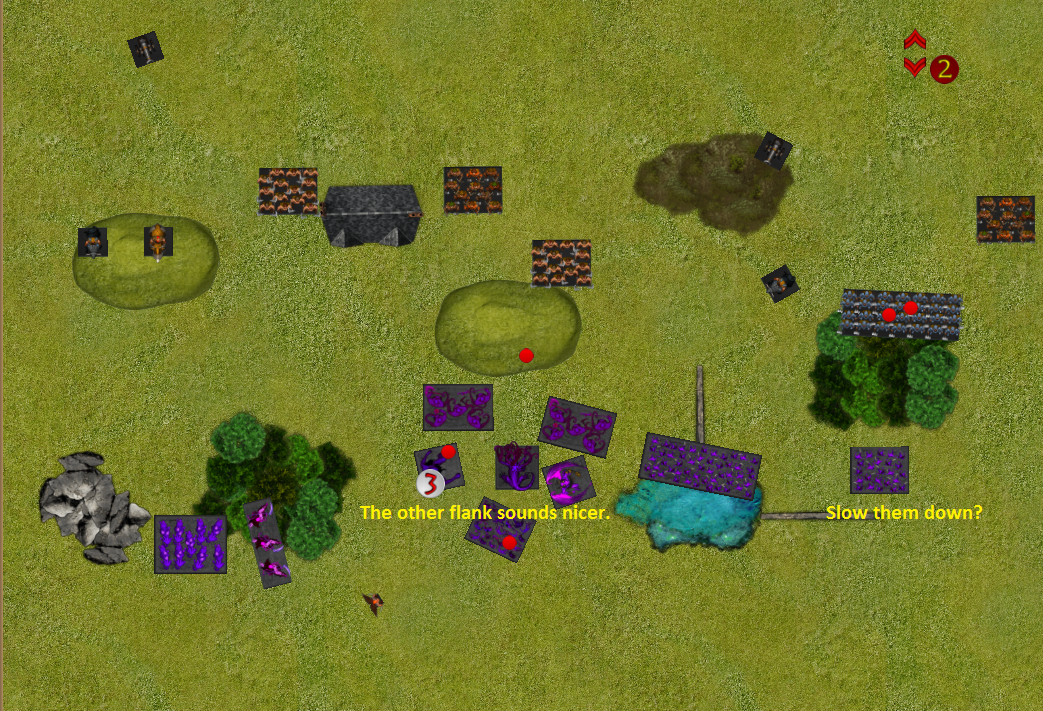
Deployment
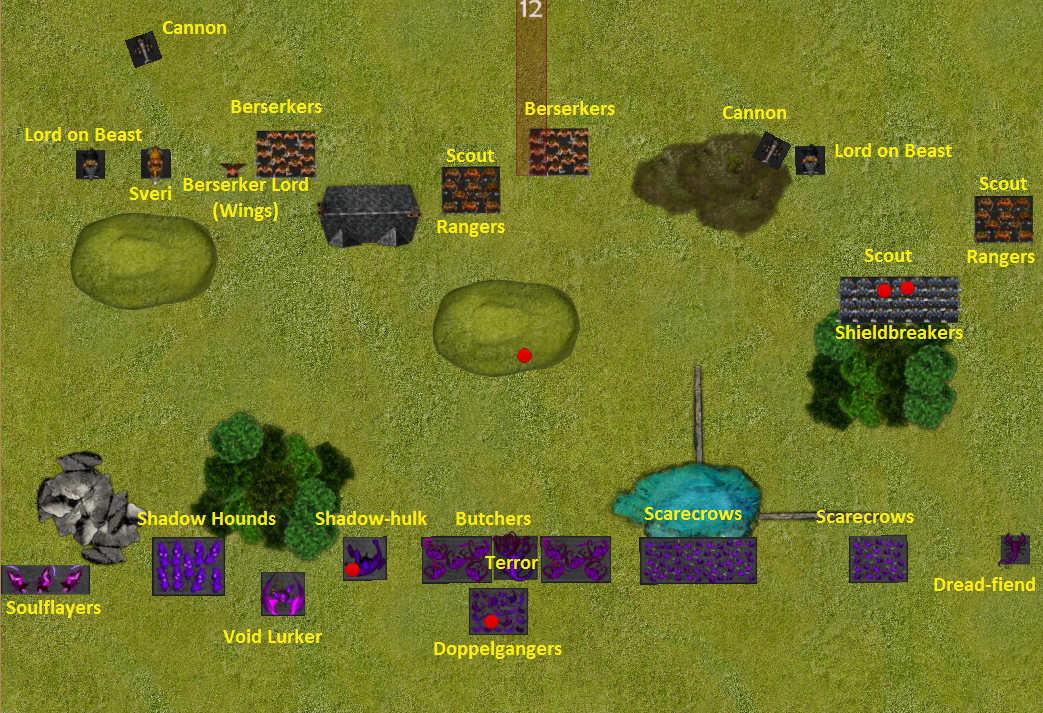
The plan was to be aggressive on the right flank (just need to hop the terrain) while I push through the middle (doppelgangers with loot in tow). The shadow-hulk has loot because I didn’t want to put both tokens on one unit, this was a mistake. The scarecrows are meant to slow down my opponent on the right.
My opponent saw my strong left and put his loot far away from it. Then opposed my units with a lord an Sveri. This effectively countered my plan. Not only would it be difficult to deal with those units, there is also nothing to fight for on that flank.
Free Dwarfs turn 1
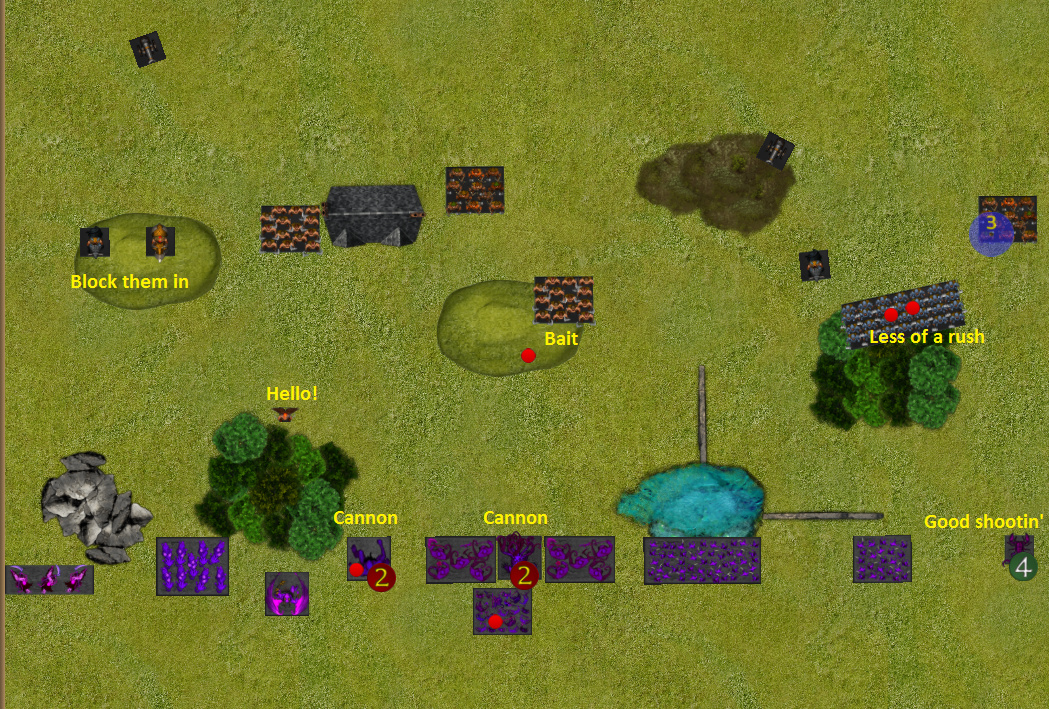
The game starts with a reminder not to deploy units in a position where they need to clear terrain in the first turn. My units that are supposed to be putting pressure on the right flank are stuck, they don’t have line of sight to charge and will get charged if they hop over the terrain like I planned.
The berserker lord flies up and a regiment of berserkers get thrown out to bait a charge from the terror and give my line pause. The loot carrying horde hangs around. Cannons scratch my titans and the rangers on the right put some hurt on my dread-fiend.
Night-stalkers turn 1
The soulflayers cannot turn and leave without landing on the shadow hounds, so slide sideways to at least project some threat. The void lurker turns to project threat and start toward the right flank.
My line shuffles up to charge range.
Free Dwarfs turn 2
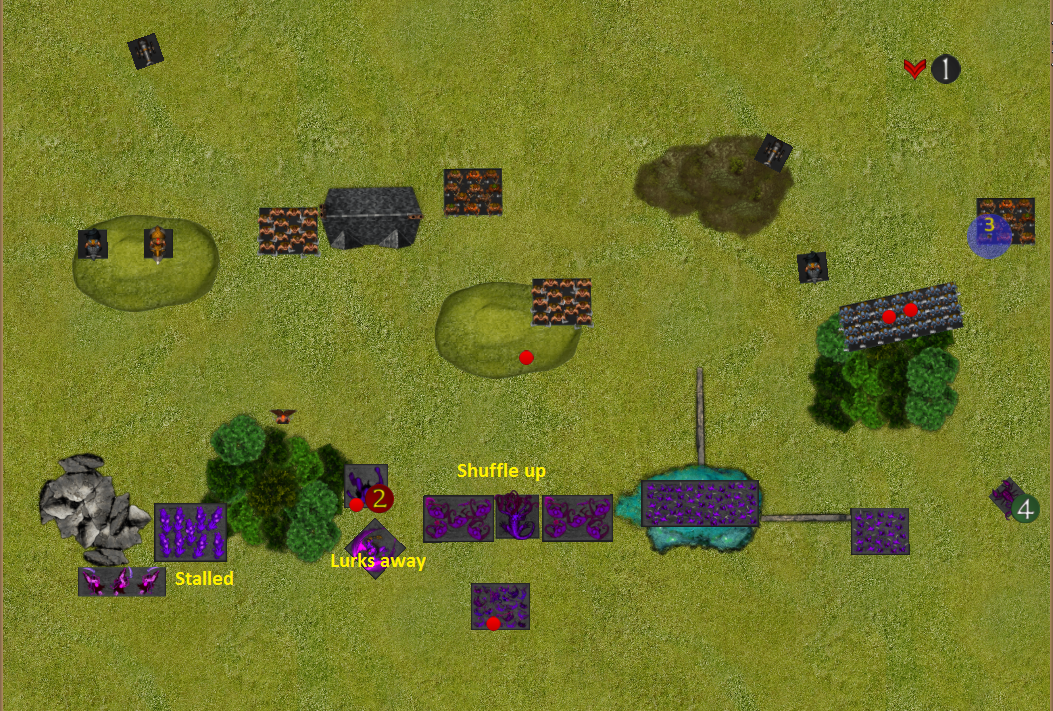
The dread-fiend gets show off while the cannons turn their attention to the shadow-hulk.
The berserkers back up to delay engagement! The berserker lord shows them how things are done by jumping behind my lines.
Night-stalkers turn 2
The night-stalkers titans make a hard right turn, there is no reason to engage with the dwarf left flank. The butchers push up to cover the move. The shadow hounds stay to delay the left flank.
The scarecrows push up to put on some pressure, but go too far.
Free Dwarfs turn 3

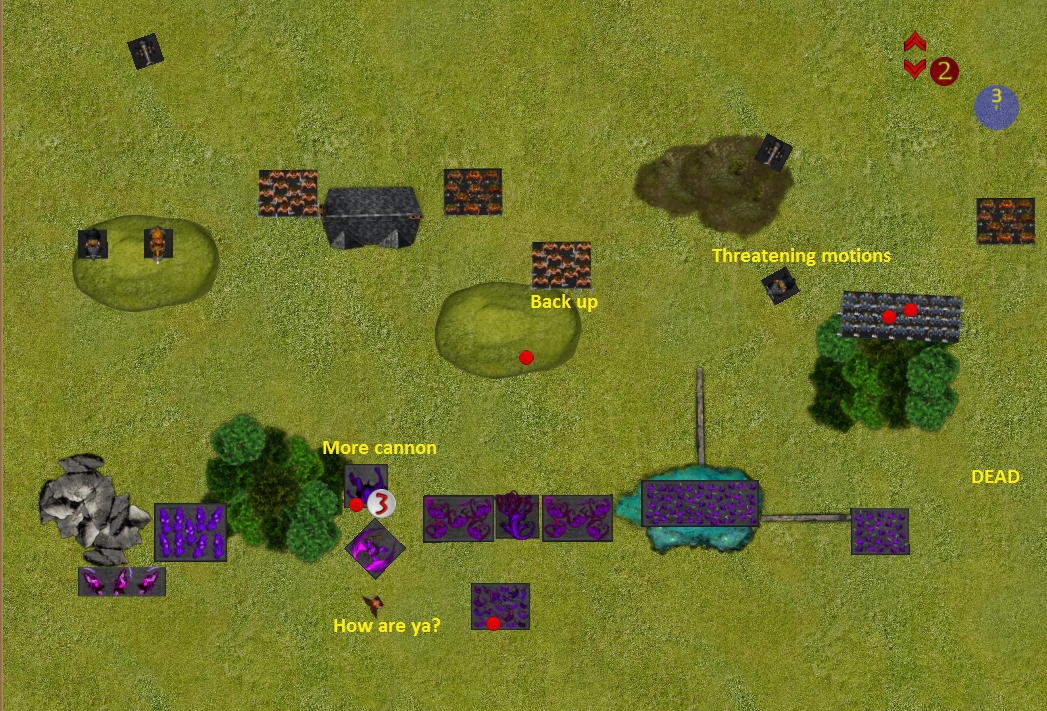
The beserkers, lord and horde of shieldbreakers devastate and destroy the scarecrow horde, putting them in a fight with my core. The loot is passed to the rangers on the right.
Shadow hounds are not enough to deter dwarfs on large beasts, the dwarfs rumble forward on the left.
The pressure is on!
Night-stalkers turn 3
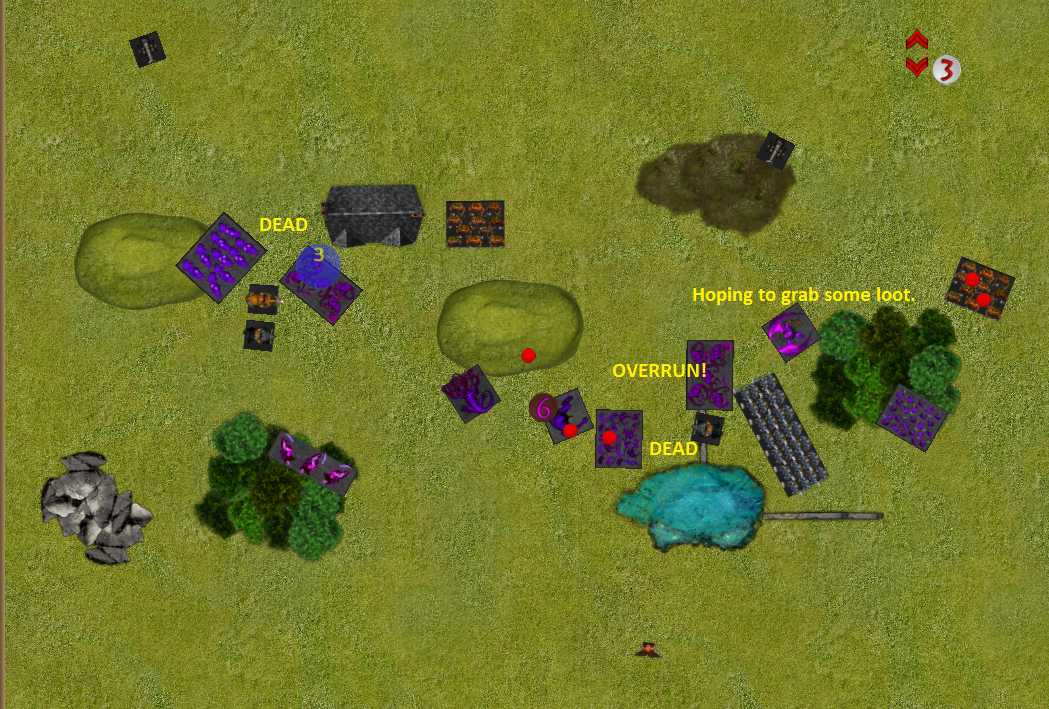
Berserkers die. The shadow hounds smell blood and get a flank on the left unit while butchers go in. doppelgangers and the other butchers destroy the berserker regiment on the right. Those butchers overrun as far as they can, properly exposing their flank.
The void lurker goes ranger hunting and the scarecrow regiment try to help.
Free Dwarfs turn 4

Sveri and the left berserker lord plunge into the middle of the night-stalker army.
The scarecrow regiment is destroyed and allows the rangers to overrun out of the void lurker’s arc.
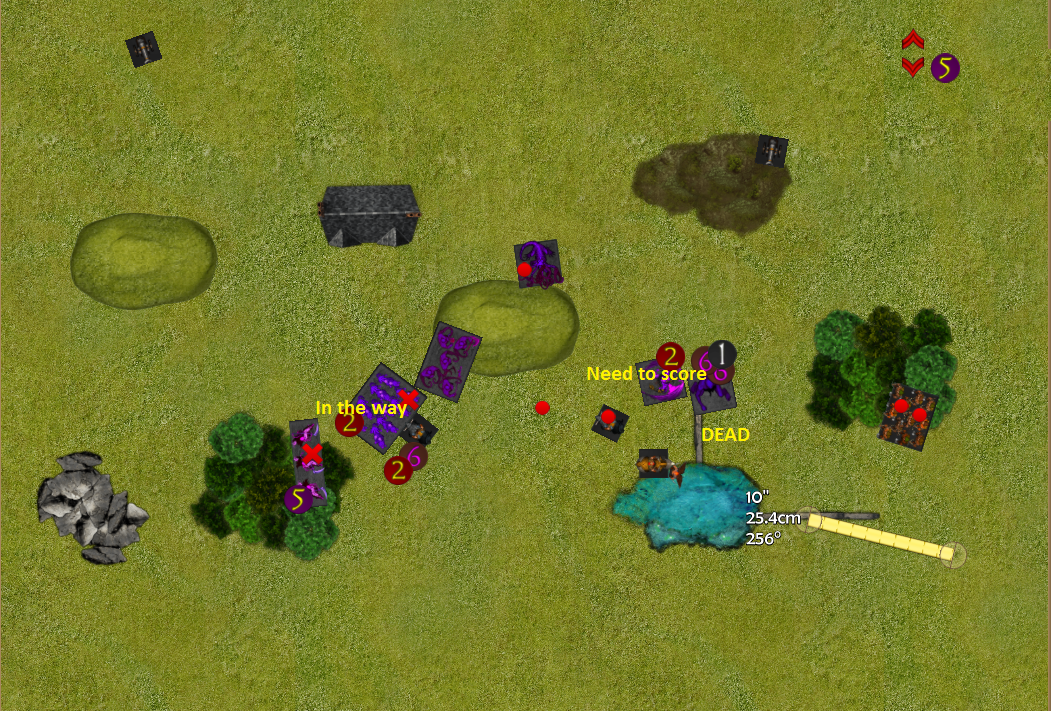
Night-stalkers turn 4
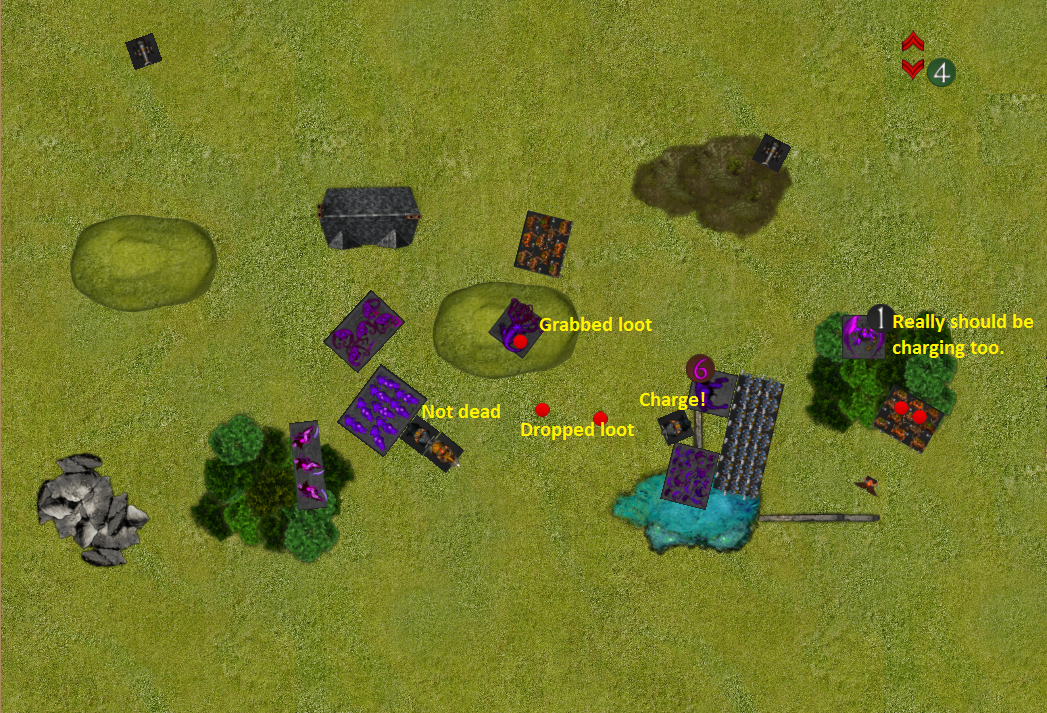
The shadow hounds show that a dwarf lord really does not need to worry about them, they charge the rear of the left one and do not even waver. The void lurker turns to finally charge the rangers.
The terror pushes up to grab loot and also kill some rangers.
The shadow-hulk and doppelgangers drop their loot to charge the horde, but do not shake their nerve despite 16 damage. Which is unfortunate, because I need to charge through to get at those rangers.
The soulflayers position to grab and protect the dropped loot.
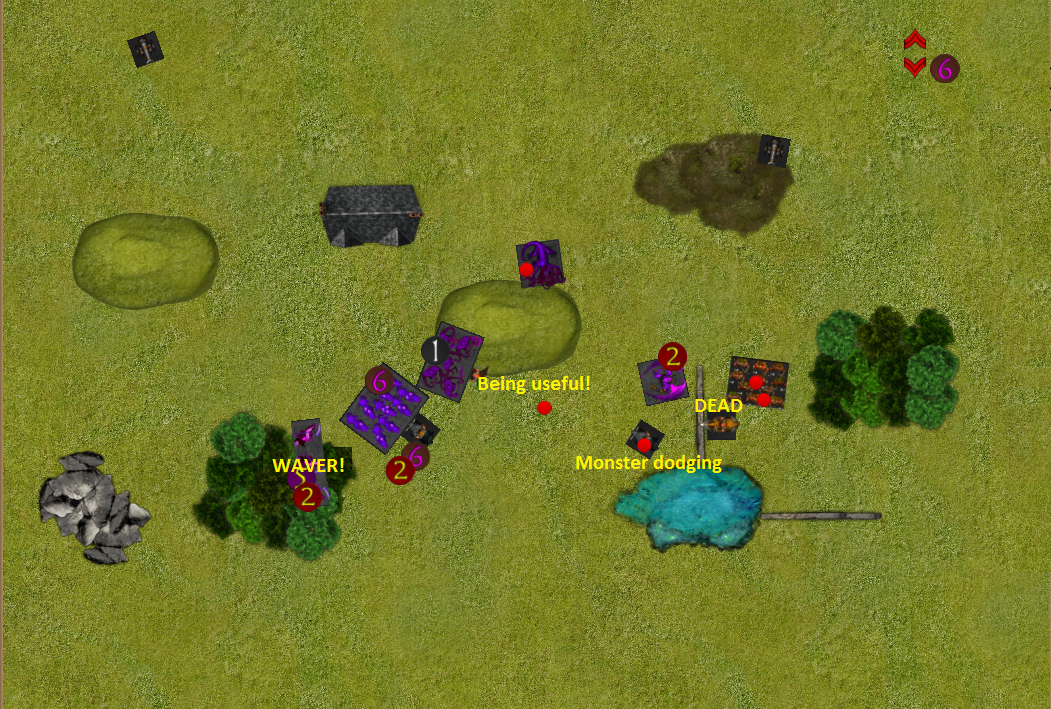
Free Dwarfs turn 5
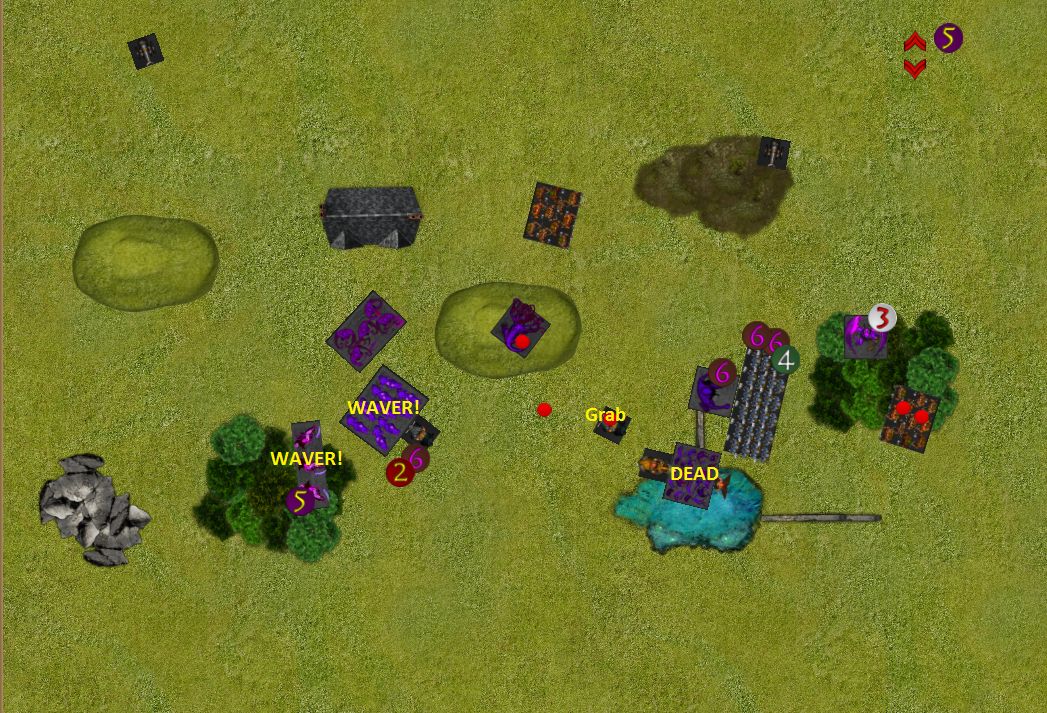
The shadow hounds continue to fail by getting wavered and a cannon shot does the same to the soulflayers. The units that I was relying on to pick up my loot are now unable to do so.
A lord grabs one of my tokens, safe from being challenged.
Sveri and the flying berserker lord kill off the doppelgangers, putting Sveri in a position to flank my void lurker if it charges the rangers.
The shadow-hulk goes up to 13 damage, but holds with a double 1!
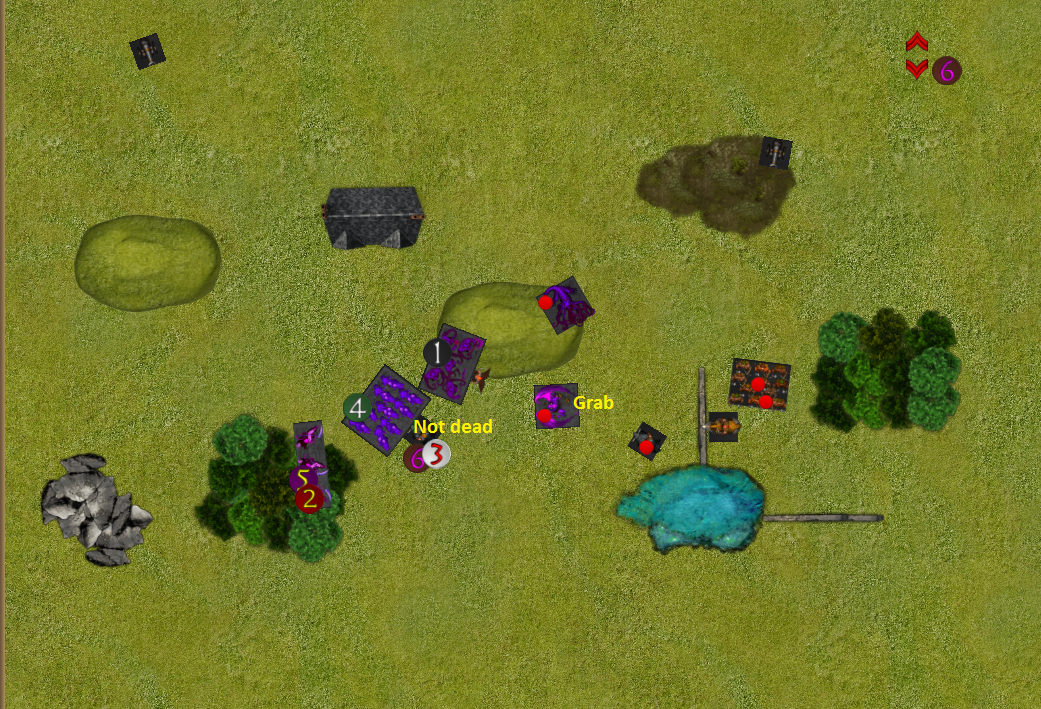
Night-stalkers turn 5
The void lurker cannot kill the rangers in one hit and will sacrifice itself to try, so goes to try score something.
The butchers are too close to the shadow hounds for them to get out of the way, so the butchers cannot join that fight.
The terror kills a unit of rangers and turns around.
Free Dwarfs turn 6
The soulflayer get wavered again!
The flying berserker lord gets in the butcher’s way and the dwarf lord with my loot dodges the void lurker’s arc.
Night-stalkers turn 6
There is nothing to do but take the loot I can and fail to kill dwarf lords.
No turn 7, the games ends 6-3 to the Free Dwarfs.
There was a tendency for things not to roll my way in this game, enough to make a close game harder, but not enough to decide the game itself. I had it the other way around in round 2 though, so it evens out.
I also didn’t play very well, I didn’t think several moves through (i.e. where they would leave me after my opponent moves). Plus my plan was bad from the beginning, I could of used the scarecrow regiment to carry the loot behind my push instead of sacrificing them to my own detriment. That would have left my shadow-hulk and doppelgangers free to do what they needed to.
It is also time to rethink my list a little. There are units that I don’t get good use out of and other that I just want to try out.
The void lurker is my most expensive unit, but I didn’t feel confident in sending it to attack a unit. I wasted it hoping around trying to get a flank. A cheaper nimble unit could also dance around and hunt flanks. Flying monsters are a lot of points that need some skill to use well, I am tempted to try this army without one.
Soulflayers also disappointed (but that was a lucky waver) I may be expecting too much from them though. I will have to reconsider their role or replace them with other units At 105 less points than the void lurker I don’t mind if they spend the game just being a threat though.
Speaking of army composition, I quite like the surprisingly mobile and aggressive list that my opponent brought! It’s also still quite tough.
I am a little pleased that Dwarfs won a game too; even though these dwarfs are not part of the great empire. 
My other army is Dwarfs and if I take part in another UB tournament, there might just might be a (slightly more narrative) series of reports featuring The Fool’s Hold!
Thank you for reading! Round 5 will be below.