I’ve been a lurker here for a while but with the new edition I’m hoping to be a bit more active in the community, so what better excuse to do that than a battle report! This was my second ever game of 4ed KoW and my opponent’s first, but we both have decent experience with 3ed. The game was 2000 points, and we chose to leave commands out of it for now.
I used Battle Chronicler to make the actual battle views but I am still getting used to the program. Some of the distances/angles are a bit off from reality resulting in some dodgy-looking manoeuvres - I’ll try to point out when that happens.
The Armies
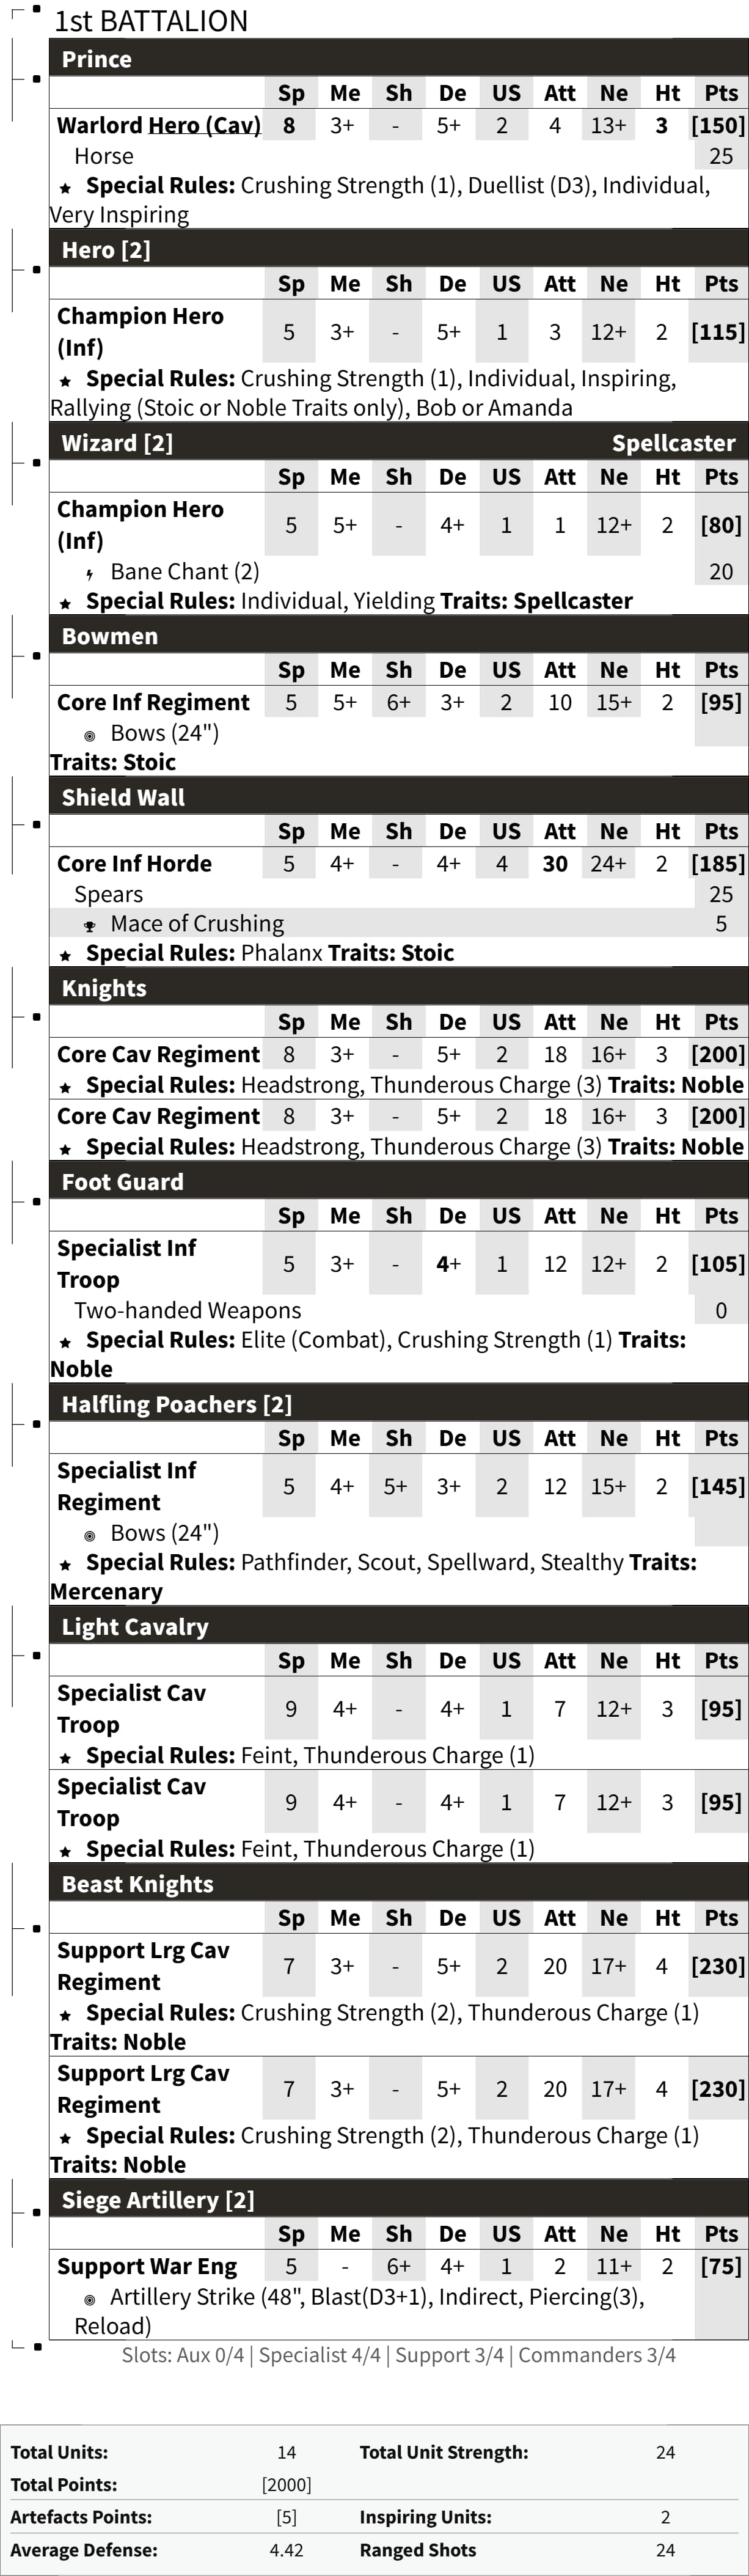
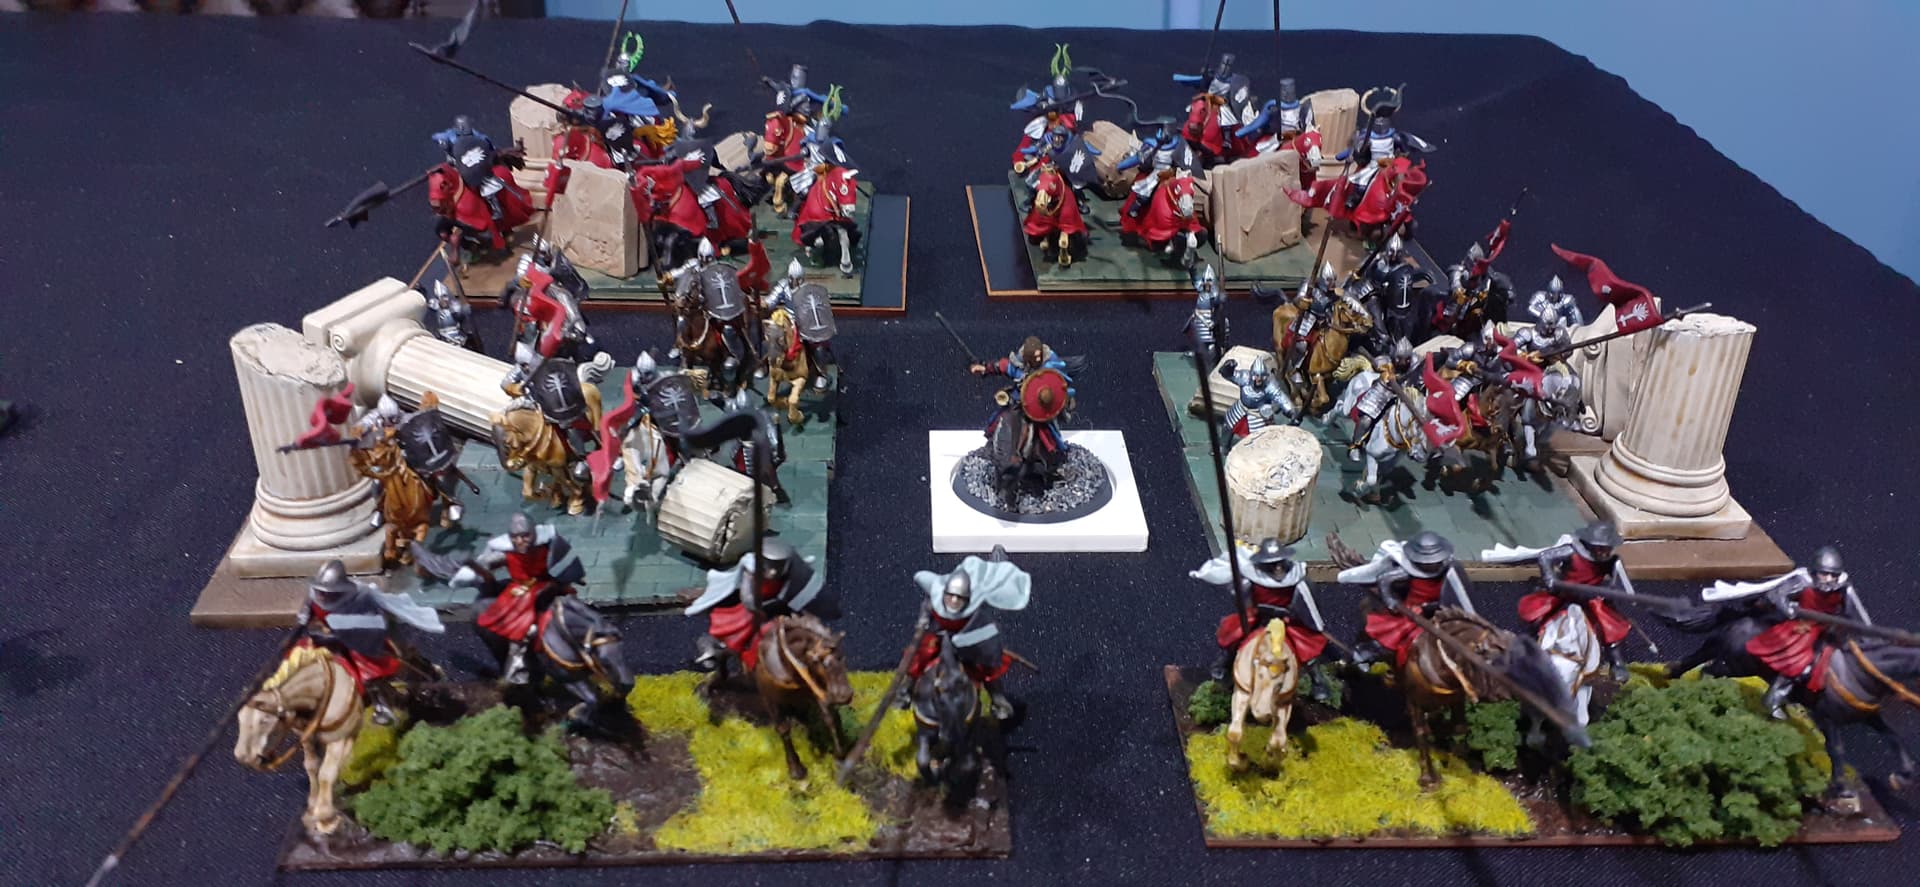
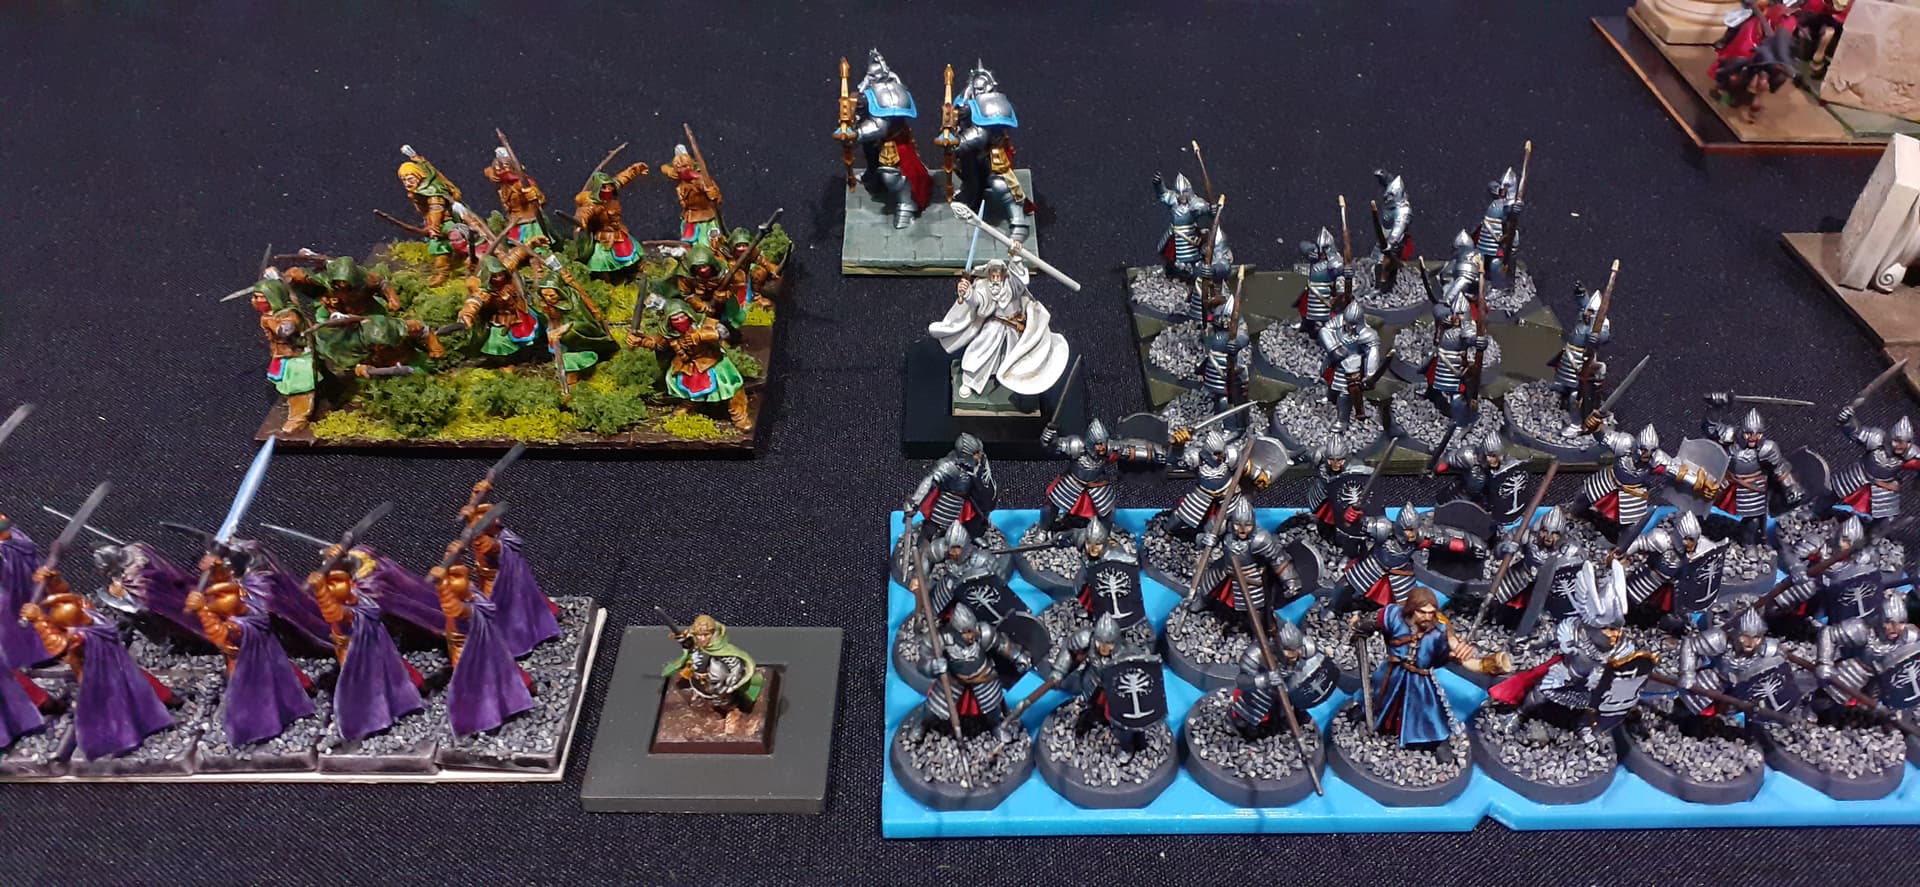
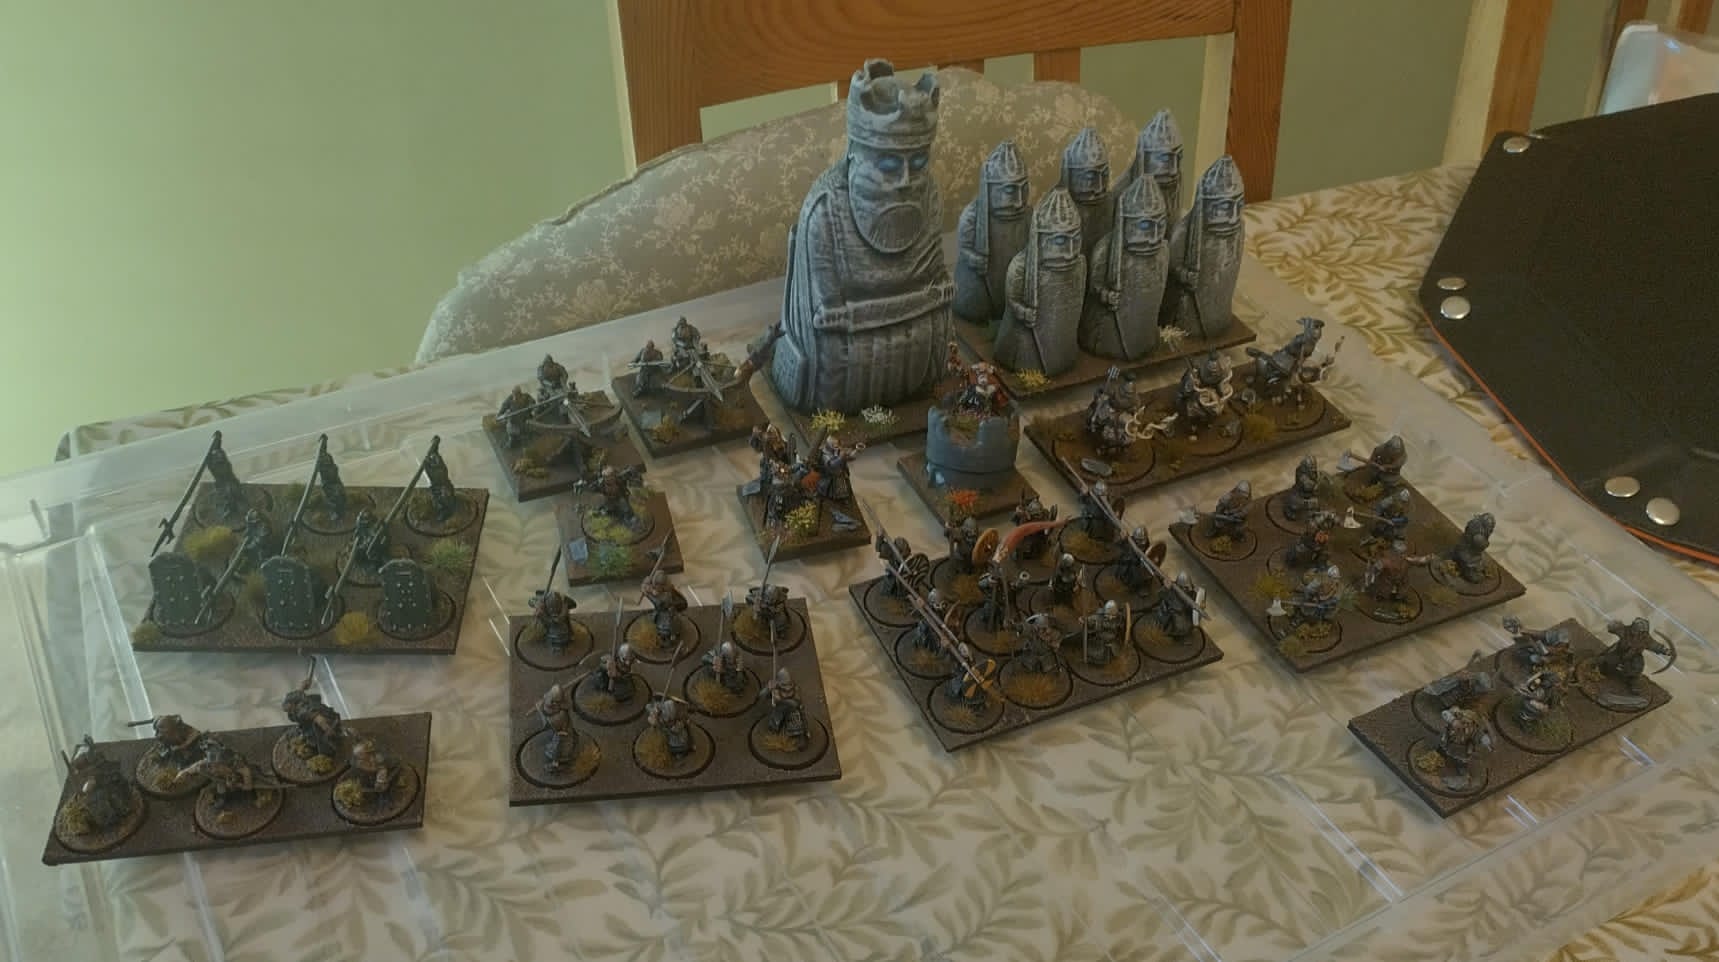
I was playing Kingdoms of Men, for the first time. This army is a mix of GW Gondor minis and a few Fireforge minis to bolster the numbers. I used to run them as a Brothermark force in 3ed and with the new edition I’m trying them out as KoM. Here’s the army list, and a picture of the crew all parade-ready:
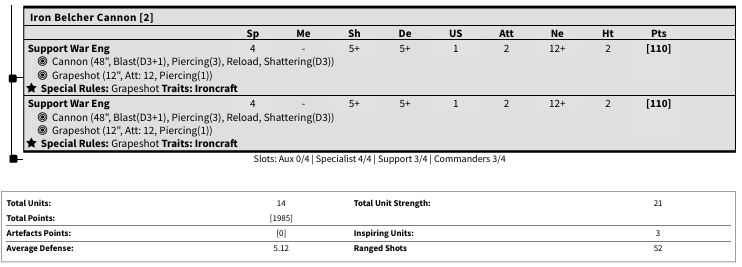
My opponent was playing Dwarfs. He had the same number of units as I did but his average defence was higher and the number of ranged shots was over double what I brought. Note that the earth elementals regiment also had the Sanguinary Scripture, not noted here.

Terrain
I set up the terrain to match example #6 in the rulebook. Dead simple. It’s worth noting that my dining table is 6’ x 3’, so it’s 12” narrower than the board is supposed to be. That’s never really mattered before, but it did today!
Deployment
We rolled for deployment shape, and got the “short table edges” result. Suddenly that narrow table is very important, as we were fighting with only a 3’ frontage!
The scenario was Loot, meaning 3 loot tokens were spaced along the middle of the board.
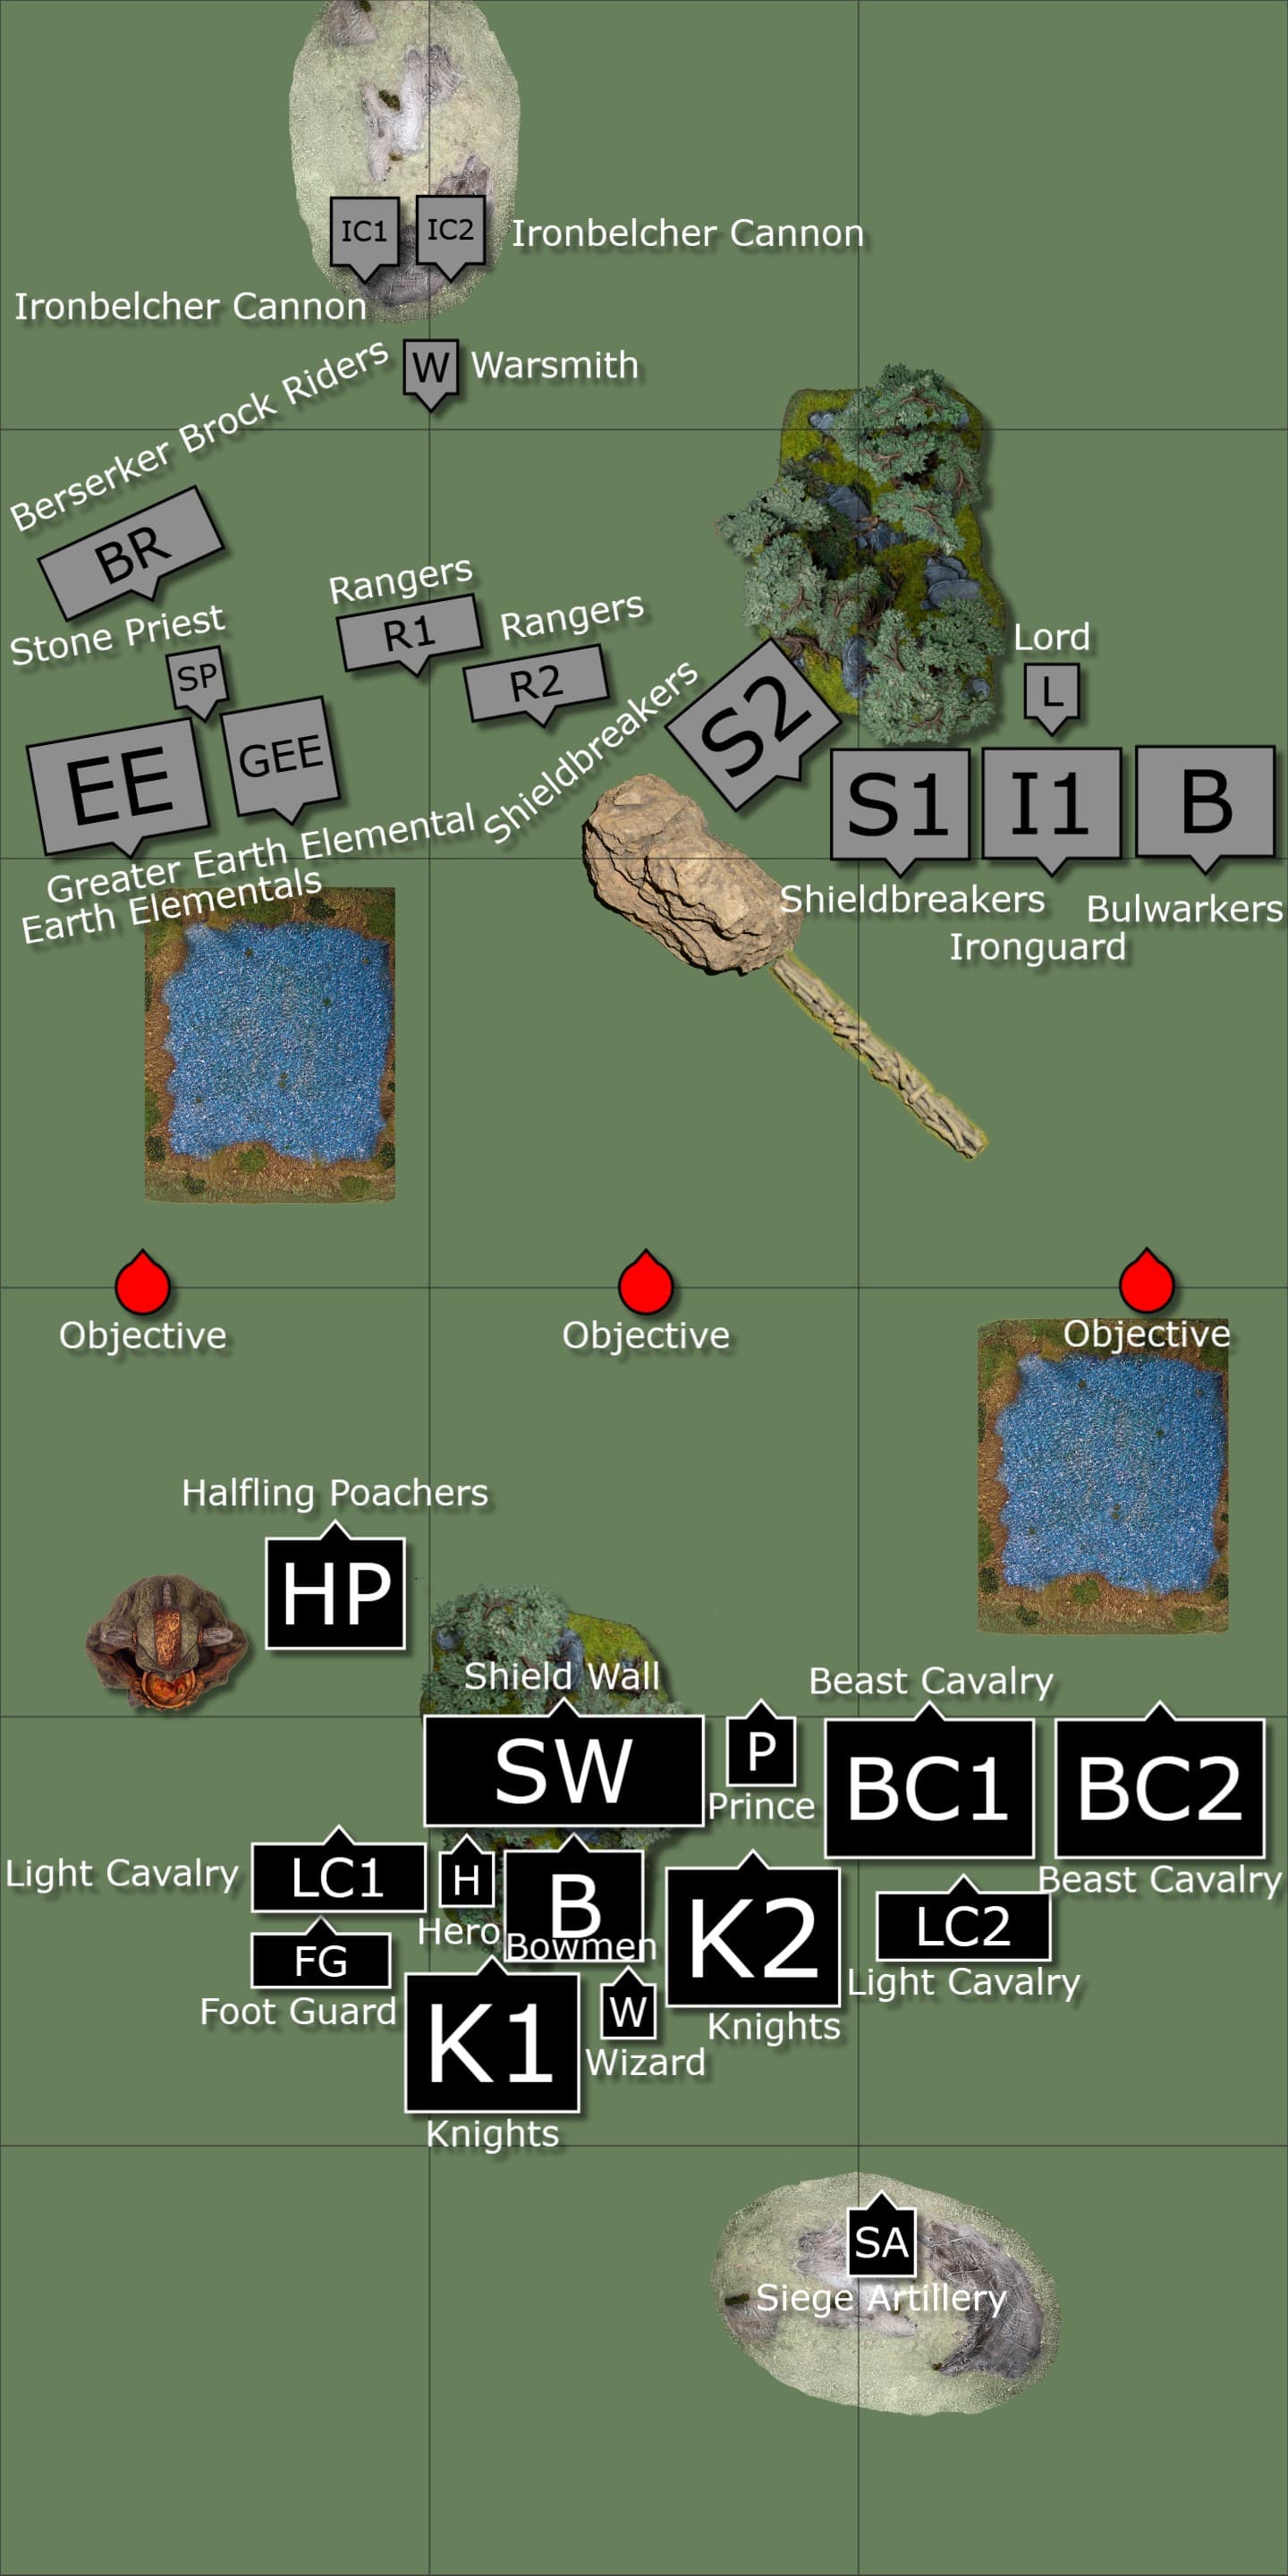
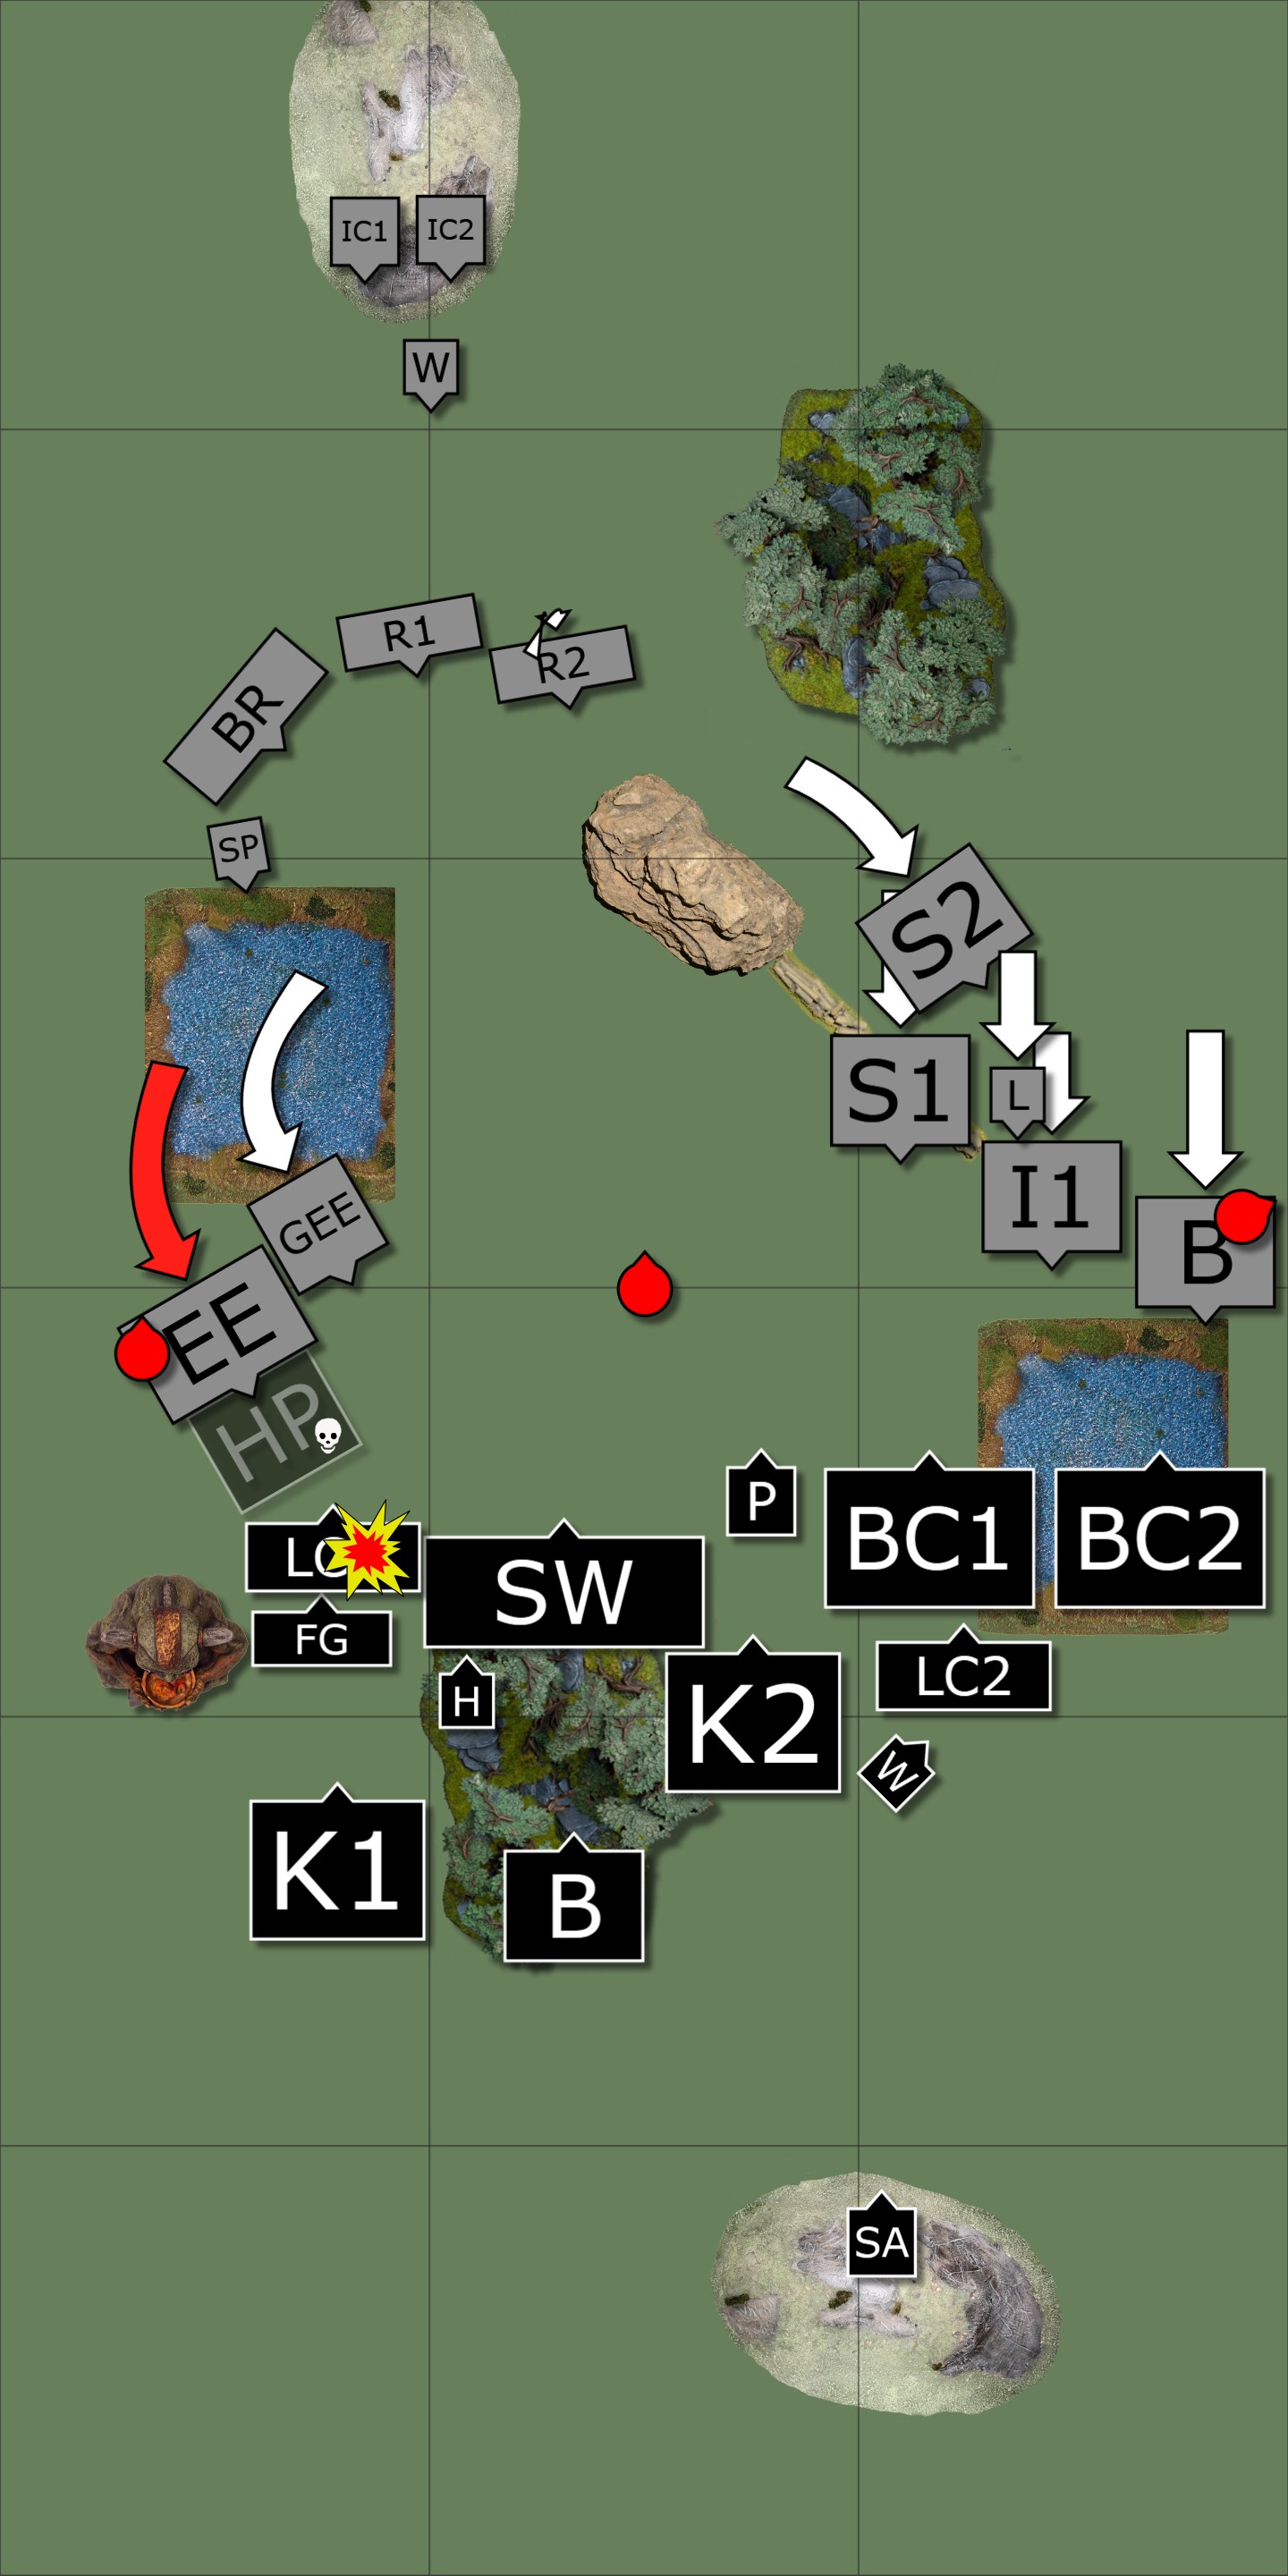
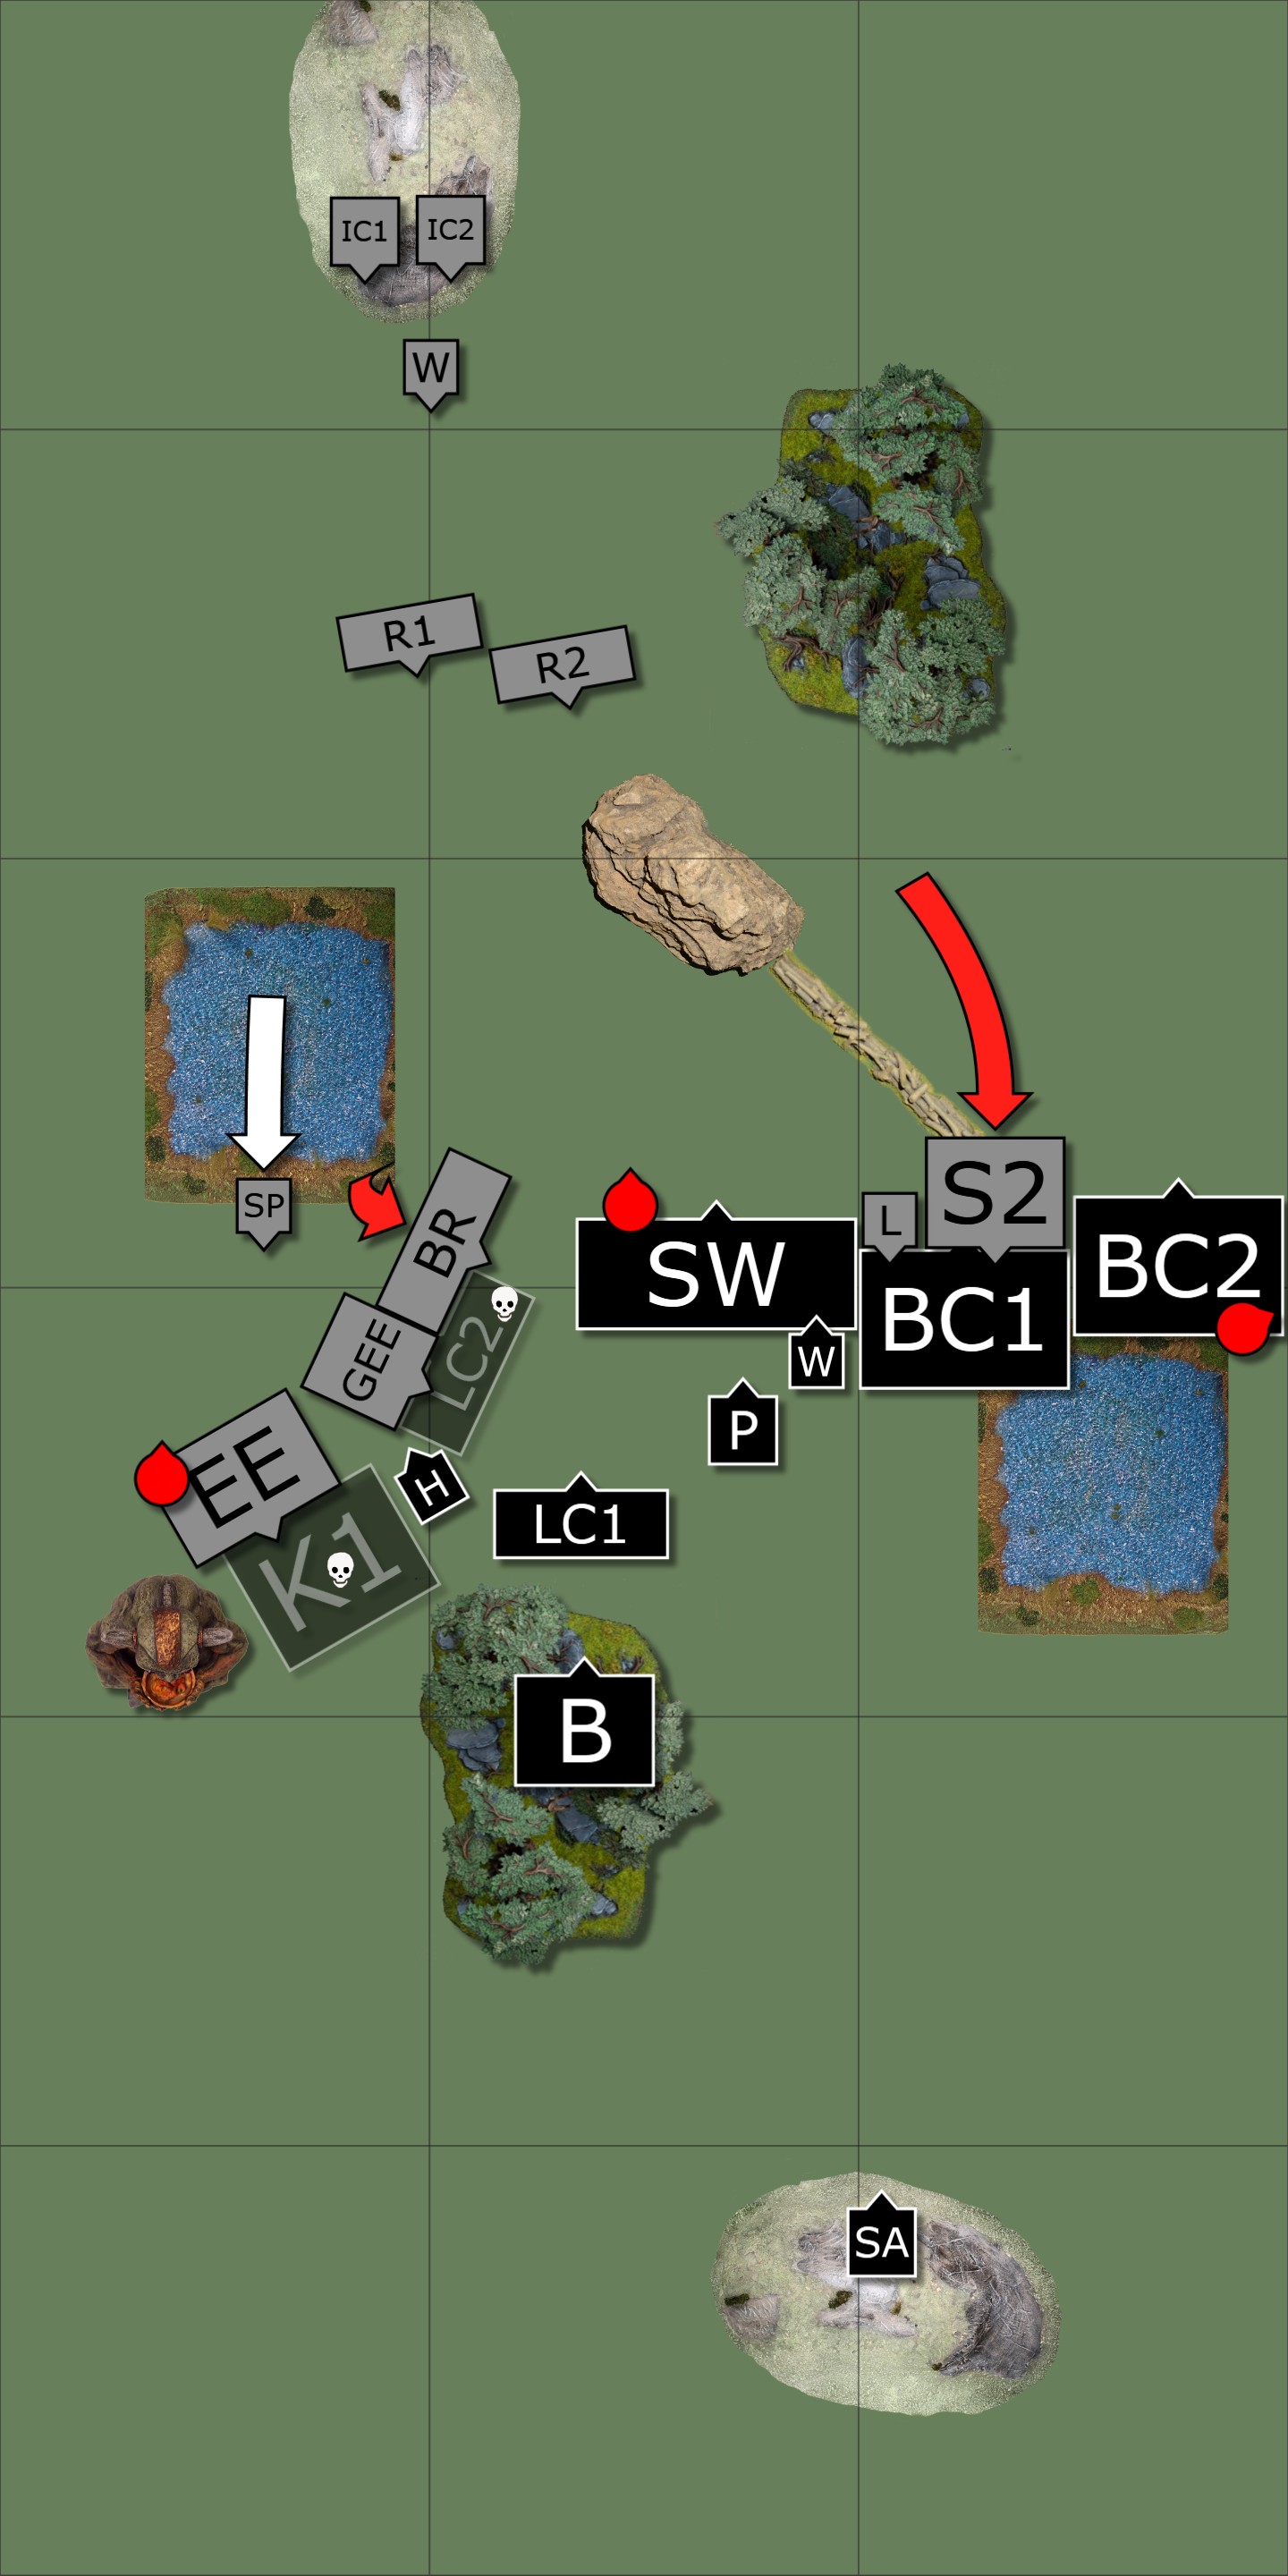
My opponent won the roll-off for deployment and very cleverly chose a side that put a piece of blocking terrain right on my front line. This meant my forces were even more squashed in. He deployed a wall of infantry along one half of the line, his elementals way out on the other wing, and a lovely gap in between for all of his ranged firepower to shoot down. My army had a much larger footprint so I really did struggle to deploy them. I put my shield wall horde down in front of the central objective, supported by the poachers and the foot guard troop. I got my beast cavalry (Fireforge Teutonic Knights) in front of my opponent’s infantry line, hoping that their crushing strength would counteract all the difficult terrain strewn around the place. Then my light cavalry and knights were behind the line, just waiting to zip through any gaps that appeared. The poachers used their scout move to threaten the left loot counter a bit.
Turn 1
The dwarfs won the roll-off and took first turn. Turn 1 was fairly uneventful, with both sides advancing to threaten each other.
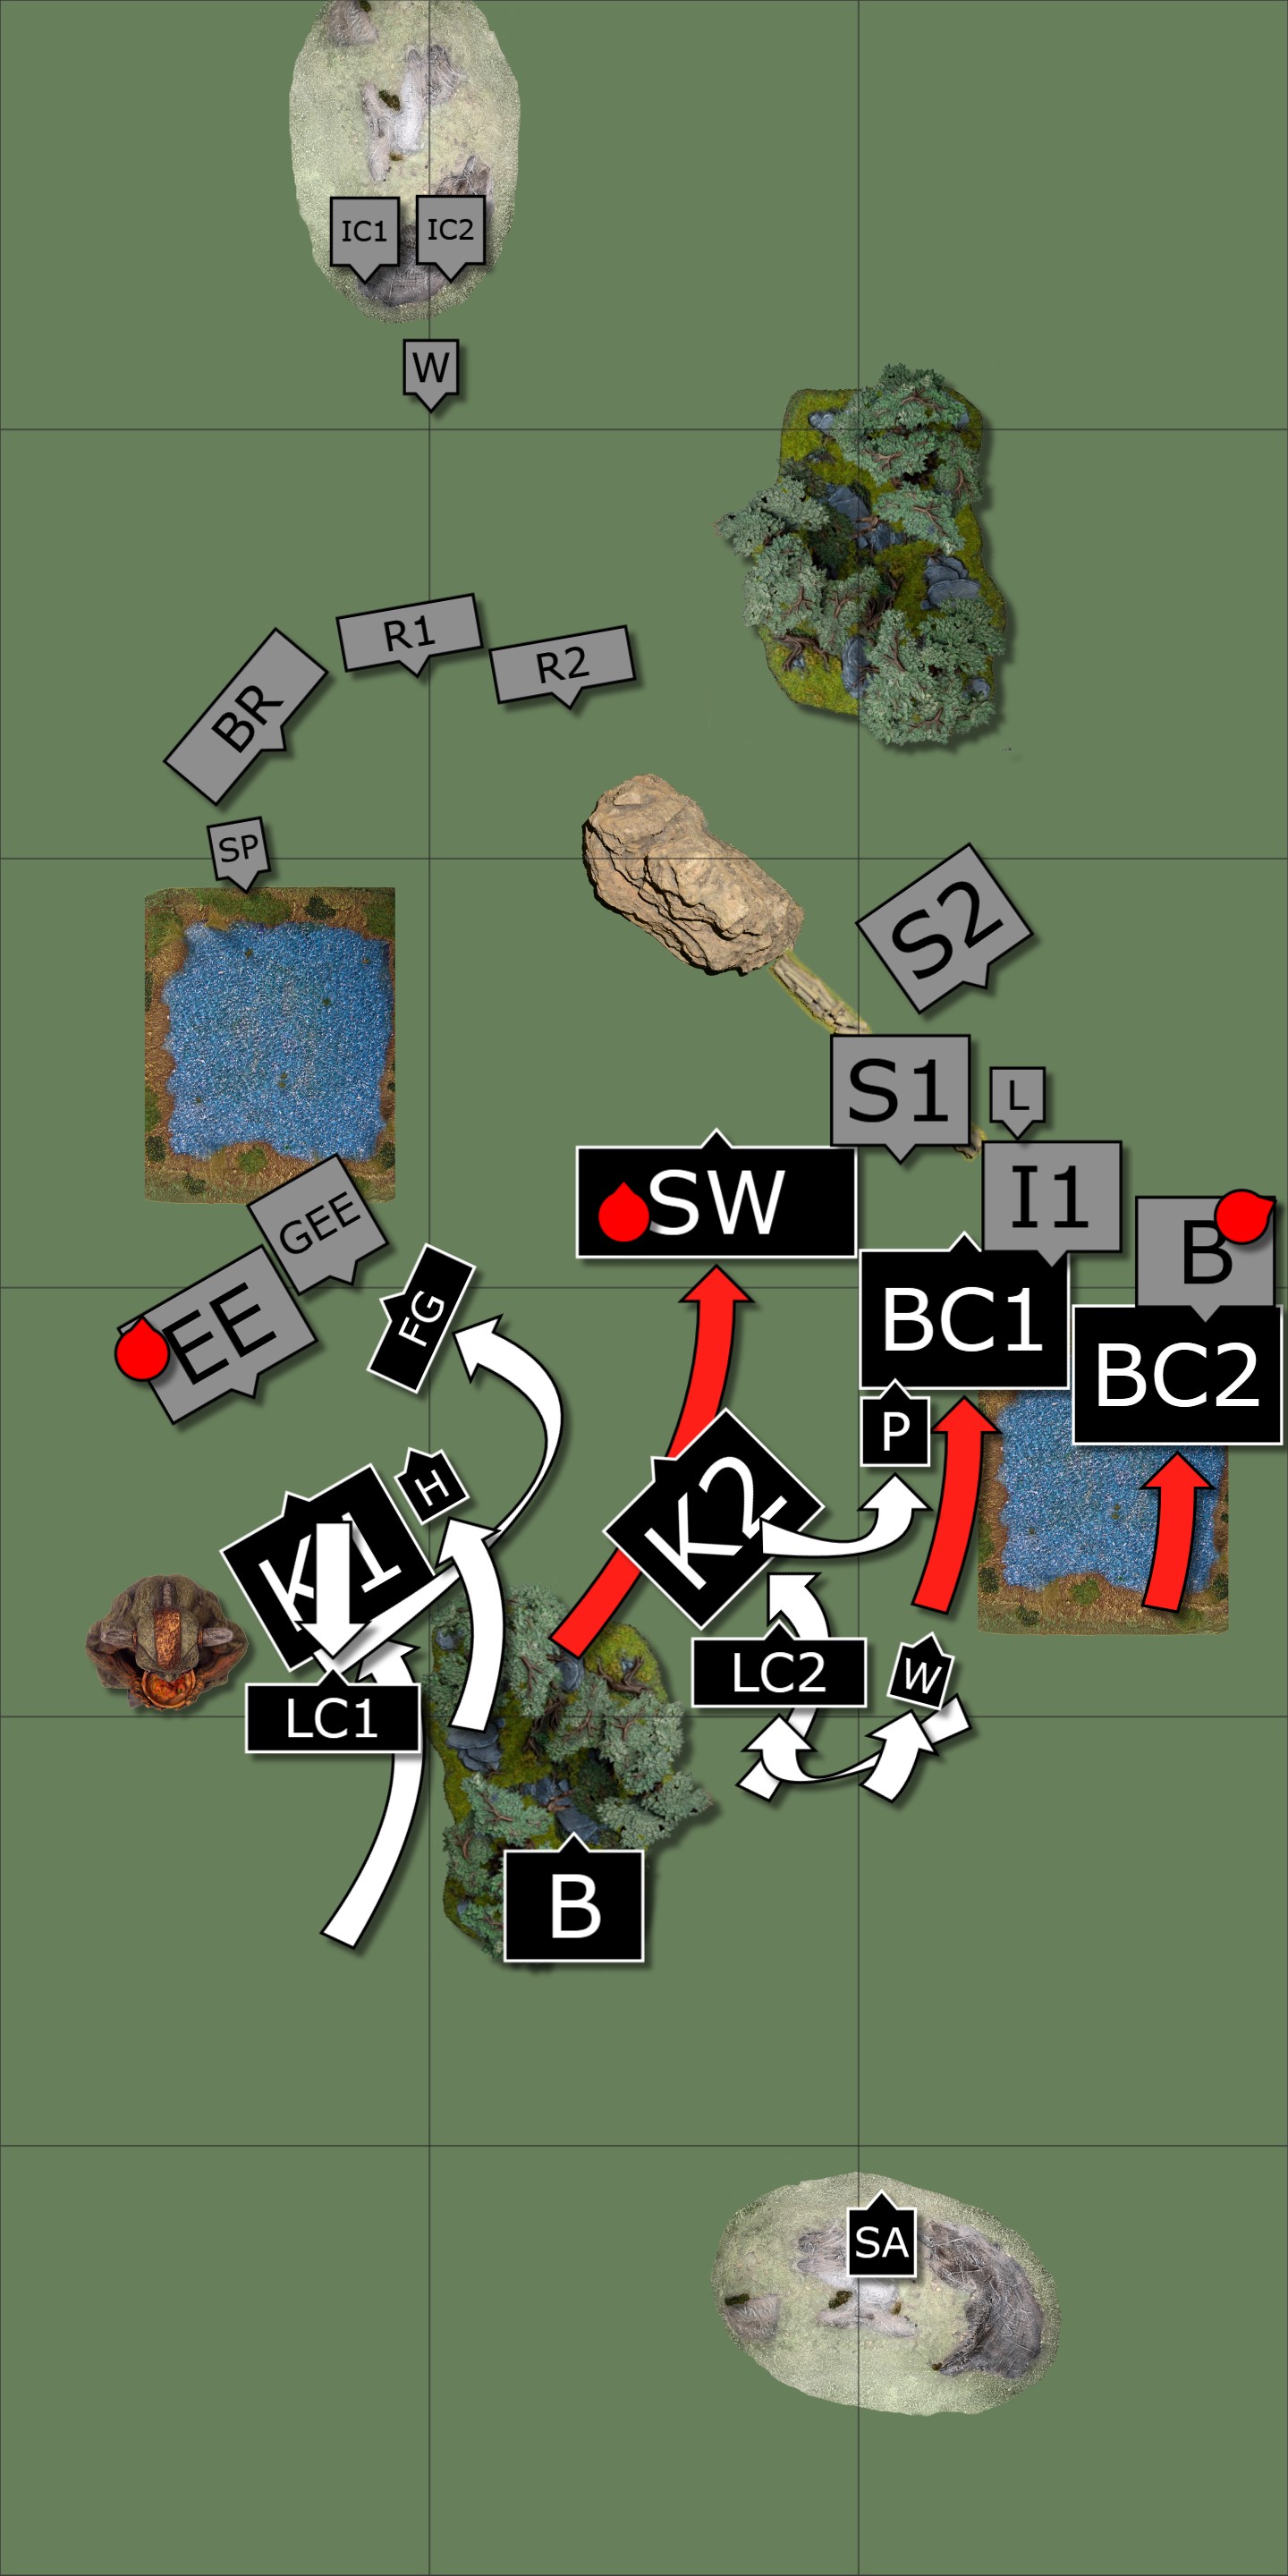
Turn 2
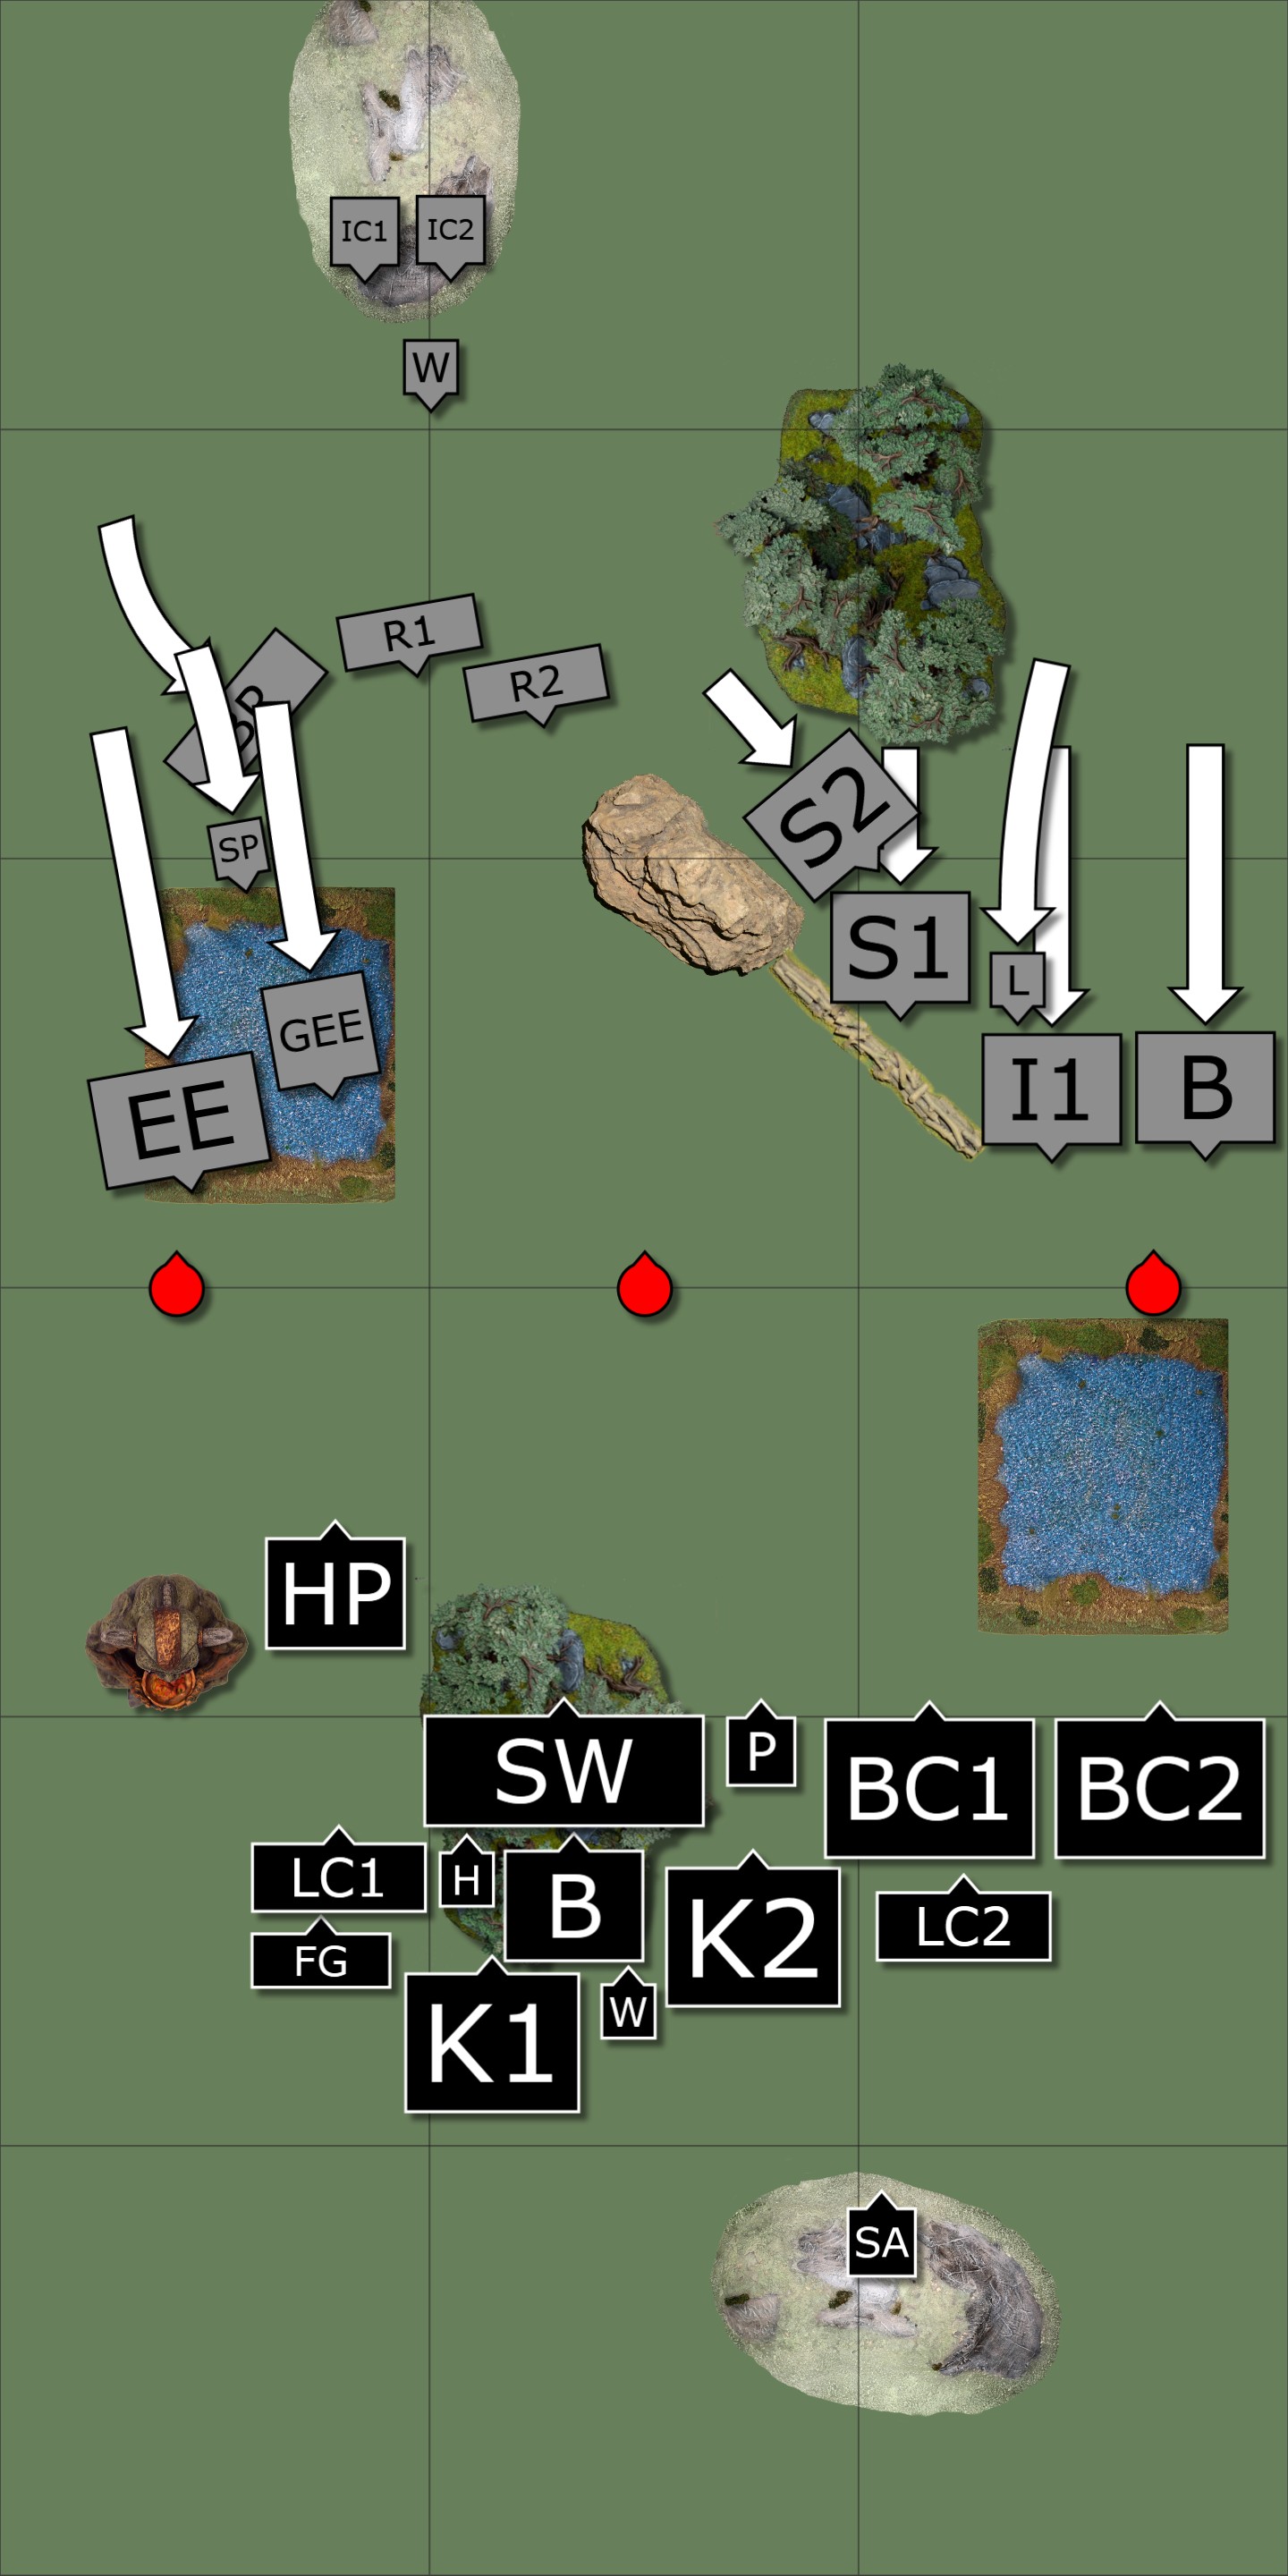
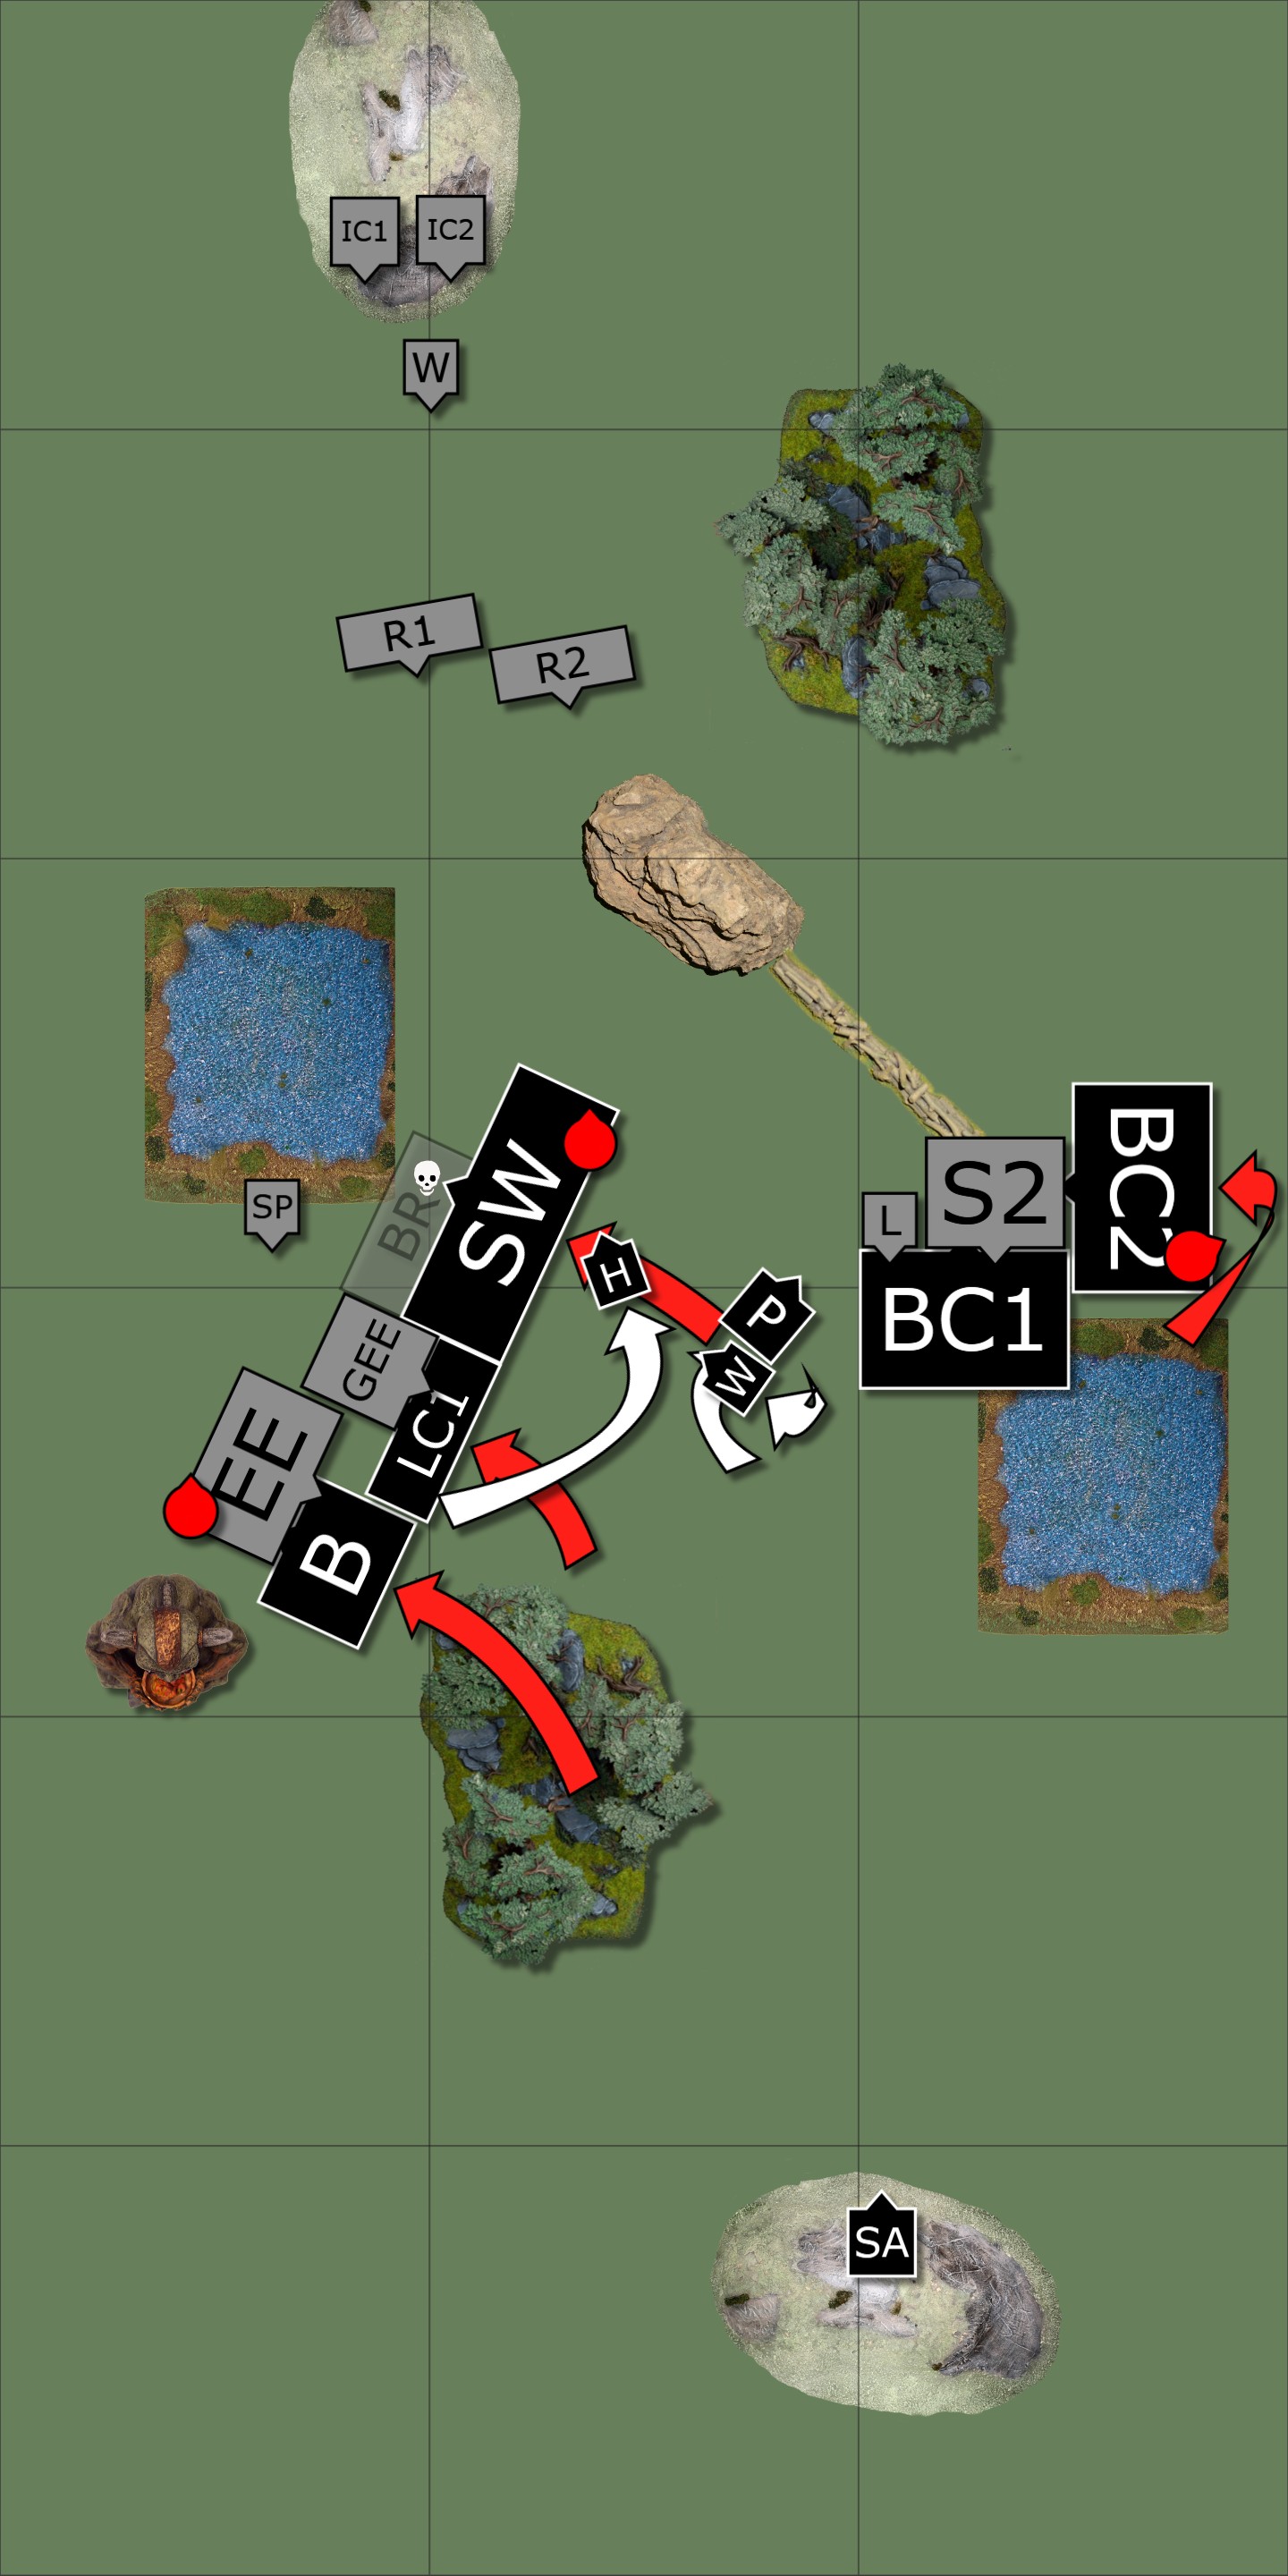
The dwarfs advanced all along their front line. The elementals in the west charged my poachers and grabbed that loot token in the process, while on the east they very cleverly stepped their units to prevent me getting any double-charges with my wider regiments. In hindsight I think I should have held the poachers back a bit to force the elementals to choose between getting the charge or the loot token. It might have slowed them down a turn, but at the time I didn’t know how dangerous they’d be. The dwarf shooting also managed to waver my light cavalry on the west flank.
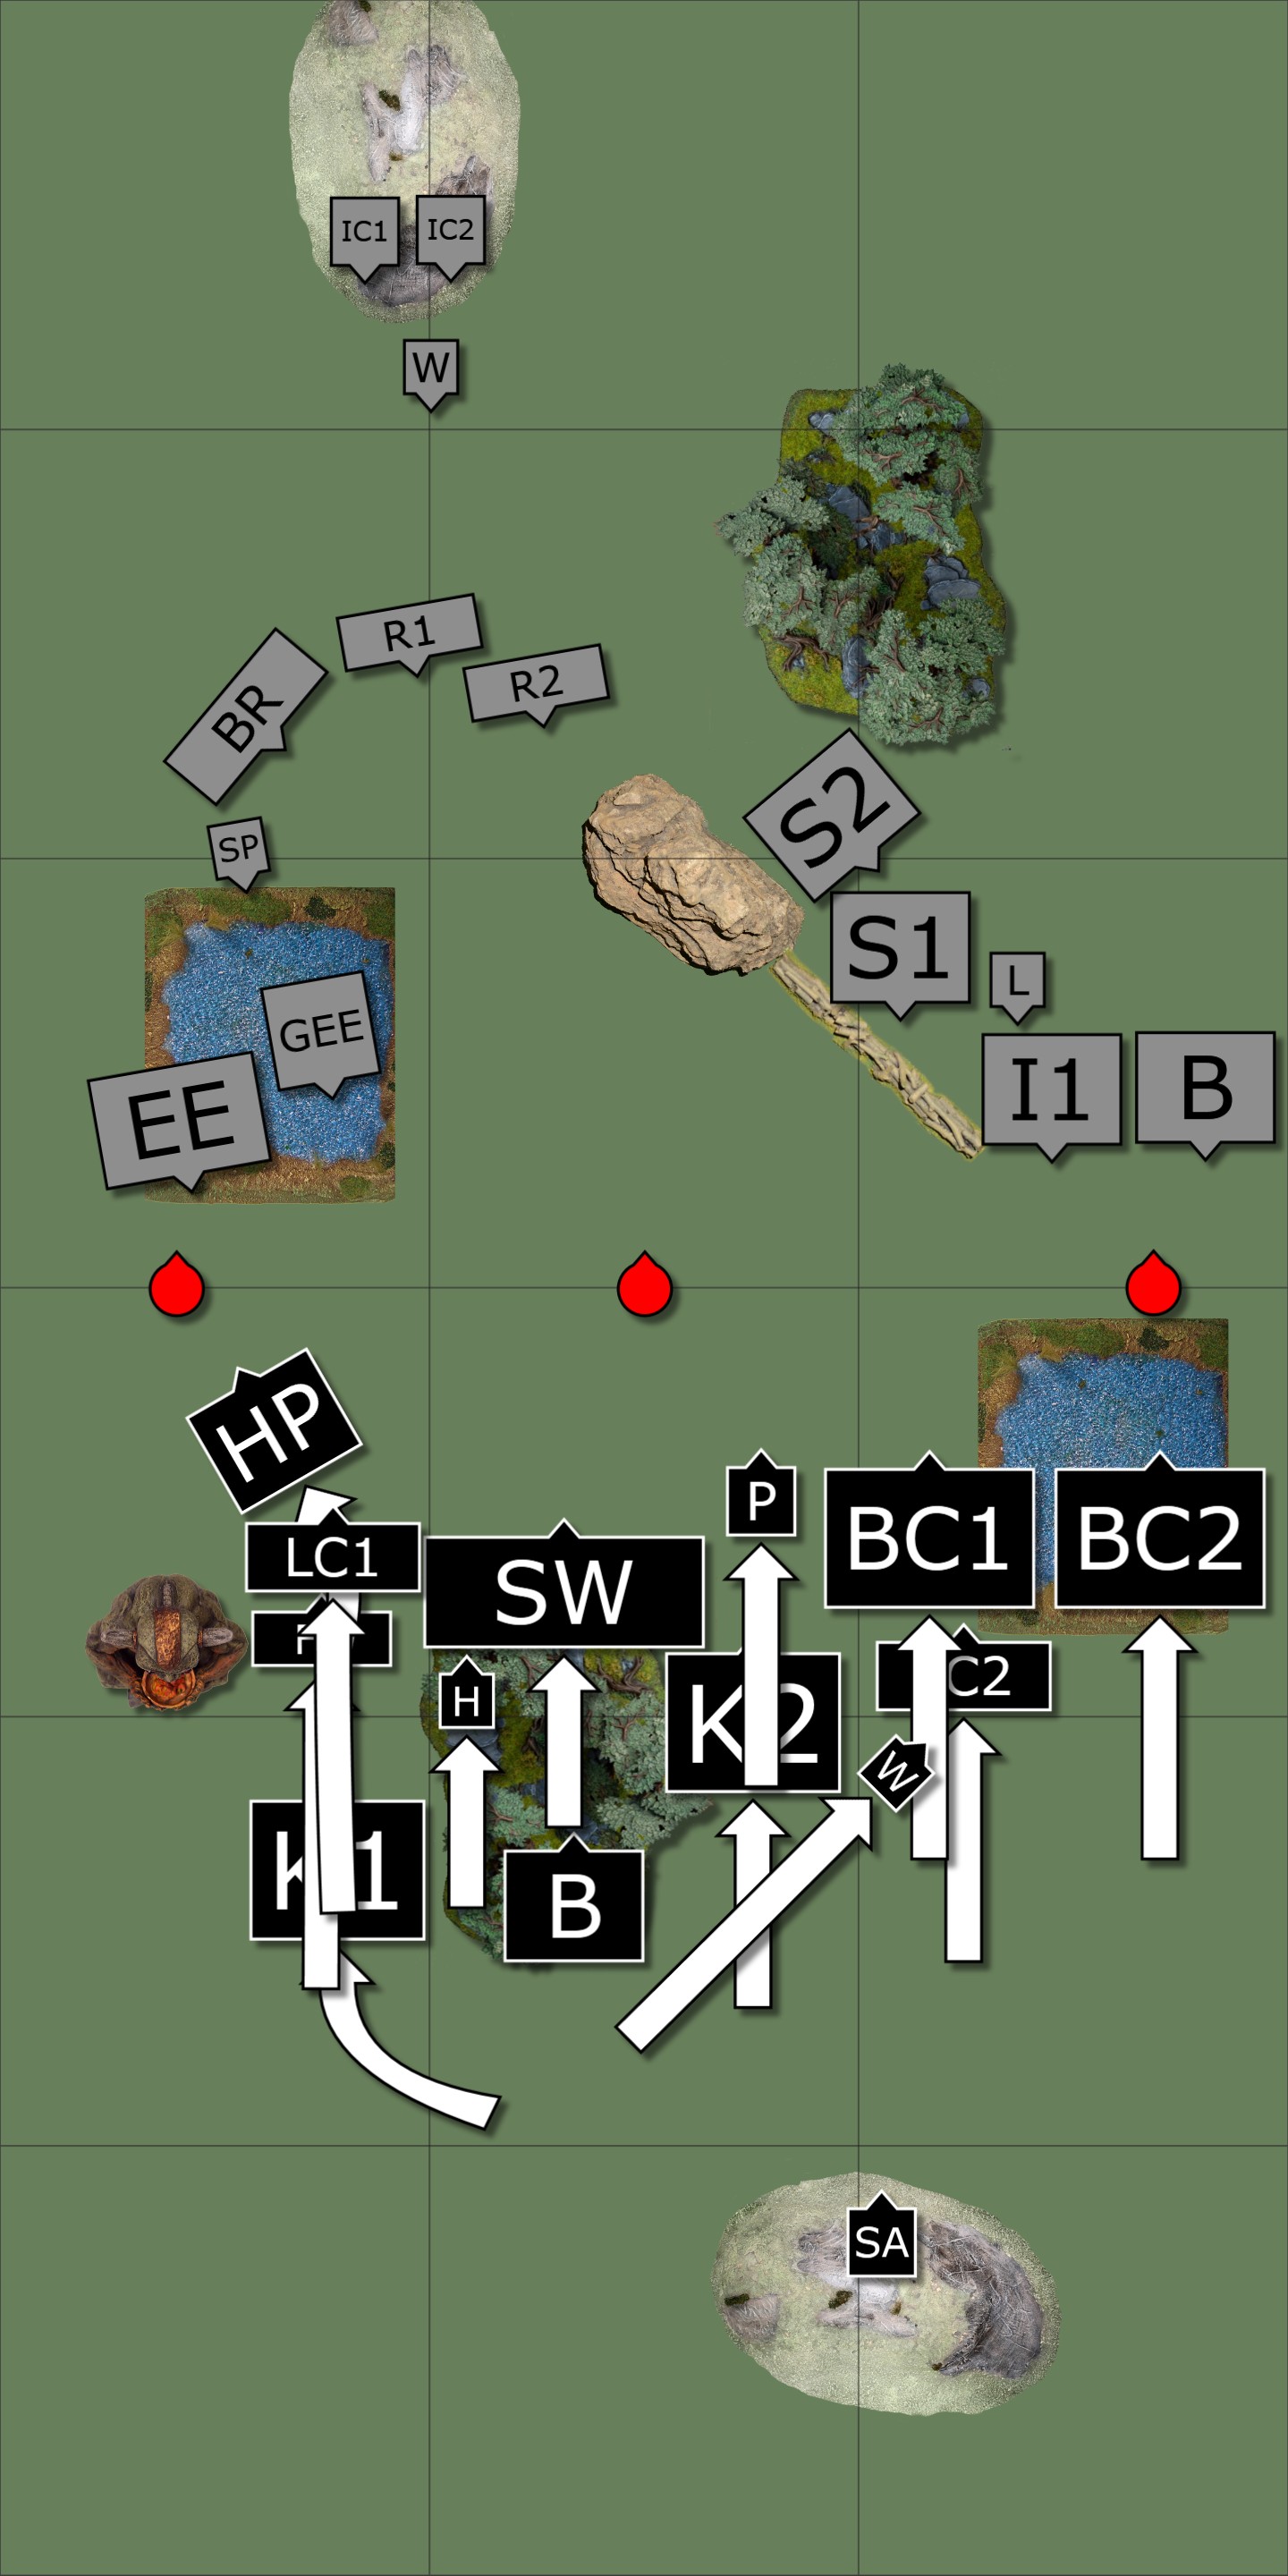
On the centre and the east flank I took the available charges and grabbed the middle loot token. No routs there, but decent damage. My wavered light cavalry moved back to make room for the foot guard troop to zoom forward. This is one moment where the images are a bit deceptive as the foot guard were much more tucked into the flank of the shield wall horde. I also managed to get my knights in the middle out of any terrain, ready to take any charge opportunities that came up.
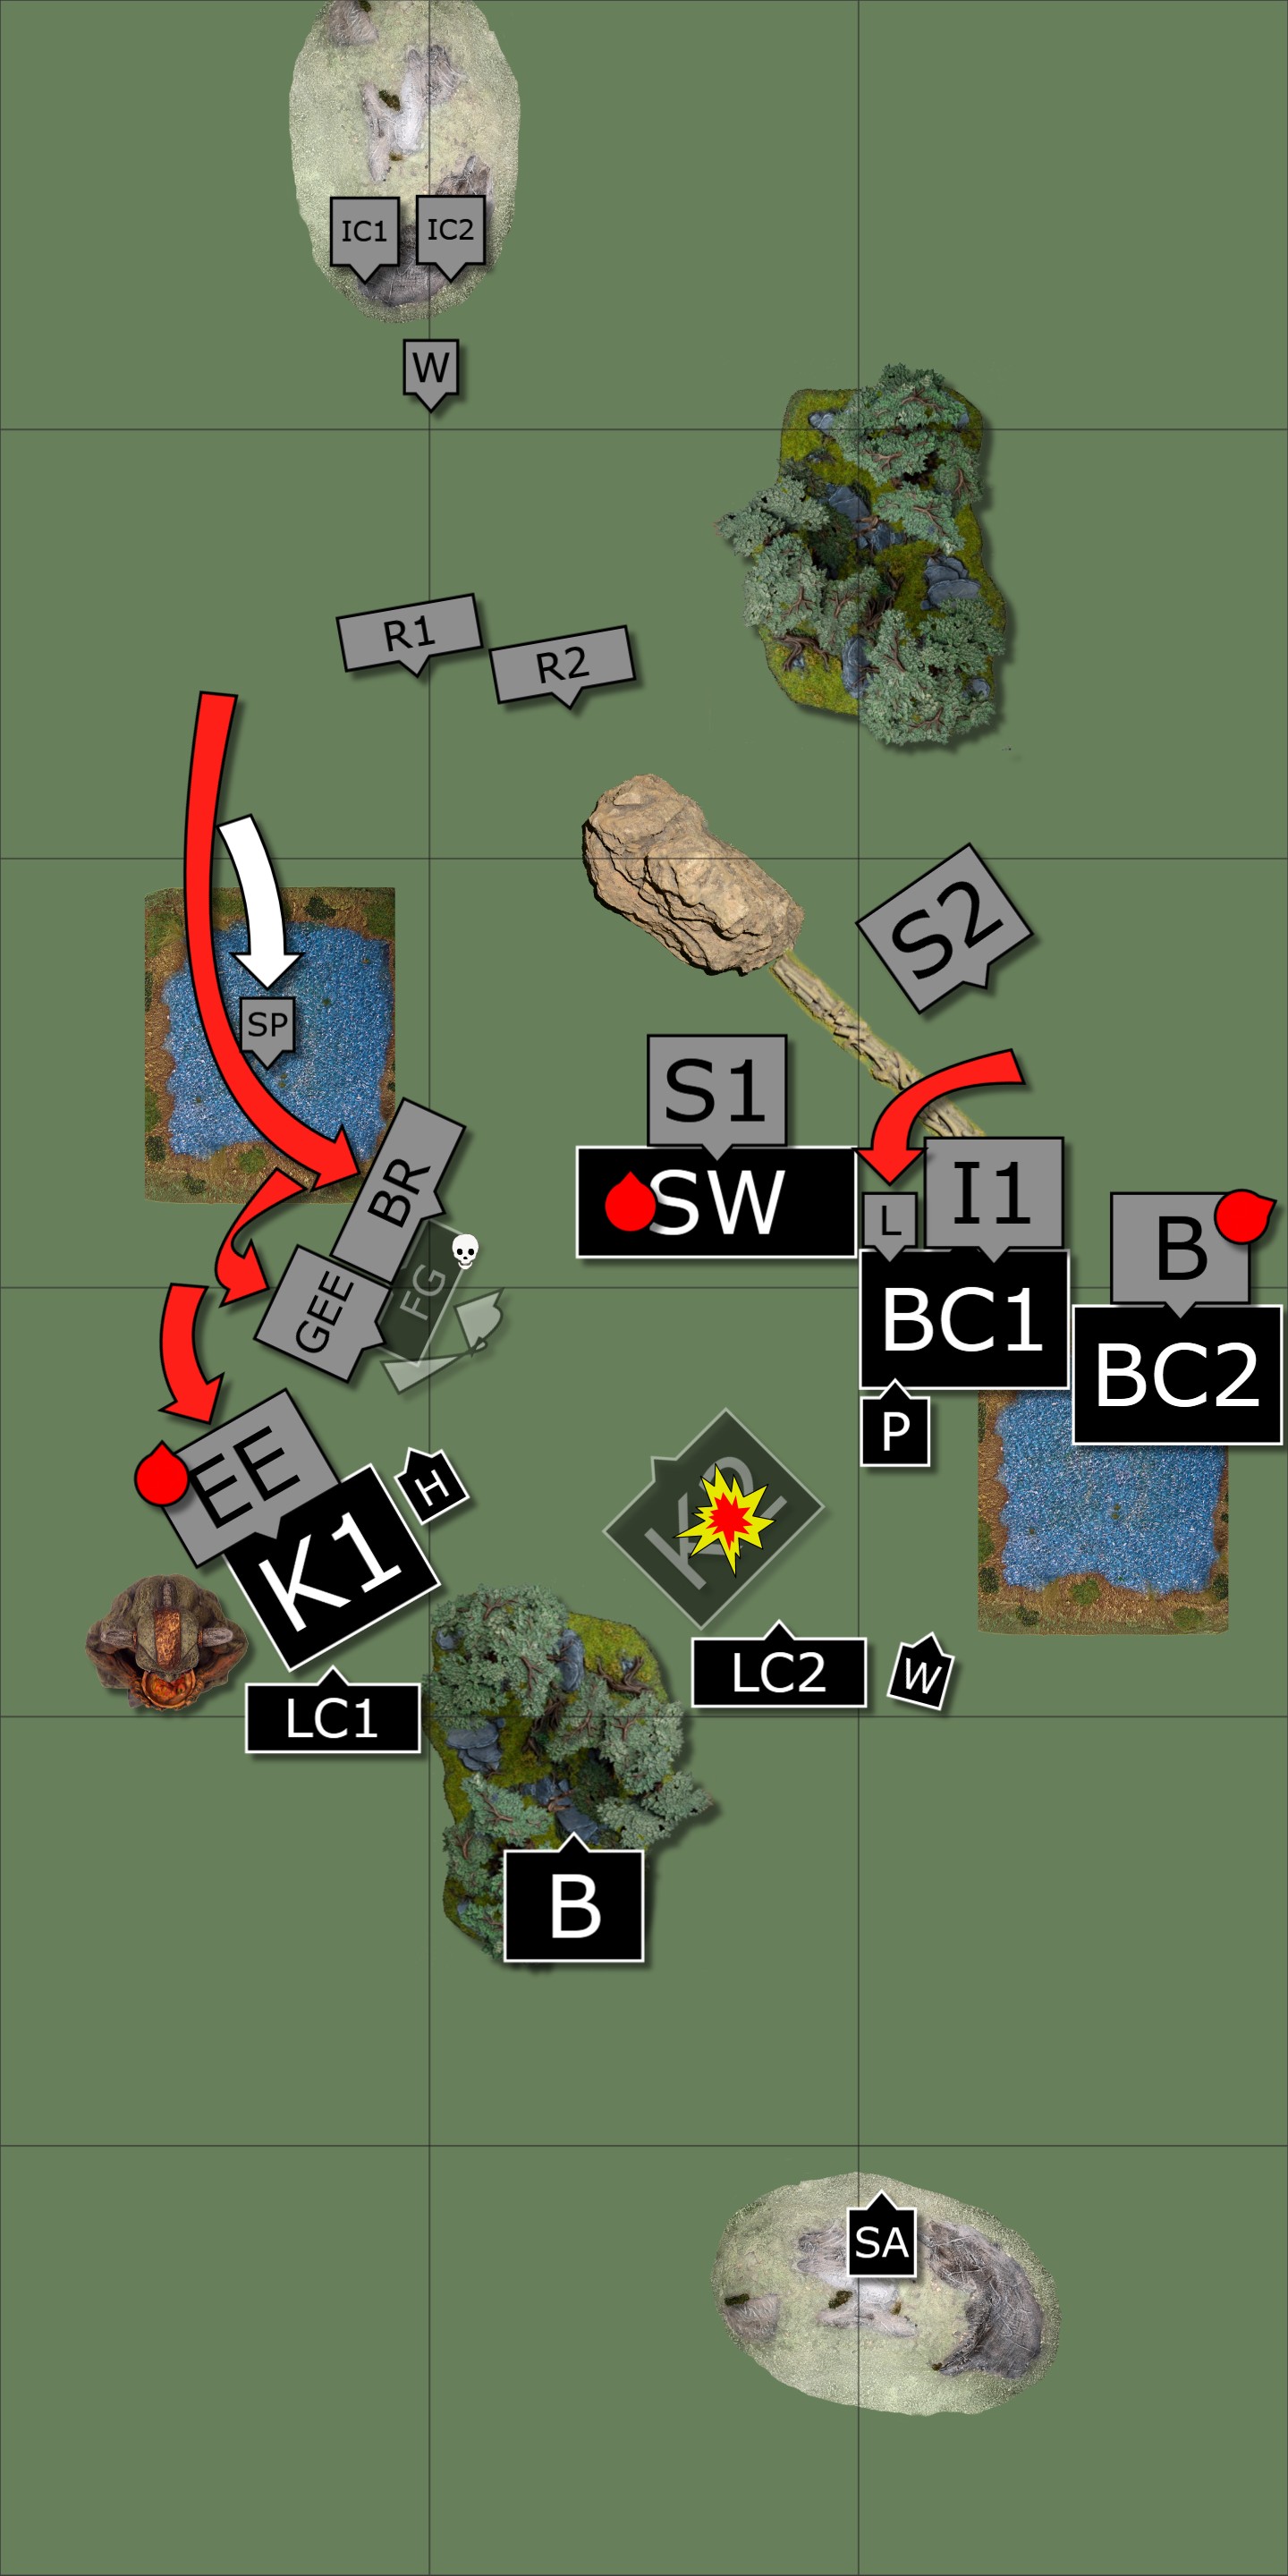
Turn 3
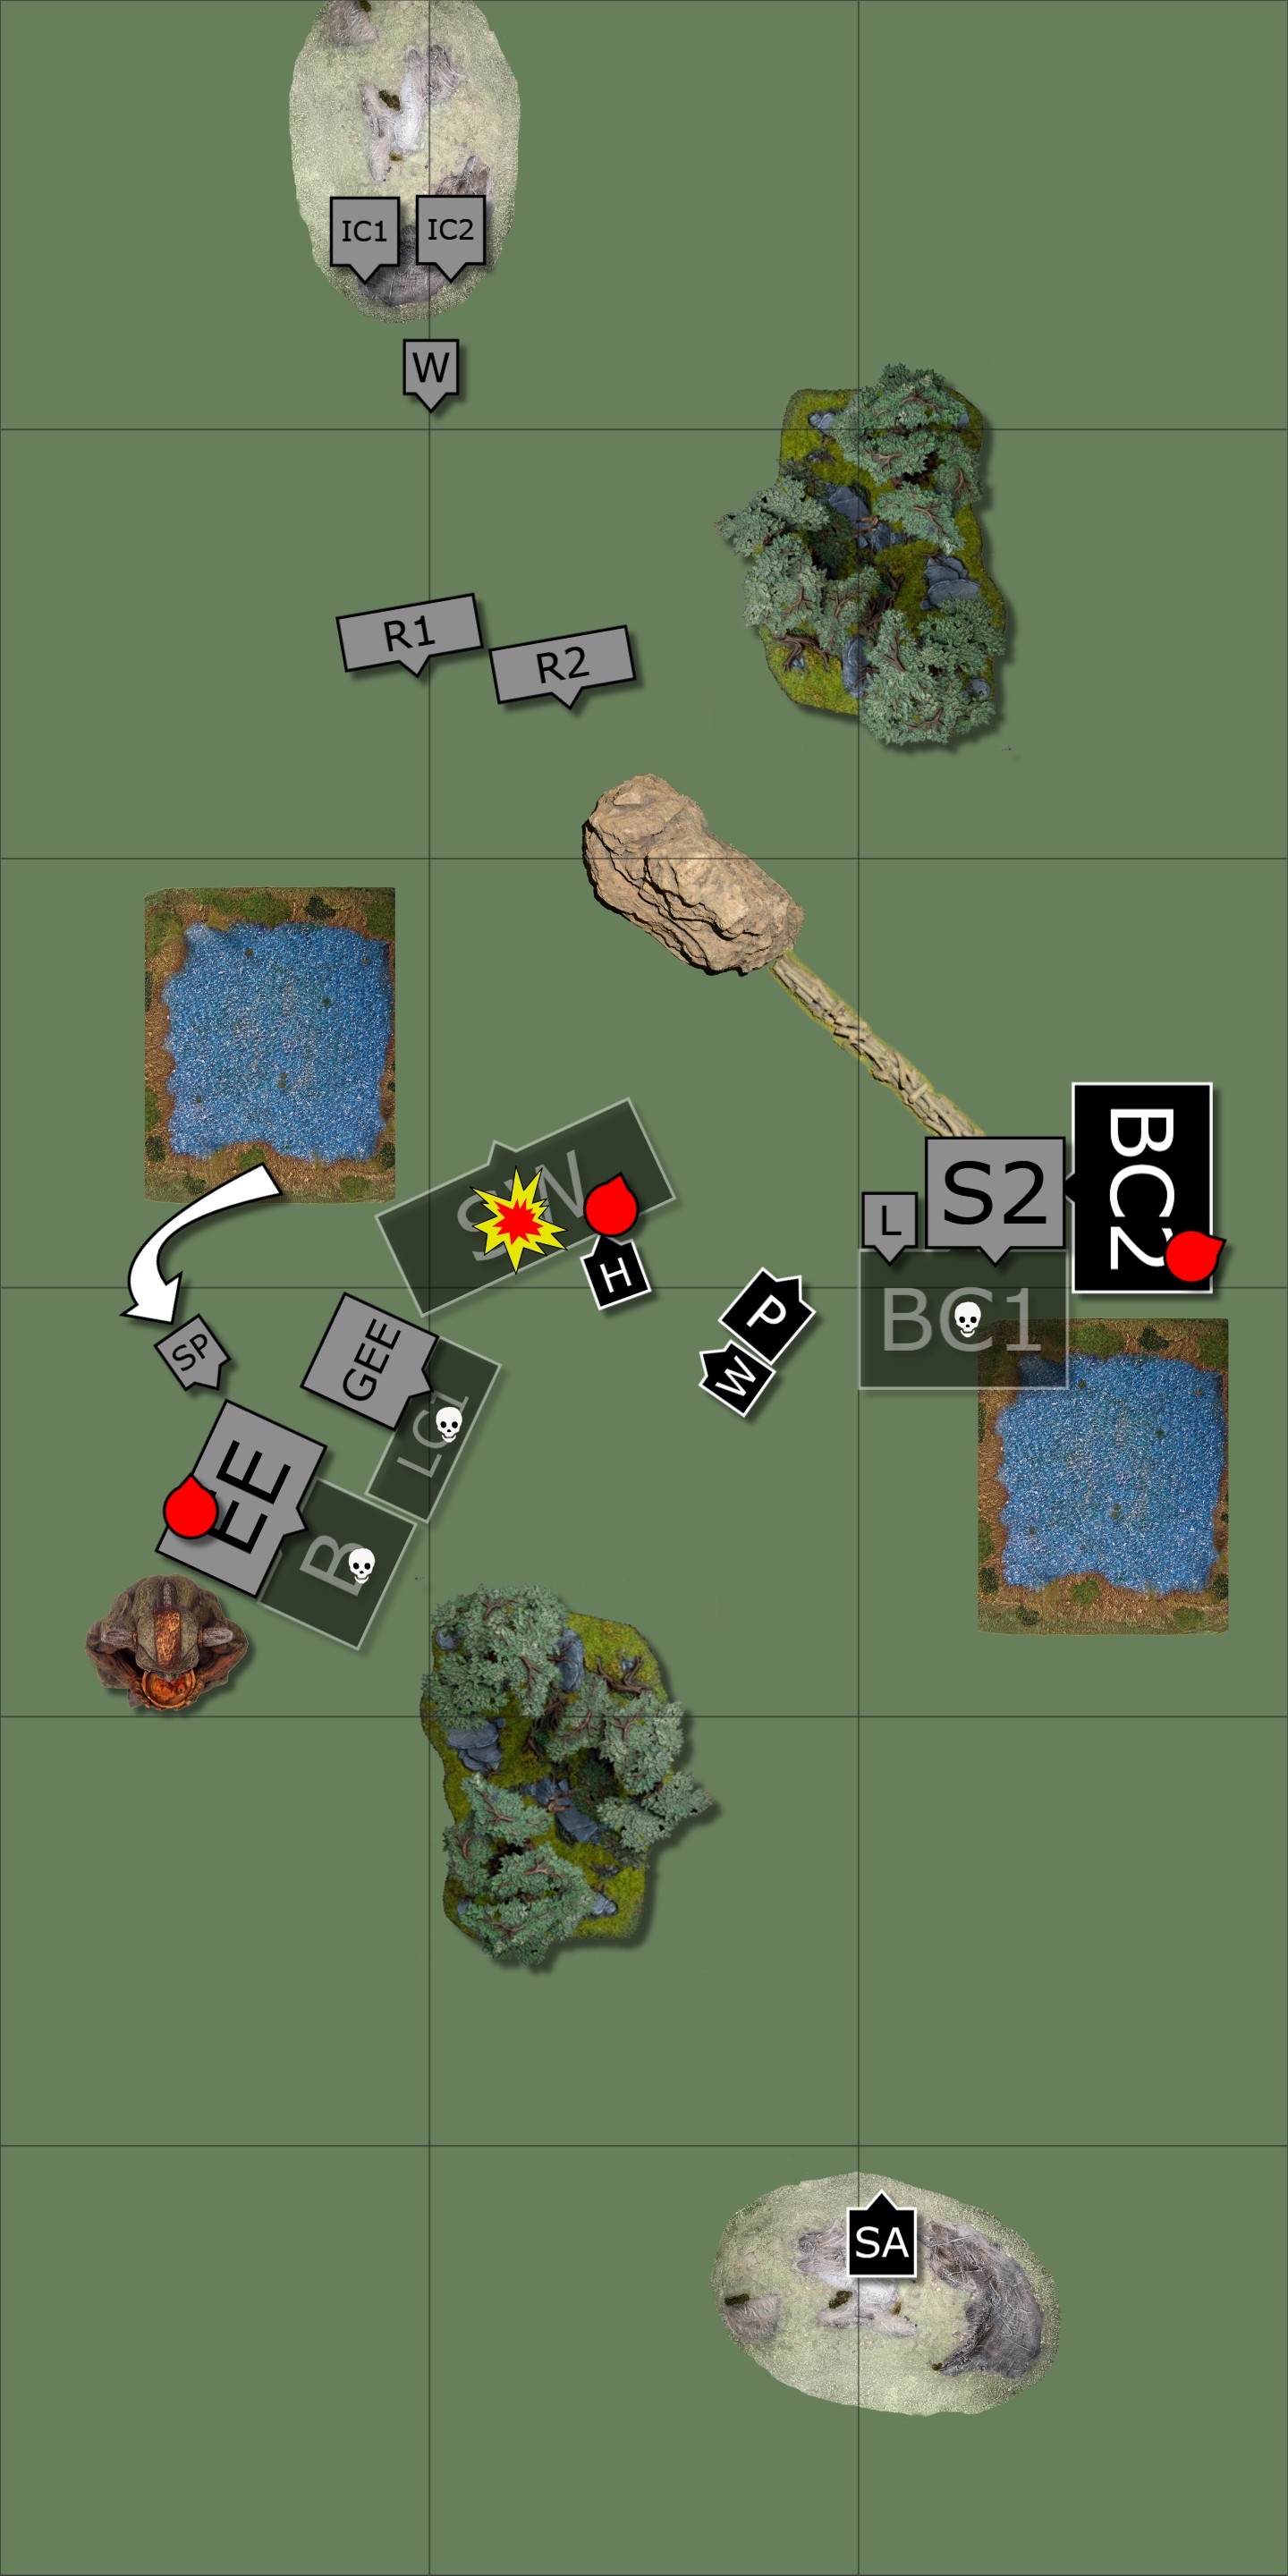
The greater elemental and brock riders get stuck into the foot guard and take them out easily, while the dwarf lord joins in on the east flank. The shieldbreakers fighting my shield wall aren’t able to wrap around onto the flank as there isn’t room for them, so they just reform into the centre. While all this is going on the combined might of the dwarfen artillery converges on my knights in the centre and manages to rout them!
My light cavalry in the centre immediately charge in to replace the foot guard on the flank of the shield wall horde. The beast cavalry and shield wall all kill their targets (except for the dwarf lord). The cavalry on the flank roll forwards and the shield wall creep backward, to try to straighten the line a bit.
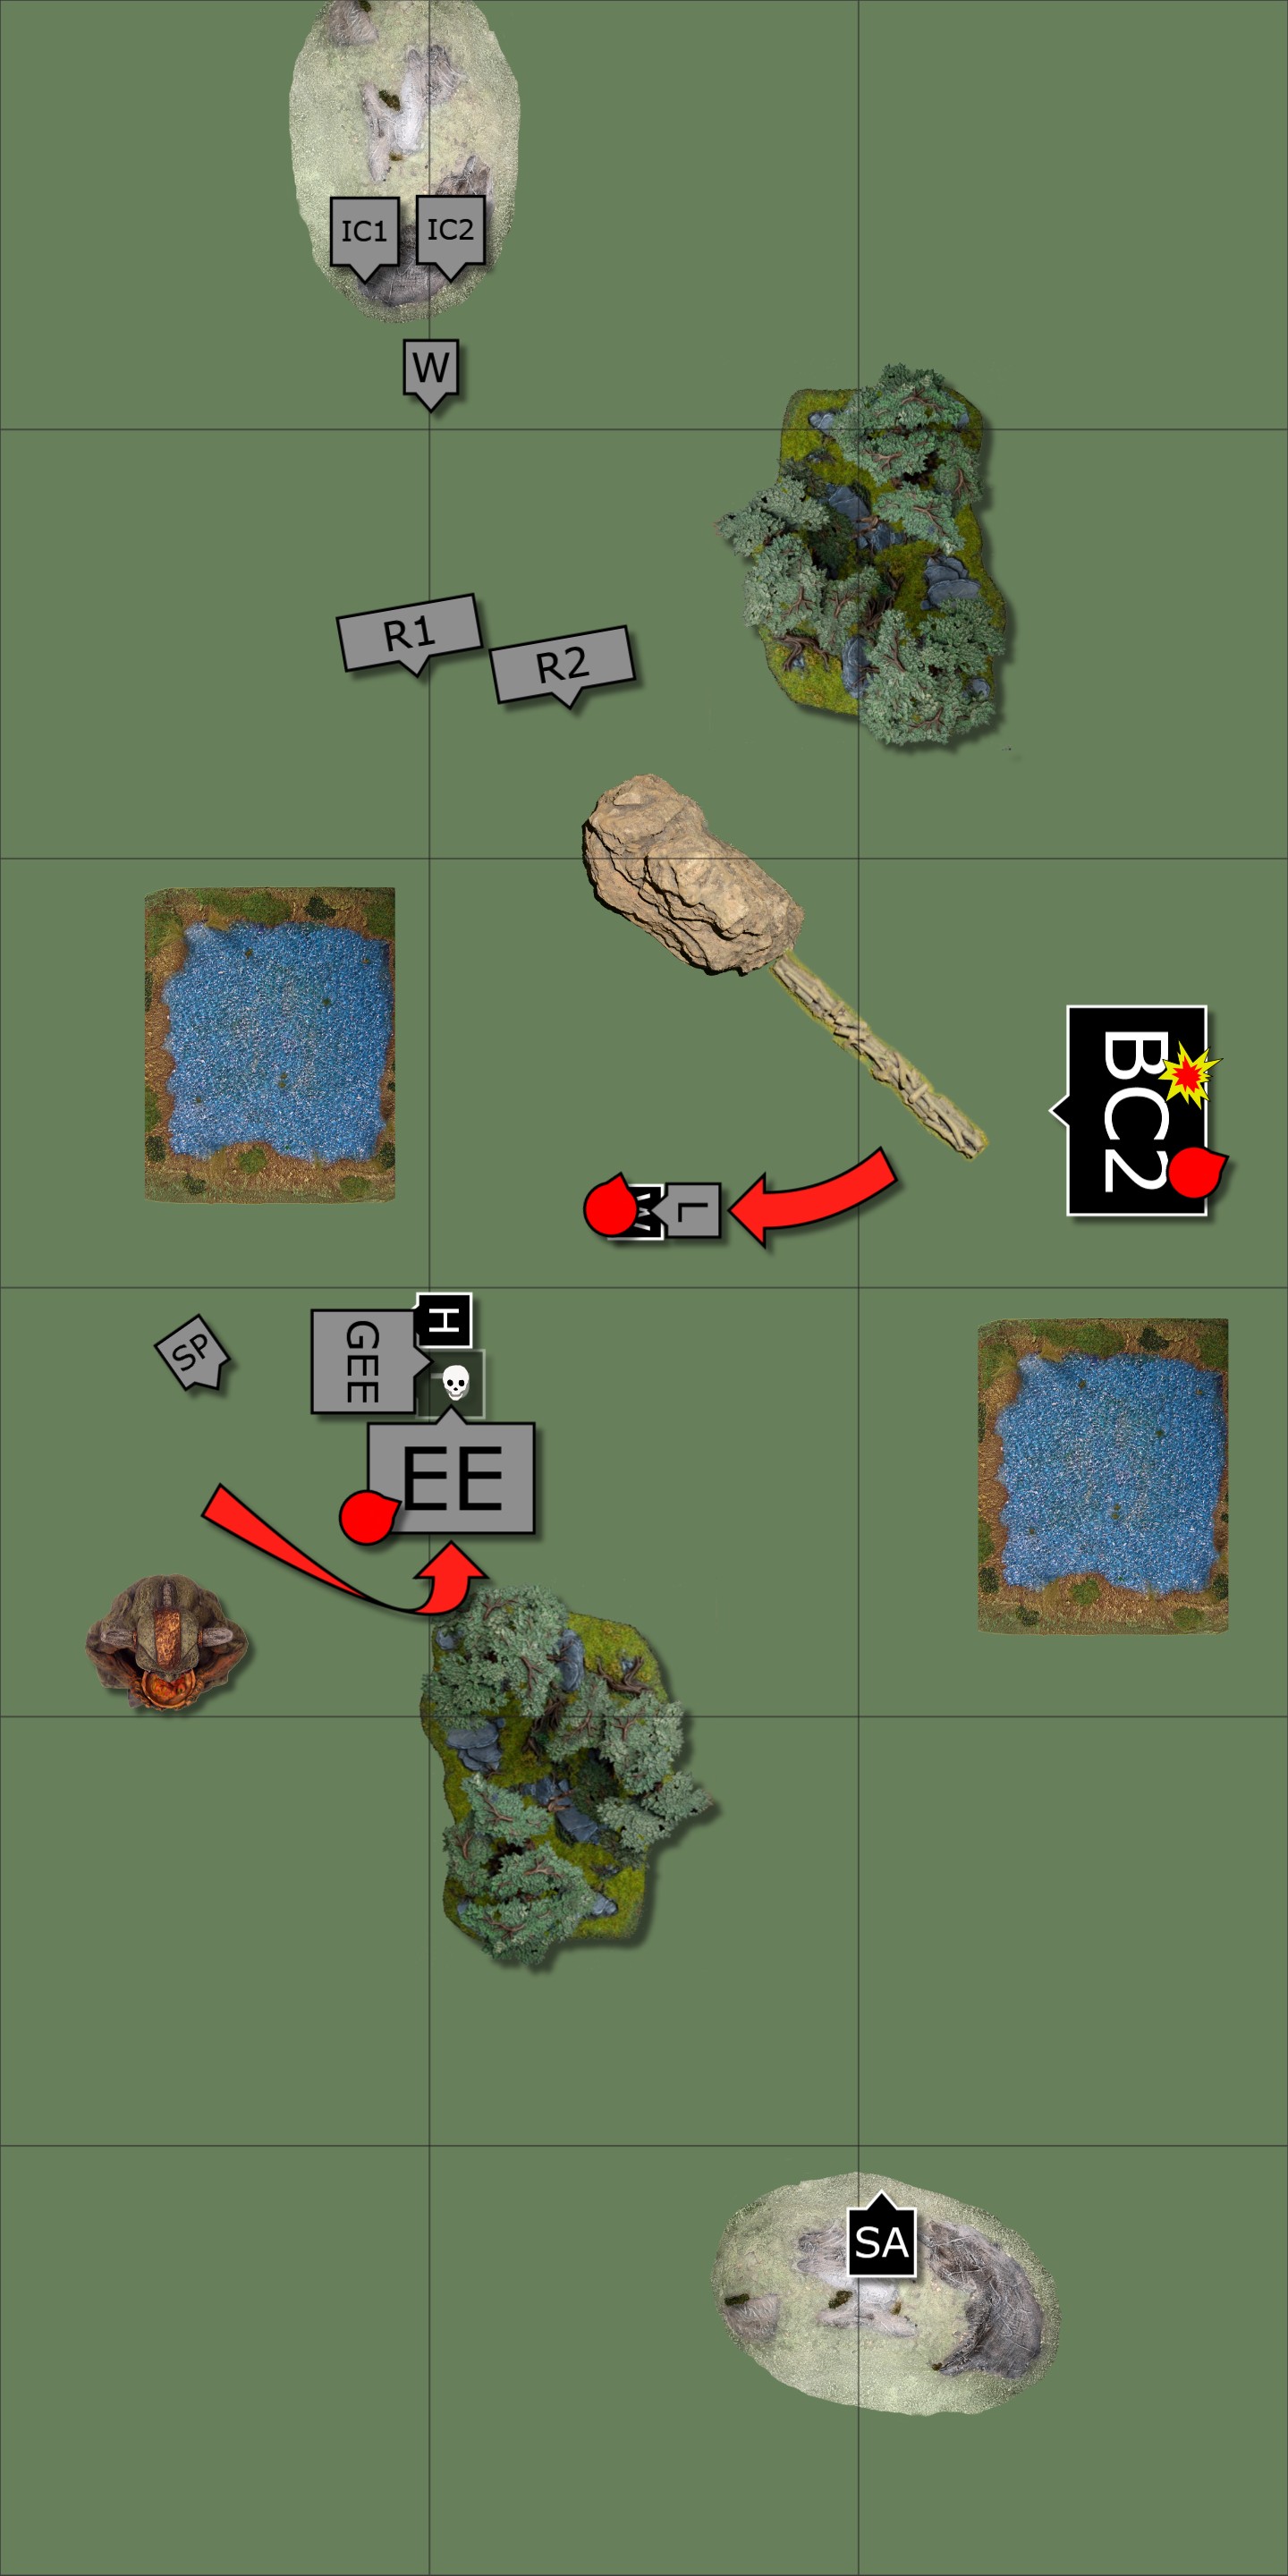
Turn 4
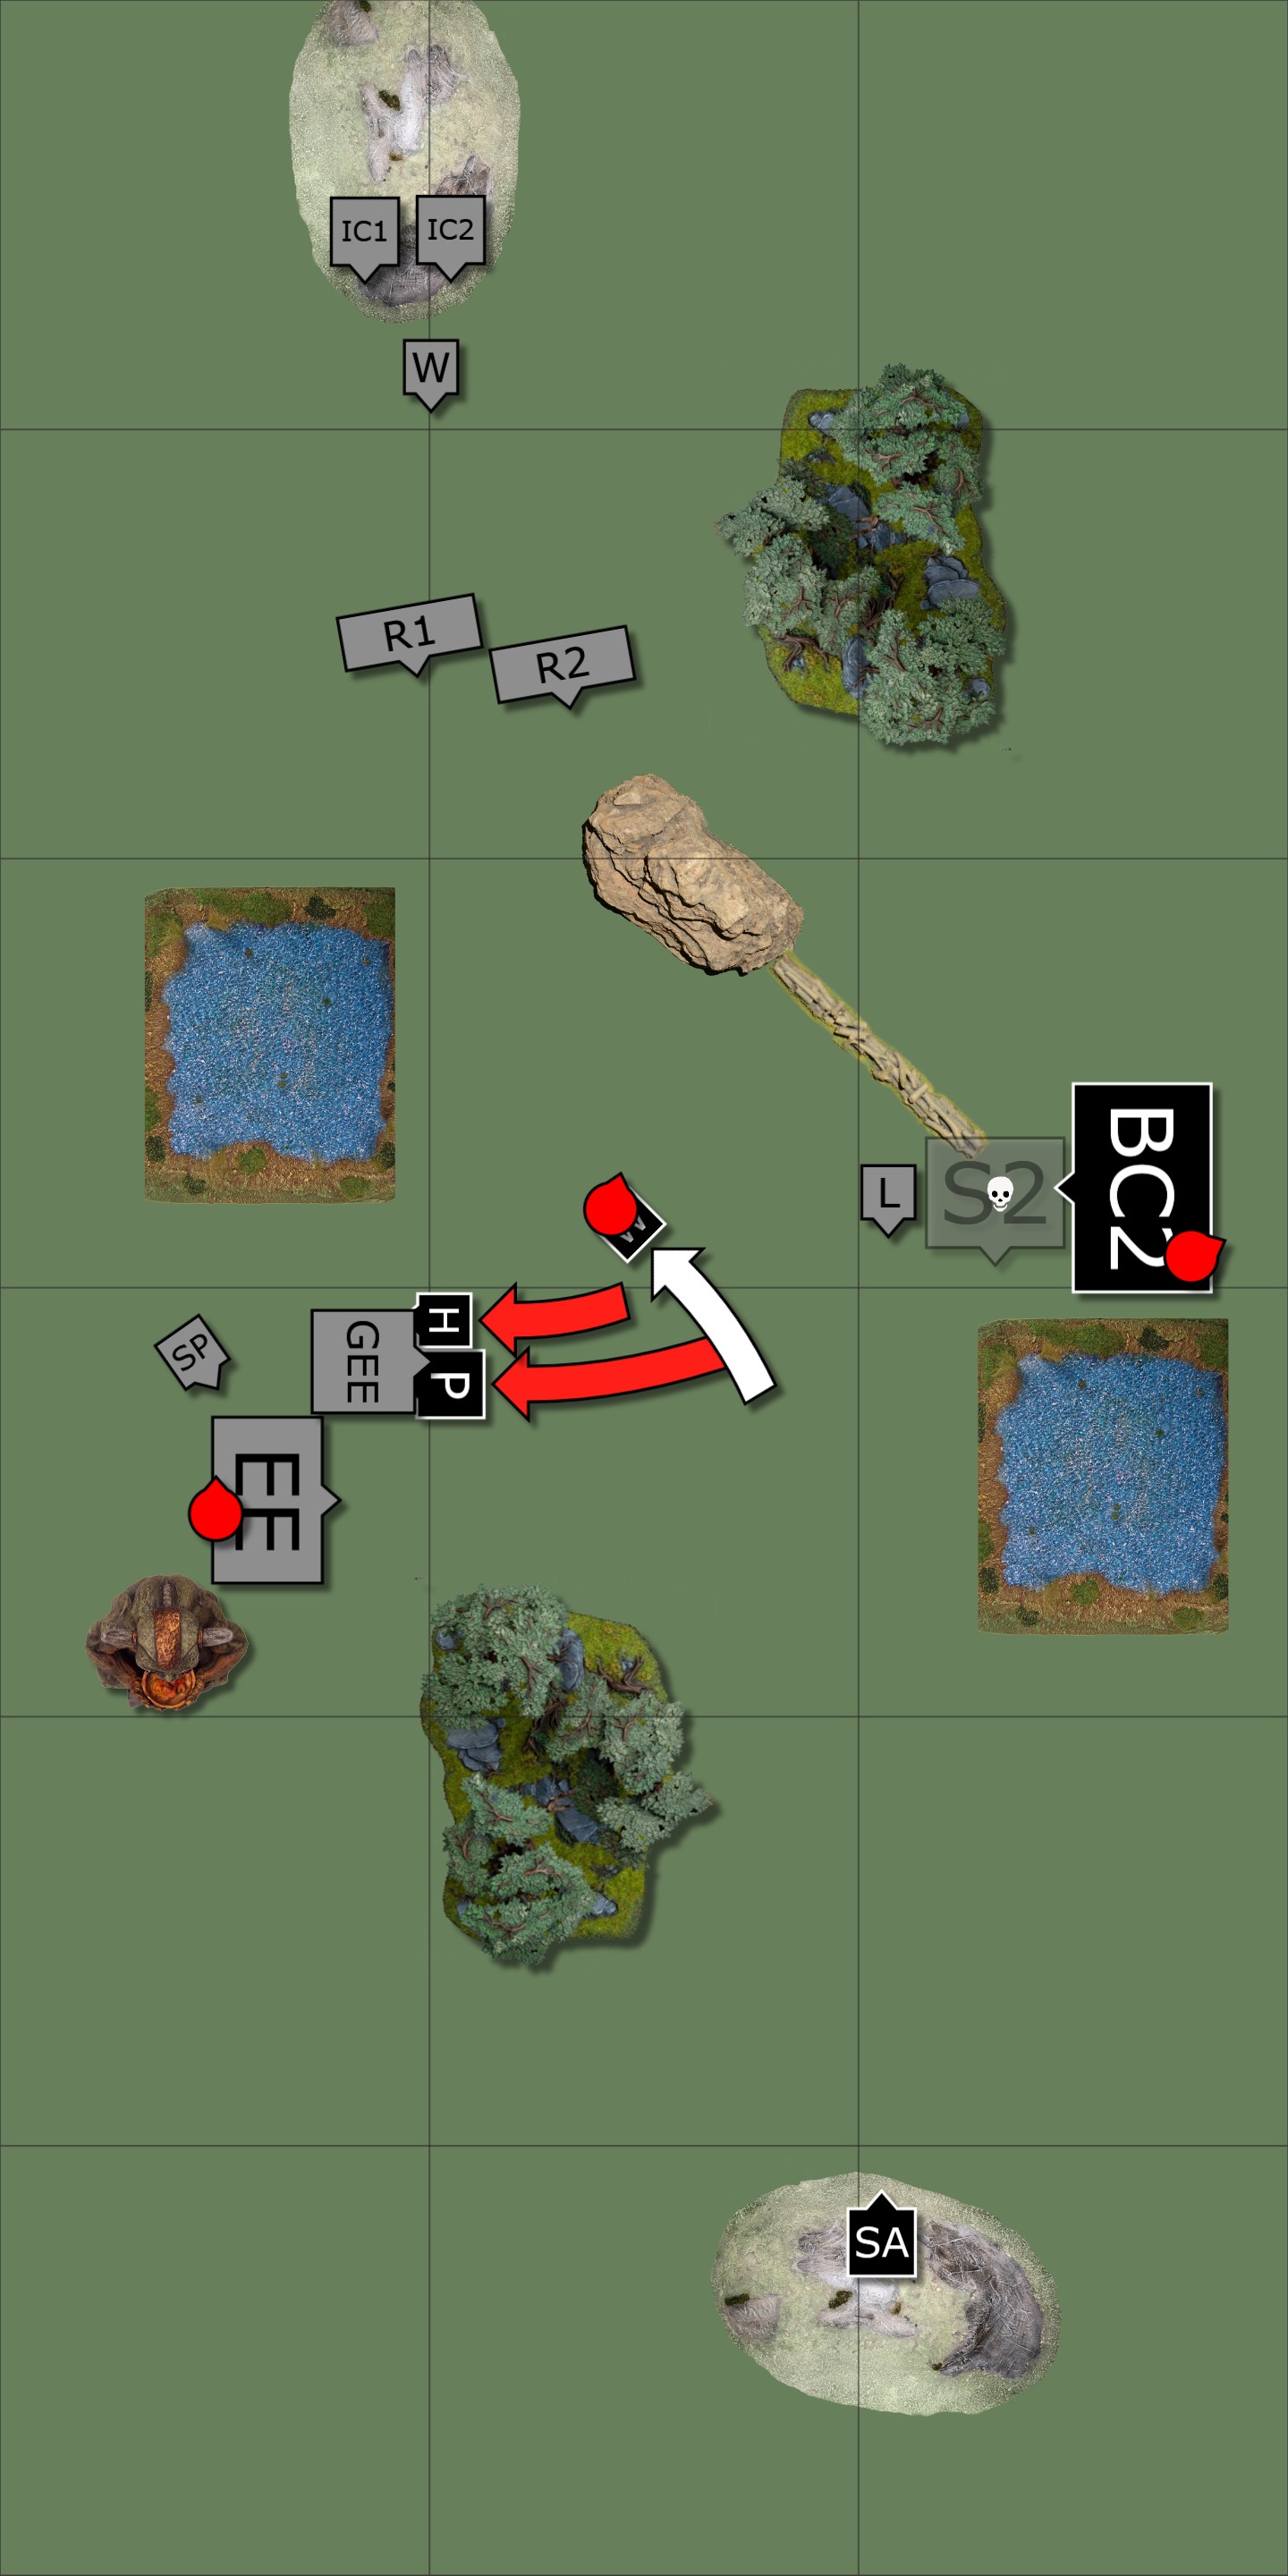
The elementals and brock riders continue their rampage, tearing through the cavalry on my west flank. The dwarfs commit some more shieldbreakers on the west, but the beast cavalry hold.
On my turn I continue to feed people to the elementals to slow them down. I also commit my shield wall against the brock riders - we’ve sustained a lot of damage, but it’s better to charge than be charged! I managed to rout the brocks, and turned to face the rangers to avoid a flank charge. The beast cav on the flank get a sneaky flank charge on the shieldbreakers, but looking over it in hindsight I actually think this was an illegal manoeuvre. On the table, with units balancing on terrain, it looked like the edges of the shieldbreakers and beast cavalry unit 1 were flush, which would allow unit BC2 to make contact. But looking at it here I think the shieldbreakers should actually have been slightly tucked in, making the charge impossible. Neither of us noticed at the time, but I think the dice did as they gave me a big old snake eyes on the nerve check to rout those shieldbreakers.
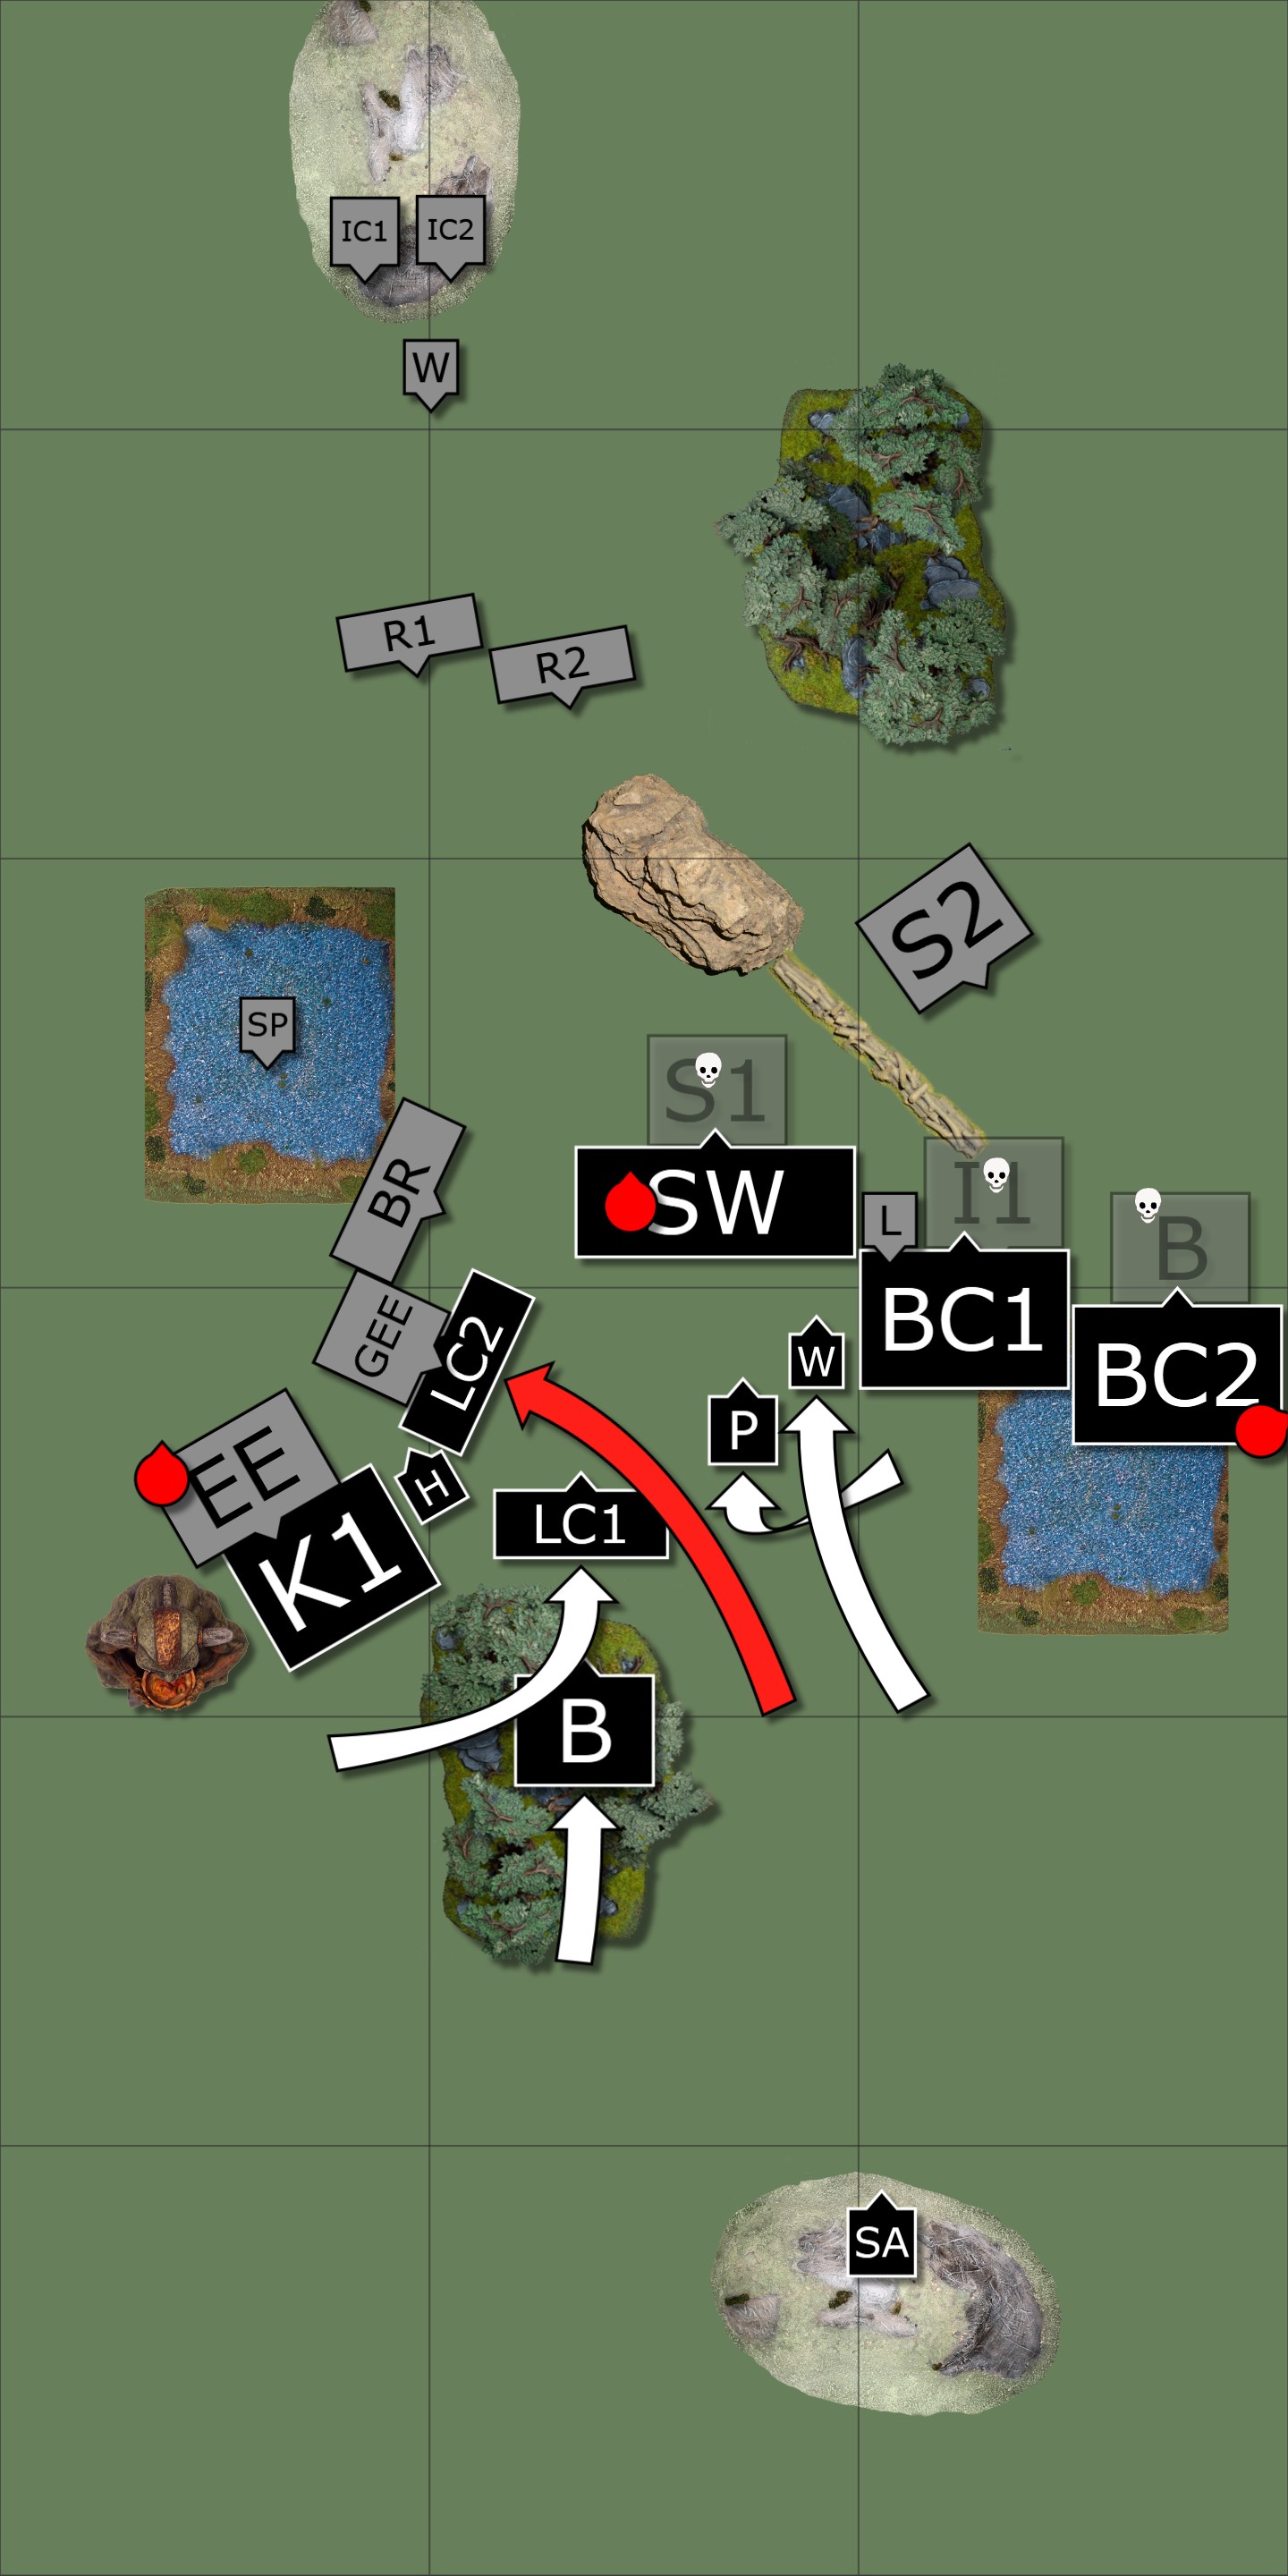
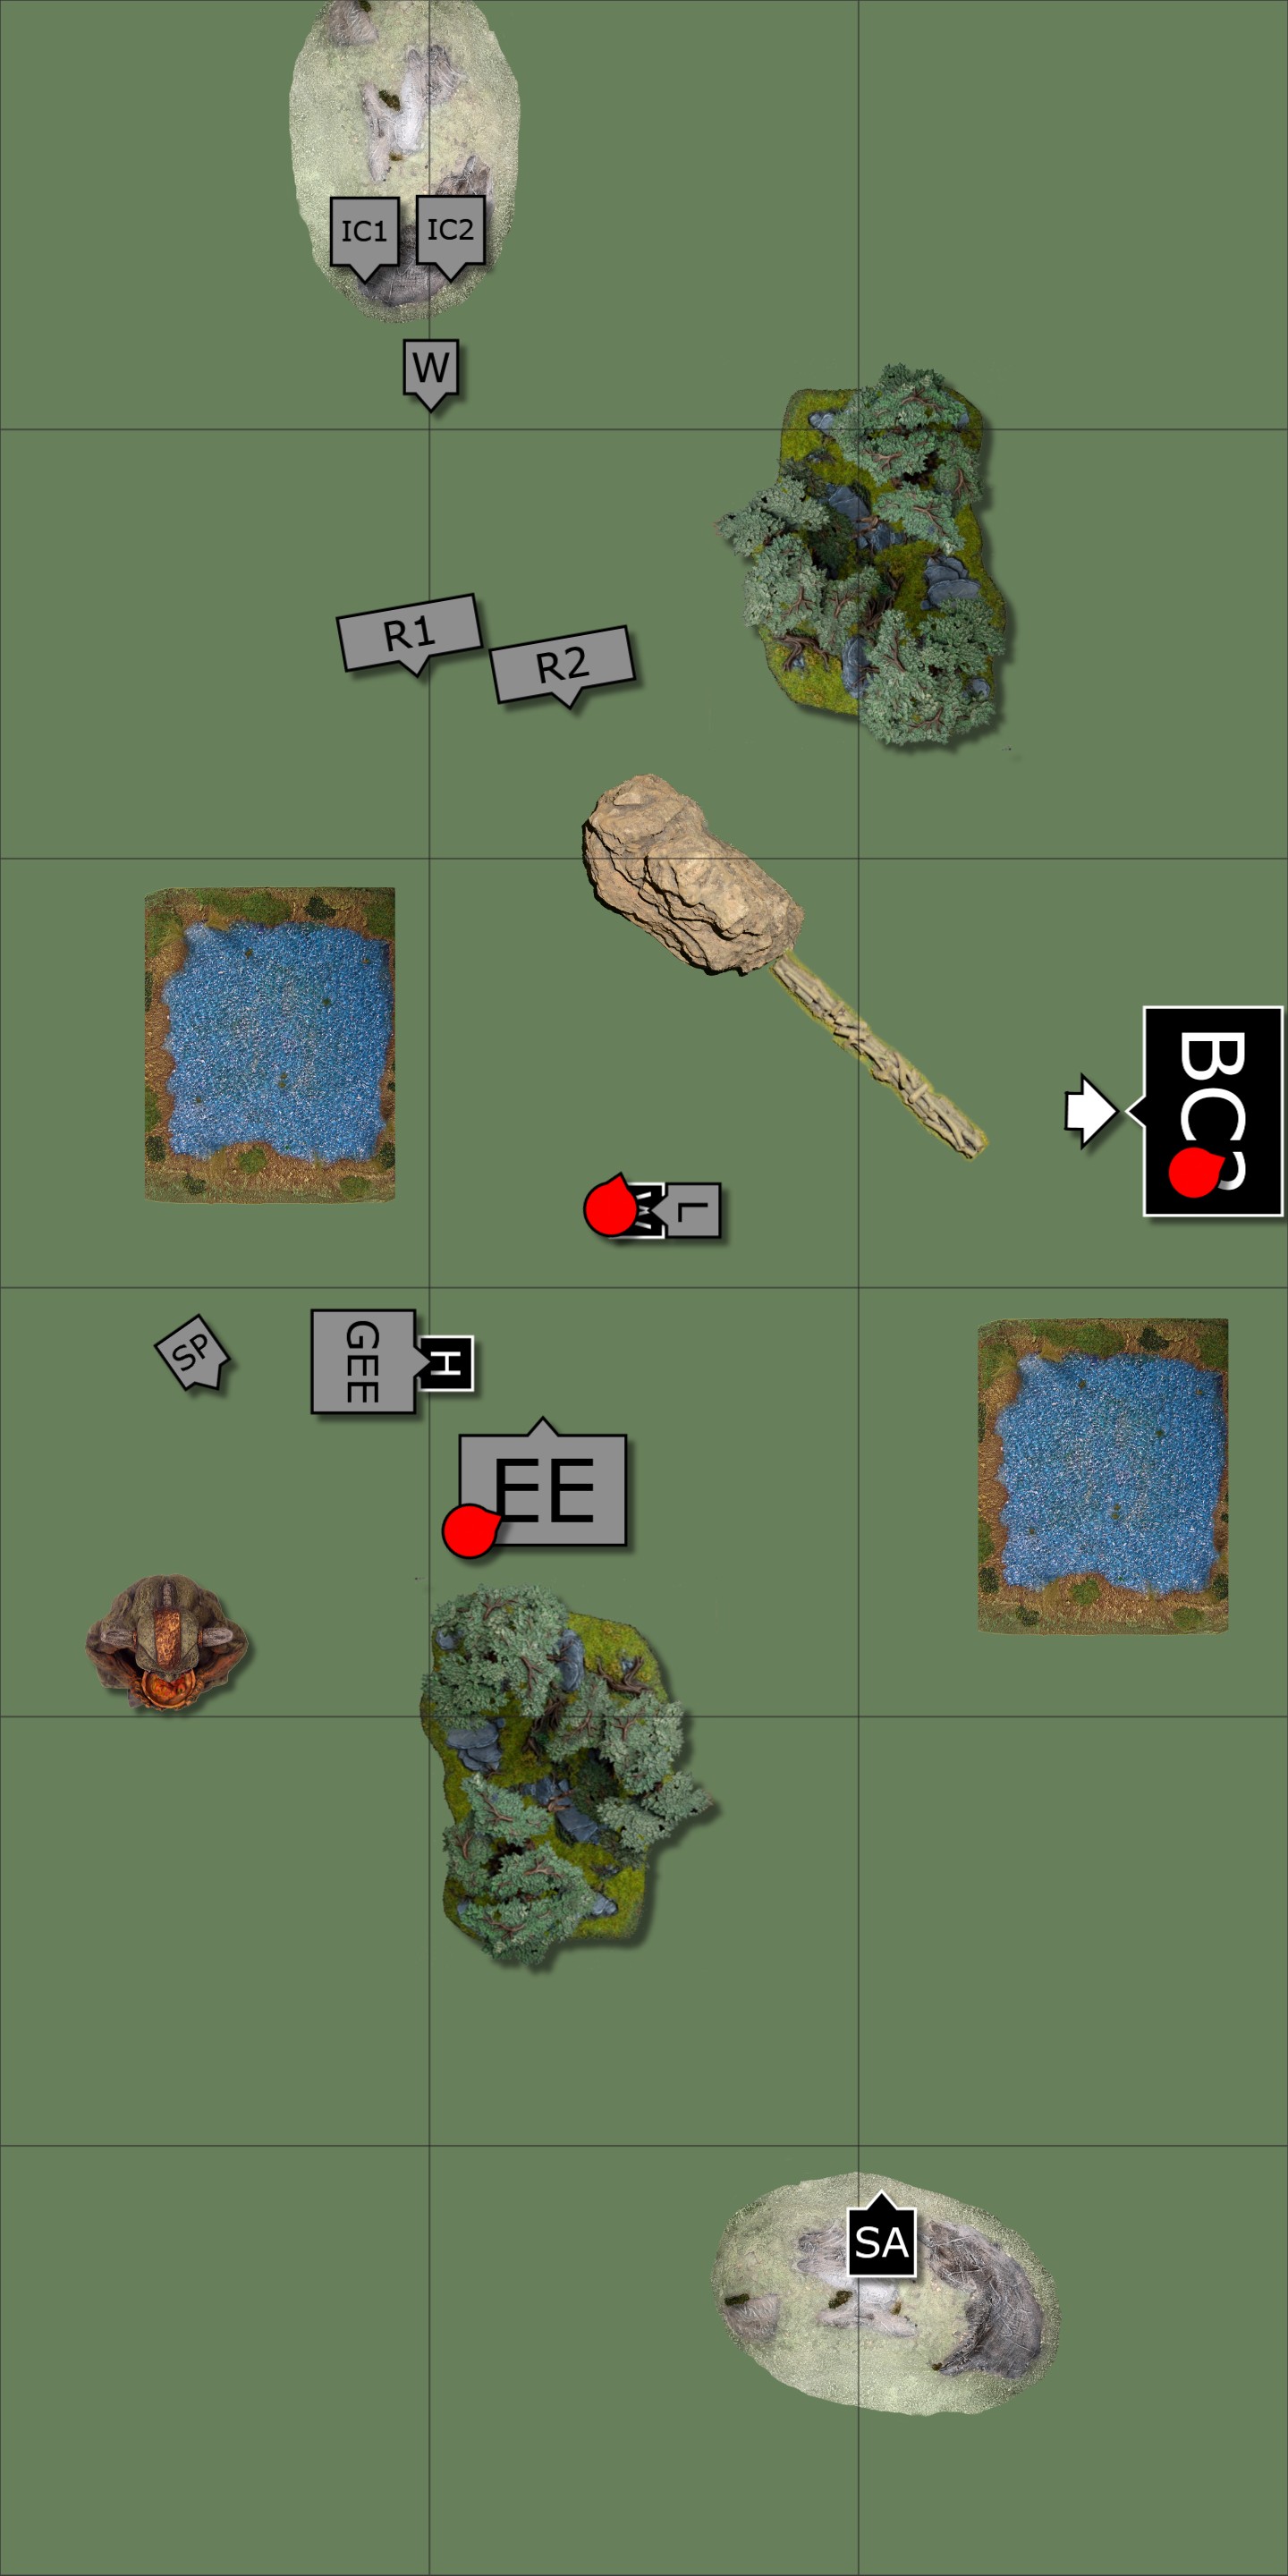
Turn 5
The shieldbreakers routed the beast cavalry in front of them, and the earth elementals continued to eat whoever was foolish enough to fight them. The massed firepower of those ironbelcher cannons was able to rout the shield wall as well, dropping that loot token in the field.
My beast cav finished off that fight on the east flank and crept sideways to try to hide behind the forest. The wizard ran and grabbed the loot, putting me at 2-1 again. I knew I needed to hold off the elementals so I committed the hero and the prince against the greater elemental. I’ll go into more detail at the end but I think that was the key decision that ultimately lost me the game.
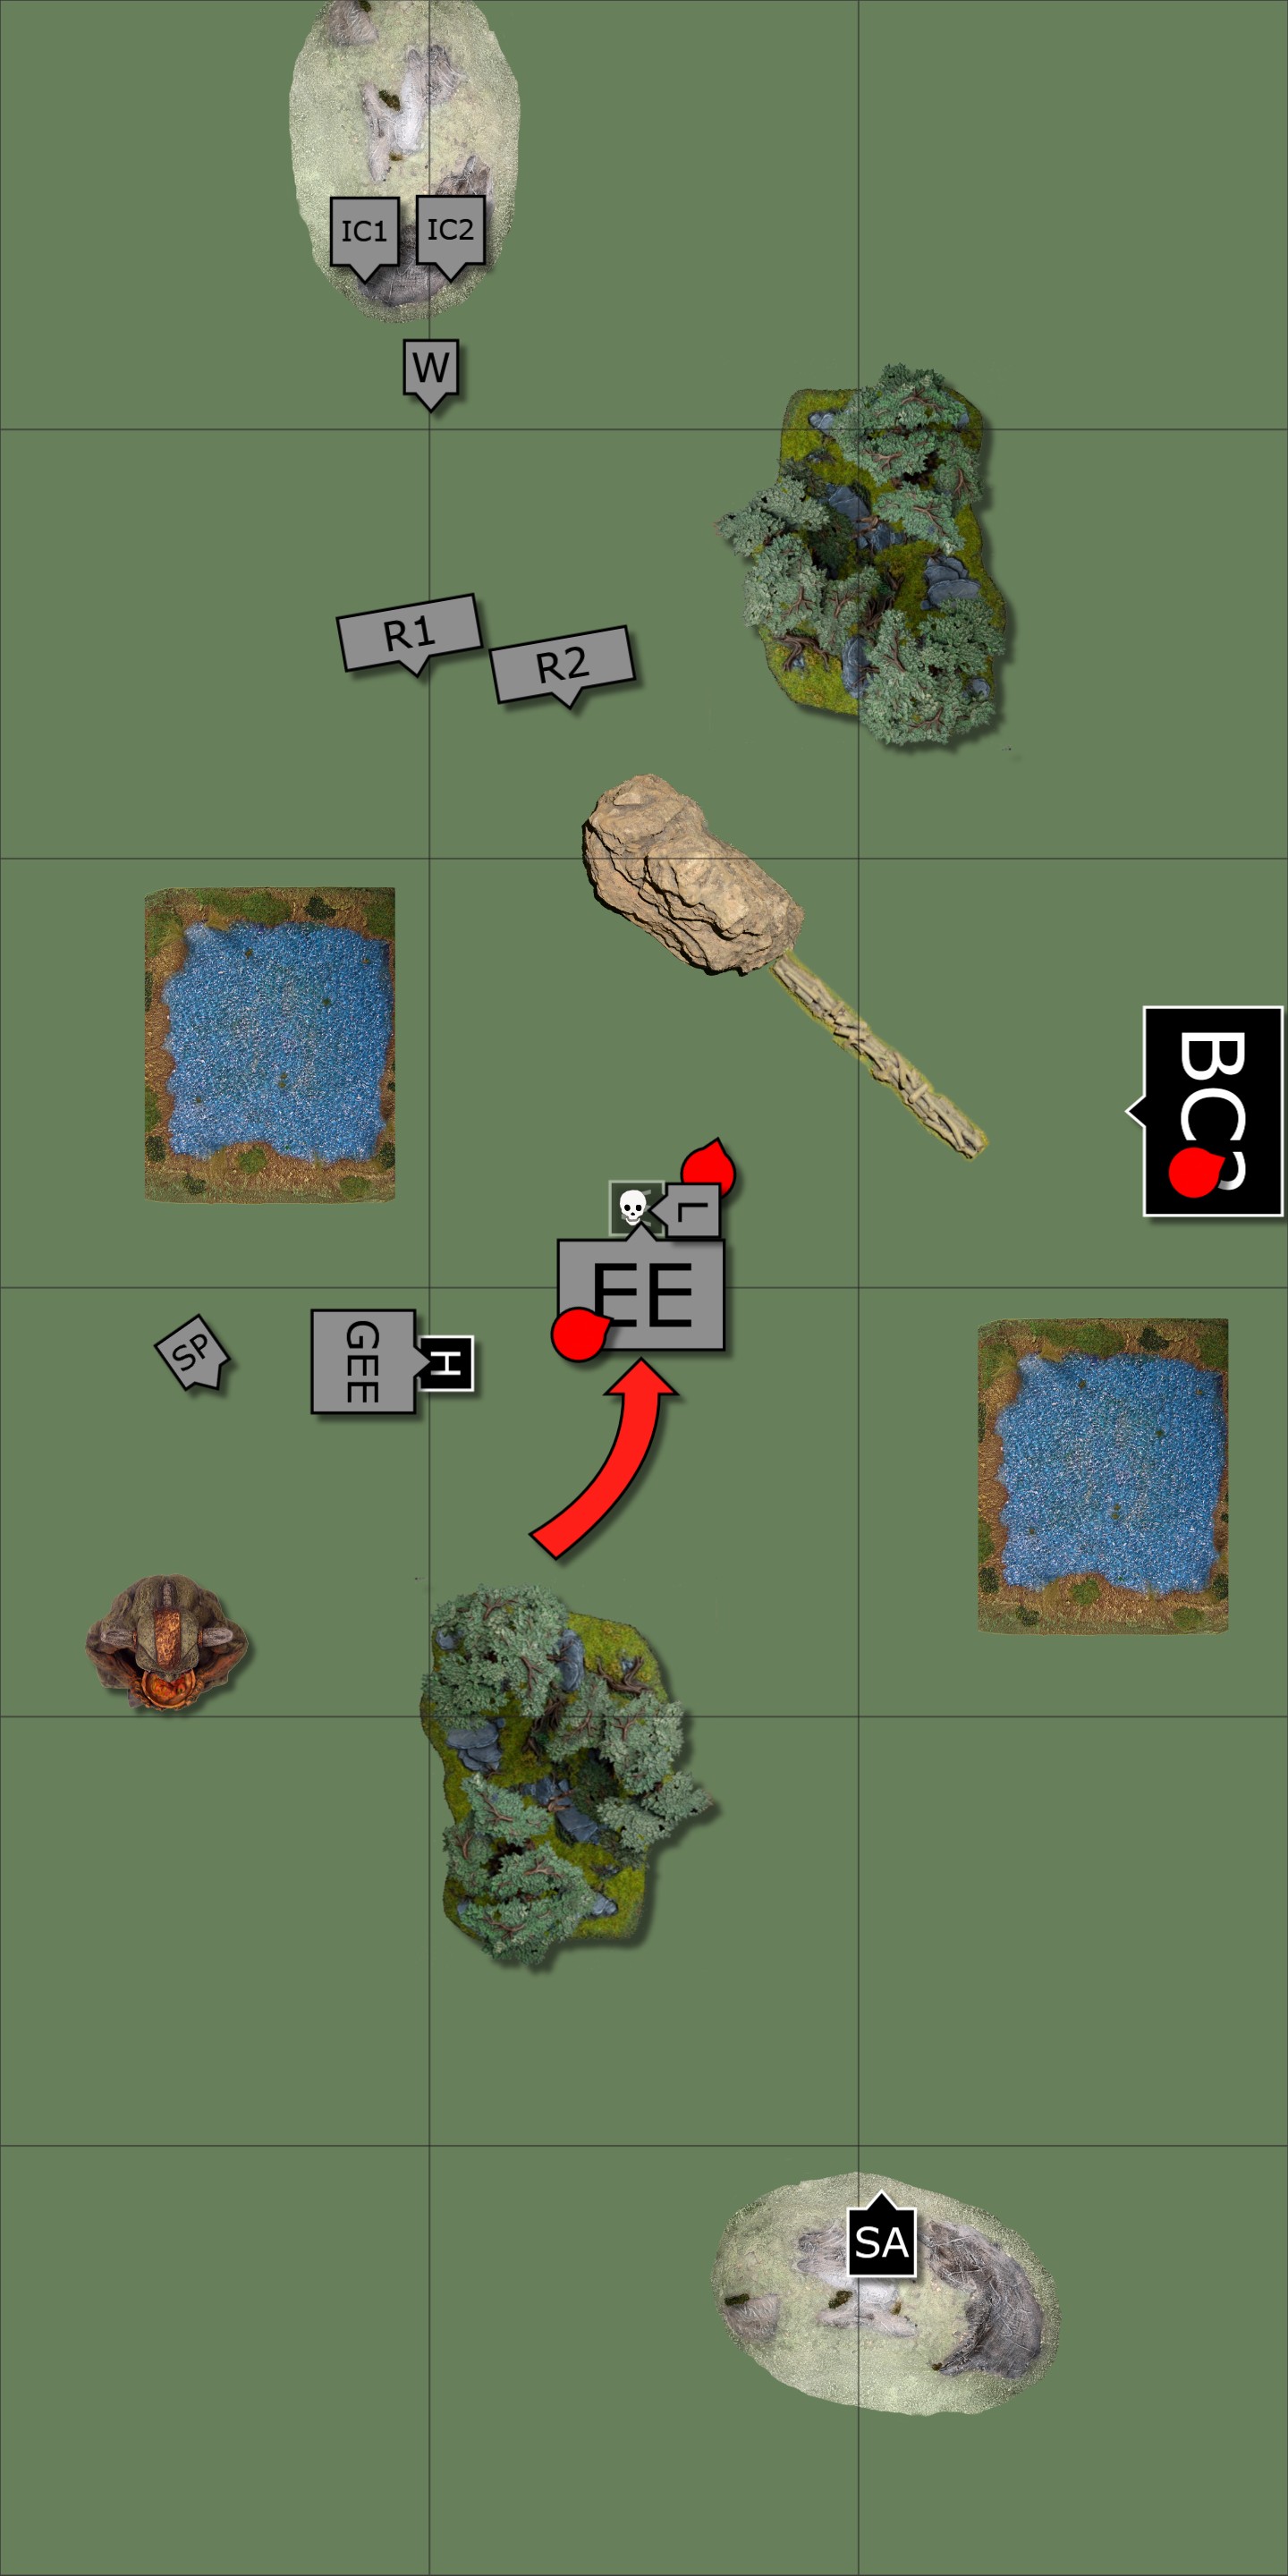
Turn 6
We’re in the endgame now. The dwarf lord charges the wizard. He fails to kill him, but does enough damage that I’m not willing to try to Withdraw on my turn. The cannon shoot my beast cav, but can only waver them. The regiment of elementals charges my prince in the flank (this is another moment where the angles on battle chronicler don’t quite match reality, but it was definitely flank) and kills him, though the hero survives. They then overrun sideways, to have a clear run against the wizard.
On my turn my heroes fight, but don’t manage to kill anyone. The beast cavalry retreat further, hiding behind the forest.
Turn 7
The elementals charge my wizard and kill him. The dwarf lord picks up the loot counter.
My artillery shoots at the elementals , but it’s a token gesture. Even if I rolled all 6s I still couldn’t do enough damage to rout them.
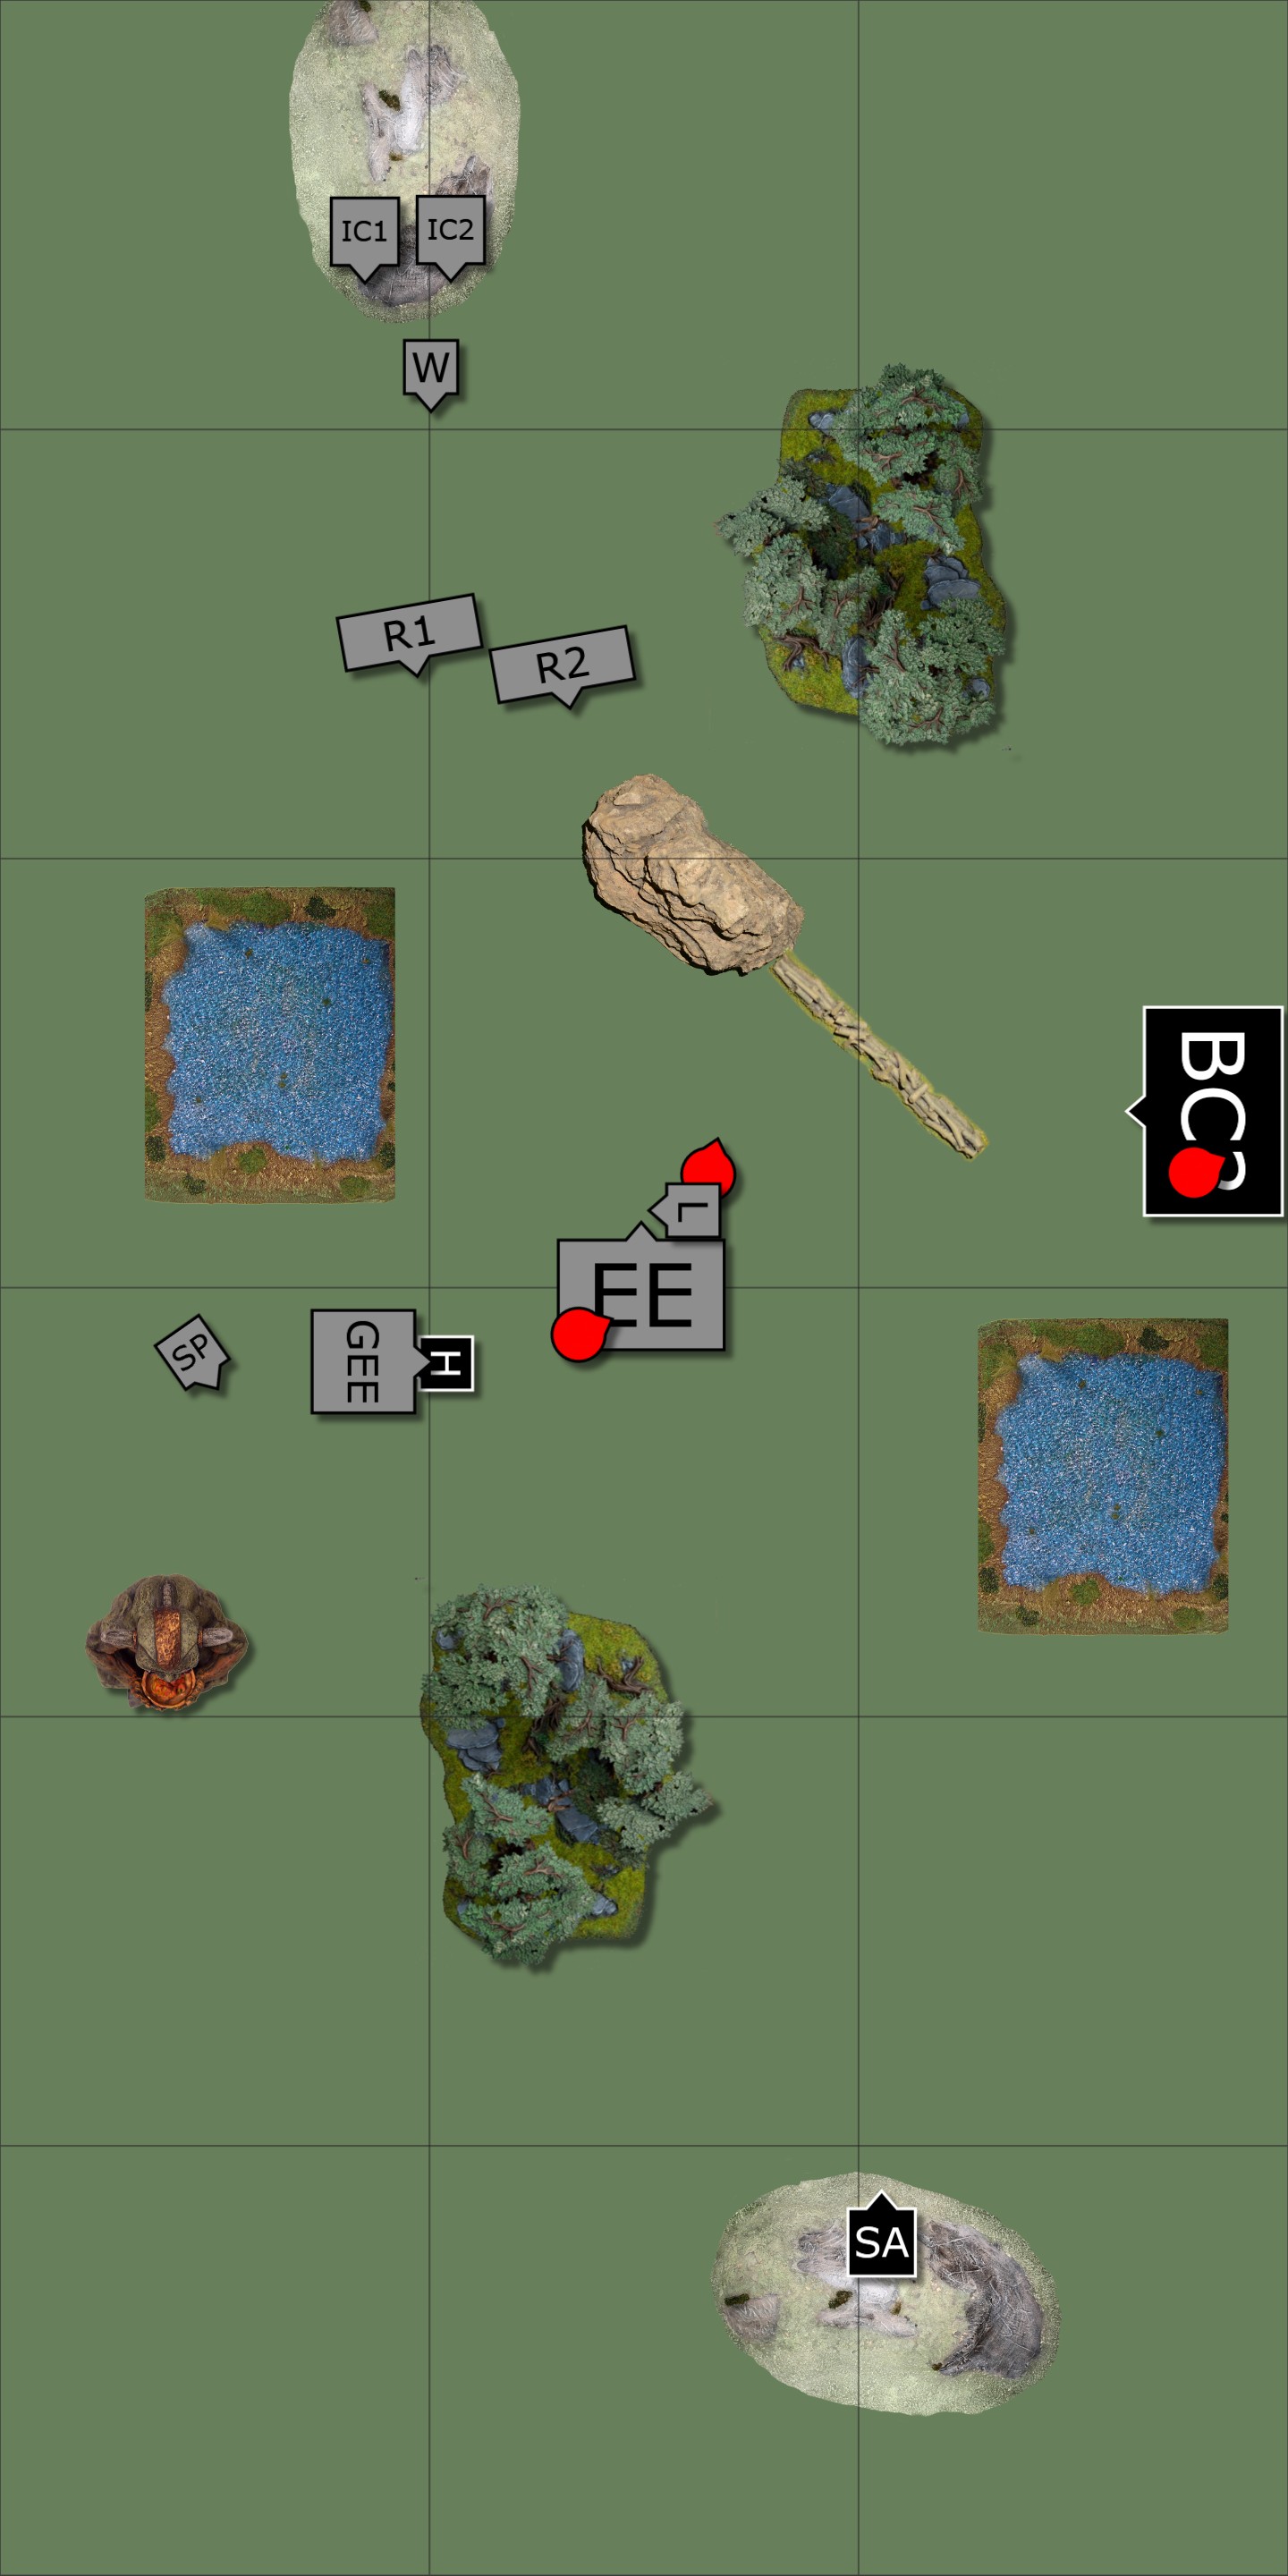
Final result: defeat (2-1)
Post-game thoughts
-
The beast cavalry are great! They’re one of the reasons I chose KoM over Basilea for this army in the new edition, so it’s nice to see them do well.
-
My two main armies in 3ed were Brothermark and Undead. My units did OK today but I’ll need to get used to them being a bit less tough than I expect. Not having Iron Resolve or Lifeleech makes a difference!
-
I think I have the wrong number of ranged attacks. I feel I should either take more so I can achieve a bit more with it, or bin it and use the points elsewhere. I’ll give it a few games before I make any decisions though.
-
I think if I hadn’t charged the GEE with my prince in turn 5, I would have won the game. My reasoning at the time was that I might have to hold off those elementals for 2 turns, so I should apply as much force there as I could find. But in hindsight I think if I’d just sent the hero alone then I could have used the prince to screen the dwarf lord. Then while the elementals were busy eating the hero in turn 6 my wizard would be able to move and get to safety. Still, we live and learn.
Overall I’m enjoying 4th edition so far, and definitely looking forward to fielding this army more.