Round 2 vs Jon McCready
Plunder vs Ogres with Basliean allies
Siege Breaker Horde - Maccwar’s Potion of the Caterpillar
Siege Breaker Horde - Mead of Madness
Siege Breaker Horde
Siege Breaker Horde
Siege Breaker Horde
Siege Breaker Horde
Warlock -Inspiring Talisman - Drain Life (5)
Berserker Bully -Blade of Slashing
Berserker Bully
Basliean Men-at-Arms -Veteran Command
High Paladin on Dragon - Aegis Fragment
This looks like a hard list. Faster than me, mostly De 6+ and still hits like ogres. Plus a dragon for extra speed. Lets see how the Fool’s Hold does. I do not want to take this on in a straight fight, so I will have to spread the objectives out and try to fight part of the army while holding off the rest.
Seems like a Basilean noble with money for mercenaries. On the wrong side of Golloch’s Empire.
*See the end of the report for more narrative.
My list again, for convenience
Ironclad Regiment - Throwing Mastiff
Ironclad Regiment - Throwing Mastiff
Ironclad Regiment - Throwing Mastiff
Shieldbreakers Regiment
Rangers Regiment
Rangers Regiment
Sharpshooters Troop
Sharpshooters Troop
Berserker Brock Riders Regiment
Berserker Brock Riders Regiment
Mastiff Hunting Pack Regiment
Steel Behemoth
Dwarf Lord on Large Beast
Berserker Lord -Brock -Blade of Slashing
Dwarf Army Standard Bearer
Flame Priest -Inspiring Talisman - Bane Chant -Increase Fireball to (10)
Deployment
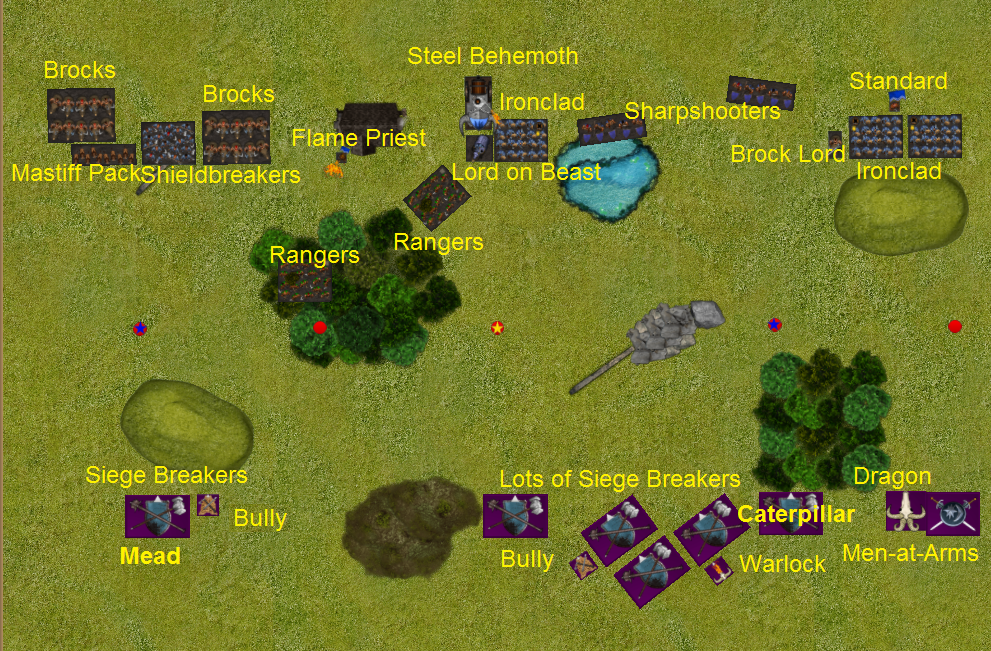
Note that the loot tokens with blue stars are worth two points, while the yellow star marks bonus points for the tournament score only.
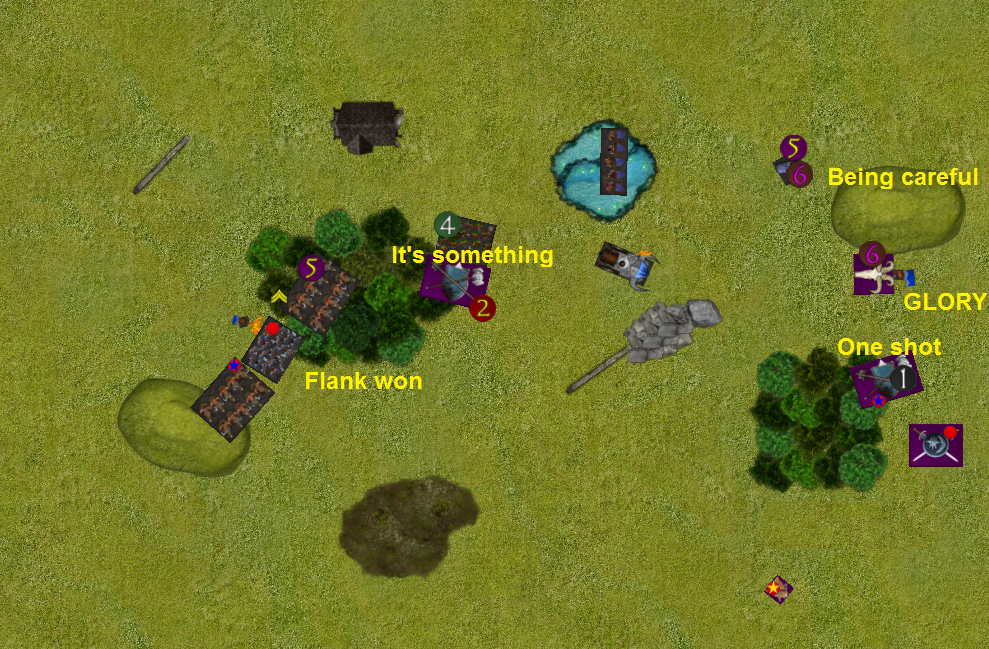
Being aware of where I can apply force, I put most of my offensive units on the left to claim the tokens there. This time having the brock riders attack over open terrain.
Then more good troops to grind in the middle, with my Lord on Beast ready to grab the centre token first turn.
The sharpshooters, ironclad and Brock Lord on the left are to stop those forces from joining the rest of the battle and maybe maybe denying an objective
My opponent has a similar plan, but aiming for the right tokens, with more committed to the centre.
Ogres Turn 1
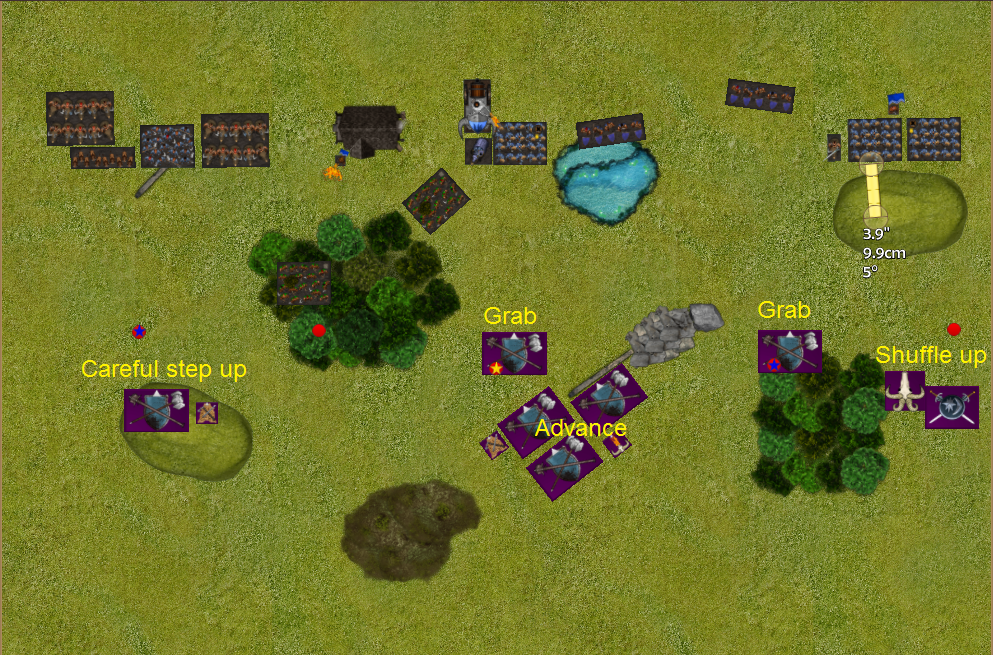
Ogres get first turn.
The delaying troops on the left are careful. The centre and right objectives are grabbed right away because there is no serious threat projected over them. More on that later.
The main force of ogres step up.
Dwarfs Turn 1

Without enough charges to dent the unit holding the centre objective, dwarfs position to charge and take aim.
Our own delaying troops (on the right) step up and unleash mastiffs at the dragon, because the Men-at-Arms are out of range.
Our offensive troops get in position while the mastiffs grab the loot. Our left unit of rangers find themselves overextended.
Ogres Turn 2
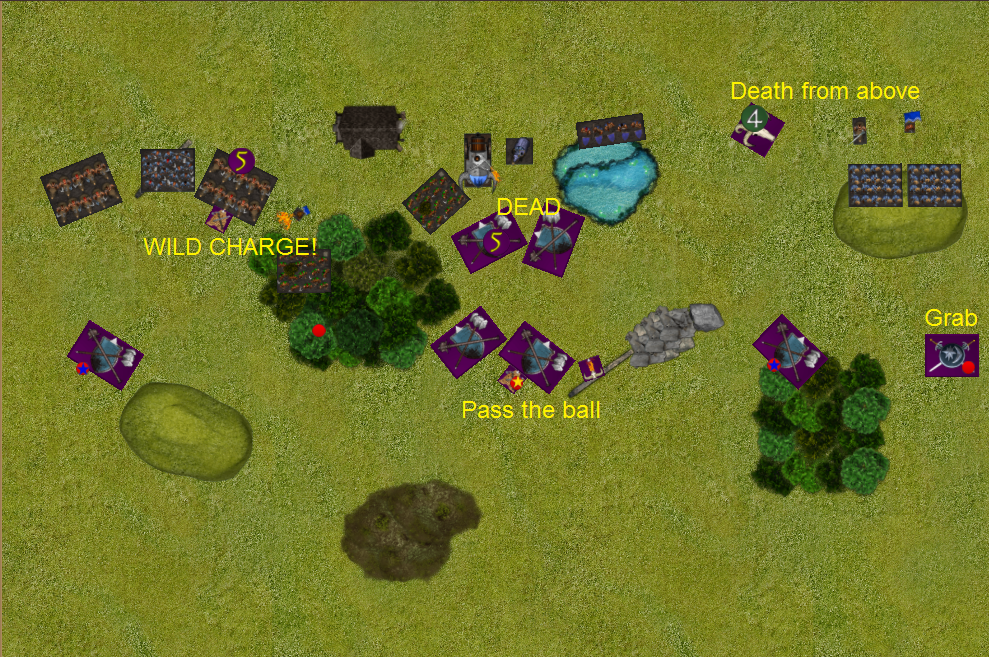
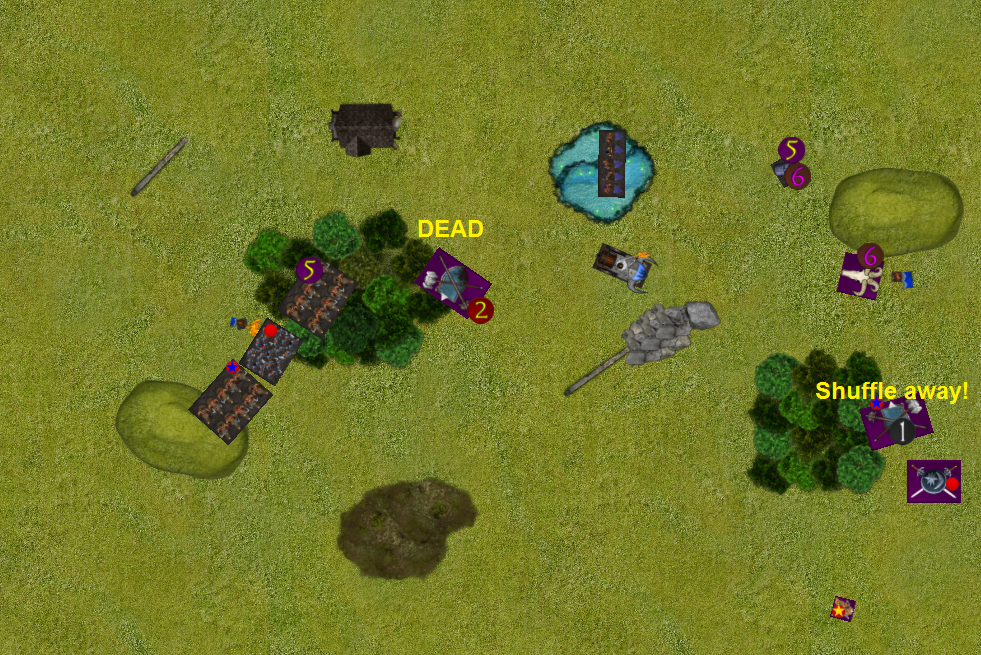
The ironclad in the middle were a little too eager and get charge by two units of siege breakers (one hindered though), which brings them to where they can be dealt with.
The other units move over the loot token, allowing the bully to grab it. This makes the game very difficult if not impossible to win for the dwarfs. More on that mistake later.
The bully on the left gets the wild charge to hold up a unit of brocks, while the mastiff pack is easily scattered.
On the right, the dragon stomps on a troop of sharpshooters and turns to face the right flank. That’s a relief, because dealing with it in the centre would have been a nighmare.
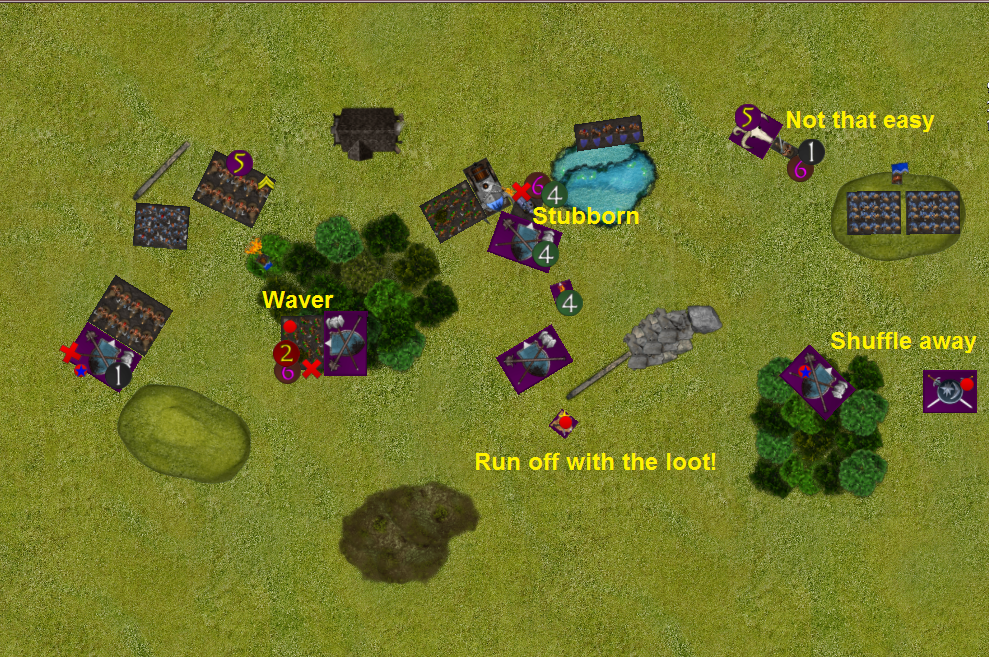
Dwarfs Turn 2

The fight in the middle gets going, with the lead siege breakers dealt with, while the Lord on Beast keeps the other siege breakers busy. This was foolish, because the unit that stopped the slide to conform is destroyed, exposing a flank to the unit in front of Norgrunn.
The remaining sharpshooters begin a duel with the warlock.
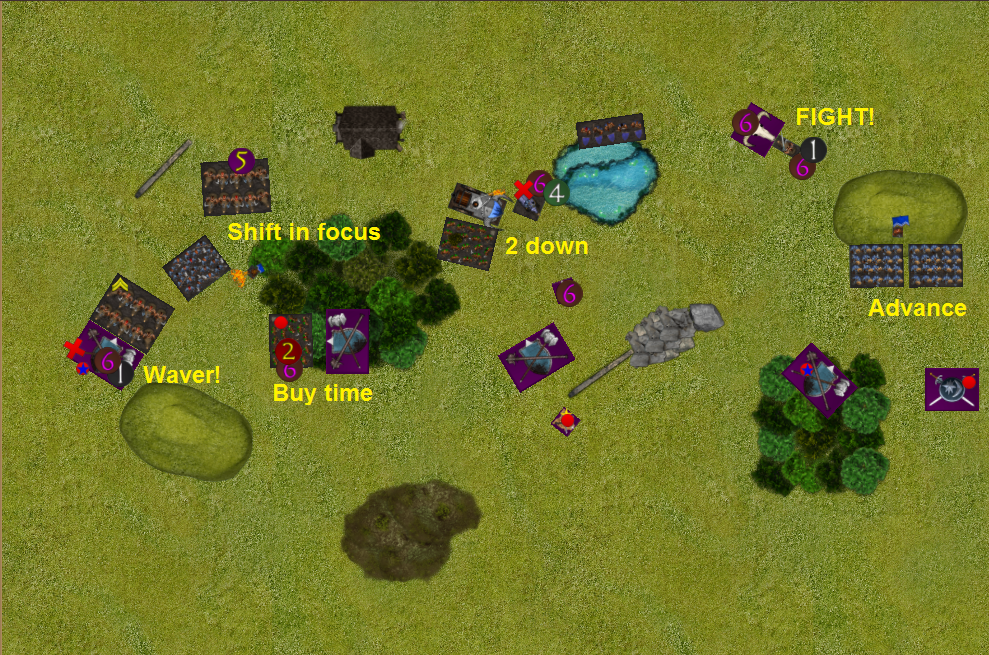
On the left, the brock riders do very well, the Berserker bully is dealt with very quickly (with help from bane chant). Despite a poor 1 damage, the siege breakers are wavered! Rangers step up to grab a token as the threats from a turn before are committed.
With a battle cry of “why are you plundering us if they can pay you” the dwarf berserkers put the ogres on the back foot.
On the right the Berserker Lord challenges the dragon while the ironclad press on. Again, I do not project threat. If the Ironclad advanced more in turn one, they could have started a fight with the Men-at-Arms for a token on the right now. Instead of useless shooting on the dragon.
They probably couldn’t keep the token, but could have posed a problem.
Ogres Turn 3
The ogres move to secure their loot on the right, taking victory even further from the dwarf’s grasp.
Nevermind that though! Heroics are afoot!
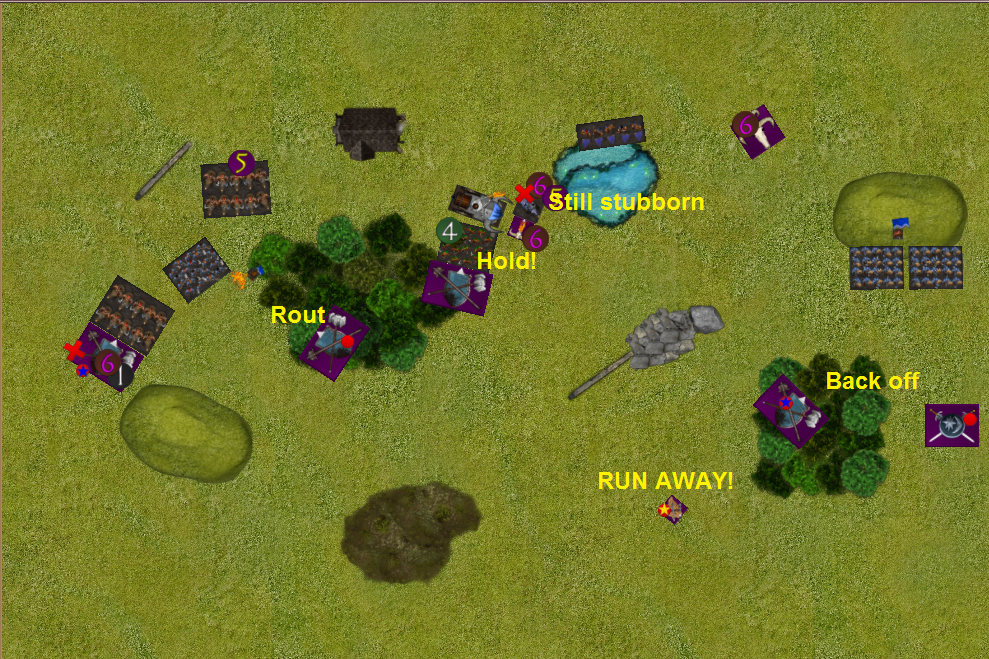
The Berserker Lord takes a beating, but holds against the dragon.
The Lord on Beast holds of the flank attack with a waver! Opening up a flank in kind.
The rangers with a new loot token hold off a siege breaker charge too.
Dwarfs Turn 3
The Rangers and steel behemoth rout another unit of siege breakers.
The dwarfs on the left turn to the centre, while the rangers buy time and the engaged brocks score another waver!
On the right the ironclad keep pressing while the Berserker Lord continues his EPIC FIGHT!
Ogres Turn 4
The ogres do more running away with the loot on the right. The dragon puts down the Berserker Lord.
On the left one unit of rangers routs as the other begins to hold in the middle. The warlock flanks the Lord on Beast, but only gets a waver.
Dwarfs Turn 4
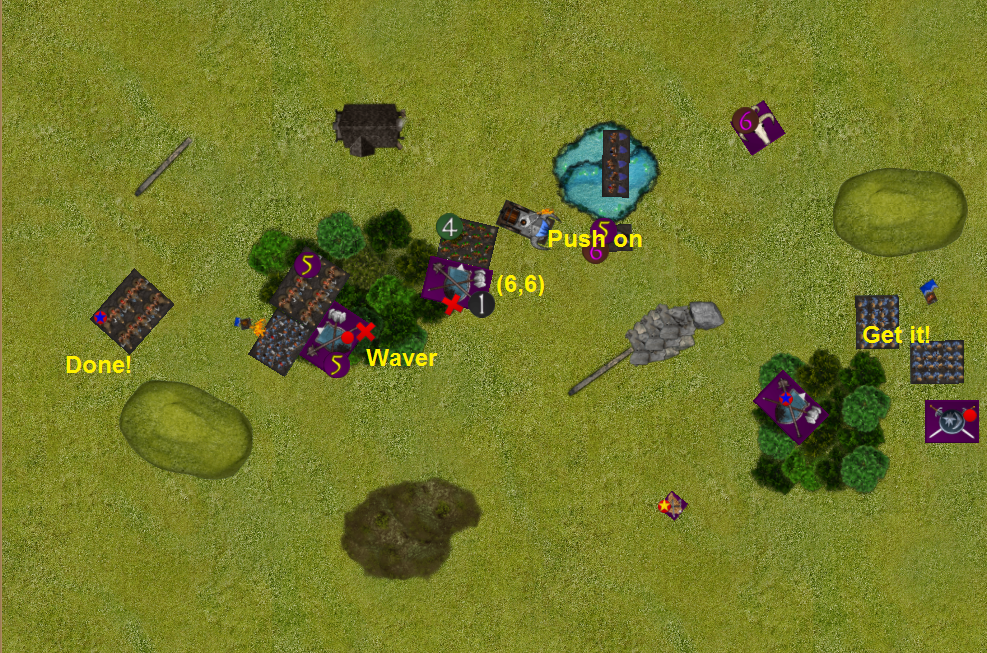
The beserkers on the left win their fight while the other two hordes of siege breakers in the middle are wavered!
The Lord on Beast gets his headstrong roll, but is only just out of range to charge the dragon! The steel behemoth runs over the warlock. Both units press on the maybe try help on the right in turn 7.
The ironclad on the right move up too eagerly, in a hopeless bid to contest some loot.
Ogres Turn 5
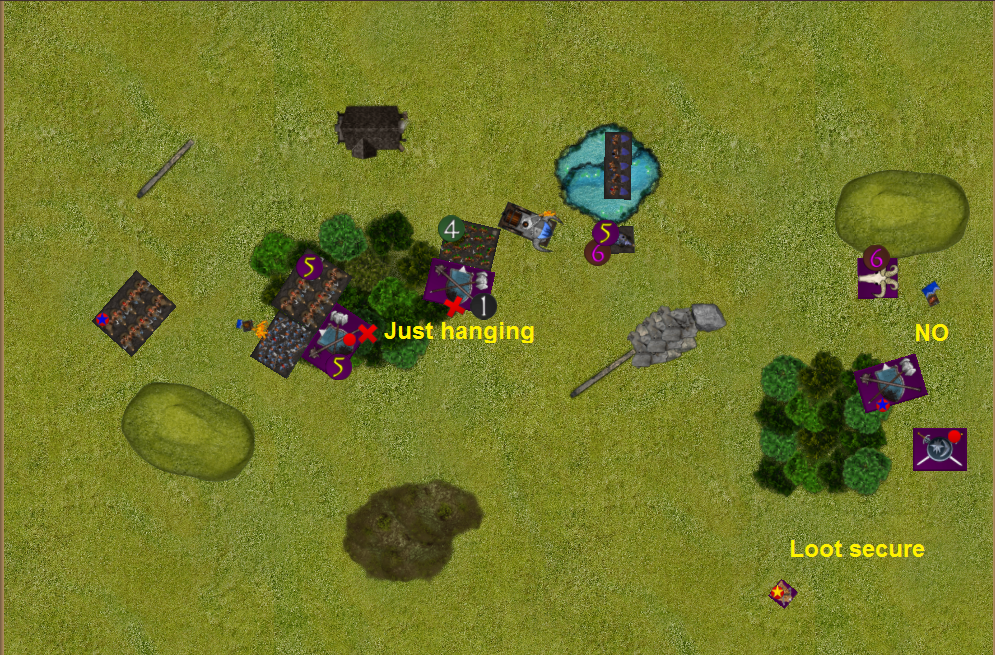
The hopeless bid on the right is crushed, the dwarfs realising that the time to retreat has come.
The other ogres are wavered.
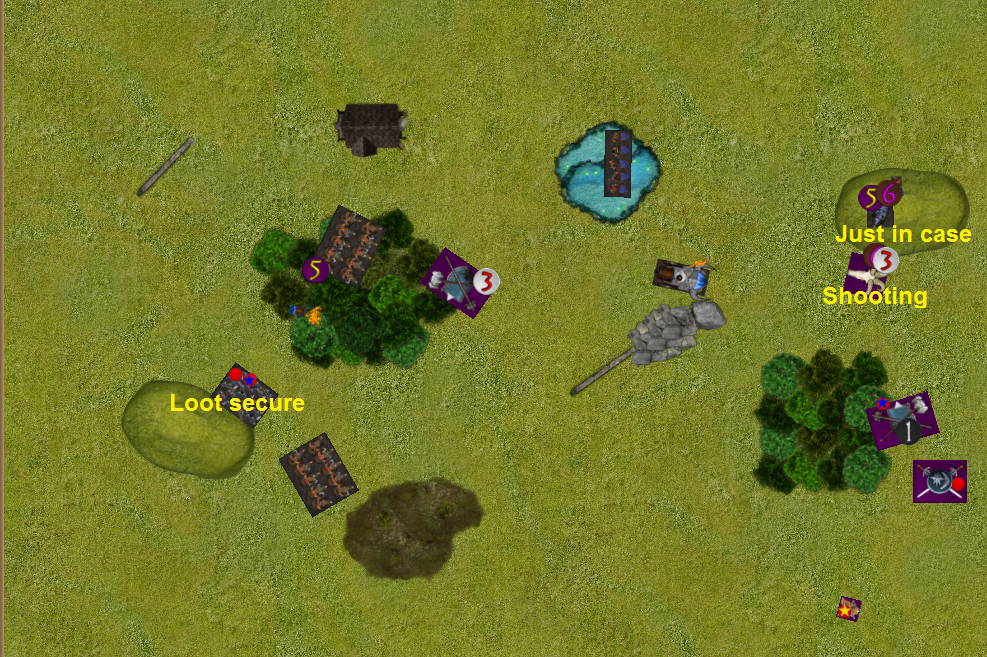
Dwarfs Turn 5
The dwarfs win the left flank and approach the right in case of turn 7.
Ogres Turn 6
One more unit of rangers flee as the ogres continue to move their loot further into a corner.
Dwarfs Turn 6
Dwarf secure the slightly less loot they have, while avoiding the remaining ogres in the middle.
Shots go into the unkillable dragon, in a bid for kill points. It has iron resolve and an aegis fragment, so unless it’s incredibly careless (which it would need to be to be taken off in one go), it can take more damage than a horde.
There is no turn 7, so the dwarfs loose 4-3.
Thoughts
As hinted above, the major lesson here is that I need to think harder about projecting threat. Similar to how I learned about concentration of force in the last game.
It would have been a closer game if I got the first turn, but relying on that is not a plan. I needed to have threat projected over the key tokens at deployment, to make grabbing tokens dangerous for my opponent in turn 1, not only in turn 2. I could have had rangers in the pond (scouted into range) and brock riders in the middle. That would have given me a reasonable chance to take the centre token back in turn 1.
With one unit of chaffed brocks and shieldbreakers there already, I could have had slower supporting units on the left, like the steel behemoth.
I did need all the force I put on the left though; I should have lost more units there, but got lucky wavers. Those wavers made me win better on the left, but I was going to take that flank anyway
Both concentration of force and projecting threat are not new concepts to me; all armies need to consider them, but most can do so as a matter of course. Dwarfs have to plan ahead to do so, because they don’t do either as directly.
Which makes dwarfs harder to play. “Buffing” dwarfs to compensate isn’t an option though, because it can be compensated for through thinking ahead, so “buffs” would then make dwarfs too good in the hands of skilled players.
It also means that playing dwarfs is a good way to improve at Kings of War.
A bedraggled ranger burst into the hall with grim news. An army of ogres, prepared to fight dwarfs, was approaching the trade caravan. It seems that the had been hired by That Paladin. The one who arrived a few weeks before with only one regiment of men and demanded tribute for Basilea. Obviously funding his own adventures under the assumption that all dwarfs have piles of gold. He was told that subjects of High-King Golloch don’t fear Basilea and wouldn’t, even if if he wasn’t on the wrong side of Abercarr.
The caravan was mostly samples of ale and salted pork to establish trade, so could be abandoned. Two of the wagons were more important, they held samples of the secretly made black powder, bound for testing by Golloch’s warsmiths. That powder had to be reclaimed, or word would get out that there is a black powder supply and more enemies would come.
The Hold is not ready yet, the halls are still being dug and stone walls are still being built. At the moment the Fool’s Hold, our home, is little more than a fortified camp around a mine.
For that same reason the ogres are a grave threat. The Fool’s Hold cannot stand against siege breakers yet, that army cannot be left to be hired or plunder nearby. The ogres have to be fought and enough damage done to them that they must retreat to recover and will consider these lands threatening.