Round 3 vs Justin Berg
Dominate vs Salamanders
Rangers came back from patrol and reported an army or Salamanders marching nearby. Norgrunn knew that they would be looking for supplies, plunder and morale; which will put the logging expeditions at risk. “We have to get ready for a fight” he grumbled, “just in case”.
The armies eyed each other near a small logging camp, really jut a clump of trees with some supplies and tools. The council approached the salamander leaders to talk trade. With the Fool’s Hold on the eastern edge of Golloch’s Empire, meeting the Salamanders to set up trade was an important step in securing the hold’s prosperity.
“Our rangers report that you are in need of supplies” said Mimir, “we will assist you for the promise of trade”. One of the two salamander clan lords hissed “Why pay if we can take? We will show you the fire of Kthorlaq”. Before Mimir could correct him, she meant that they would give supplies now for a trade agreement later. Mendeleev, the flame priest, burst out: “FIRE?! You think you can show ME fire!? I know the chemistry of flame! I will show you FIREPOWER!”.
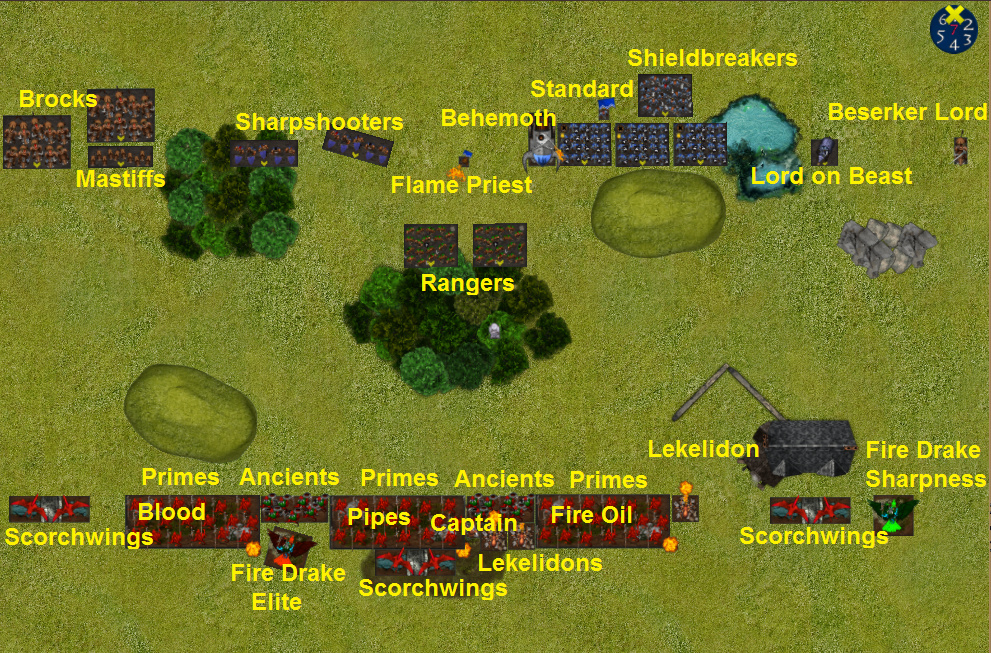
Salamander list
Salamander Primes Horde - two handed weapons - Effigy of Fire - Pipes of Terror
Salamander Primes Horde - two handed weapons - Effigy of Fire - Fire Oil
Salamander Primes Horde - two handed weapons - Effigy of Fire - Blood of the Old King
Ancients Troop
Ancients Troop
Scorchwings Regiment
Scorchwings Regiment
Scorchwings Regiment
Lekelidon
Lekelidon
Lekelidon
Battle Captain -Path of Fire
Clan Lord on Fire Drake - Brew of Sharpness
Clan Lord on Fire Drake - Blessing of the Gods
That looks like a scary lit at first. It is, but the De 4+ of the infantry and the Me 4+ of the dragons make it sound a little more manageable. The pathfinder aura of the battle captain is really good though, especially on this table (see below).
Lots of flying is a problem for dwarfs, I will have to use shooting and my fast units to delay or remove flyers and rely on my combat troops to deal with the infantry. Ideally my sharpshooters can take out the scorchwings (spoiler: they do not). The ancients troops have low enough nerve that piercing (2) shooting could be effective, but there are already a lot of targets.
I actually would have been more concerned by De 5+ on the infantry hordes. With 25 attacks on Me 4+ (and a pathfinder aura) the average is 12.5 hits for 8 or 9 damage to De 5+ or 10 or 11 to De 4+, plus effigies.
That means that a regiment of ironclad should survive a hit from a horde of primes (so two turns with or without two handed weapons), but a regiment of rangers probably will not (thanks to two handed weapons). Brock riders can go either way, but should be alright, especially if inspired.
3 mastiff and 3 charges from ironclad will do on average 8 and then 9 damage to De 4+ (total 17), so my ironclad can handle one horde on their own. Depending on what else they have to deal with.
There is also actually quite a lot of shooting that will no doubt add up, another reason to get rid of scorchwings.
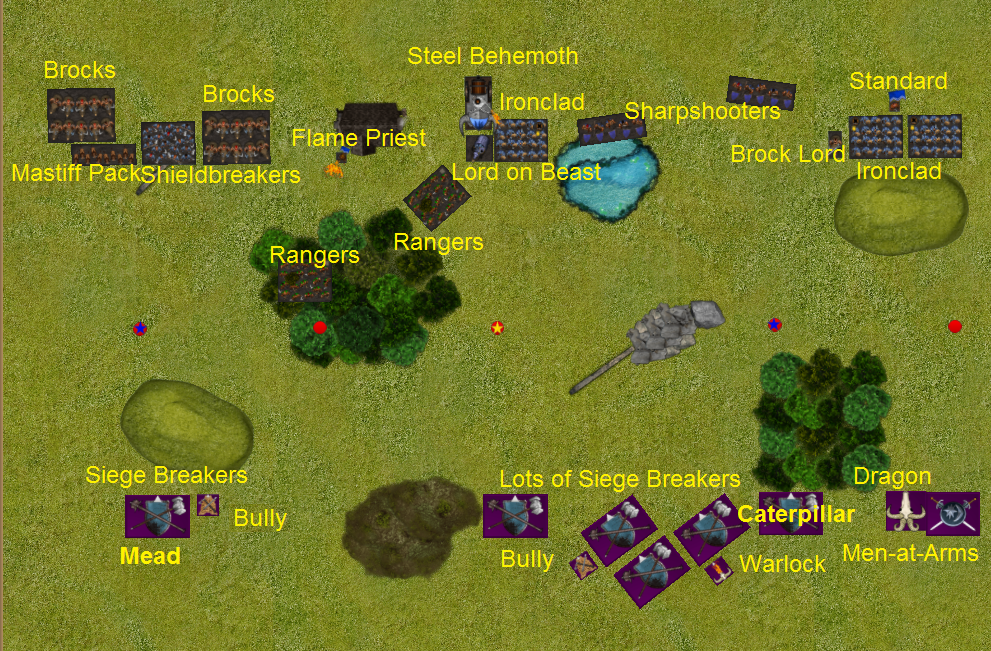
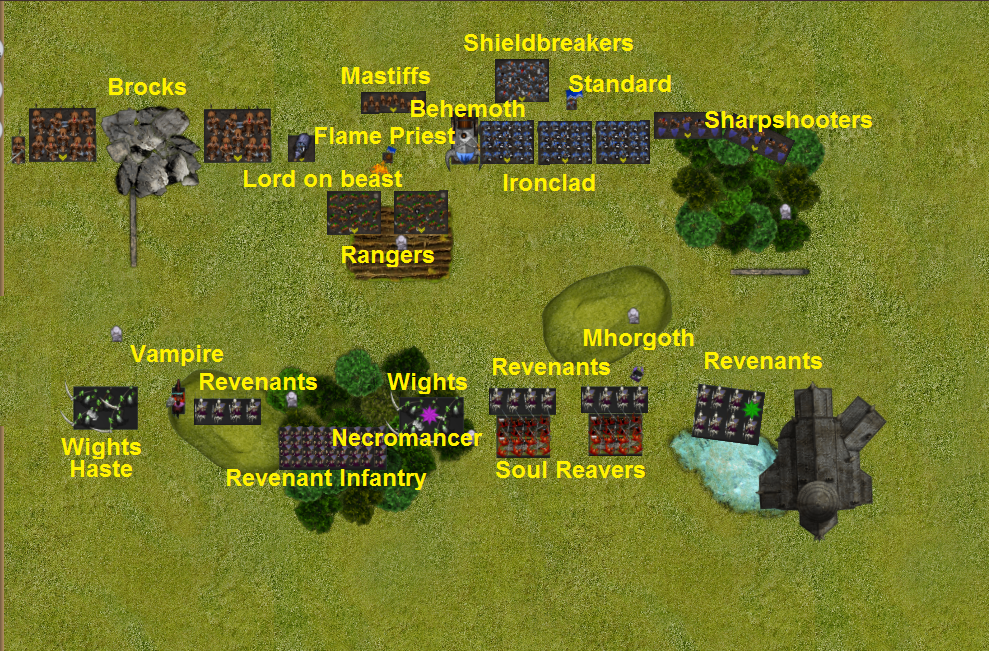
My list again, for convenience
Ironclad Regiment - Throwing Mastiff
Ironclad Regiment - Throwing Mastiff
Ironclad Regiment - Throwing Mastiff
Shieldbreakers Regiment
Rangers Regiment
Rangers Regiment
Sharpshooters Troop
Sharpshooters Troop
Berserker Brock Riders Regiment
Berserker Brock Riders Regiment
Mastiff Hunting Pack Regiment
Steel Behemoth
Dwarf Lord on Large Beast
Berserker Lord -Brock -Blade of Slashing
Dwarf Army Standard Bearer
Flame Priest -Inspiring Talisman - Bane Chant -Increase Fireball to (10)
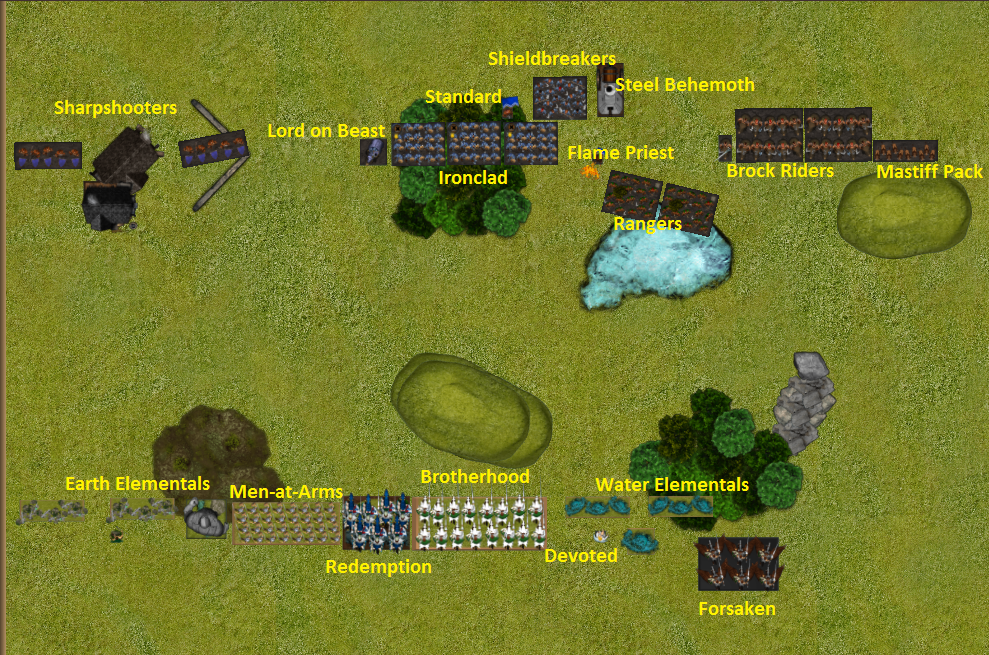
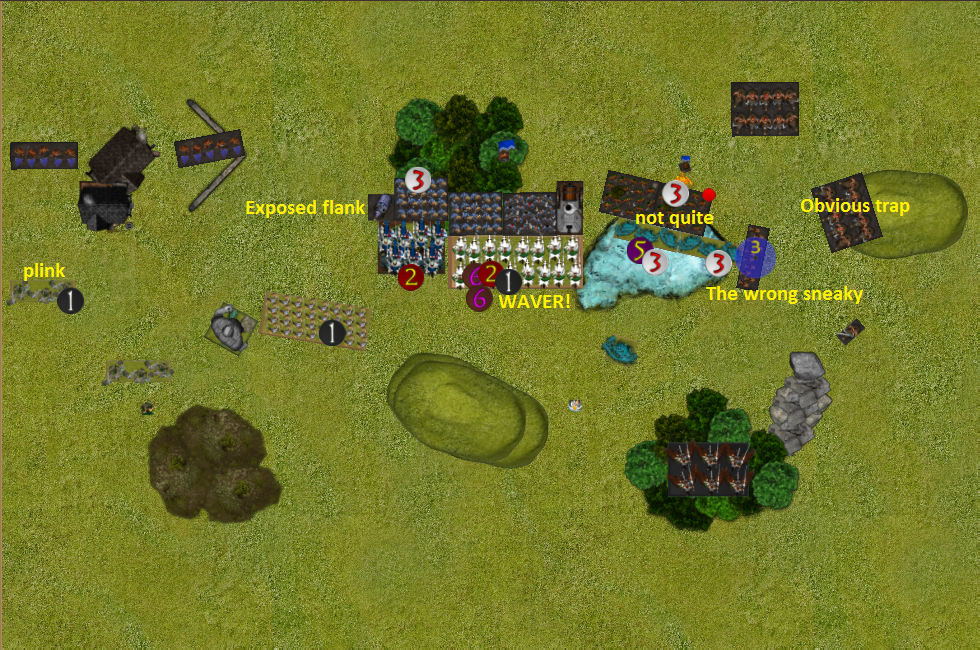
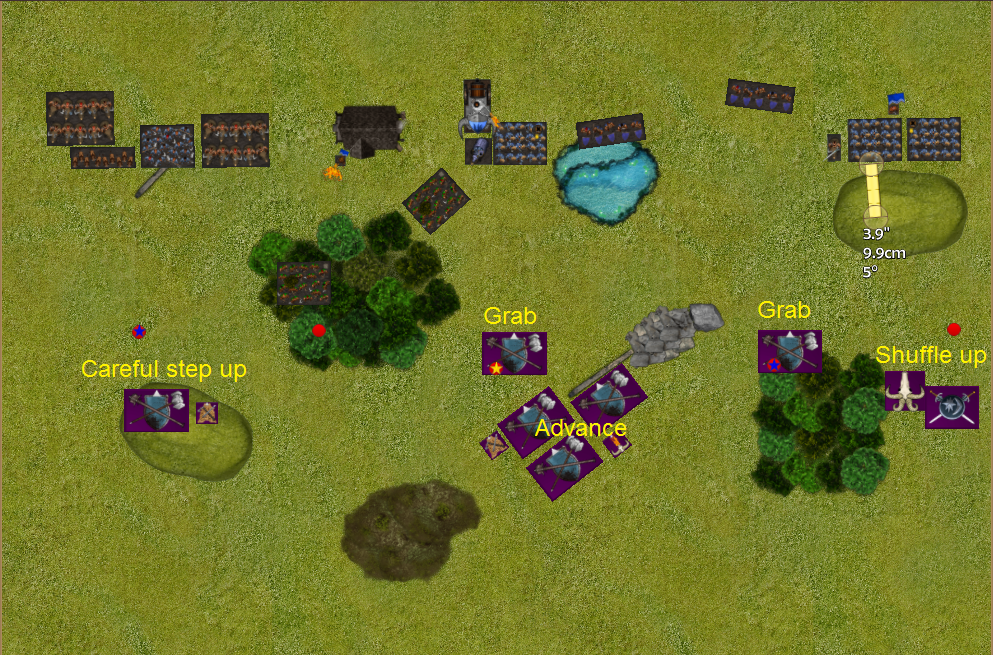
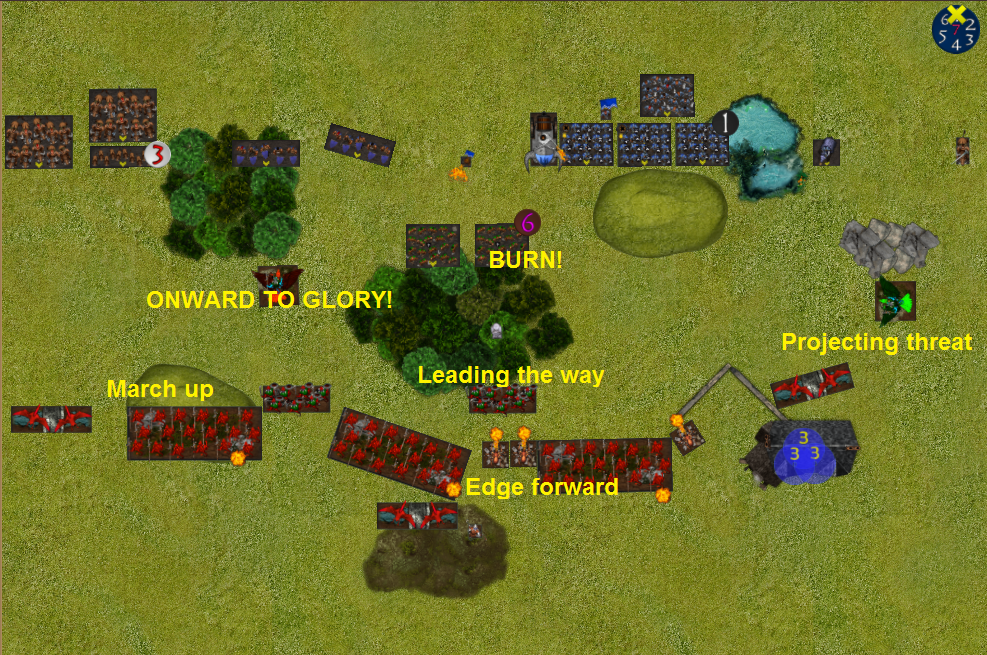
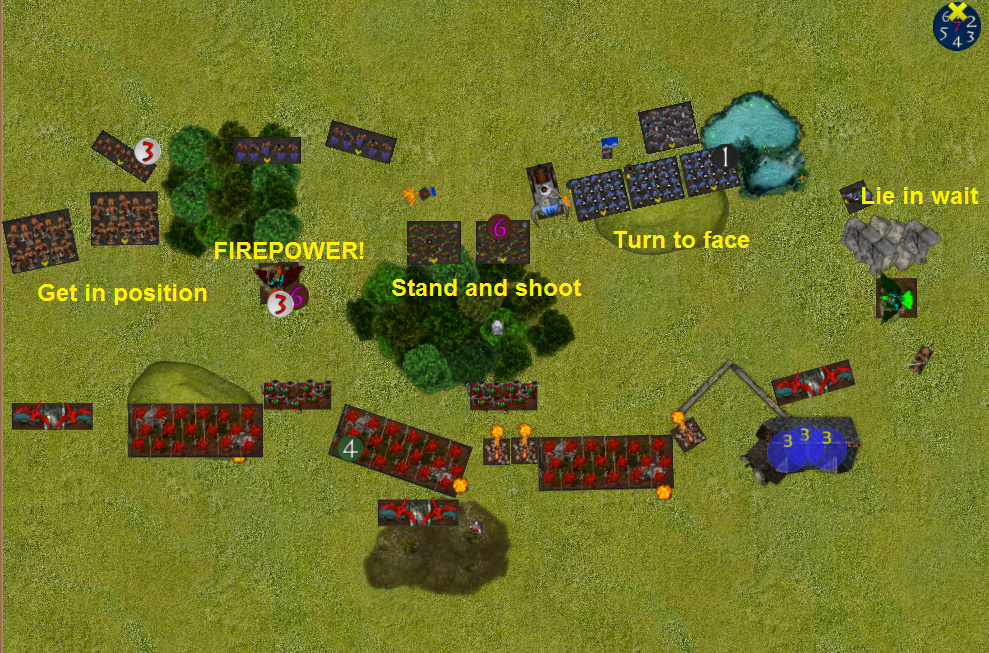
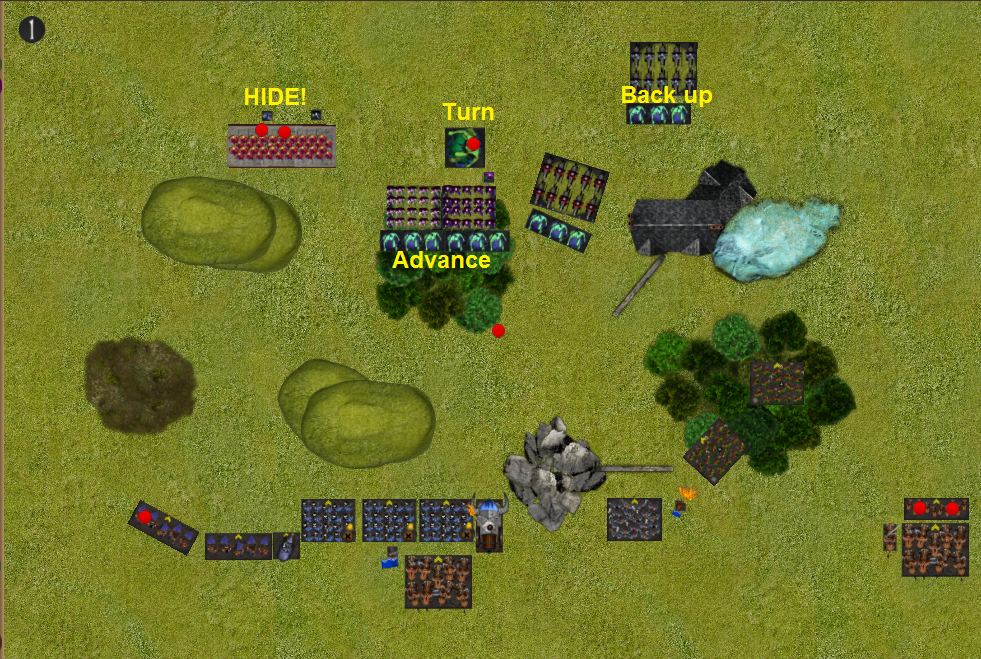
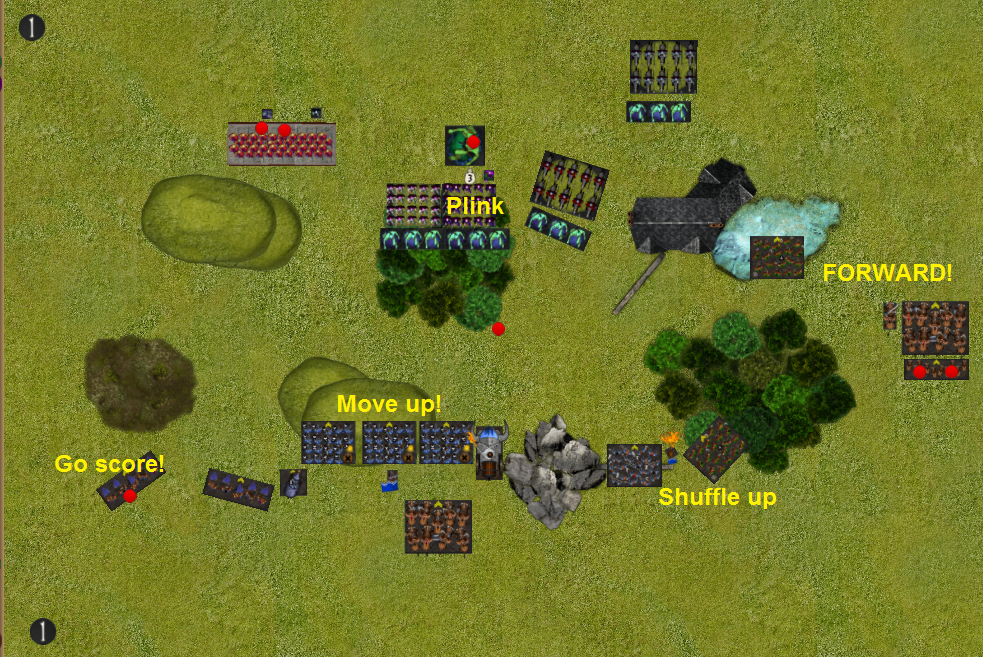
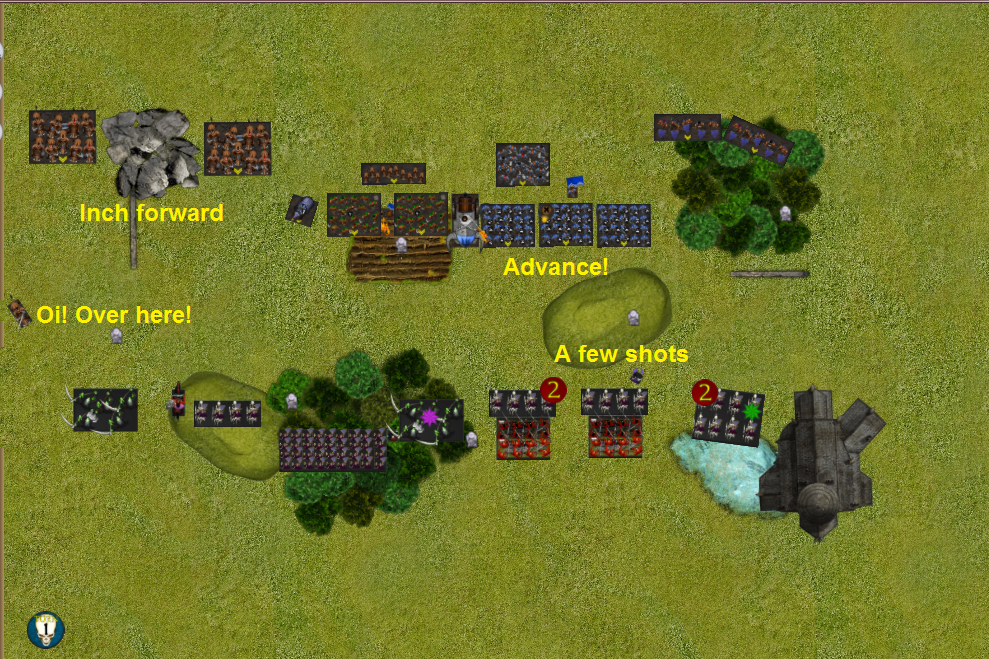
Deployment
The interesting map provided has a forest in the middle for dominate. That makes my rangers and behemoth the obvious choice to threaten and occupy it.
The infantry line on the right is to hold the right and deal with what fits past the house (remember they can handle a horde on their own), but close enough to hopefully send units into the dominate circle later.
Lords to hunt the fire drake on the right and hopefully shooting can deal with the other. Which leaves the brock riders positioned to “sweep down” the open flank without inspiring, hopefully their nerve will make up for it.
Rather than put both units of sharpshooters in the woods, one is positioned so that it can turn and score late in the game. Turns out that it is also a better target for charges though.
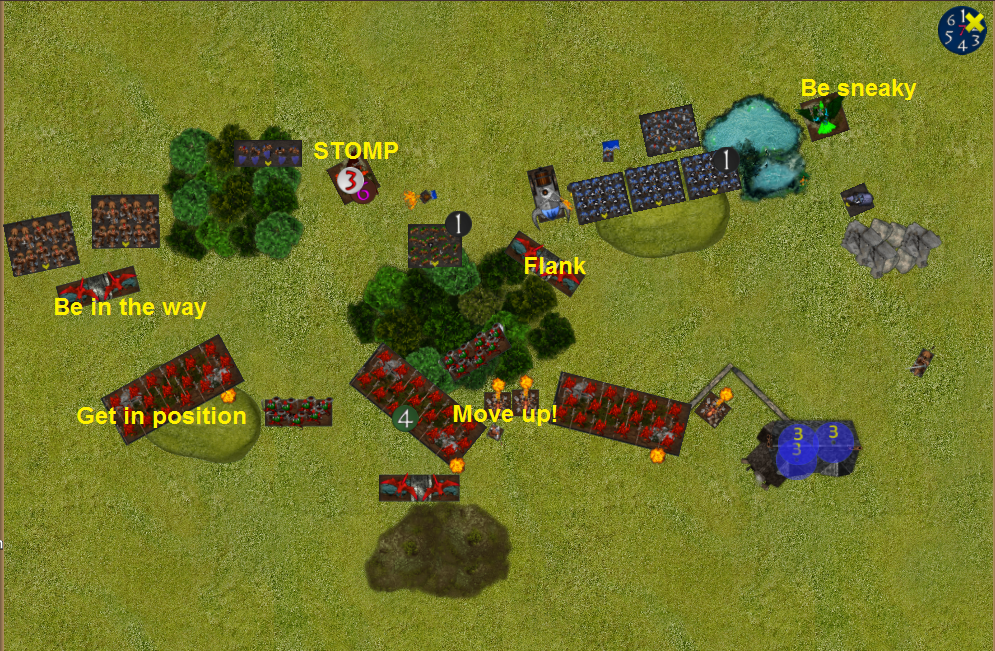
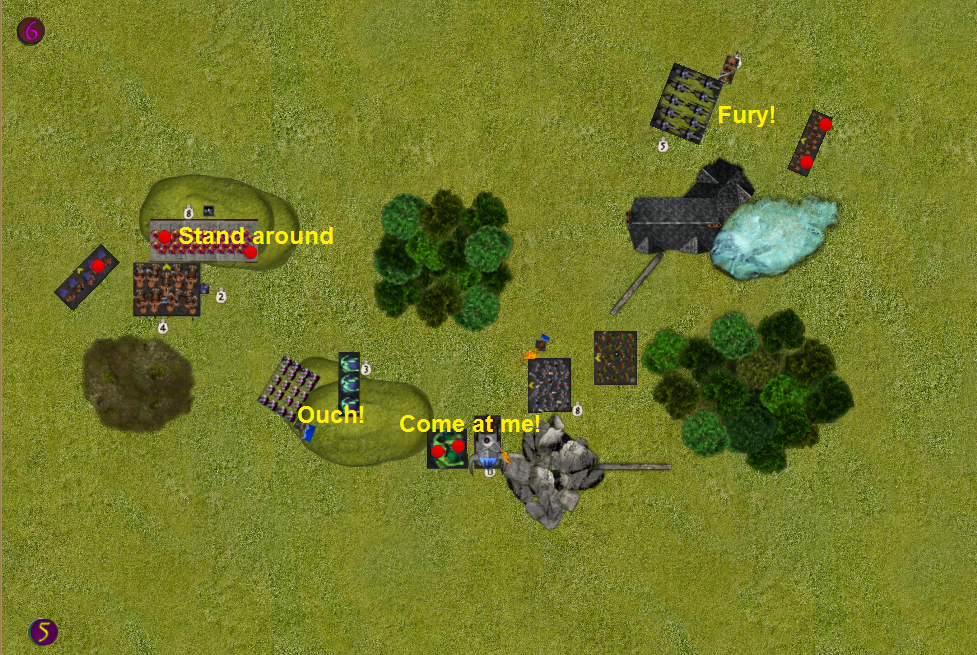
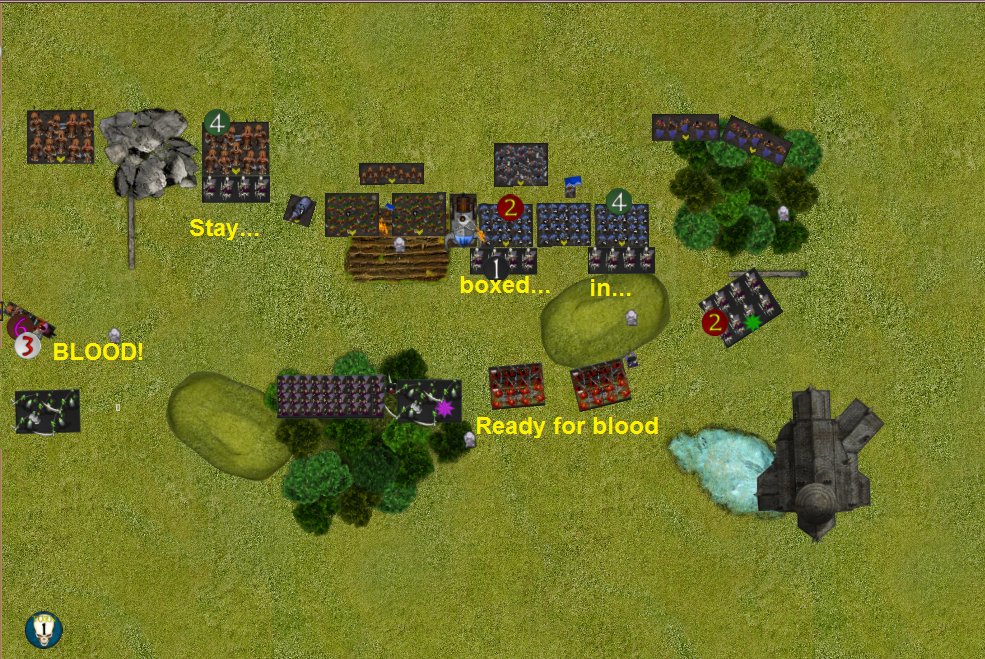
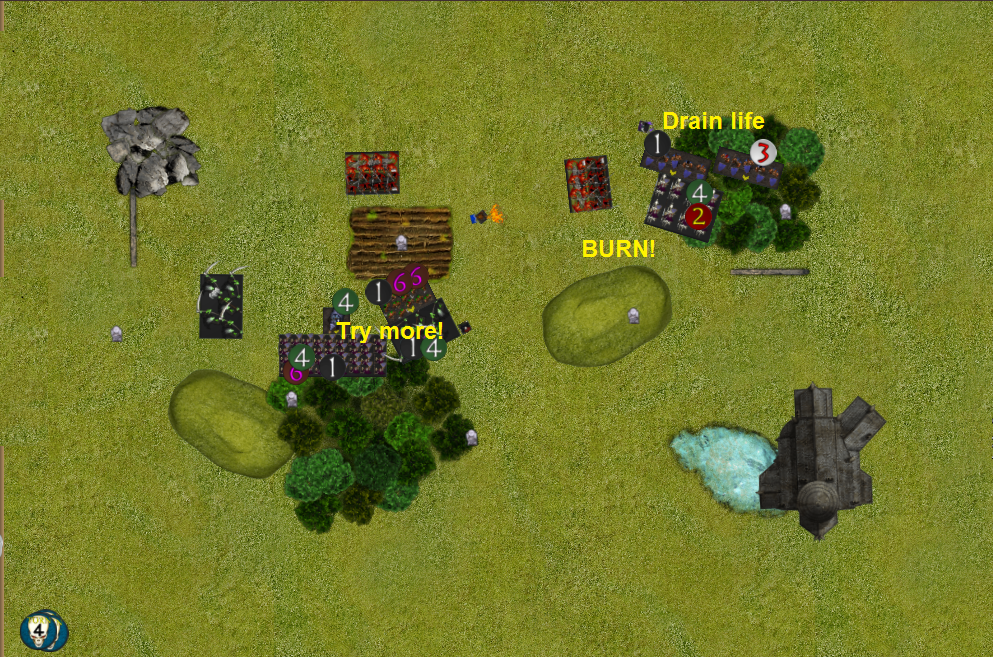
Salamanders Turn 1
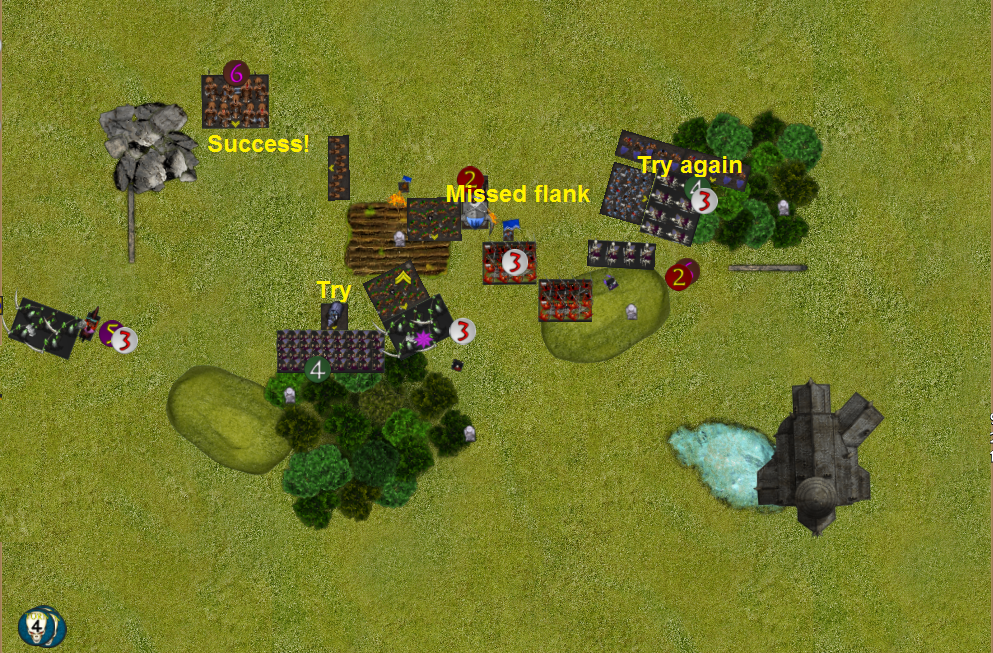
The long line rumbles forward and the lots of little bits of shooting target the rangers, with cover.
One fire drake moves up to threaten on the right and the other puts pressure on the left, so much for shooting ancients troops or scorchwings.
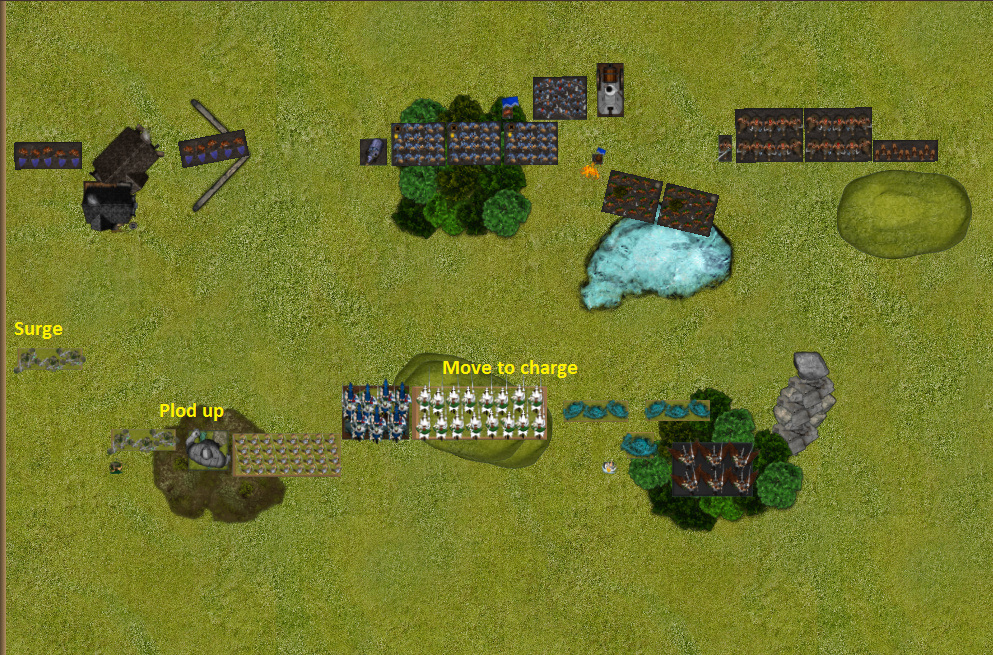
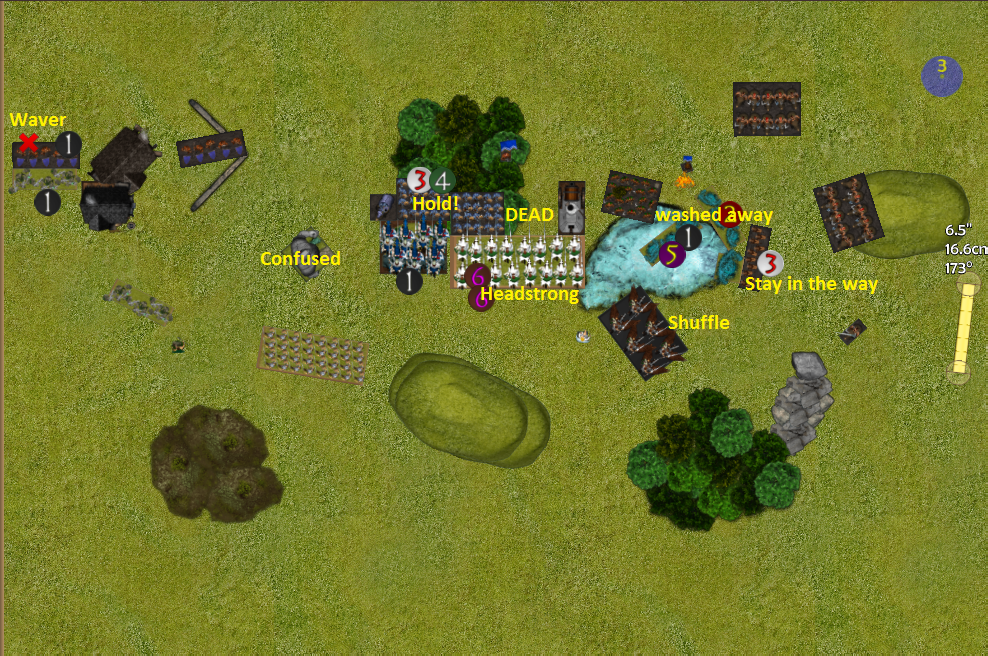
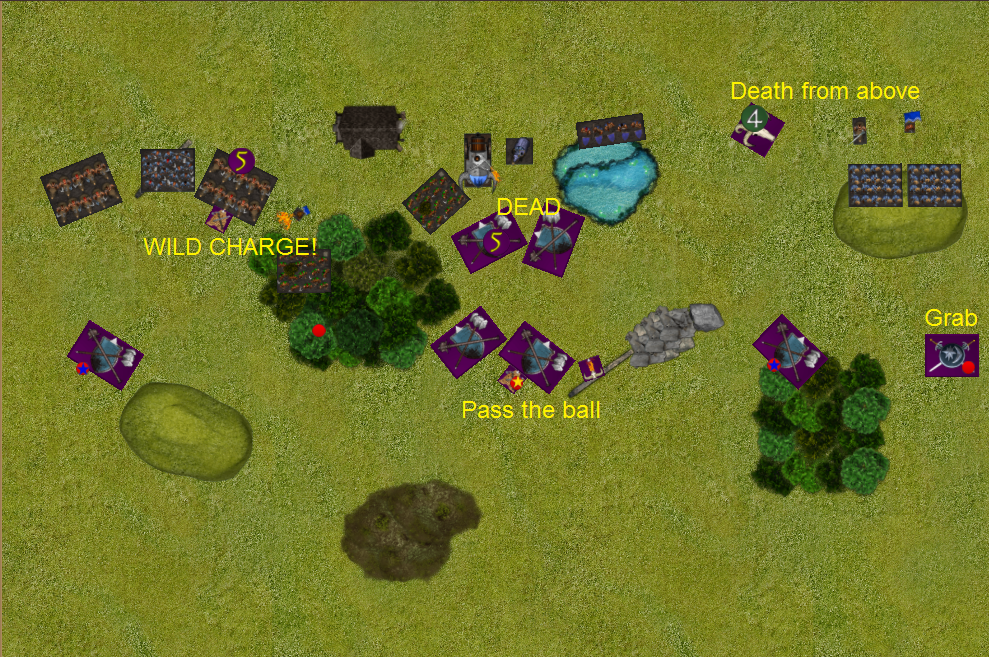
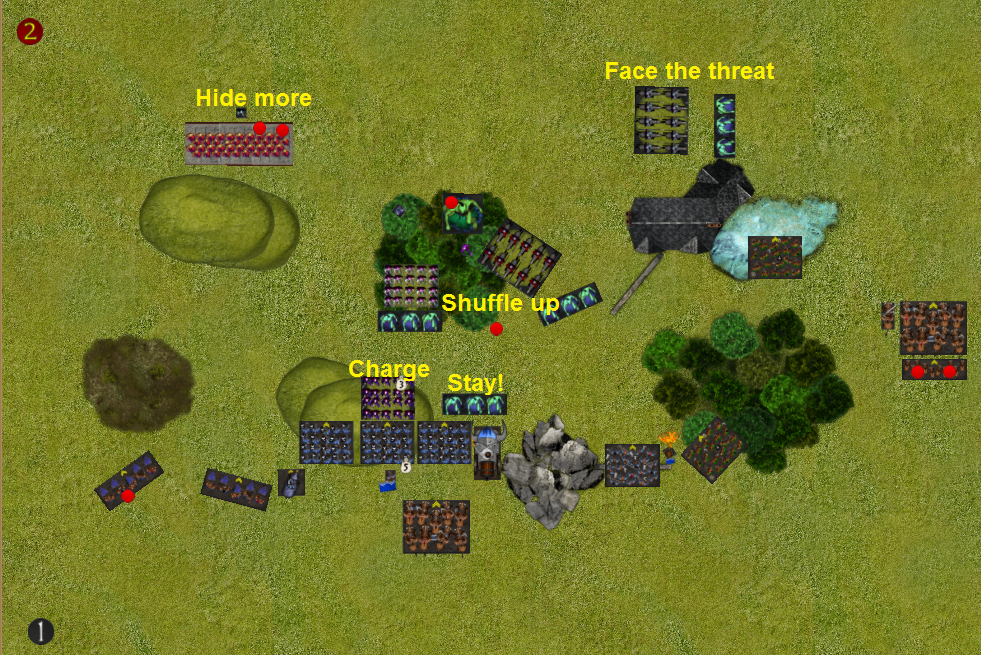
Dwarfs Turn 1
The right moves up a little and turns for the fire drake while the lords start trying to catch it.
Rangers forgo moving to shoot the middle horde, expecting the ironclad to handle the right prime horde and the brocks the one on the left.
Brocks move into position, leaving behind the damaged mastiffs.
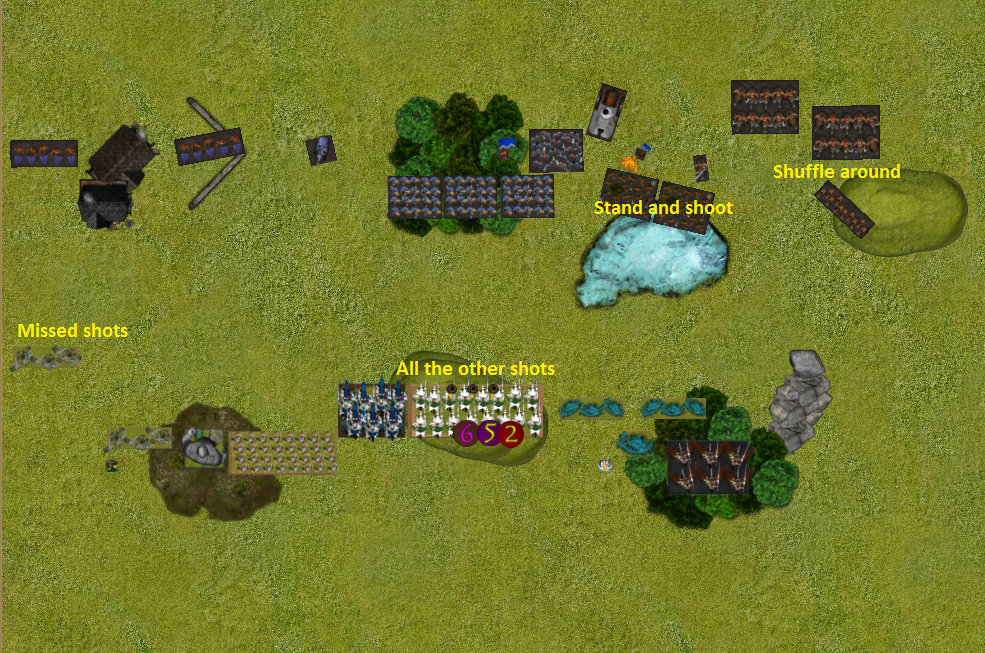
The sharpshooters do an expected amount of damage to the left fire drake, but the flame priest shows the clan lord what dwarf firepower is about, ending with 9 damage (double the average from those 3 units).
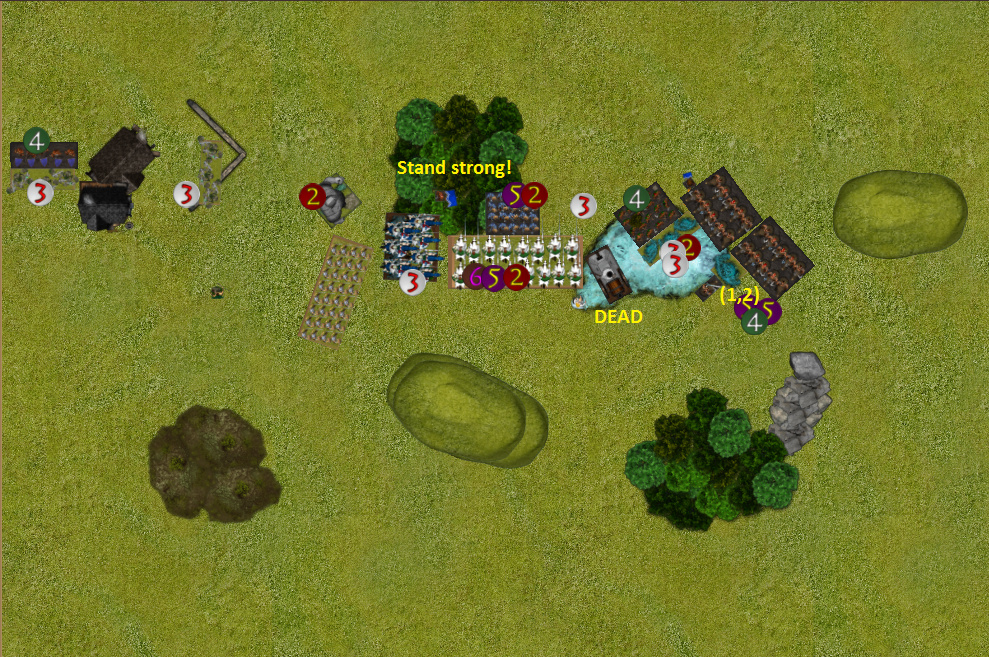
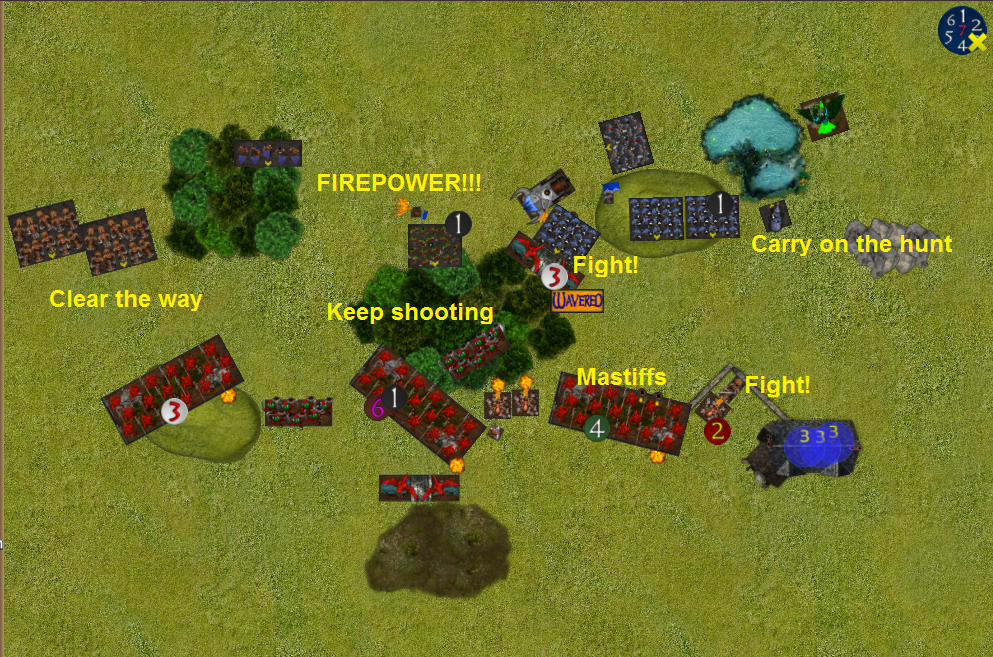
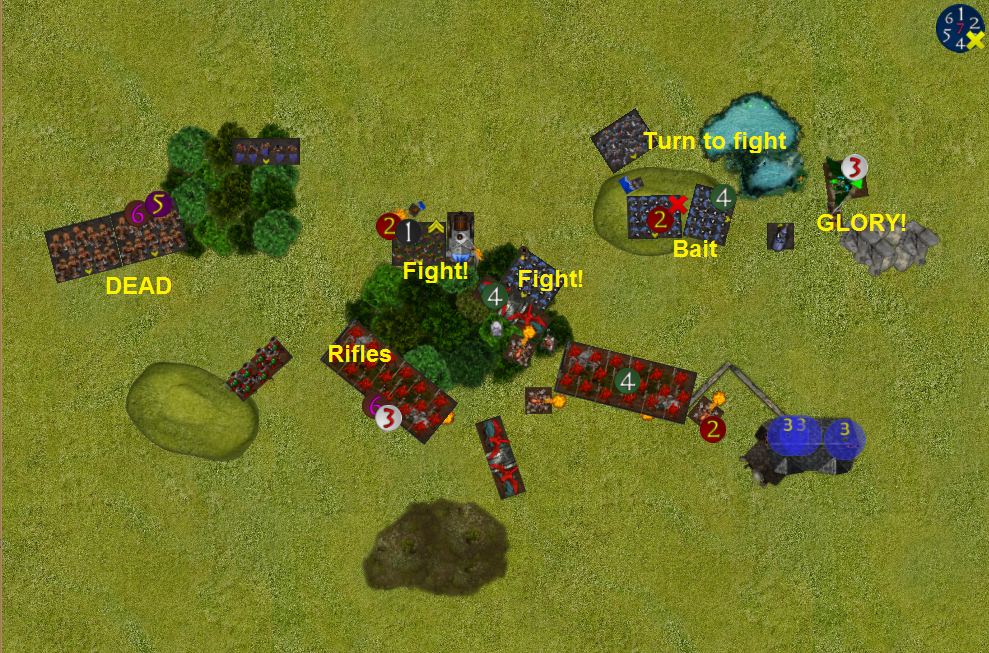
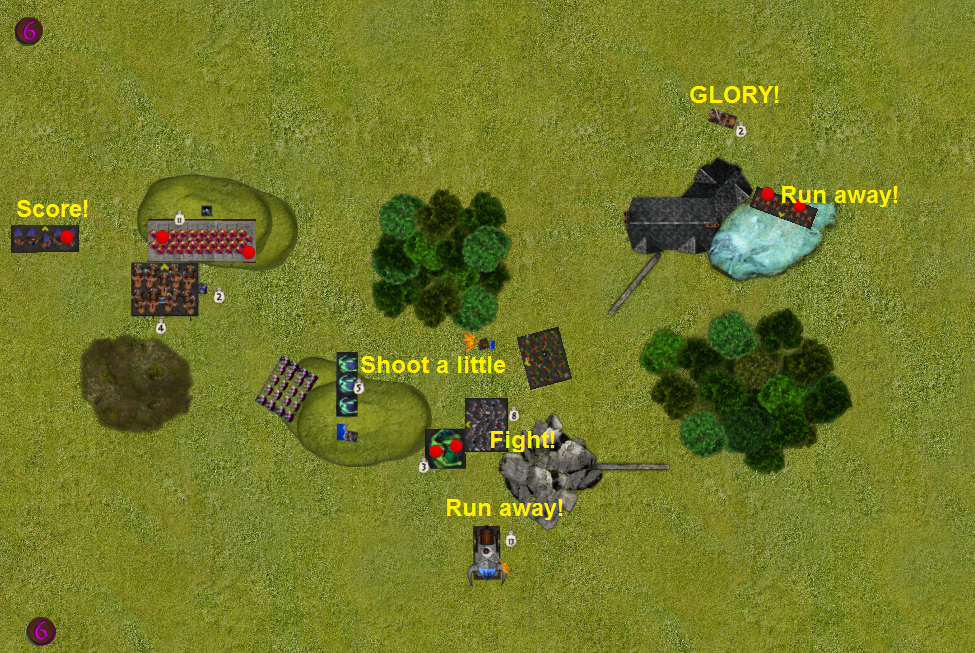
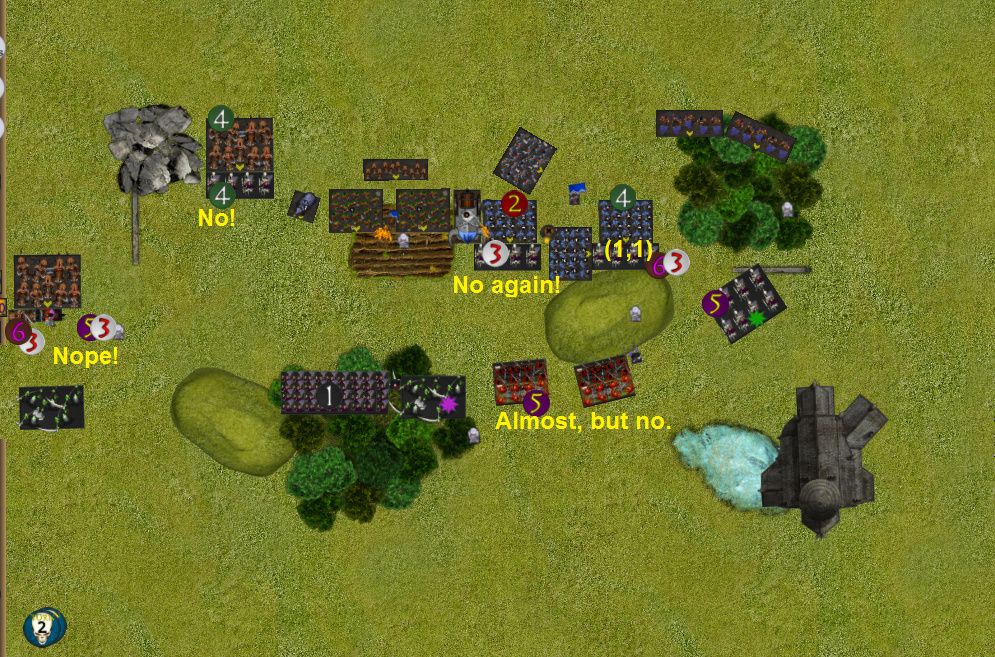
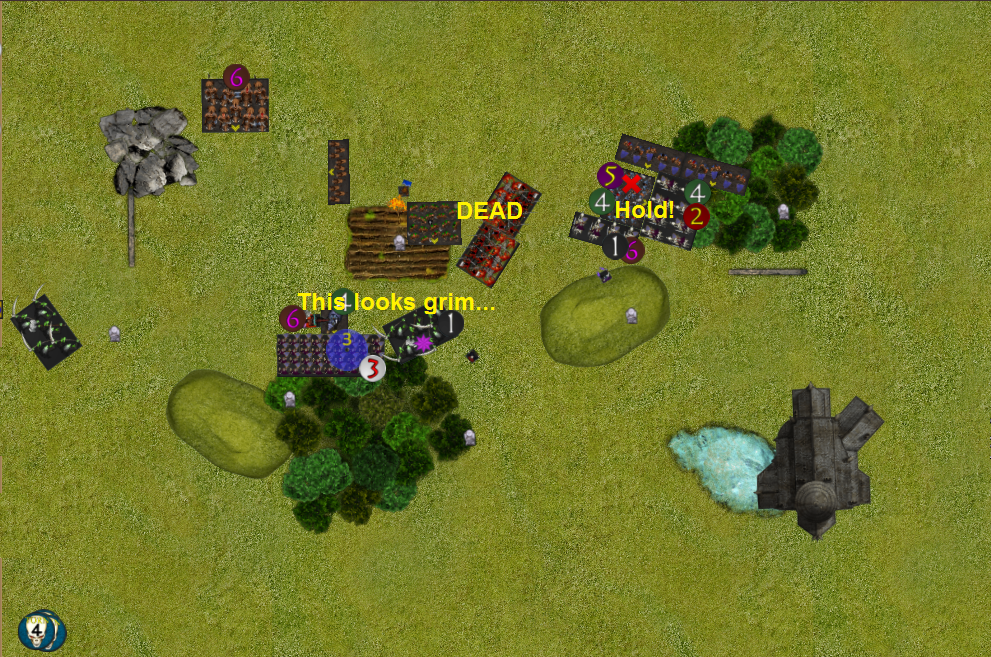
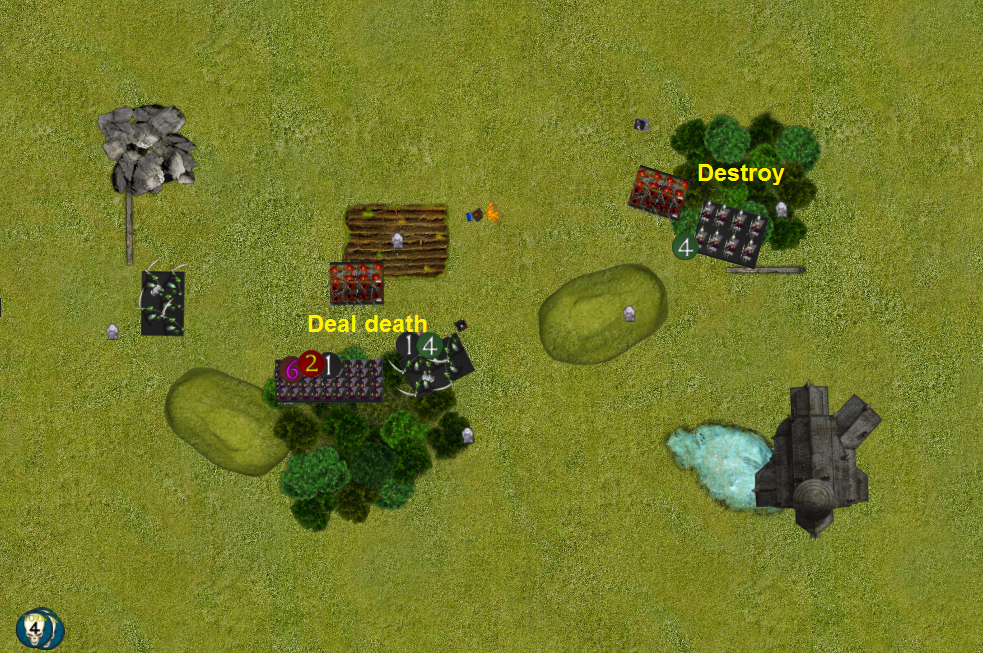
Salamanders Turn 2
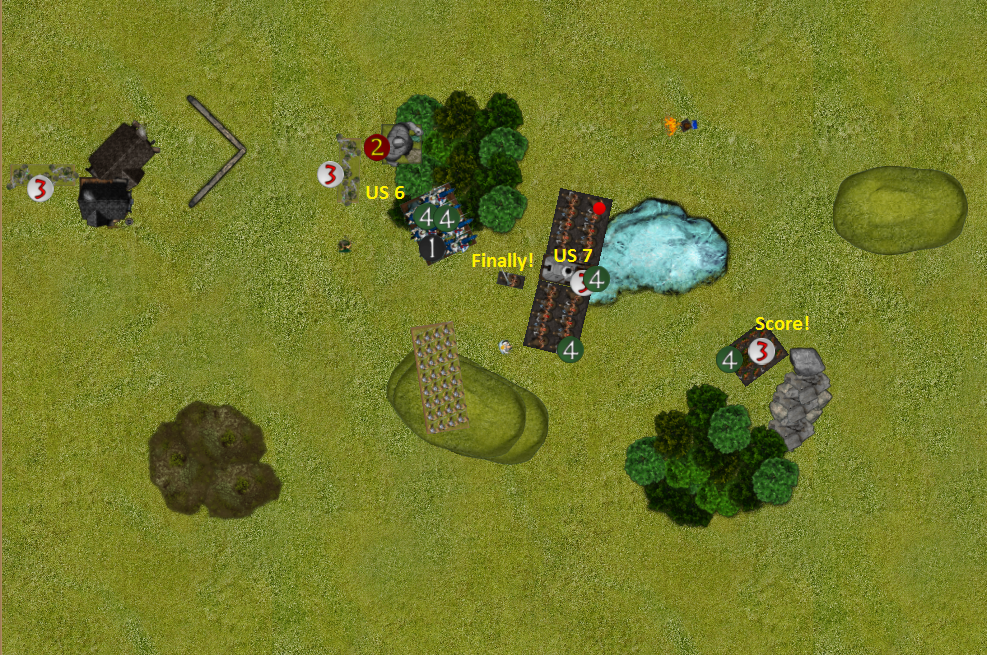
The right fire drake hops over the rocks, but has to go too far to also turn. The far rifht scorchwings have a flank on a unit of rangers that I missed.
THe scorchwings on the left chaff the brocks while the primes on get in position behind them, nullifying my advantage in speed.
The centre moves up while the left fire drake angrily stomps on the sharpshooters that were supposed to survive and score.
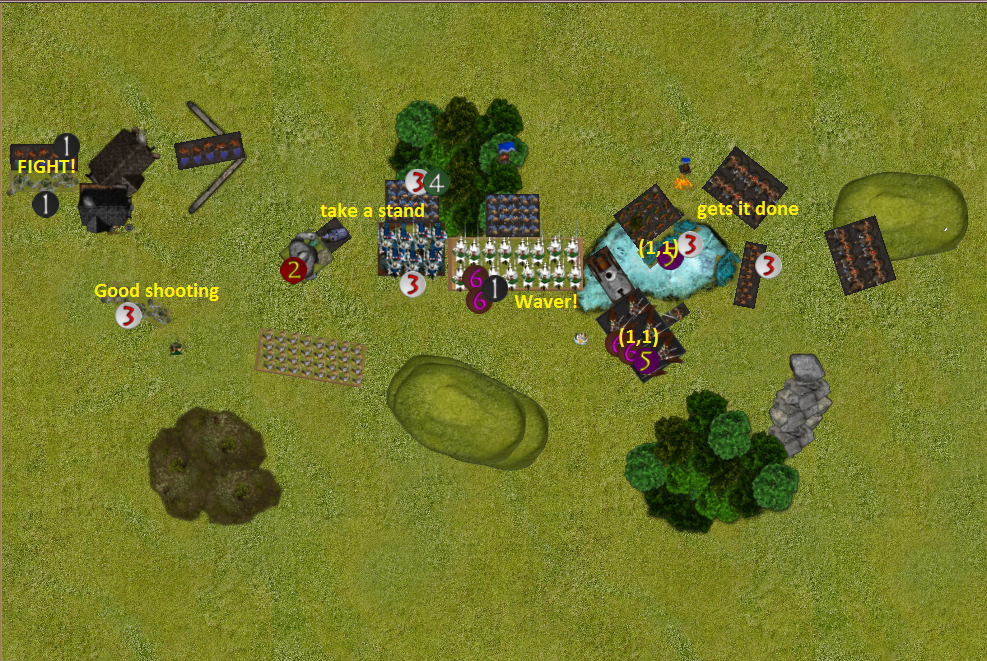
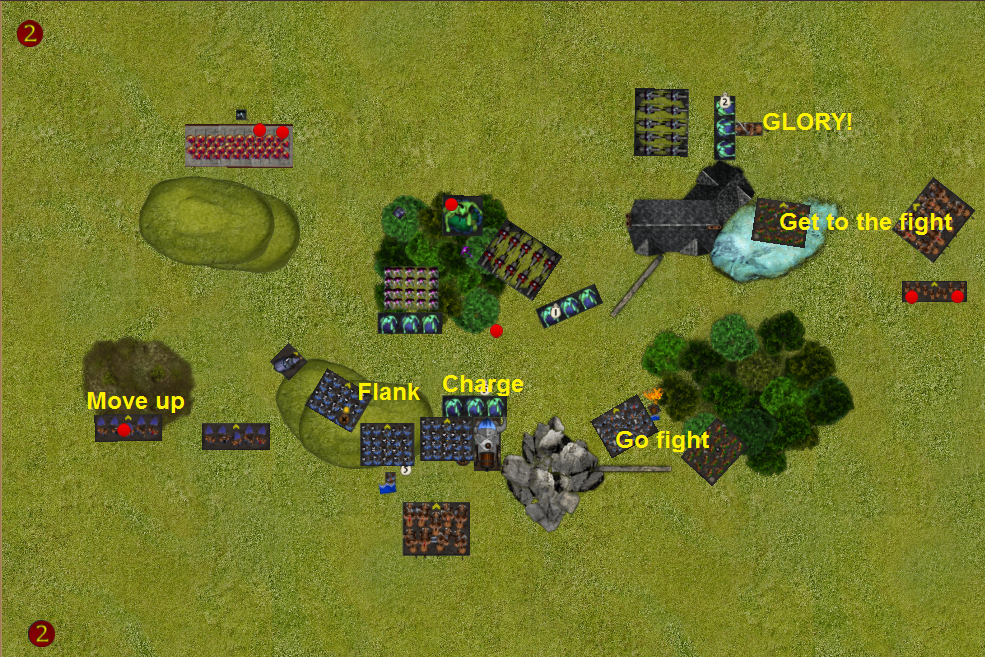
Dwarfs Turn 2
Fire from the flame priest, who over preforms again, and the steel behemoth rout a fire drake on the left. Firepower indeed. This is fortunate, but with average roll only one turn early.
The brocks accept that they will get charged.
The rangers and sharpshooter keep plugging away at the middle horde of primes.
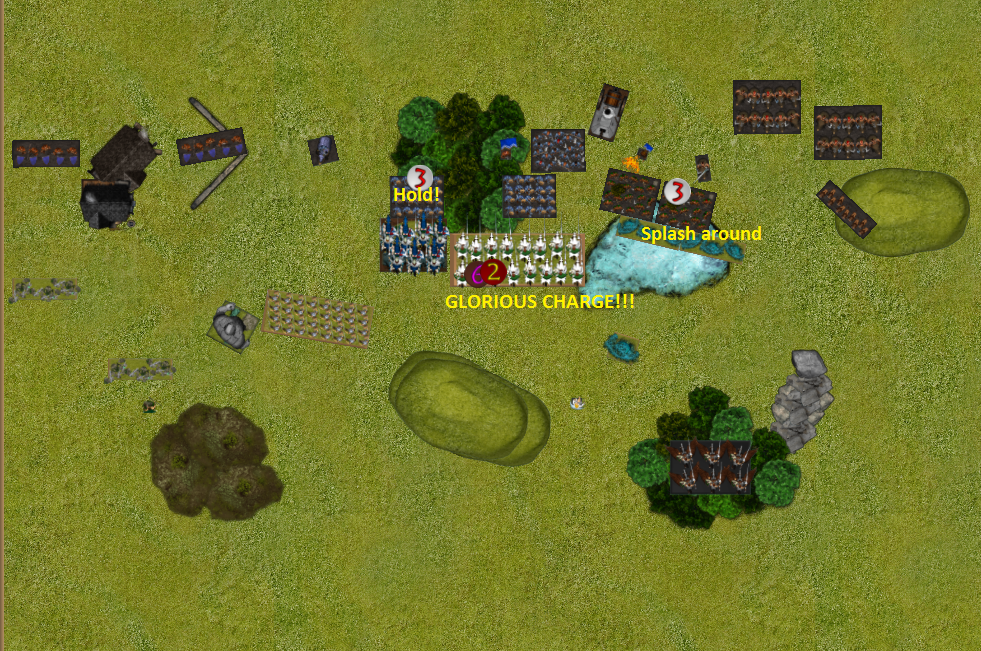
One regiment of ironclad charge the scorchwings in the froest to keep them from mischief while the right horde takes a little damage from mastiffs. The lord on beast decides to cover the back of the army, which leaves the top right corner safe for the fire drake, because the beserker lord has charged off like lekelidons are war engines, rather than monsters.
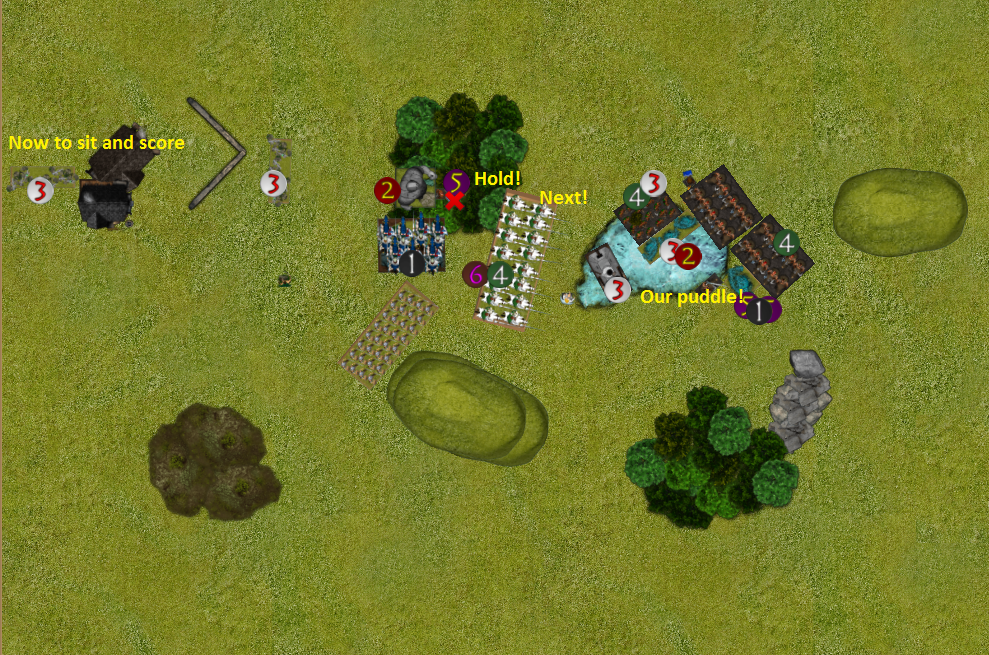
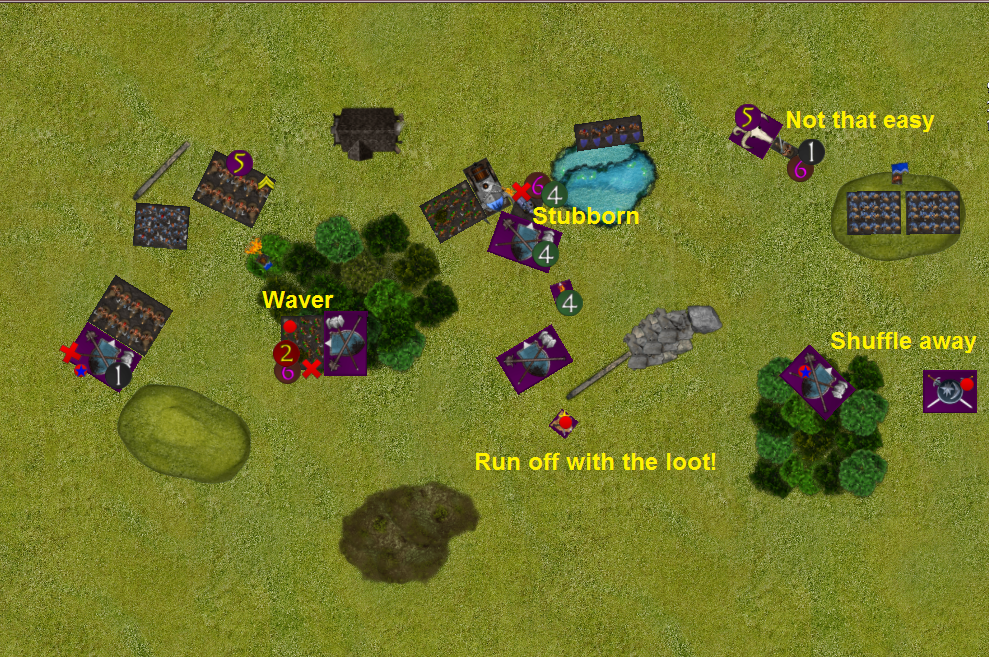
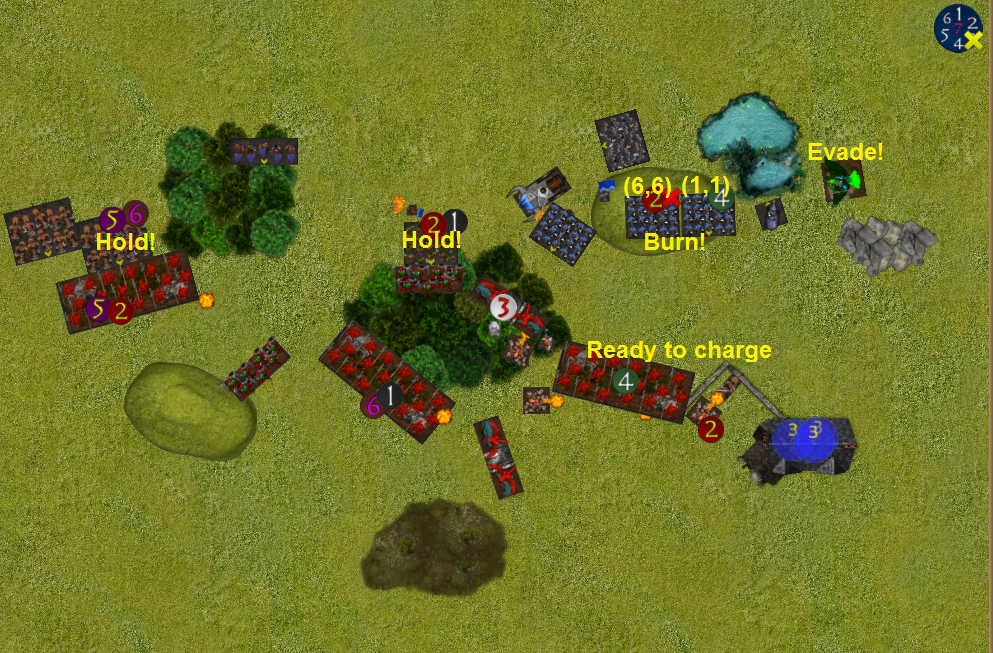
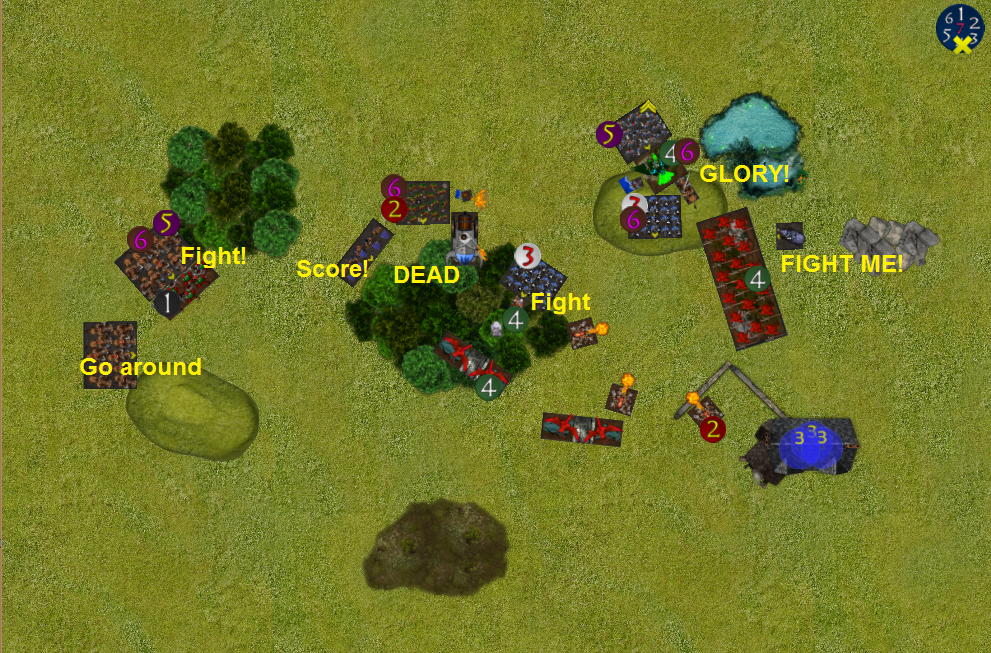
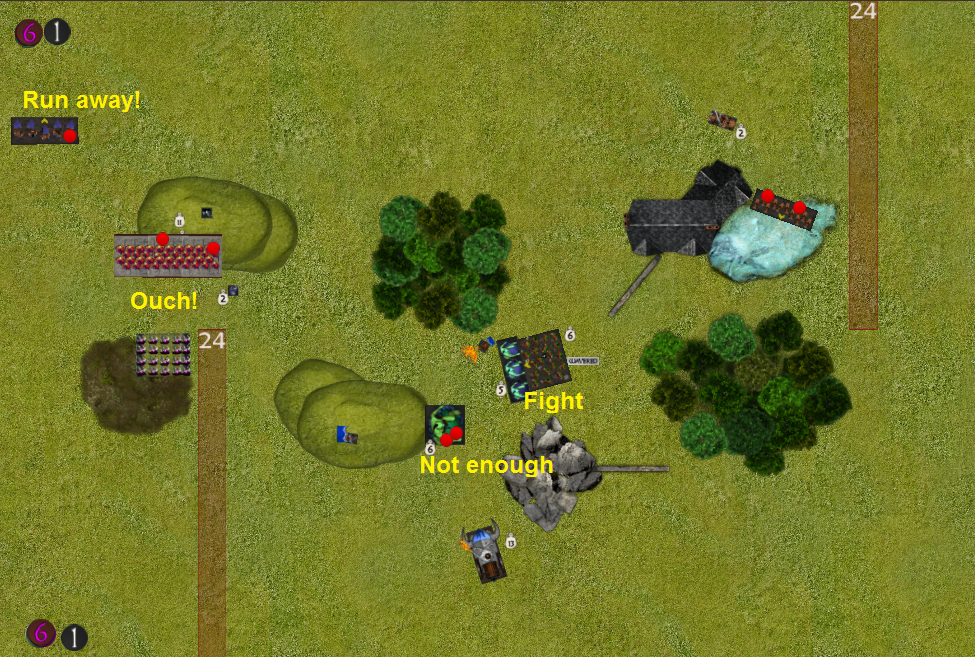
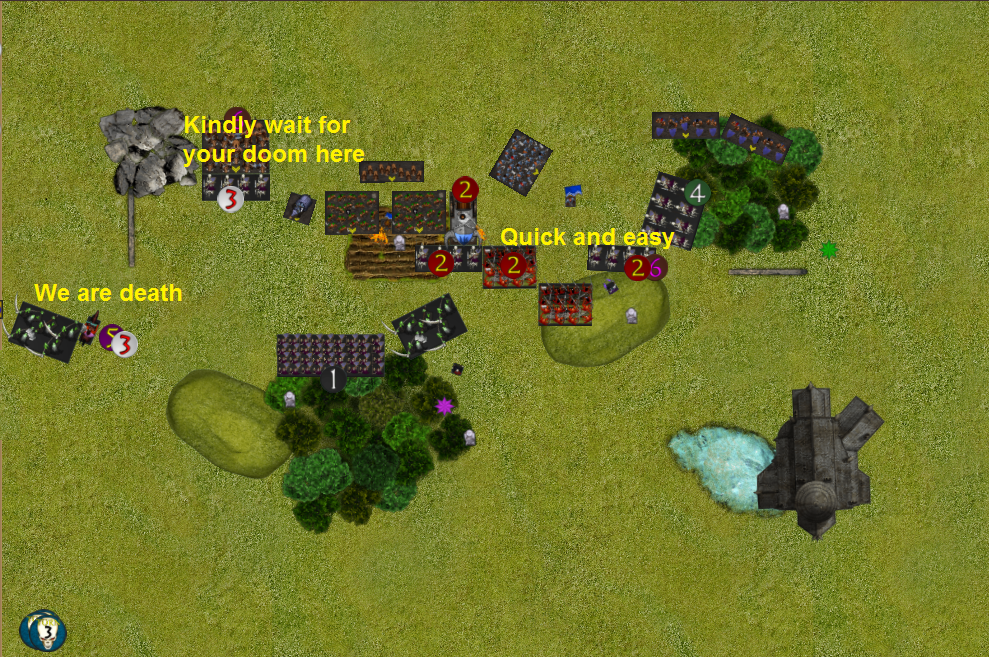
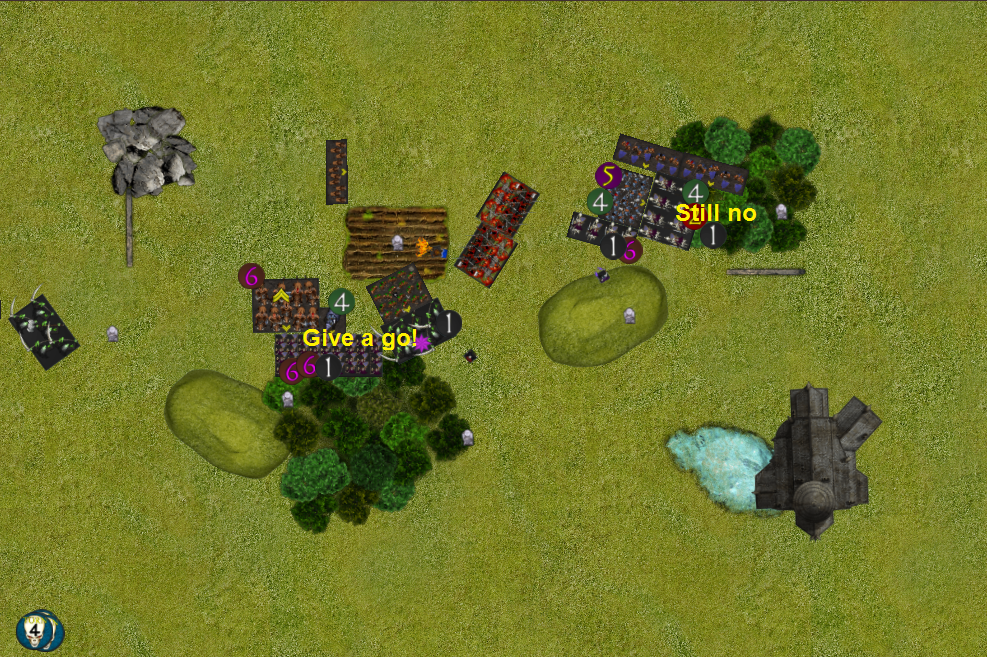
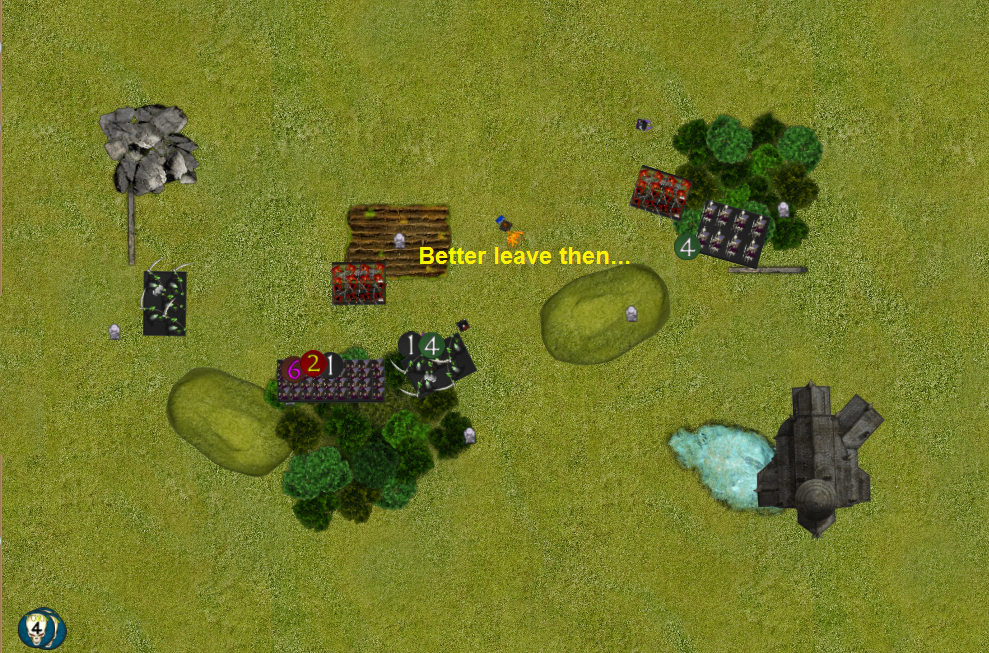
Salamanders Turn 3
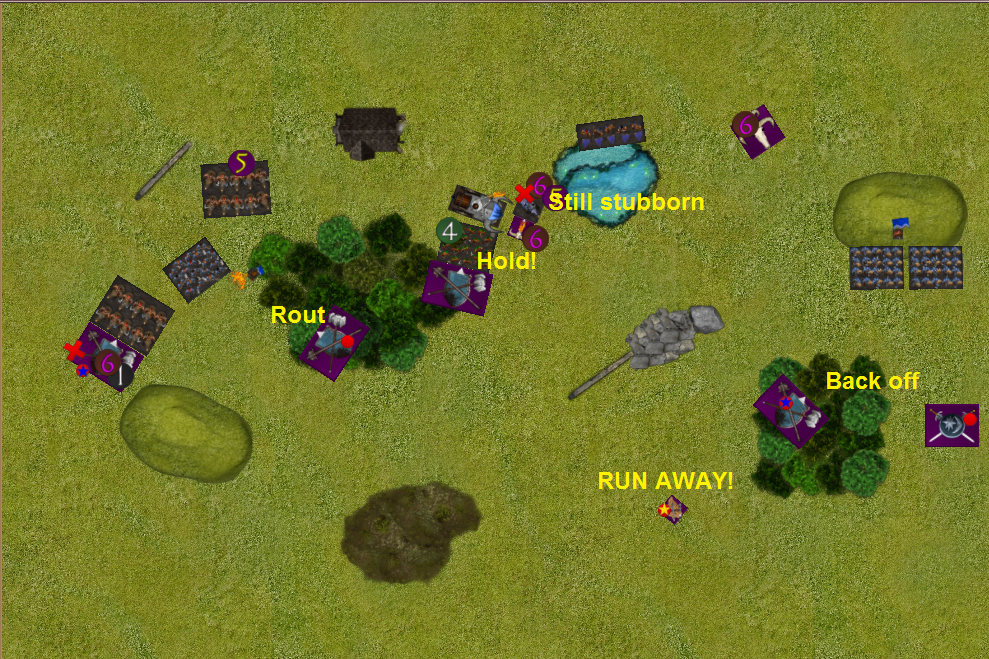
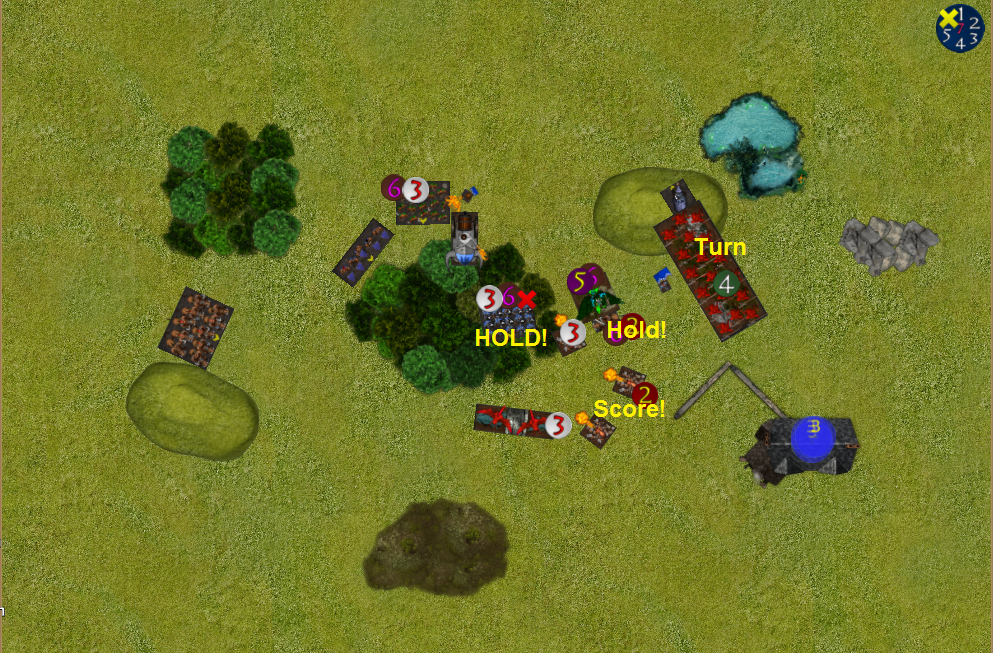
On the right; the fire drake lands in a safe spot and the ironclad on the hill start taking a barrage of shooting. One unit wavers and the other is just fine. The right horde of primes move up.
In the wood the scorchwings back up and the ancients charge the rangers without much success.
On the left the horde of primes uses the Blood of the Old King to get rid of a unit of brocks, but does not get much more than the average without it. Making the nerve roll needed to remove the brocks more difficult and does not get it. Fortunate for me, again
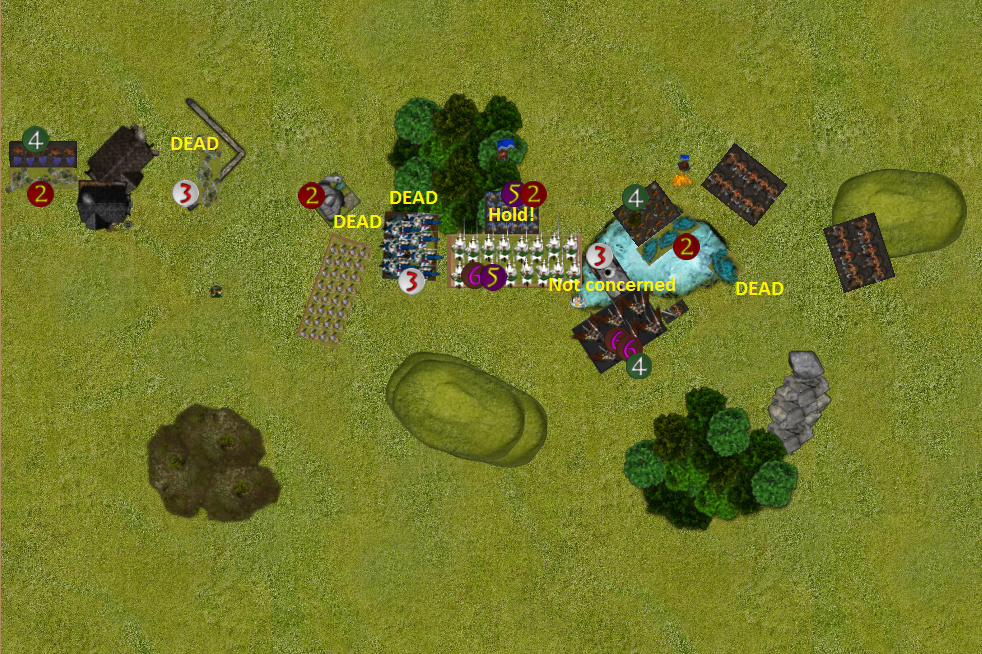
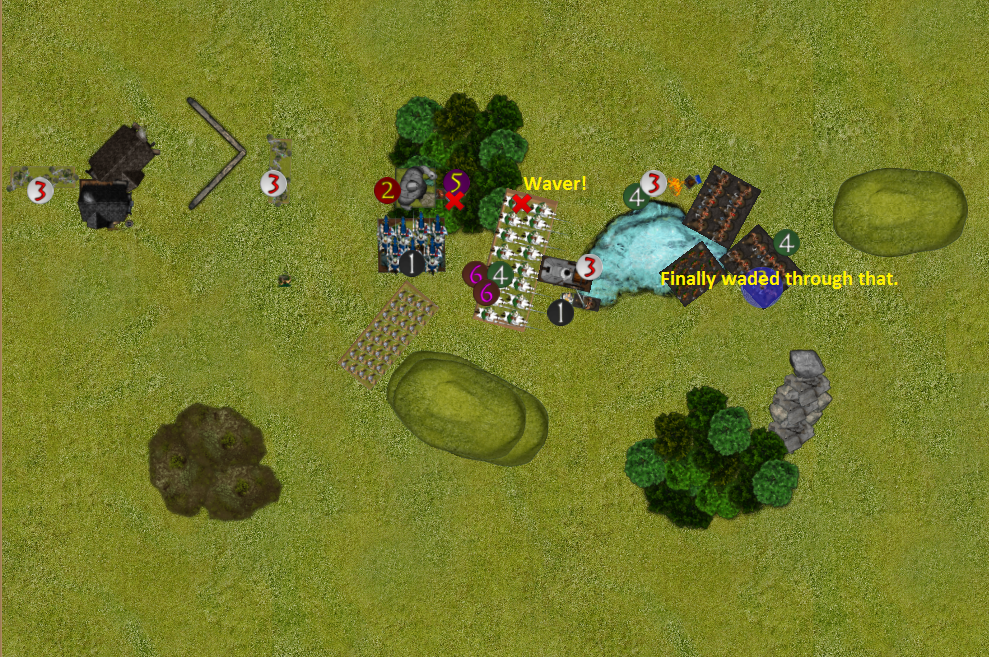
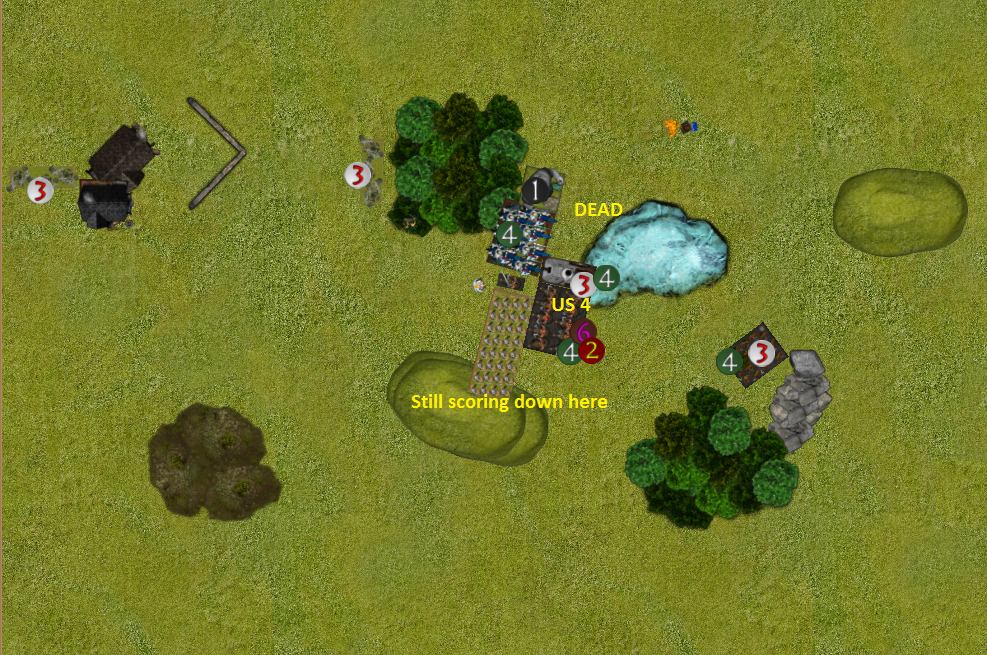
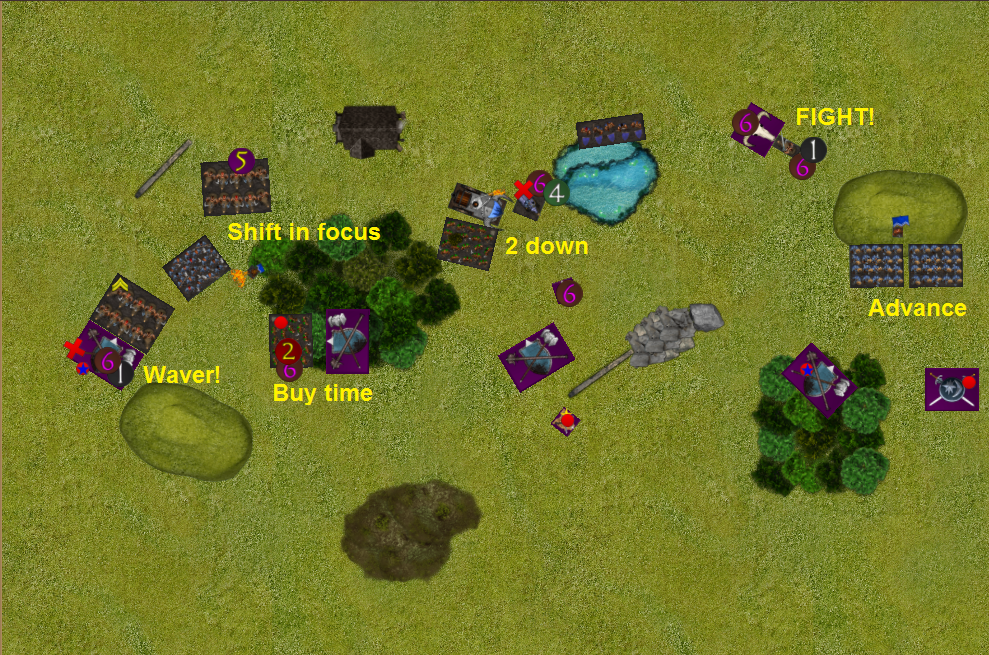
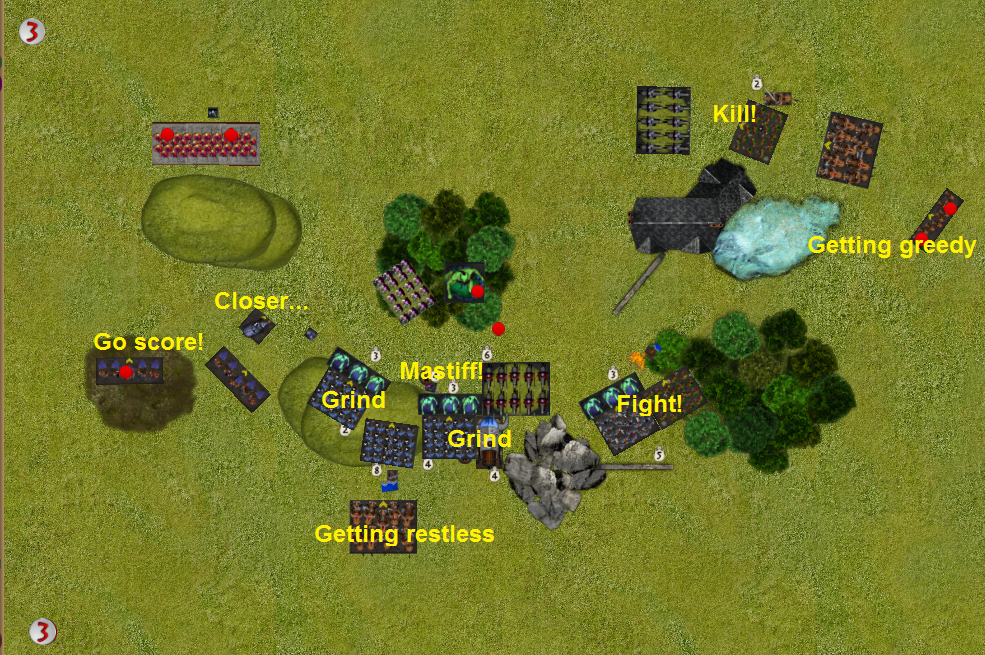
Dwarfs Turn 3
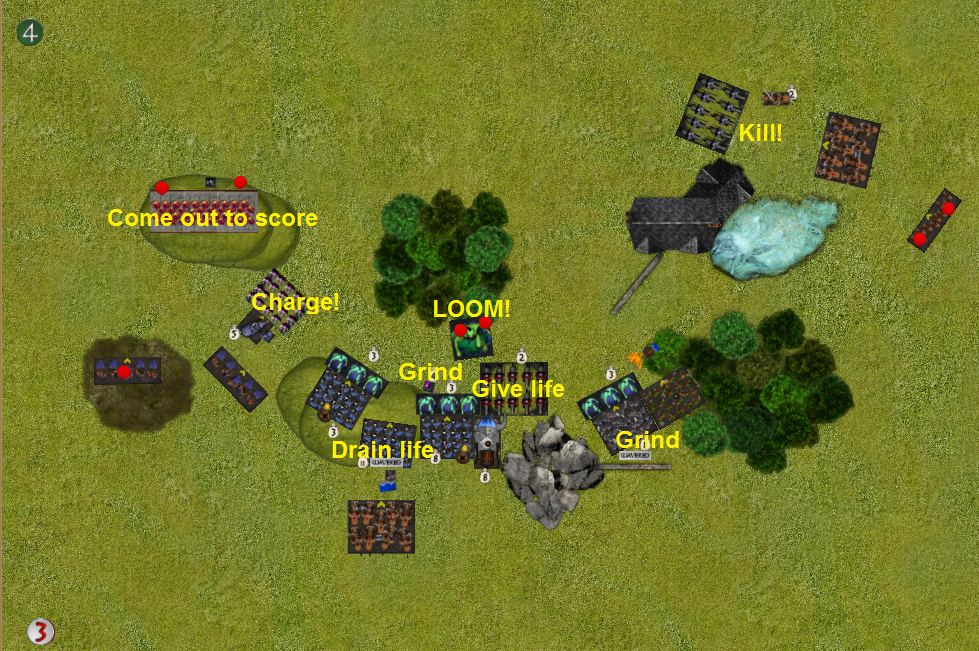
On the right; the iron clad on the hill that are not wavered cannot avoid getting charged in the flank. They choose to show their flank to the horde of primes rather than the fire drake, because they probably can’t take a frontal charge from a horde with 4 damage already anyway and, more importantly, it might lure the 4 US unit away from the dominate circle.
The beserker lord is just close enough to fight the fire drake after all!
The lord on large beast get the fire drake in his front arc, but fails to keep the shieldbreakers in his arc.
In the forest, the ironclad press on into the scorchwings. The rangers win against the ancients with the help of the steel behemoth.
On the left the brocks easily dispatch the horde of primes.
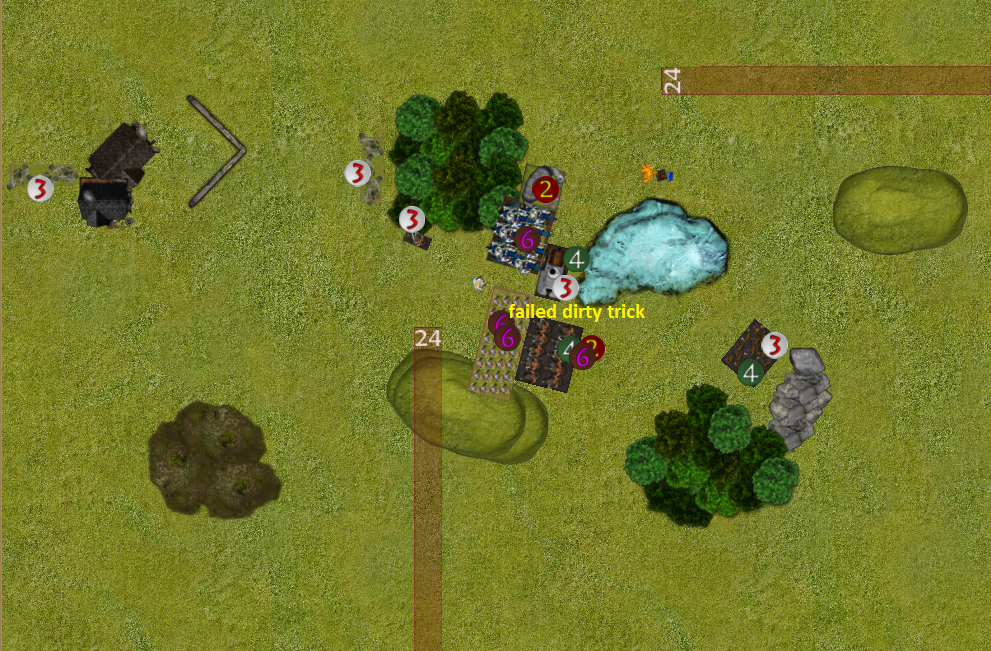
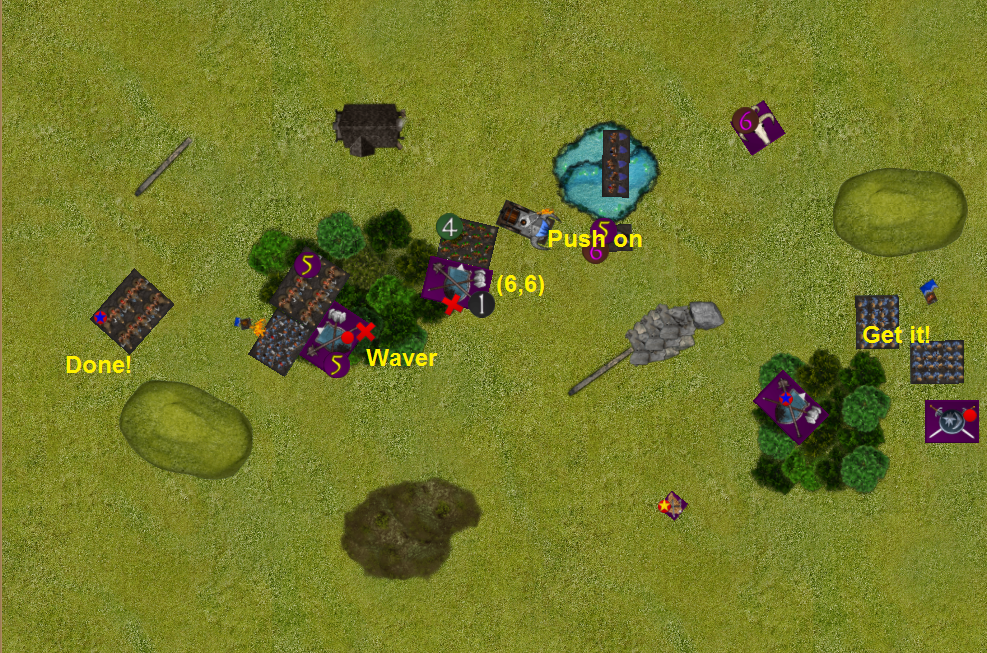
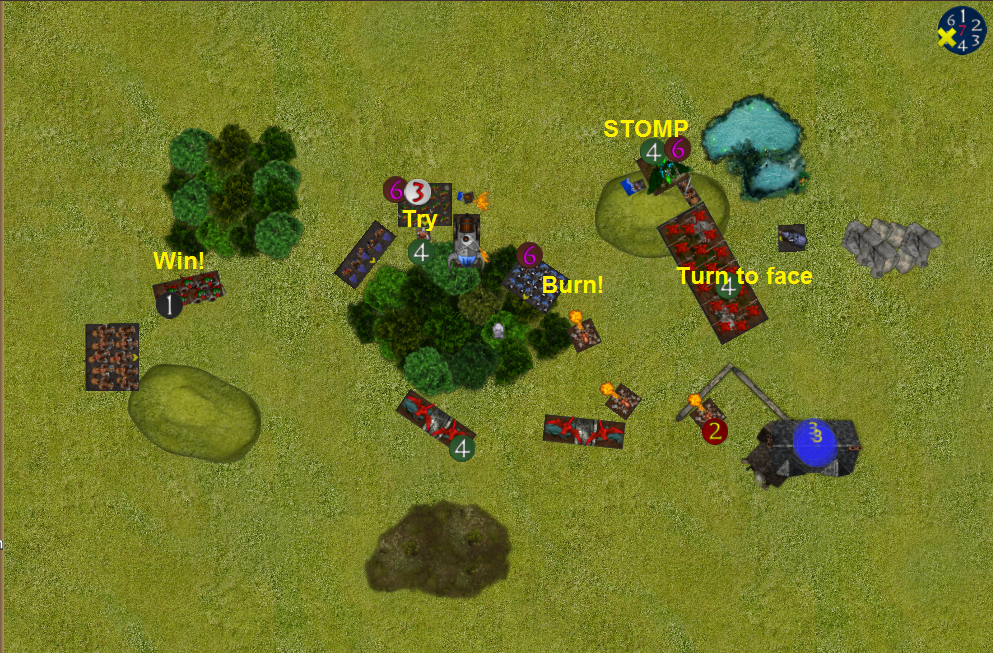
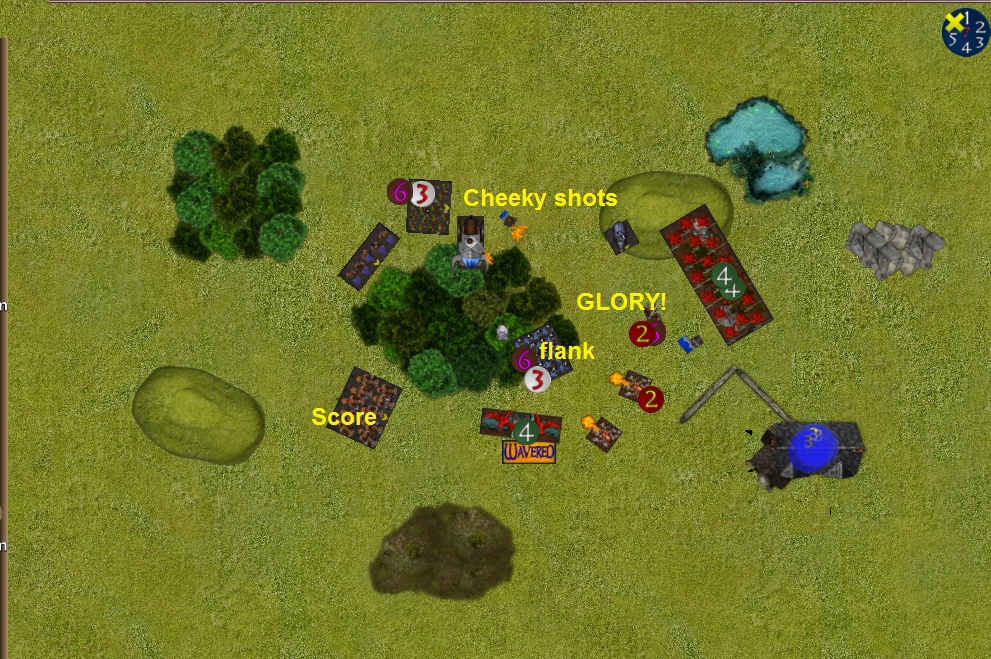
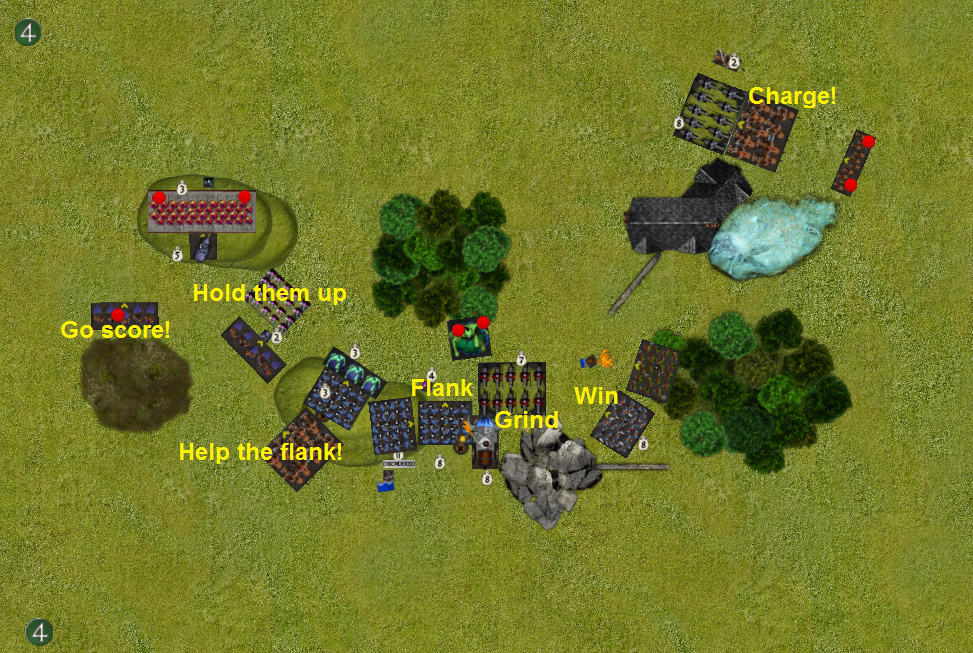
Salamanders Turn 4
On the right the primes take the bait and the fire drake starts a fight with the shield breakers.
The ironclad on the hill waver from shooting again.
In the middle, the battle captain covers the scorchwings’ retreat while the primes roll poorly and fail to remove the rangers. More fortune for the dwarfs!
The troop of ancients on the left move to hold up the brock riders.
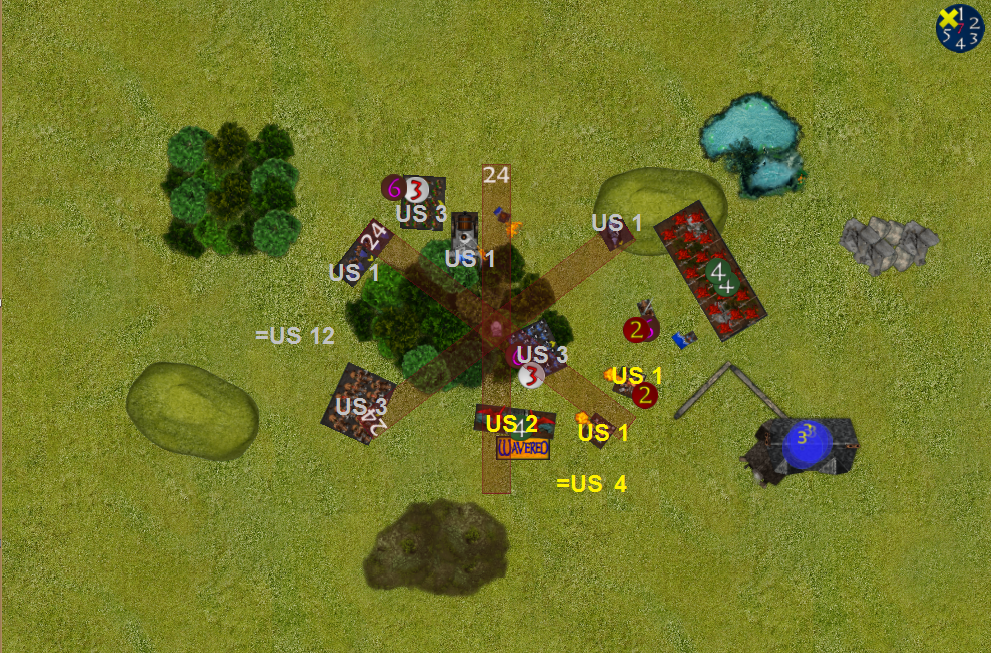
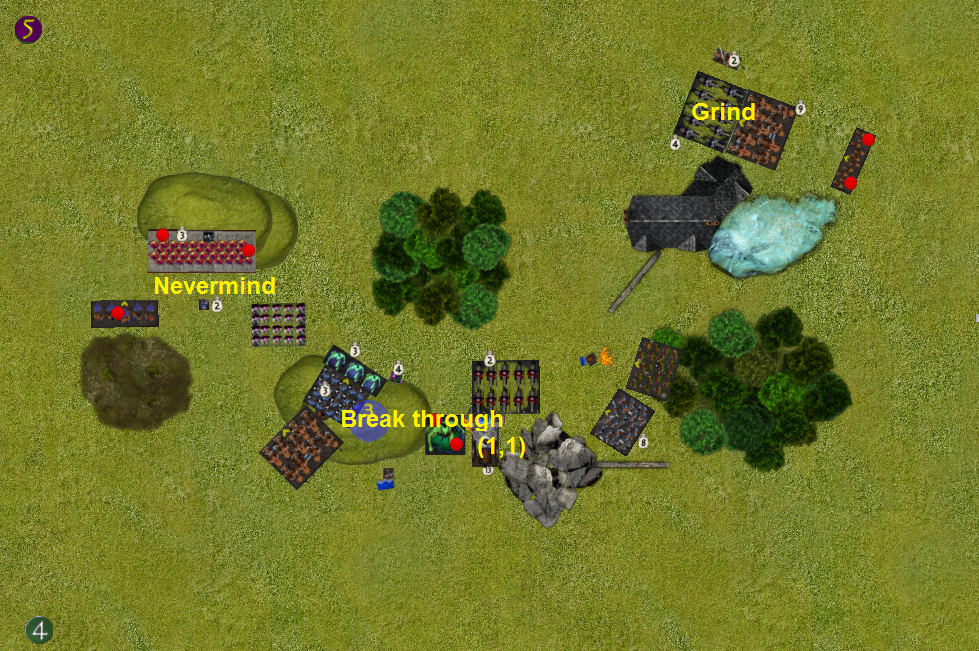
Dwarfs Turn 4
On the left, the damaged brocks fight the ancients while the other unit tries to go around. This is a mistake, crashing through them would have been more efficient, but yet more fortune makes up for the error.
The lucky rangers and steel behemoth deal with the damaged primes. the sharpshooters are luckily in charge range, so get a free double move through terrain.
On the right: the lord on beast threatens the rear of the horde of primes, to keep them from going to score. The beserker lord and shieldbreakers fight the fire drake, putting it close to routing.
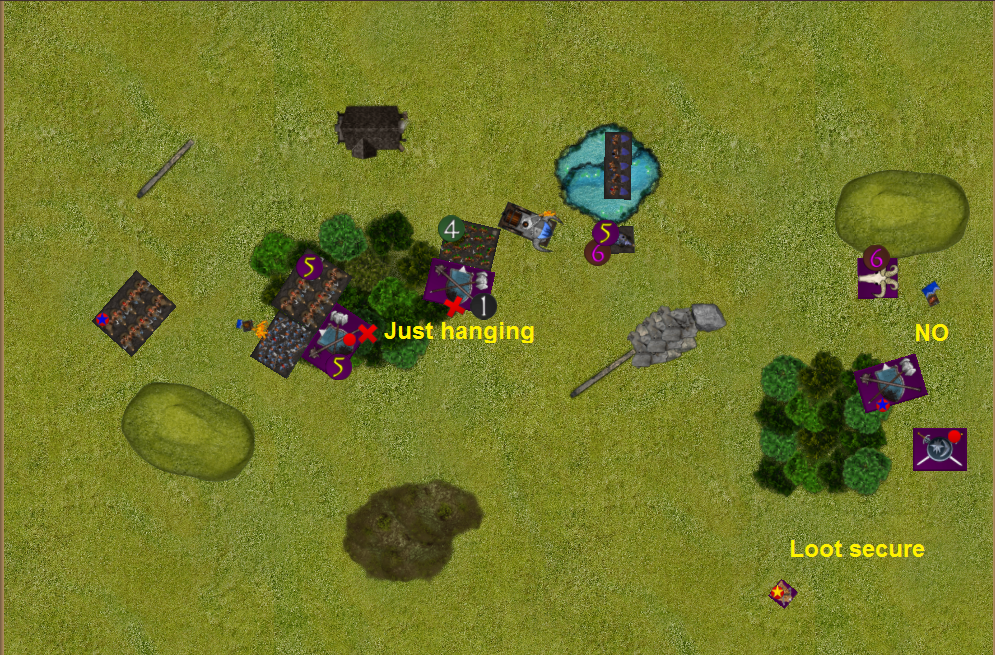
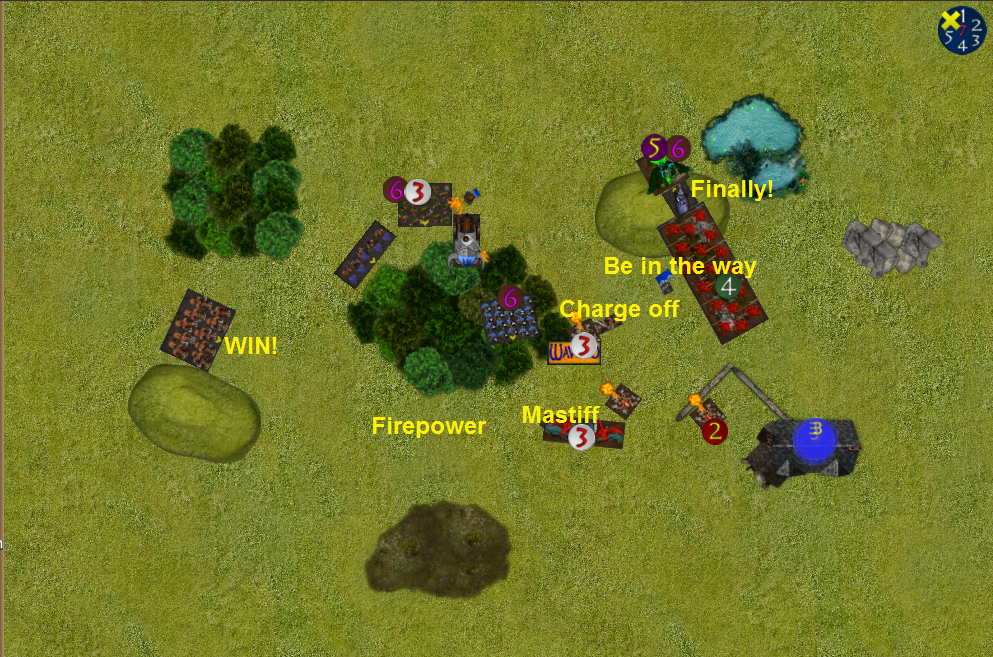
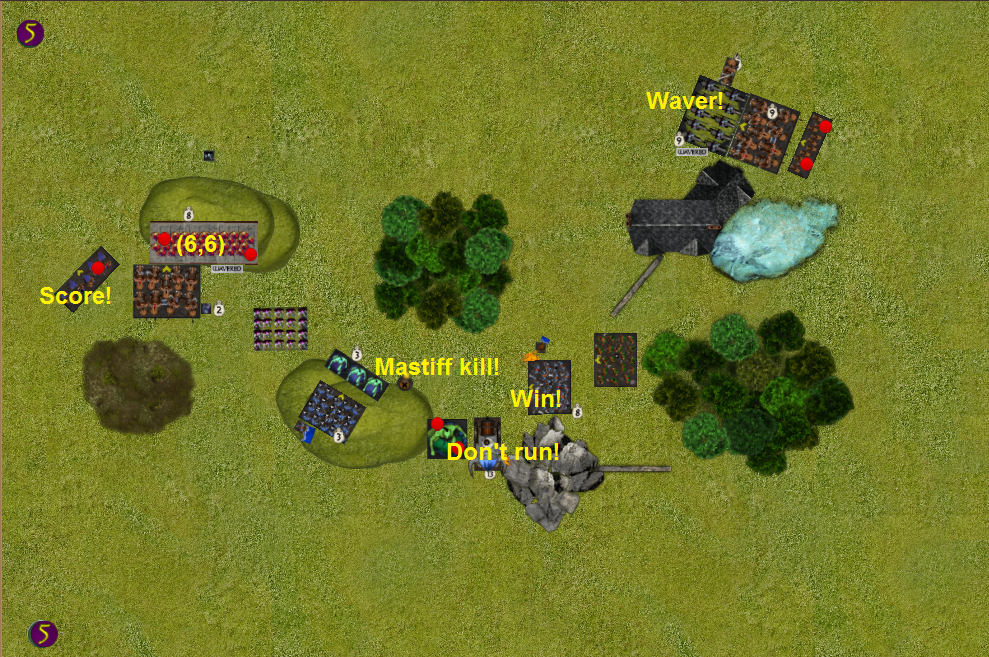
Salamanders Turn 5
The ancients on the left easily destroy the damaged brock riders and turn to keep the others from moving past.
The battle captain has a go at the damaged rangers, but fails. While the shieldbreakers are routed along with the ironclad on the hill (shooting). The lekelidons turn so that they can move to score and shoot at the ironclad in the wood.
The prime horde faces down the lord on large beast.
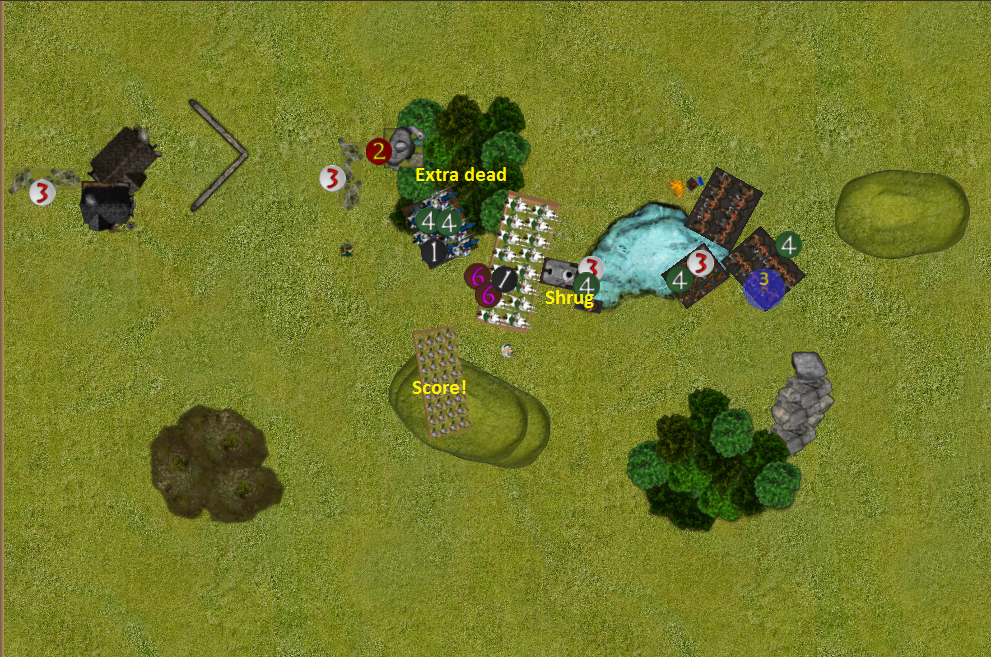
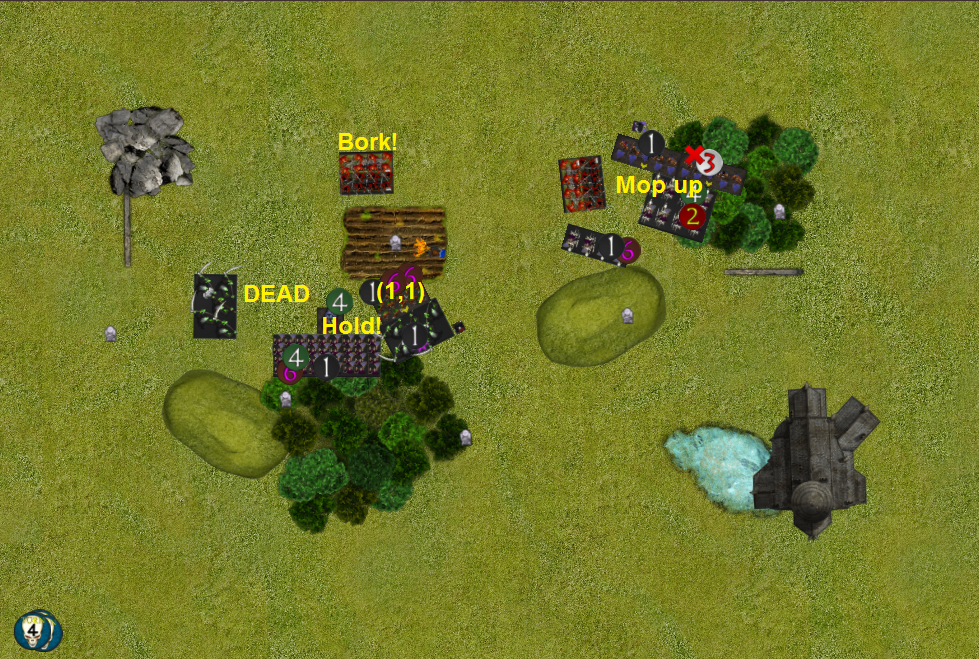
Dwarfs Turn 5
Yet more fortune! The brock riders deal with the ancients in one turn, so they can turn to score in turn 6. The steel behemoth, which is doing rather well in this game, shoots at the damaged scorch wings and routs them.
On the right the standard bearer stand behind the horde of primes, so that the cannot move backwards to score.
The berserker lord leaves the fight with the fire drake to try kill an lekelidon, again, while the lord on large beast takes over and fails. This is greedy and an unnecessary risk. There is now no threat to the horde of primes, so they can now turn and score in turn 7. It also give the fire drake an easy charge into the dominate circle.
The ironclad in the wood moves up and realises that they still have a mastiff, which promptly gets send into the undamaged scorchwings. The rangers remove the battle captain.
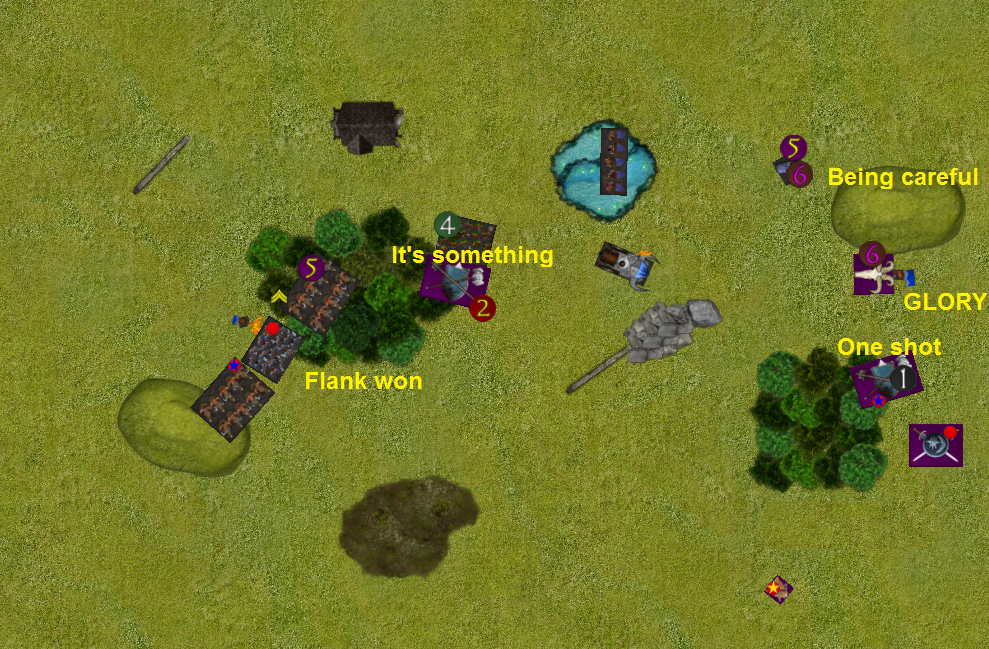
Salamanders Turn 6
The primes turn to score in turn 7. The firedrake charges the beserker lord to score, but the stubborn bastard holds.
The ironclad in the woods are fortunate and hold too. The rangers and sharpshooters are behind the woods so out of LoS.
The lekelidons all move to score.
Dwarfs Turn 6
The beserker lord finishes off the fire drake! Glorious.
The steel behemoth shoots at the remaining scorchwings, but only wavers them. The ironclad in the wood get a flank and remove a lekelidon.
Brock riders and lord on beast move to score.
Fortunately (again) there is not turn 7.
The result looks worse that the game was, Three units worth 9 US are fortunate to be scoring, but I only needed one of those bits of fortune.
Turn 7 would have been uncomfortable, but I should have been able to remove enough units to win in turn 7 too.
While it’s not an unearned win, fortune certainly favoured the dwarfs this time!
Thoughts
Most of my units did well here. I was quite impressed with the steel behemoth, it did good damage from shooting or close combat almost every turn, which was fantastic in an army that struggles with damage output.
The double rangers and brock riders were great for projecting threat and dealing damage, again.
Both lords were vital against the fire drake.
The three regiments of ironclad, rather than a horde, were great too. They took more damage and did more things that a horde could have.
My question of what to leave out for a 2000 point list isn’t any easier.v