Round 4 vs Joel Zigelstein
Push vs Twilight Kin
Norgrunn held his head in his hands. This was bad. The worst report he could think of. Strange elves doing horrific things and taking slaves. Elves don’t scare him, but he had heard about Twilight Kin and what they bring to the battlefield. That was the horror. He thought that the stories were just stories until he dealt with THEM himself. Night-stalkers.
If they took root in the fears and minds of even one village nearby then they would be near and lurking forever. Things that crawl out of the shadow. Things that walls cannot protect you from.
These elves must be eliminated or driven away before their corrupt magic can take root and invite THEM. While we’re at to we must move runic wards to the nearby villages; to protect the the villages and to draw the Twilight Kin out.
Twilight Kin List
Blade Dancers Regiment - Mead of Madness
Blade Dancers Regiment - Aegis of the Elohi
Tallspears Horde -Brew of Strength
Cronebound Butchers Regiment
Cronebound Butchers Regiment
Cronebound Butchers Regiment
Cronebound Butchers Regiment
Cronebound Abyssal Horsemen - Blessing of the Gods
Cronebound Abyssal Horsemen - Maccwar’s Potion of the Caterpillar
Cronebound Shadow-hulk
Soulbane - Mournful Blade
Summoner Crone - Boots of Levitation - Scepter of Shadows
Army Standard Bearer - Lute of Insatiable Darkness
That is a lot of dangerous things! Nothing should rout a regiment of ironclad in one go by itself, but the abyssal horsemen with Blessing of the Gods might. The blade dancers, tallspears and abyssal horsemen should run over a regiment of rangers in the open.
The blade dancers are dangerous, but have low De. They are my preferred shooting target 3, but brocks should rout them with one clean charge.
The tallspears are De4+ and bought CS 1, so similar to the hordes of primes from the last game, except my brock riders must avoid it. My ironclad will be able to deal with it, mastiffs and 3 charges should rout them or put them very close. My ironclad have a more important mission though…
The butcher regiments are probably intended to screen something, likely the abyssal horsemen. They are tough, but I know from playing butchers myself that they don’t hit that hard. If I can get them engaged one on one with ironclad it should take 3 turns to get through. Trapping whatever they are screening behind them.
The abyssal horsemen are just dangerous. They also need to be hit hard to overcome their regeneration. Hopefully I can keep them delayed till after I have dealt with the other threats.
Shadow-hulks are hard to rout and do decent damage against almost any De. It’s going to be a pain, but will take damage output the I need to deal with other threats to deal with.
If at all possible, I must get rid of the summoner crone. She will be protected though.
My list again, for convenience
Ironclad Regiment - Throwing Mastiff
Ironclad Regiment - Throwing Mastiff
Ironclad Regiment - Throwing Mastiff
Shieldbreakers Regiment
Rangers Regiment
Rangers Regiment
Sharpshooters Troop
Sharpshooters Troop
Berserker Brock Riders Regiment
Berserker Brock Riders Regiment
Mastiff Hunting Pack Regiment
Steel Behemoth
Dwarf Lord on Large Beast
Berserker Lord -Brock -Blade of Slashing
Dwarf Army Standard Bearer
Flame Priest -Inspiring Talisman - Bane Chant -Increase Fireball to (10)
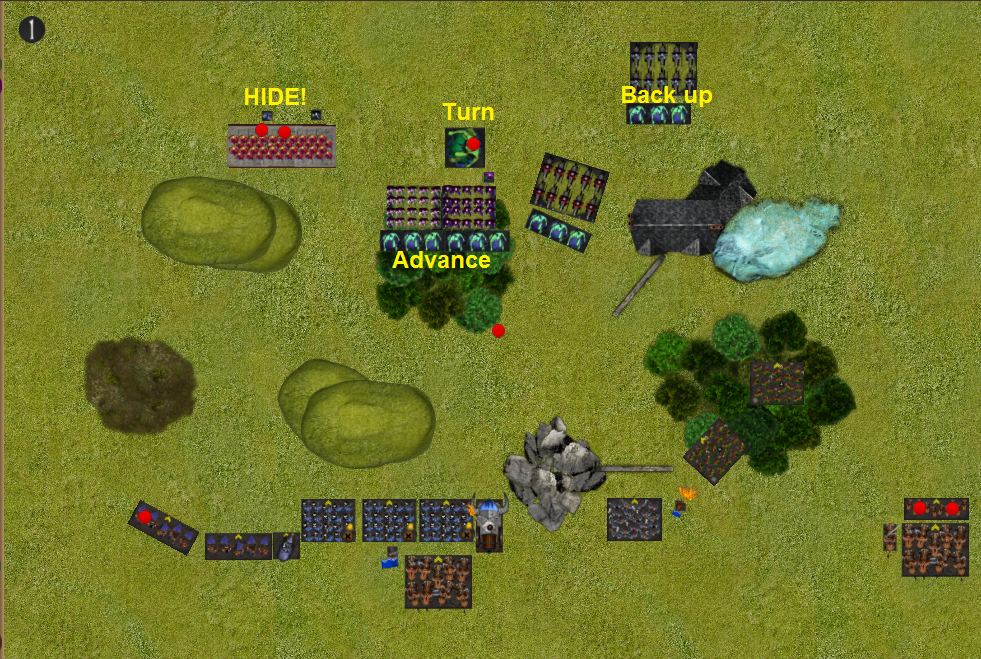
Deployment

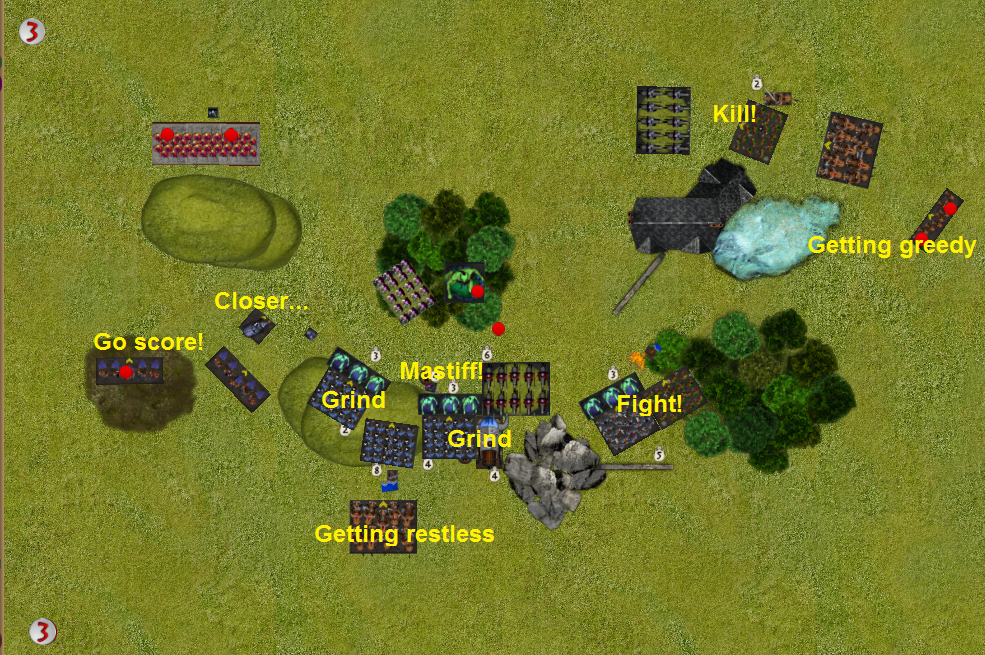
The Twilight Kin took the top and deployed centrally, with butchers screening the things I would like to shoot at. Which is good in principle, it is difficult to win Push! without the centre objective. The terrain makes attacking the centre difficult though, from the top the main attack is through terrain and from the bottom the attack force is split by the impassable rock and units moving from the bottom right will have to cross the obstacles and woods.
The Twilight Kin tokens went to the shadow-hulk and tallspear horde, probably to avoid my strong right.
The Fool’s Hold put the ironclad to hold up the centre and sharpshooters on the left for the same reason. With bare flanks, I put the push tokes there.
The right flank has little opposition, so the main Push! is planned there. Rangers to navigate the terrain and brocks for speed. The second unit of brocks is deployed centrally to help where needed in the late game.
It’s important to note that the Northern Kings scoring system used here offers bonus points for the number of units holding tokens, give us a reason to spread them out.
Twilight Kin Turn 1
Twilight Kin get the first turn and use it to send the blade dancers and their body guards up through the woods with horsemen to support. The other horsemen prepare to defend the right flank . The tallspear horde hide behind the hill to avoid getting chipped away.
Dwarfs Turn 1
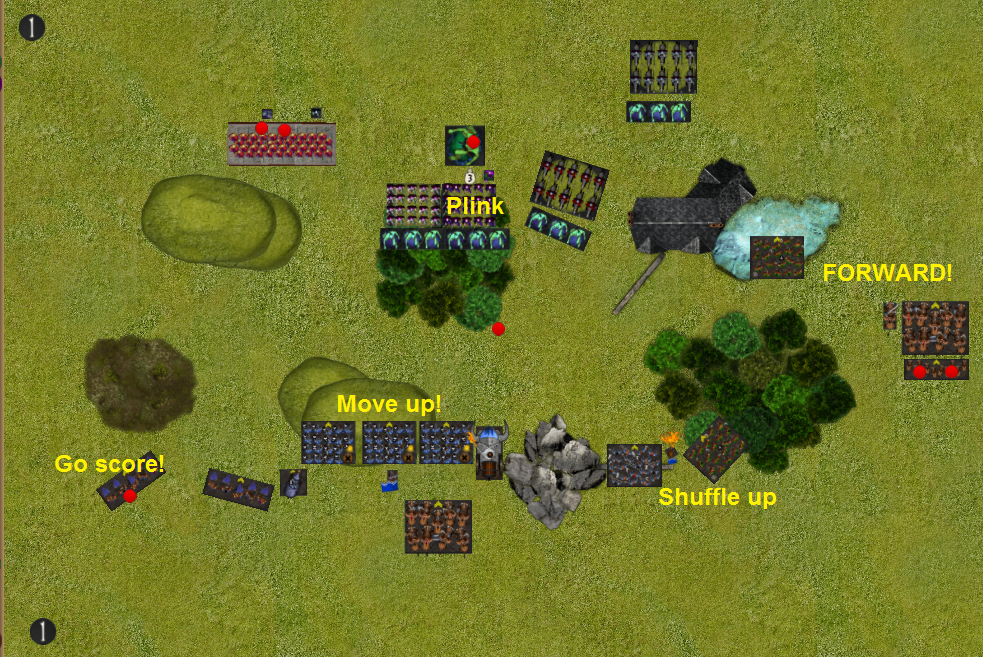
The dwarf infantry line moves up, avoiding most charge ranges, but baiting a charge from the blade dancers with mead of madness. Ironclad can take a charge from blade dancers, especially hindered, and can flank and can destroy an isolated unit if it comes in.
The right flank attack and token carrying force move up at full speed! One unit of rangers supports them and the other moves to attack the flank of the incoming attack in the centre.
The sharpshooters don’t have targets so one moves up to score and the other to find targets.
Twilight Kin Turn 2
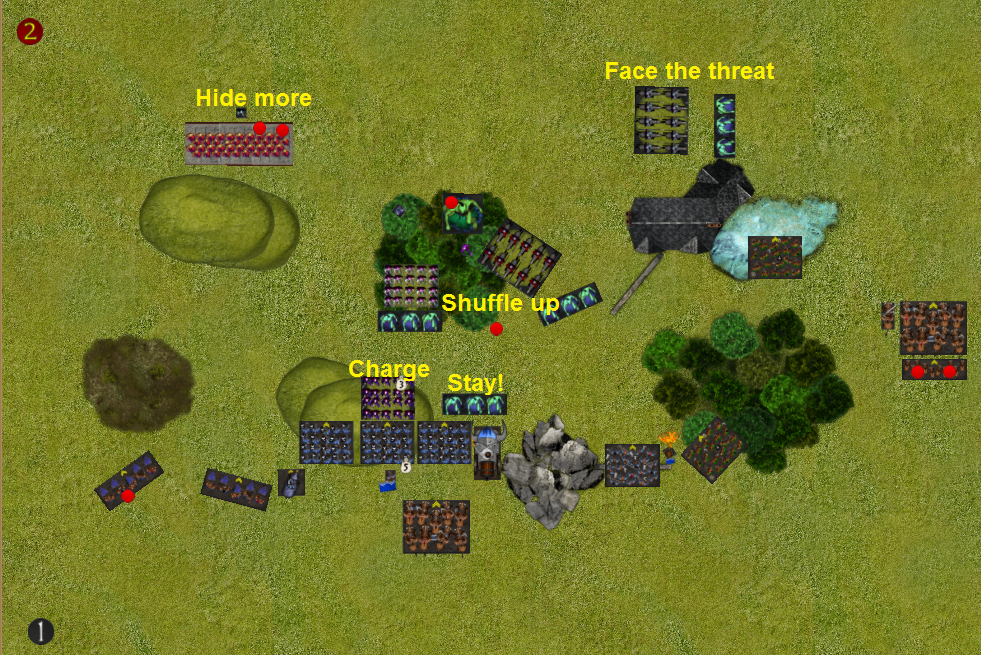
Butchers move into my way to make way for the blade dancers to take the bait.
The rest of the centre keep shuffling up. The tallspears continue hiding and the right flank continues turning to face.
Dwarfs Turn 2
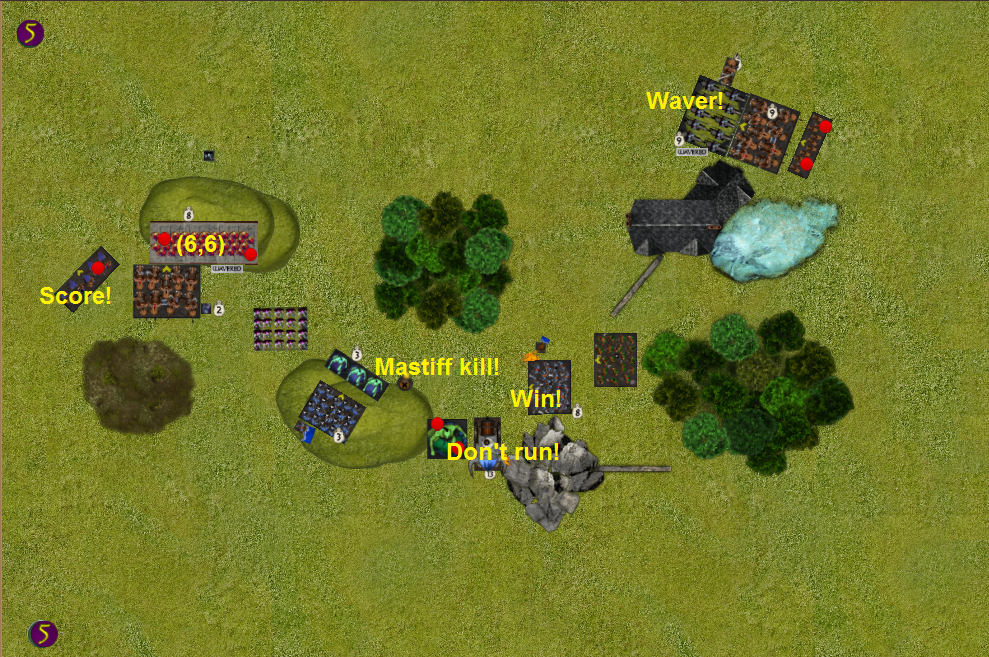
Two regiments of ironclad team up and rout the blade dancers as planned, reforming to protect the damaged unit. The other ironclad and steel behemoth charge the butcher regiment in front of them.
The right flank gets into threat range and the beserker lord engages the butcher regiment to hem in the horsemen behind them. The sharpshooters still don’t have targets to continue.
The lord on beast moves up to engage the horde and stop them from crossing the line later.
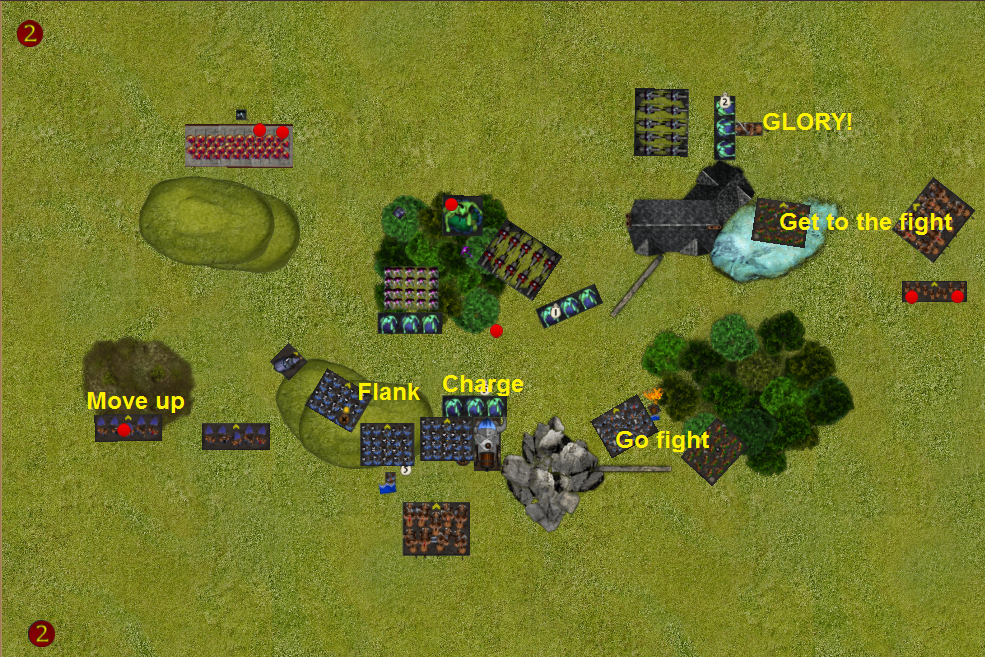
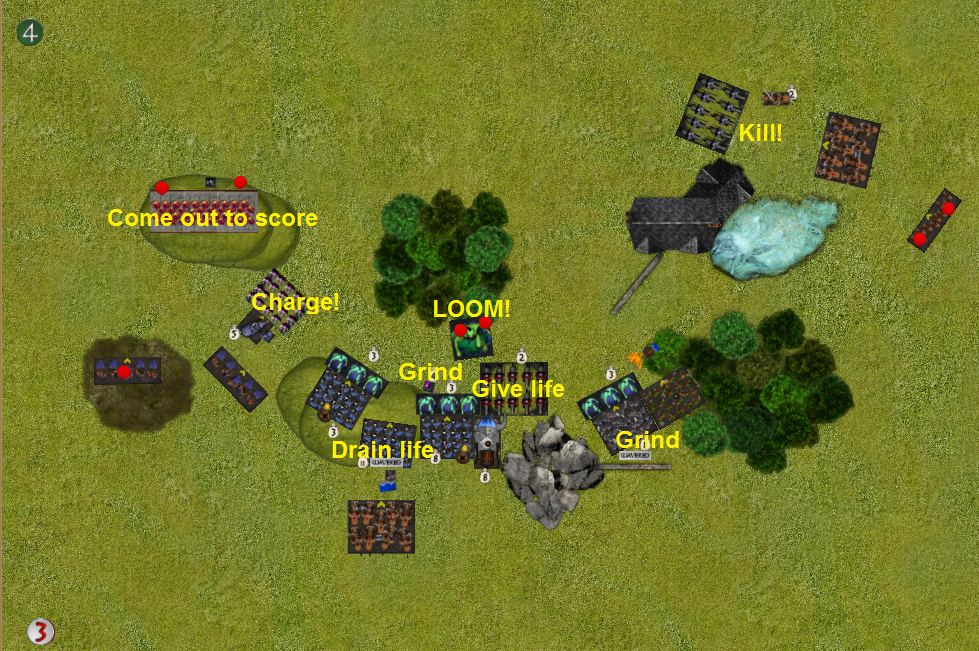
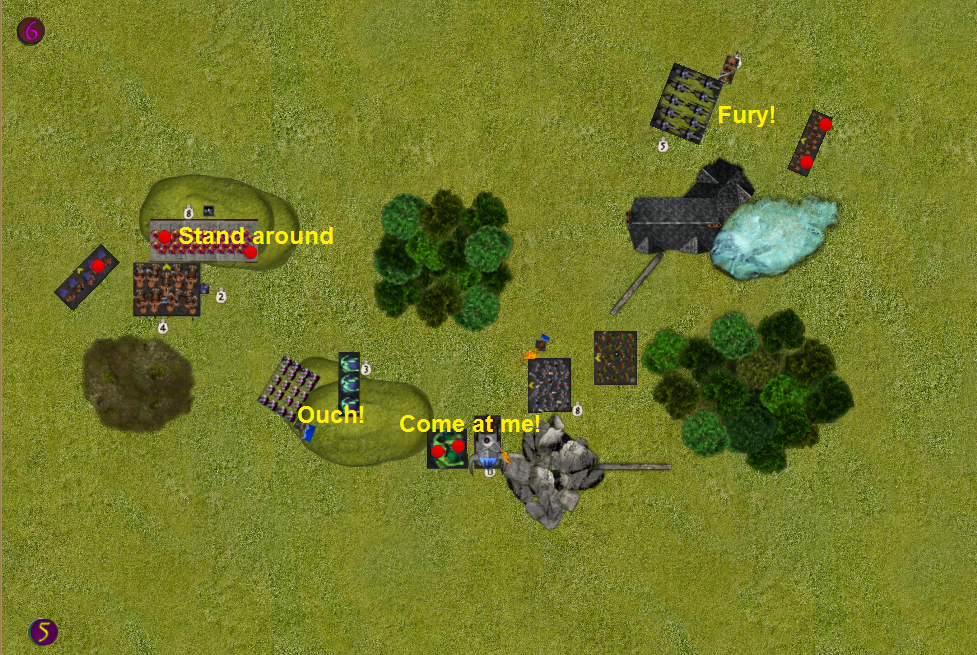
Twilight Kin Turn 3

The fight for the centre really gets going. Horsemen and butchers engage the dwarf infantry line.
The remaining blade dancers threaten the lord on beast while the soulbane challenges him to a fight.
The right flank stays in place as the butchers fight the beserker lord.
Dwarfs Turn 3
The rangers on the right flank help remove the butchers there while the brock riders get into place. Which is a mistake, The mastiff pack already have the tokens where they need to be and the attack force isn’t getting all the way around in time to help the centre, so just keeping the horsemen busy is enough. The beserker lord could hold up the butchers without the rangers getting charged by the horsemen. The mastiffs should really go hide, but come closer so that they can pass a token to another unit for the bonus points.
The dwarf infantry line engage and grind while the units on the left inch closer to their objectives.
The damaged ironclad throw a mastiff at the summoner crone rather thank flanking a unit, but the crone survives.
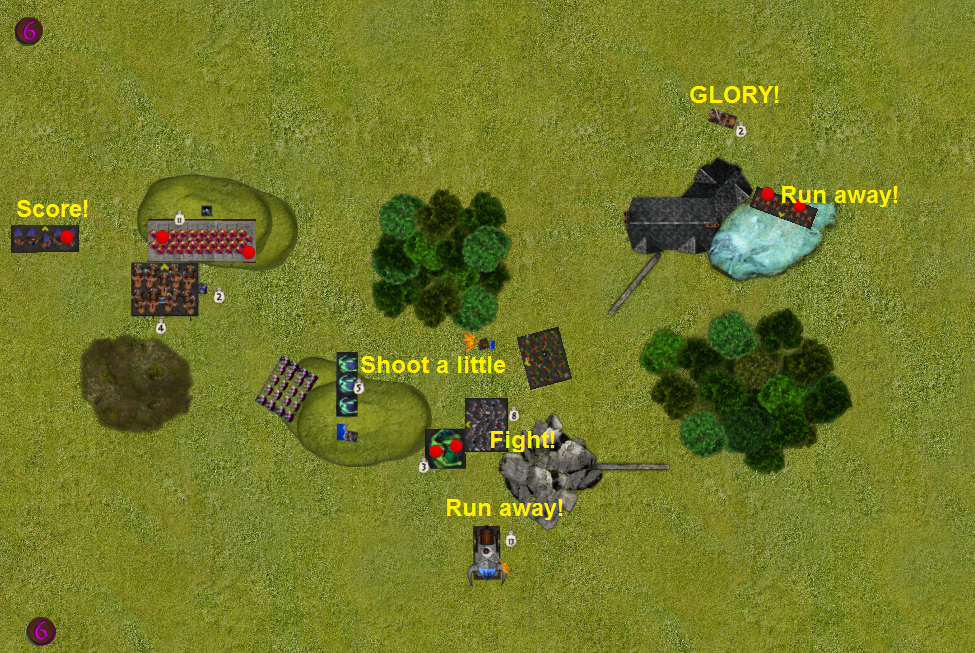
Twilight Kin Turn 4
The crone repays the mastiff with drain life and heals the horsemen, undoing most of the steel behemoth’s damage and turning that into a losing battle. The shadow-hulk picks up the centre token and looms over the infantry line.
The rangers get run down on the right.
The Twilight Kin start doing things on the left. The tallspears come out and the blade dancers and soulbane put some significant damage on the lord on beast.
Dwarfs Turn 4
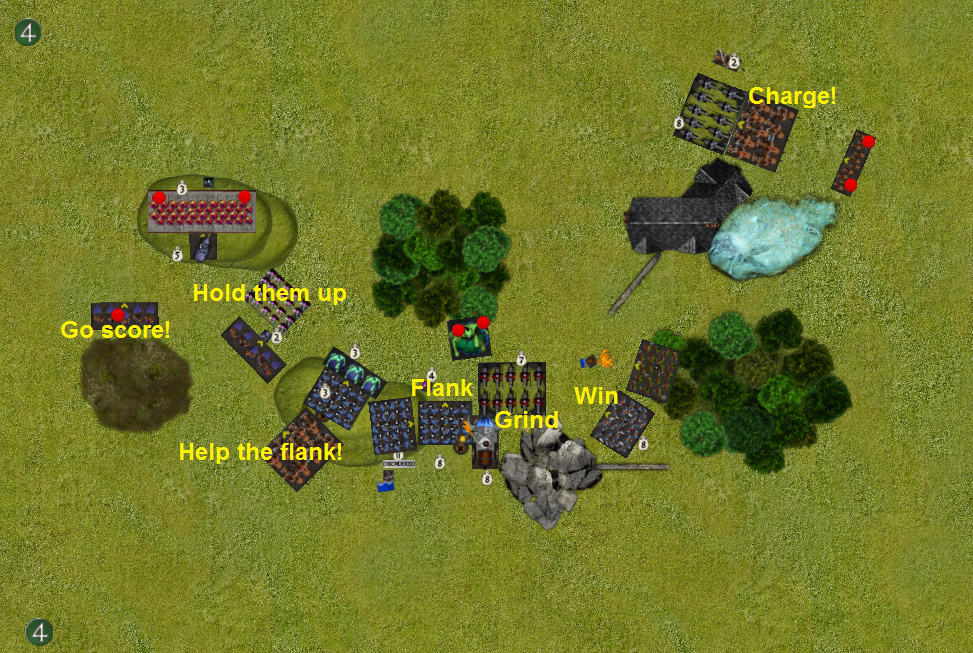
The sharpshooters without loot and lord on beast move to hold units up for a turn, while the brock riders move to come and help. Another mistake; stopping the tallspears will get me a draw, I really need to fight and kill the shadow-hulk.
The grind goes on in the middle, with two butcher regiments getting flanked and destroyed.
The brock riders charge the horsemen on the right, but could not fit with the beserker lord.
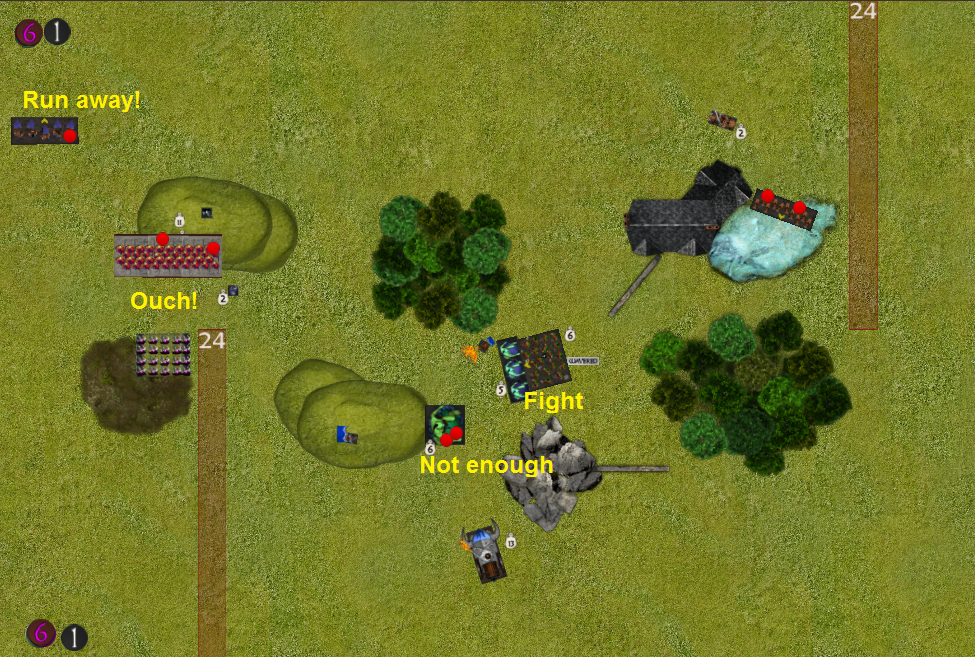
Twilight Kin Turn 5
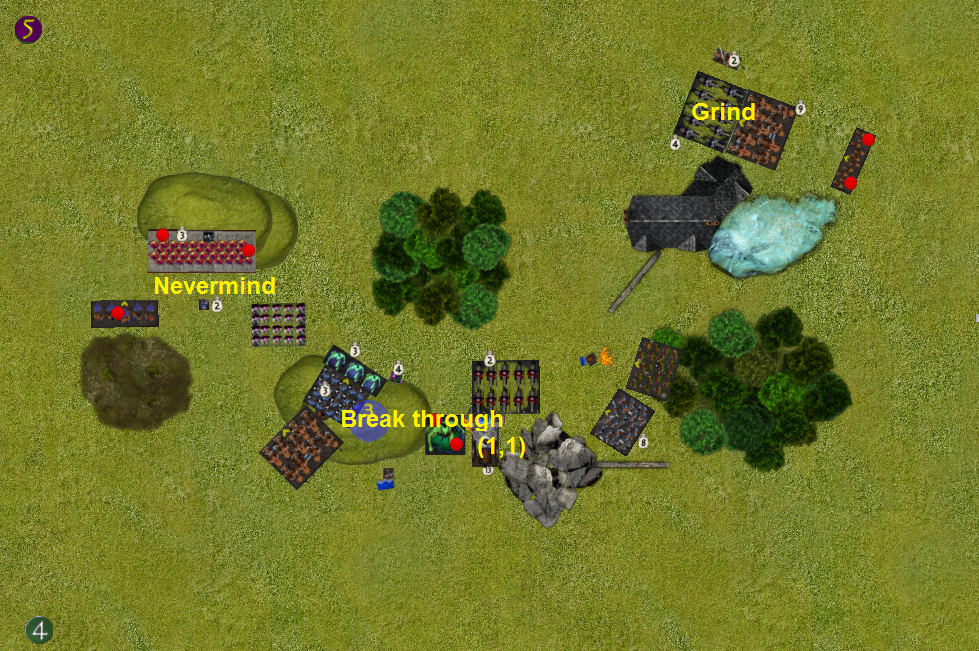
The horsemen hit back hard, but the brock riders were fresh and the steel behemoth gets lucky. There isn’t space to flank the steel behemoth, so it has to be counter charged. The last regiment of butchers fail to do any damage to the last regiment of ironclad.
The shadow-hulk and another drain life make a hole in the dwarf infantry line, making me wish that the brocks waited for the shadow-hulk instead.
The lord on beast is easily removed by the tallspears and soulbane.
Norgrunn has been on enough adventures to know that final stands are only worth it for other lives. He has distracted the elves for long enough, time for him to leave.
Dwarfs Turn 5
The infantry from the close right get in and rout the horsemen. The steel behemoth pays for it’s secure flank with a lack of options, it can only turn around, which threatens where the shadow-hulks will be if it tries to run. The ironclad on the hill didn’t take any damage, so throw a mastiff at the crone and that kills her!
The brock riders waver the horsemen on the right.
On the left the other brock riders charge the spears to keep them back and get lucky! A double 6 nerve buys two turns instead. The remaining sharpshooters get out of dodge.
Twilight Kin Turn 6
Blade dancers finish off the ironclad on the hill and the shadow-hulk faces the incoming infantry.
The horesmen on the right use fury to rout the brock riders! That puts the mastiff pack in a bad spot where my greed for bonus points might cost me the game!
Dwarfs Turn 6
The mastiff pack tries to hide, but don’t need to, because the beserker lord finishes off the horsemen! Phew.
The remaining dwarf infantry come in from the close right and do a little damage while the sharpshooters and steel behemoth get to safety.
Turn 7
There is a turn 7, but it does not change the result. The brock riders get slaughtered, but the tallspears start foo far from the line. The shieldbreakers get stomped on.
The dwarfs shoot at the shadow-hulk, but that is not effective.
Three tokens over the line gives the dawrfs 6 VP against the Twilight Kins two over the line and two not over for 6 VP too. A close fought draw!
Thoughts
Holding a unit back to keep them safe and rushing to score often gets misjudged and is risky even if it doesn’t. It is too easy for your opponent to hold your units up, making it take longer than expected.
The principle lesson here is regarding the scenario. A plan that involves getting the tie-break objective, like Push!ing through the middle, has an advantage.
I terms of unit performance; the sharpshooters are not doing badly, but also not particularly well. They had a hard time performing their primary function in this game and I didn’t actually need them to sneak an objective down the flank. It was actually risky, without the double 6 the tallspear horde may very well have taken those tokens. I think that they are the units that I would miss the least if I trimmed this list to 2000 points.
The villages are protected, for now, but the Twilight Kin and Night-stalkers remain a threat. The Fool’s Hold must prepare for horrors and fortify their minds.