tl/dr - I made movement trays and thought I’d share the ingredients for anyone else who needs scads of the things and doesn’t want to remortgage their liver.
Long rambling version:
I’m just starting out with KoW, and am seriously considering starting a club for the kids in the school I work at. I have three armies coming together, built of a glorious mess of my old Warhammer stuff and some ebay filler.
Anyway. Given that the armies will potentially be available to multiple people, and in any case, I don’t yet know whether I’d prefer large units or multiple small units, I’m not ready to multibase. So, movement trays. Which are shockingly expensive when buying a large amount to cater for different combinations (are those goblins a unit of sixty? Three units of twenty? Or one of twenty and one of forty?)
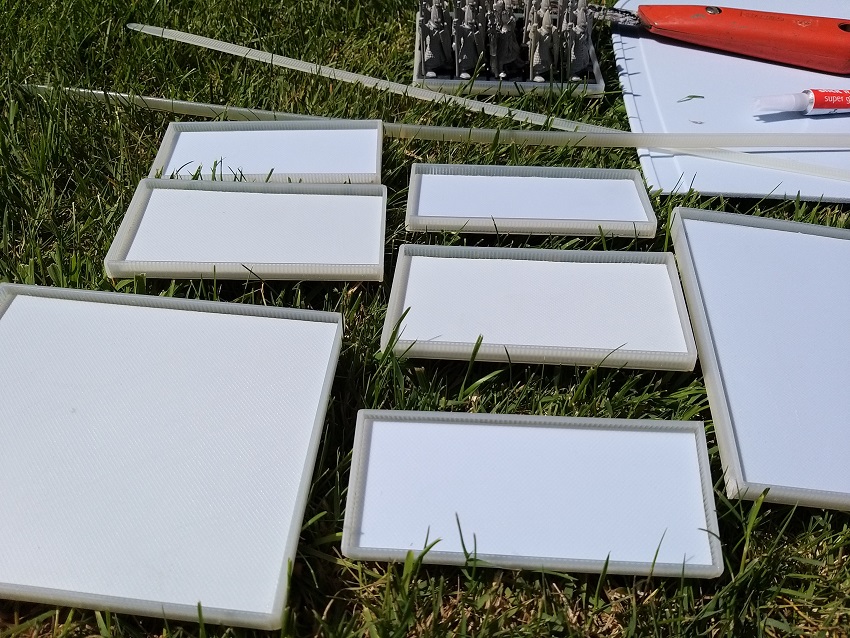
So I made some. They’re quick to put together, superglue virtually instantly, and are suprisingly sturdy. They’ll take paint. They’re ridiculously cheap. I thought I’d post the materials, on the offchance anyone’s in the same boat as me.
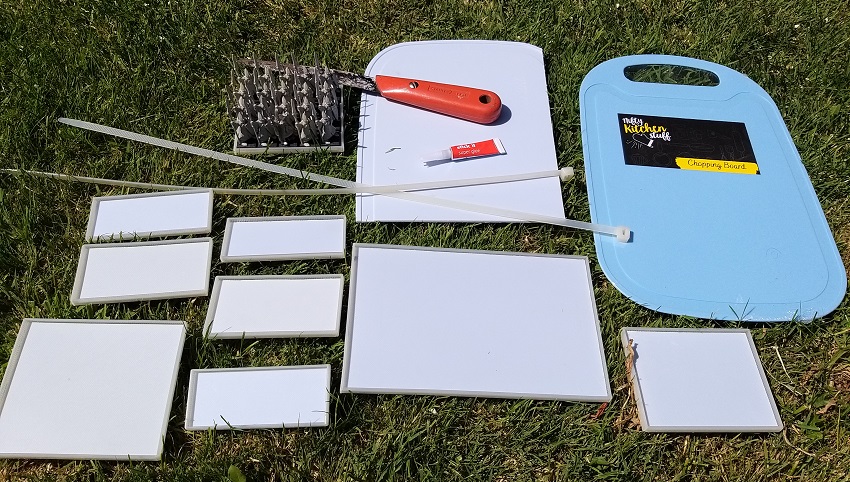
I used:
Poundland chopping boards for the base (about 3mm thick)
7mm zip ties for the sides (which end up exactly at the height of the top of the models’ bases)
Poundland superglue to unify the two
A knackered old padsaw and a square
Baking powder and superglue to fill any minor indiscretions
Electric sander to round off the corners
They seem pretty resistant to being permanently bent - but if they are, I’d imagine chucking them in a bucket of very hot water and then cooling them down pressed flat would do the trick.
I only noticed the cable ties once I’d already painstakingly cut the first chopping board into 7mm strips, then saw a cut up bit of cable tie on the shed floor and thought “that looks rather familiar…”. Live and learn! The cable ties are a bit thinner than the cut up board, and with a much nicer finish, so better all round. The serrated “zip” bit seems to help the glue key in, too.
If you get the Poundland chopping boards, the easiest way to square them off is to extend the flat moulding line under the handle, cut that, then square off one side (that’s what’s been done to the second board in the picture). That gives you two flat sides to work from. I cheated with that bit and did the lot in one go with an electric saw. They do cut very easily with the padsaw, though, which is how I made all the other cuts.
Obviously, add 1mm to all measurements to allow for the kerf.
I’ve used the left over remnants of the bottom of some old dresser drawers and the backs of the old generic entertainment centers.
They work great for larger/heavier units.
I also found that the peel and stick floor tiles work well too.
You can mark off the size you need and then run a blade along the lines to score it and then bend/snap the backing. Then run the blade along the other side to cut the inside edge and it’s ready.
Once the models and bases are done you can peel the backing off and stick the models on the glue side. They don’t slide around of fall off if they are on a hill.
You can put some white glue on the bottom of the bases just to make sure they don’t come free.