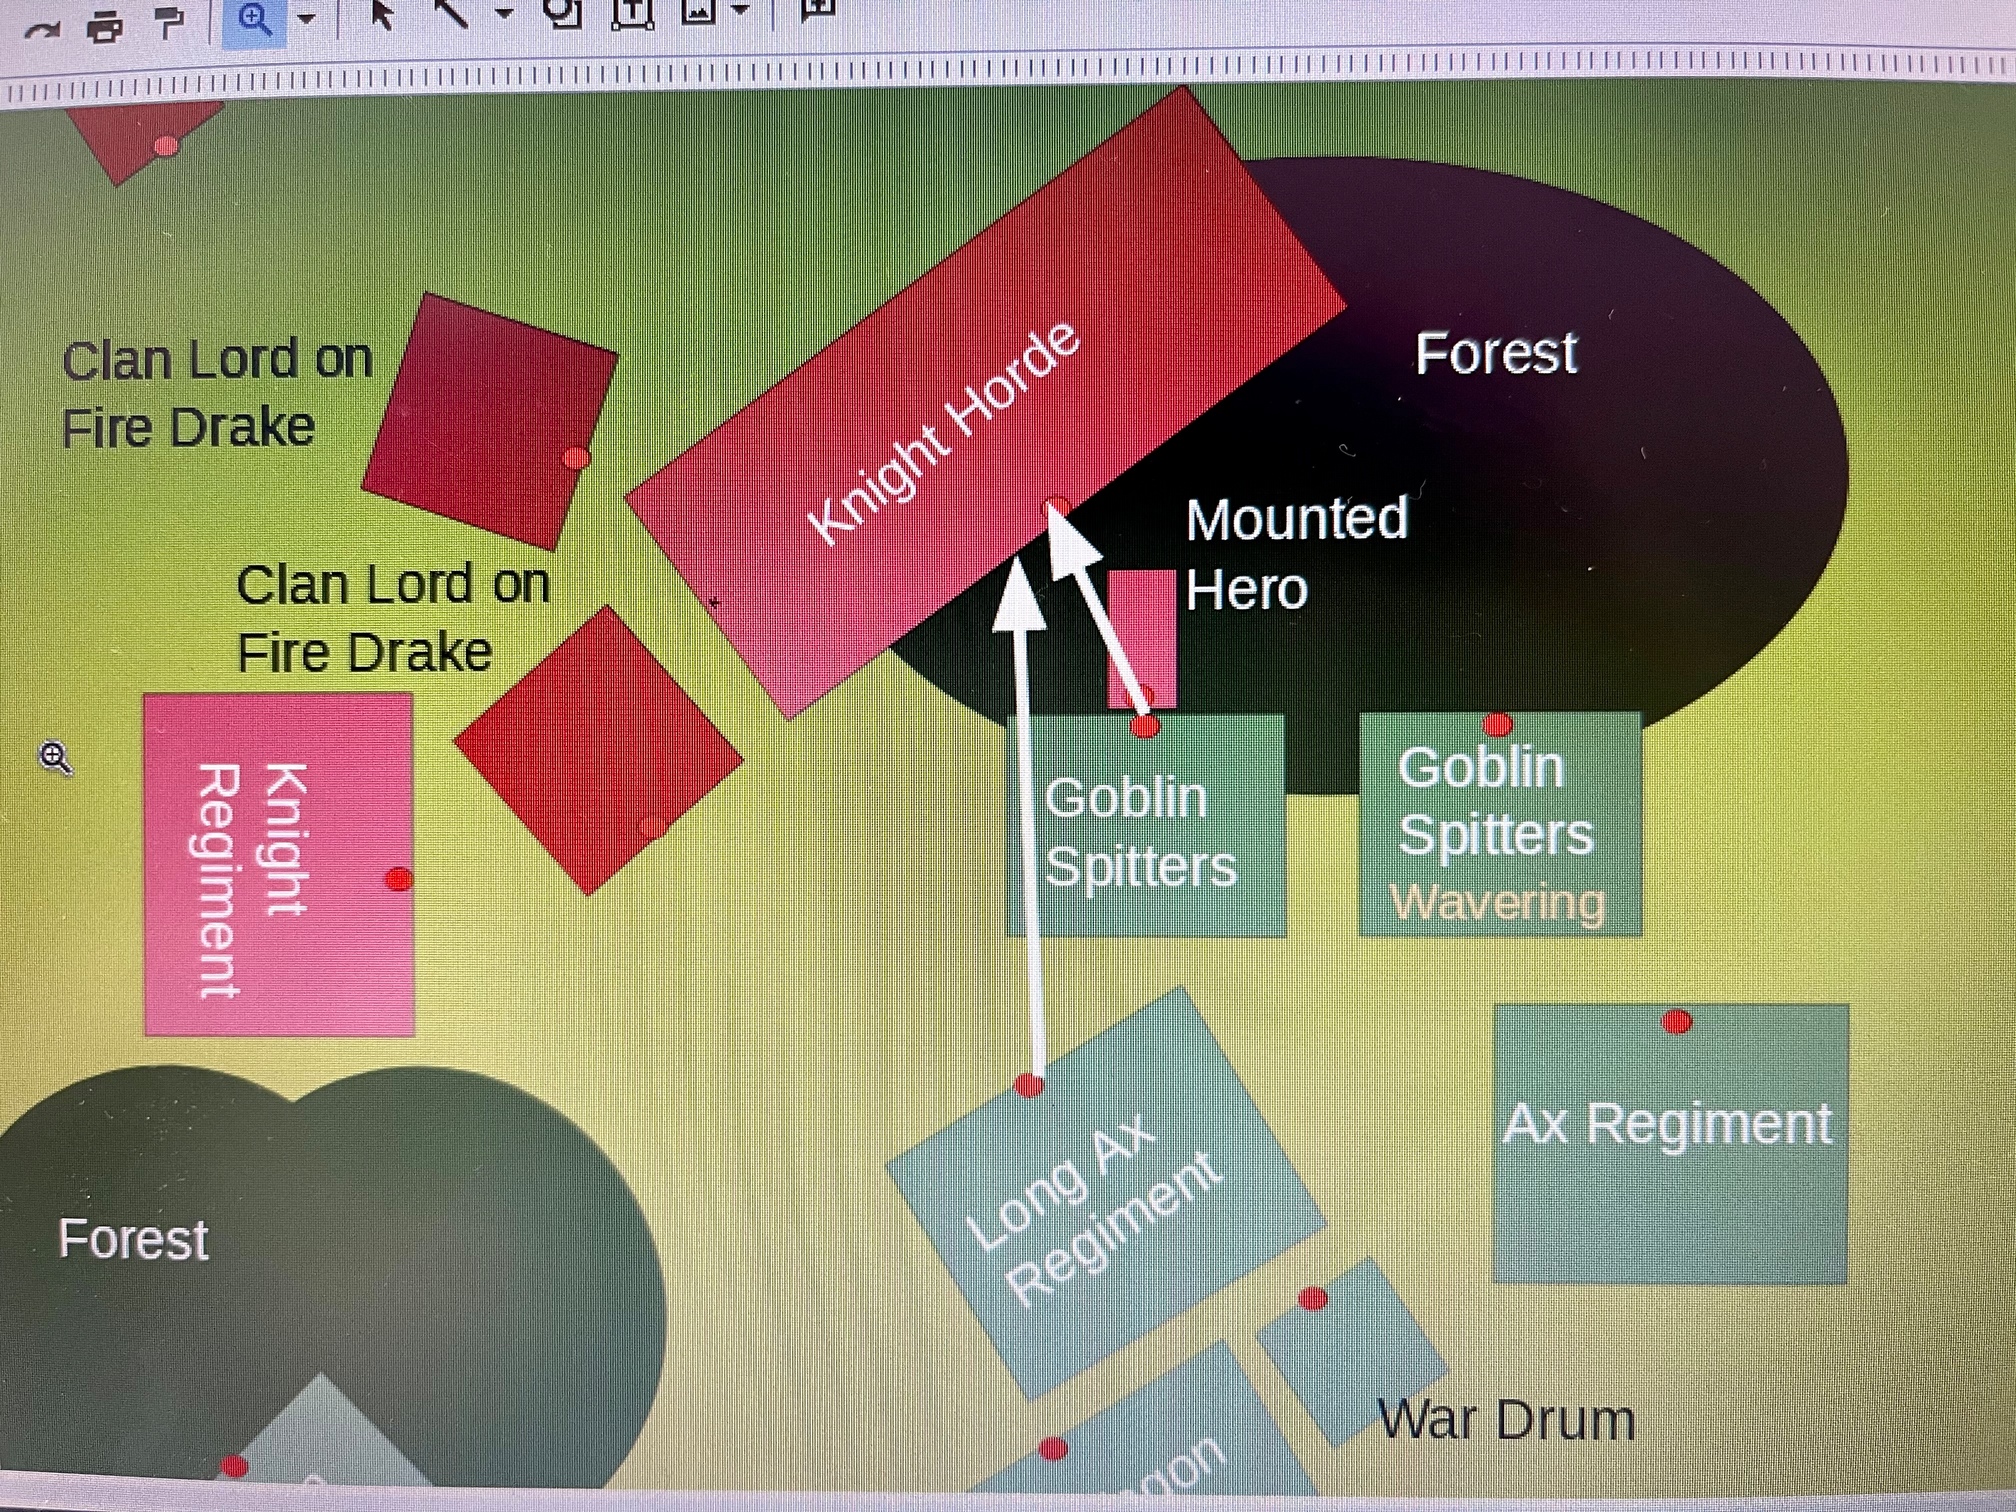
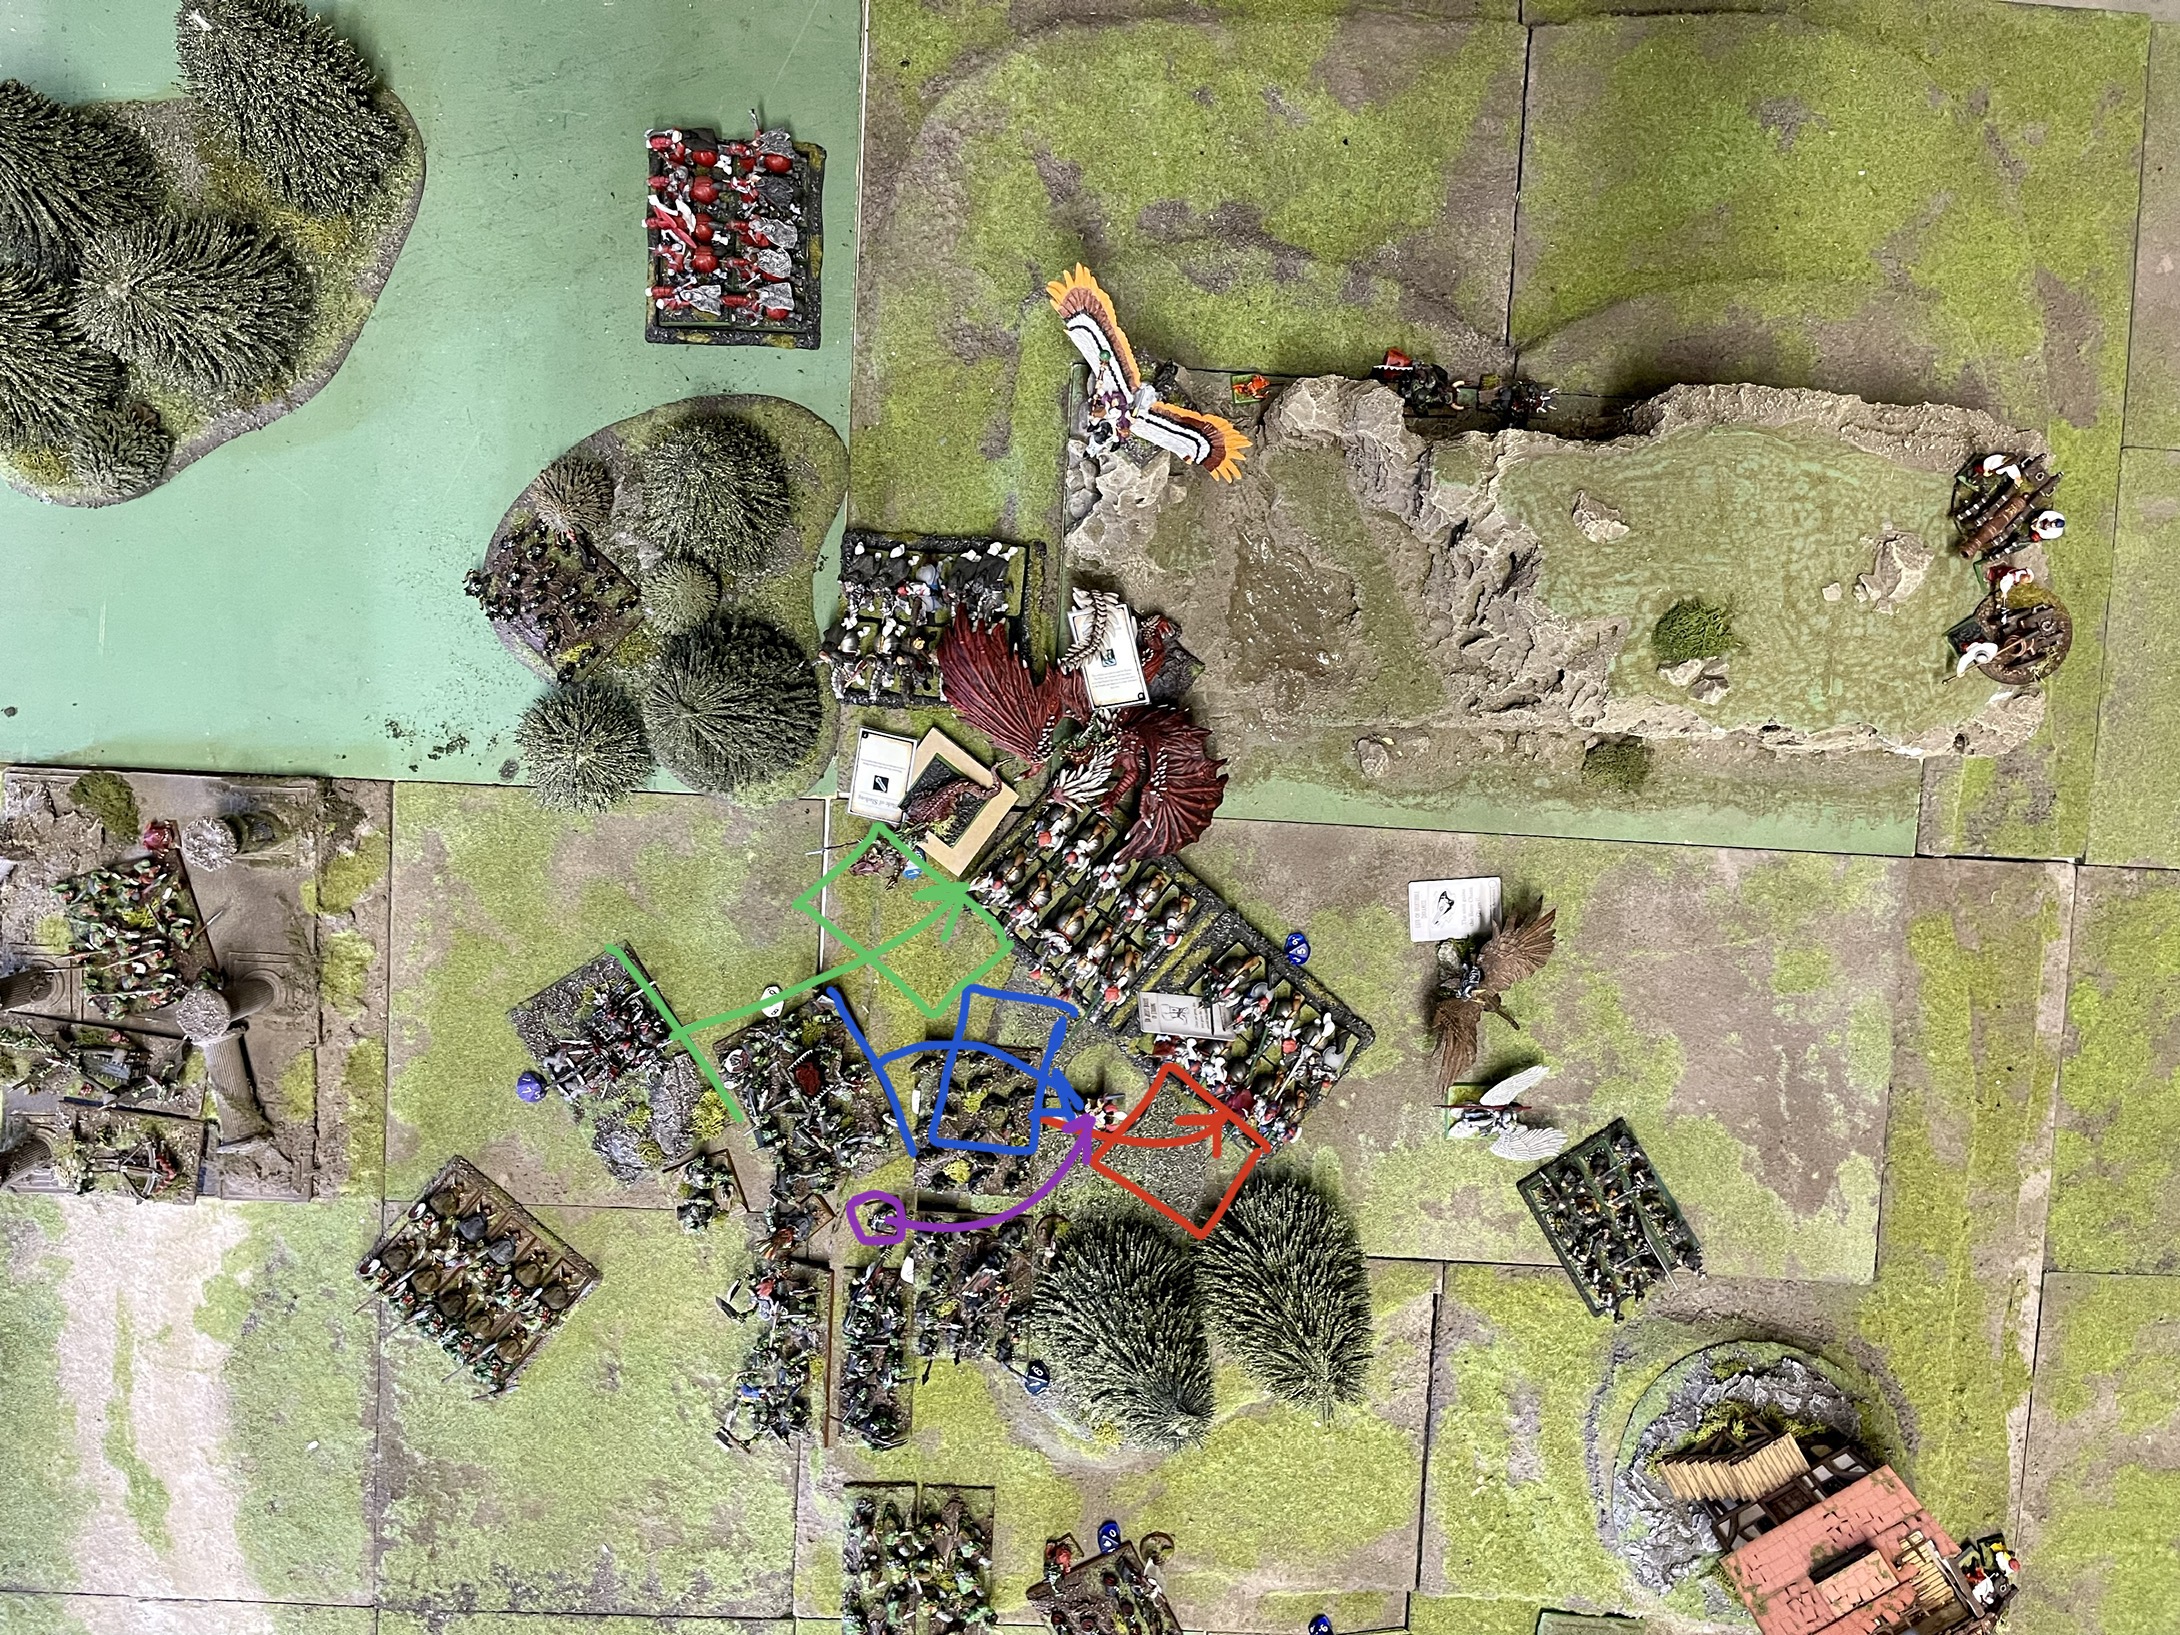
I have includes a diagram below of of situation that has presented in a current game.
Multiple charges have been declared against a horde but there is a yilding character in the way.
Assuming the goblins can pivot and move though the yielding unit. Can the charging units align against the horde either side of the yielding unit?
2 Likes
P.s clearly the gobbos aren’t going to achieve anything! But the are very brave and would make way for the fight wagons behind!
My take on it is that yes they can, but they cannot simply go straight ahead, since they need to finish the Move step of the charge clear of the individual. they have to pivot to somewhere they can touch the unit without hanging “in the air” over the individual.
This also makes sure they fulfill the rule that they must still be touching the initial point of contact after aligning.
ps. this might require them to hang over the individual after the pivot. which I think is allowed since yielding says you need only need to finish the entire Move step clear, I take that to mean that the pivot & move before you finish the Move step is something you can do while hanging in the air, but the end position must be clear.
2 Likes
Thanks @FredOslow very helpful. The more “goblin-like” thing to do would be to simply move over the yielding individual and shoot at the knights before another unit overruns the yielding unit and then engages the knights.
I have been scratching around for a mathematical model. Unfortunately it looks like a infantry regiment (100x80) can’t get clear of a 50mm model. 5” move is 127mm. Less 80mm that’s 2mm short!!
That means the only way to get clear is to charge the knights beyond to increase the move.
To avoid the overlapping you describe in your response the goblins could disengage, then pivot, then charge.
The other factor at play is; I assume a simultaneous charge would have to be declared against the knights for the goblins to follow the route described? As without the supporting unit engaging to the south in the diagram the goblins would have to engage the knights by “the most direct route” and would end up shuffling to the south?
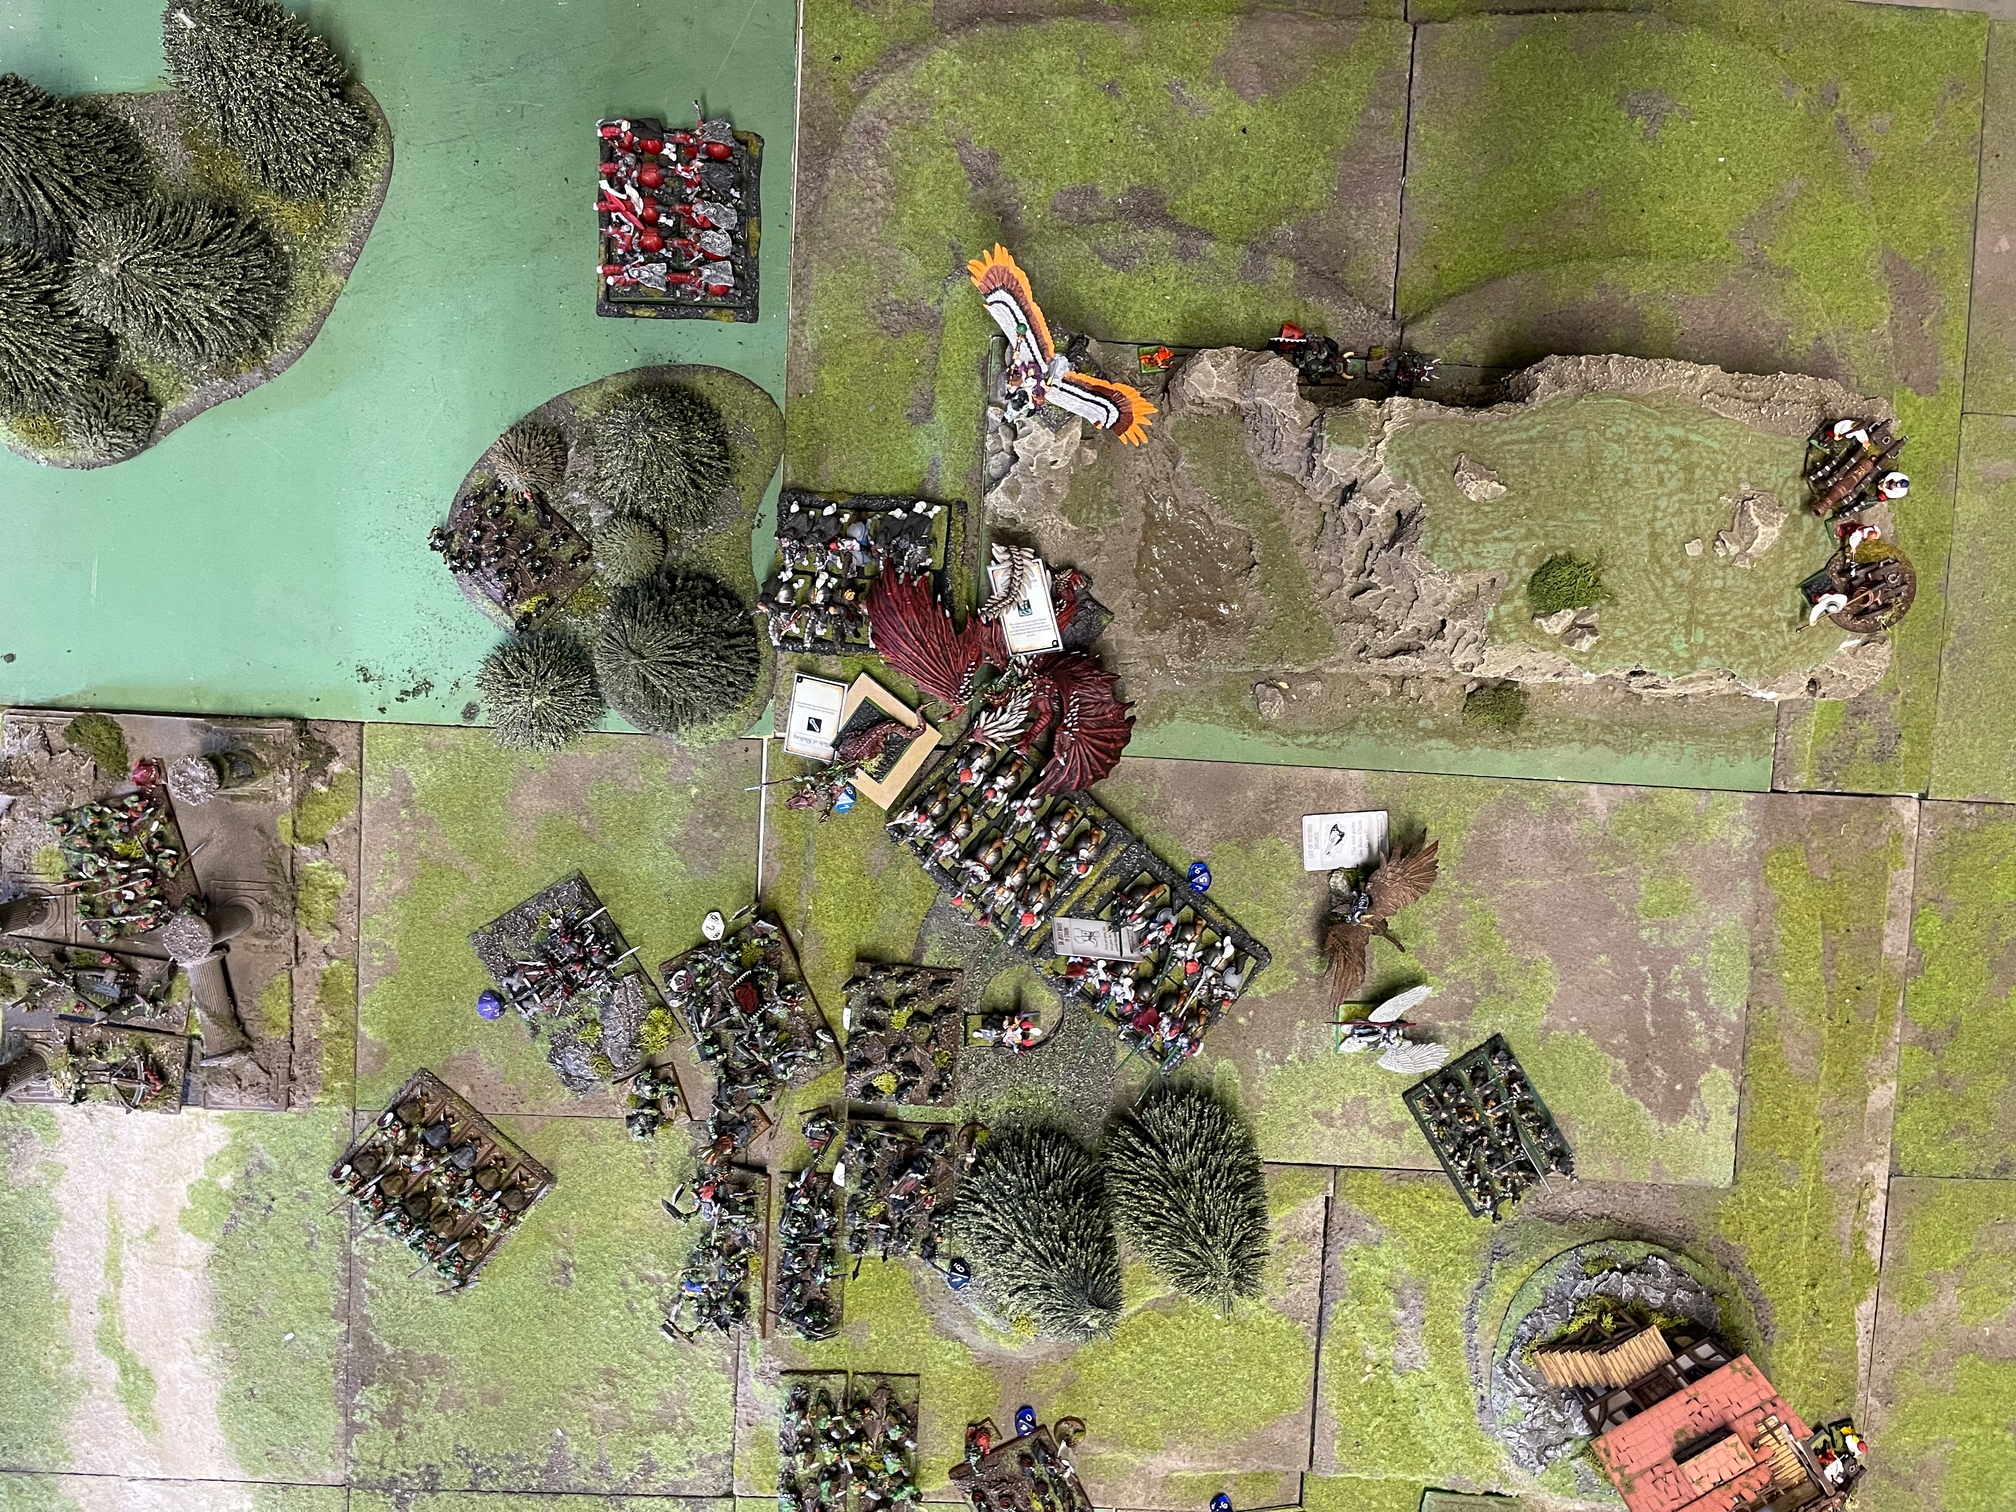
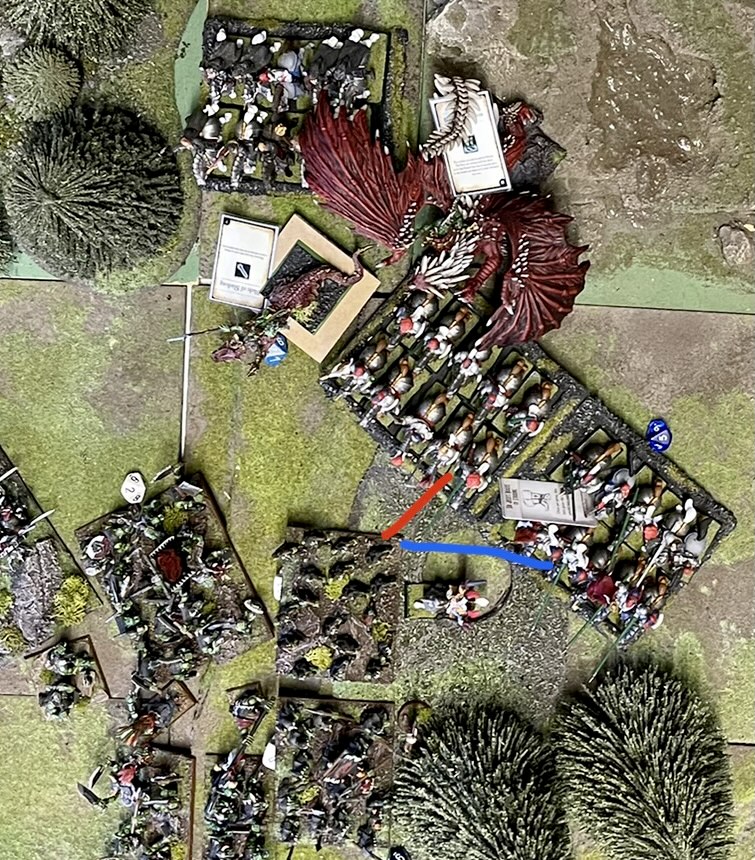
Here is a photo of the actual table
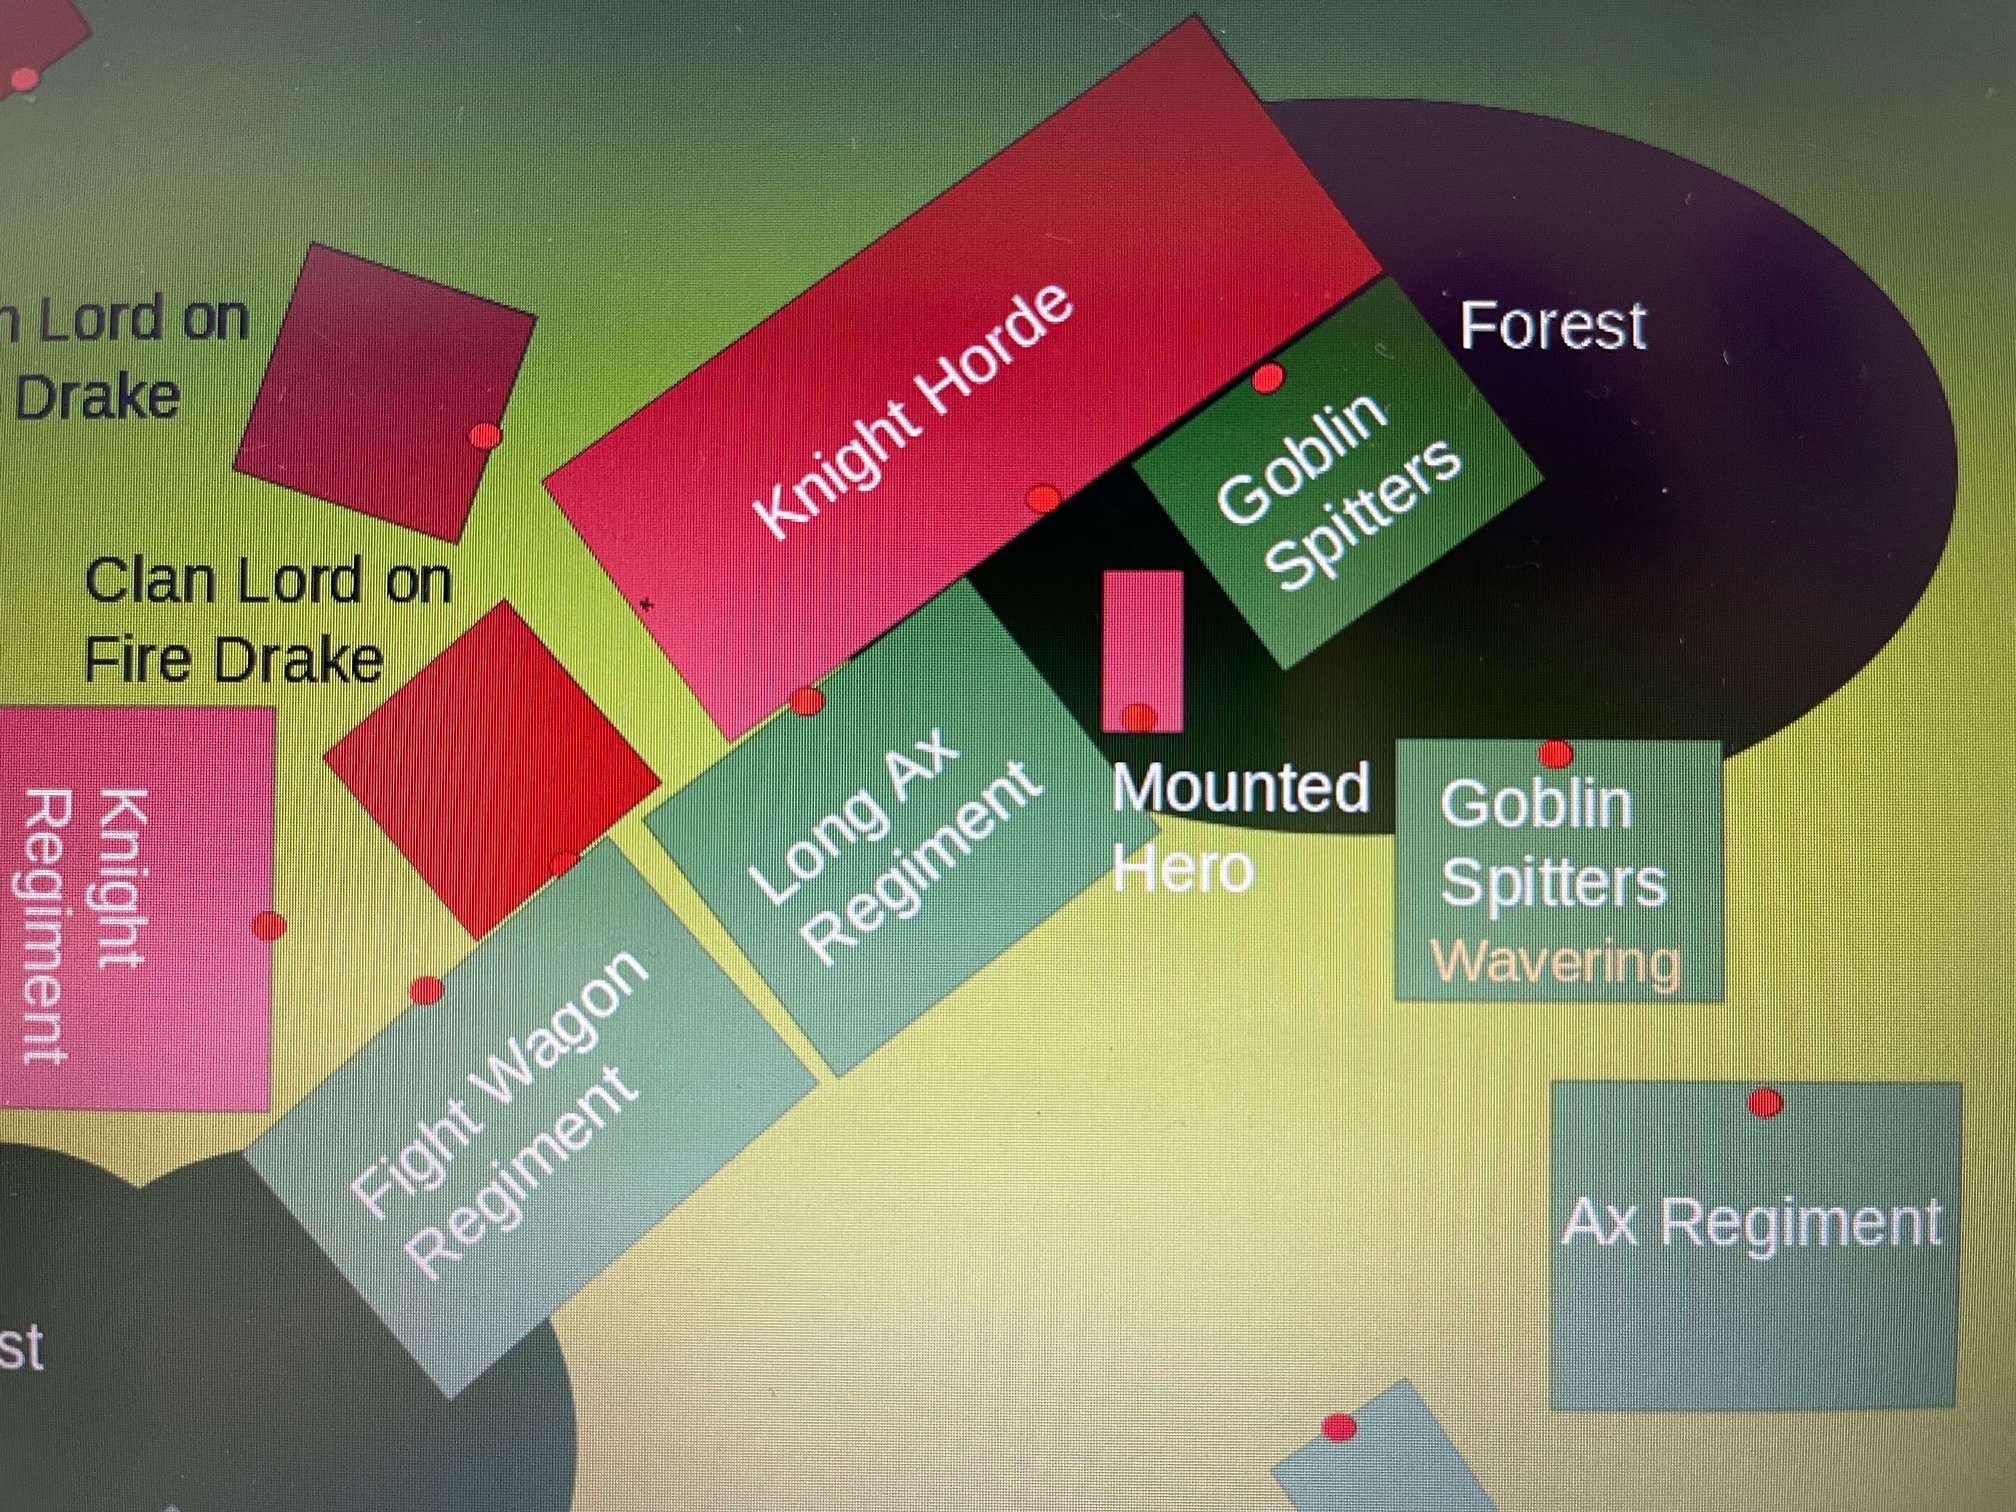
Here is my next idea!
- Charge the Knights with the gobbos as described earlier. (Red)
- Charge the yielding individual with the Ax (blue) hope for an overrun! And positioned so a roll of 1 gets you there! Throw in the Krudger for good measure!
- Charge the knights with the Fight Wagons who now avoid the difficult terrain due to blocking friendly units.
This is bordering on a tactics discussion now. Apologies.
1 Like
I would think you are right about this.
Sure, but I dont think they are forced to withdraw first, I believe it is allowed to hang over the yielding individual during the pivot and move part of the charge. Would be nice to get this confirmed of course.
The wording is different regarding regular pivots through stuff and those through Yielding individuals.
The reference to the Move step in the Yielding rules relates to this section of the Charge rules, which INCLUDES the pivot
This implies you can finish the pivot in a Charge over a Yielding individual?
Yeah that’s my take on it.
Thanks @Sceleris , in re-reading the move steps for charging I notice something else interesting.
Note the wording of the move steps includes both ‘ordinals’ “first” implying sequence and ‘exceptions’ “may, if necessary”, and “if”.
This raises some interesting questions for me about the route smaller units take when making contact with larger ones generally. Isn’t it funny how the core mechanics can still give you a surprise!
Applying to the case in point:
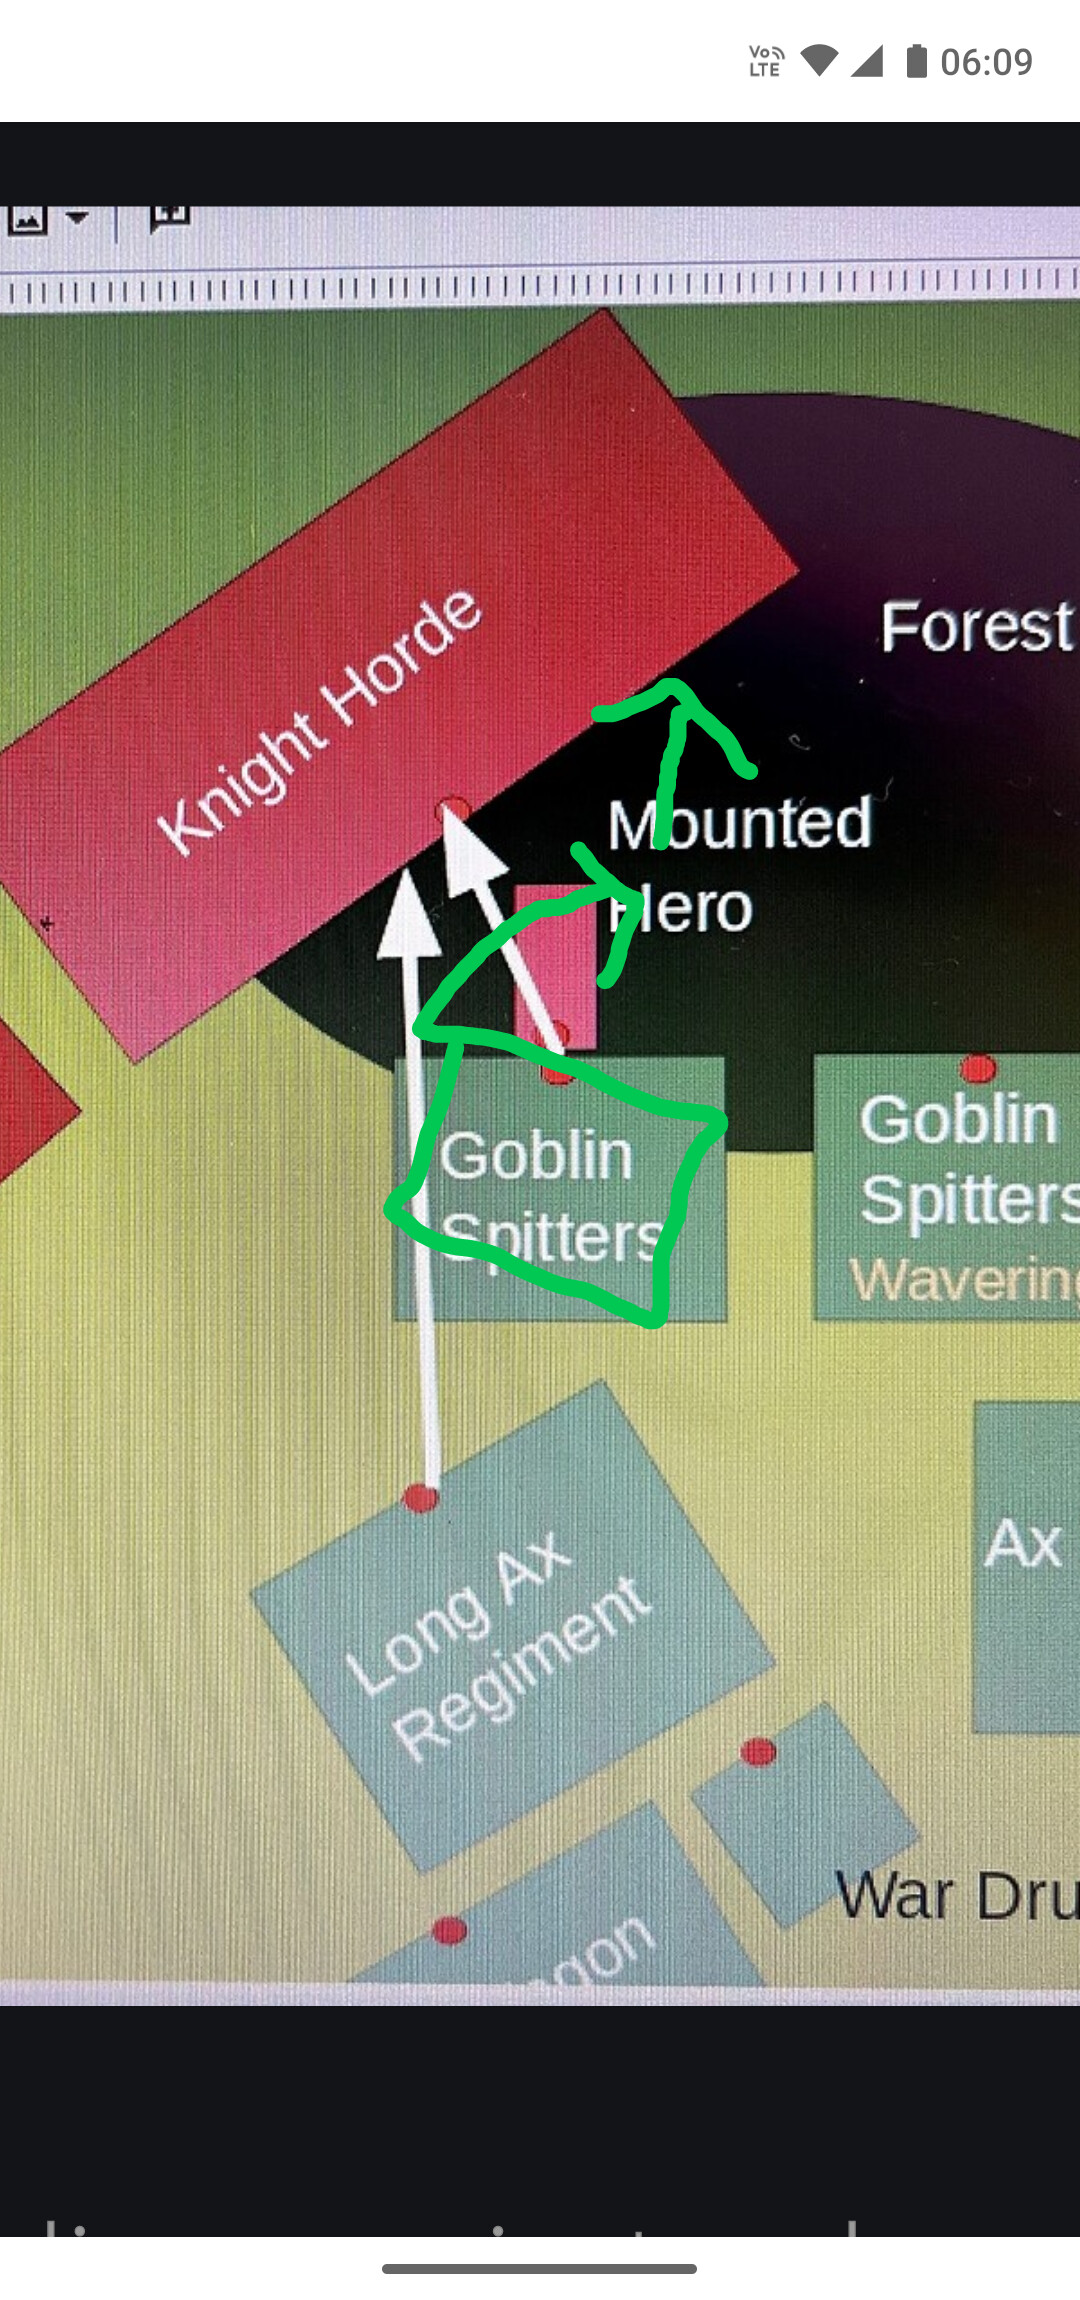
The “most direct route” for the Goblin Spitters to the Knight Horde is indicated in red. In order to execute this move the unit would have to pivot. Indeed paragraph two states “in order to do this they may,”
But, there is a condition, “if necessary”. In this case, it is not ,as indicated by the blue line.
Therefore, we apply the last rule of paragraph two, “if the charge can be completed without the pivot, then the unit should not pivot.”
I read this to mean the goblins should follow the blue route until they contact the Knights, then align, then shuffle to get as close to knights leader-point as possible, avoiding the Yielding unit?
If this is a correct interpretation it has implications for how you might position units to avoid passing through terrain on chargers. Keep and eye on the straightest route 
Yes, in 2nd that would have been a pivot to go towards the closest point. in 3rd it is correct to go in the straight line instead.
1 Like
Thanks, that’s a good learning for me.