Agree
2 Likes
This is an ancient topic, but since it’s there, I’m resurrecting it ![]()
A while ago a couple of rules questions came up. Playing internationally is always good to re-evaluate the rule options.
First one:
On my turn (green) the knights charged a unit and destroyed it. The enemy infantry horde is more than 1"away.
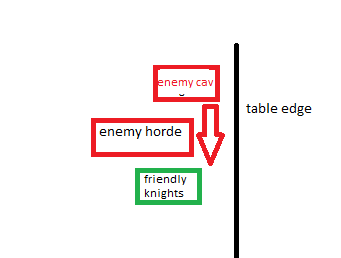
My opponent wants to combi-charge the knights with both units. as they can see and shuffle to fit both.
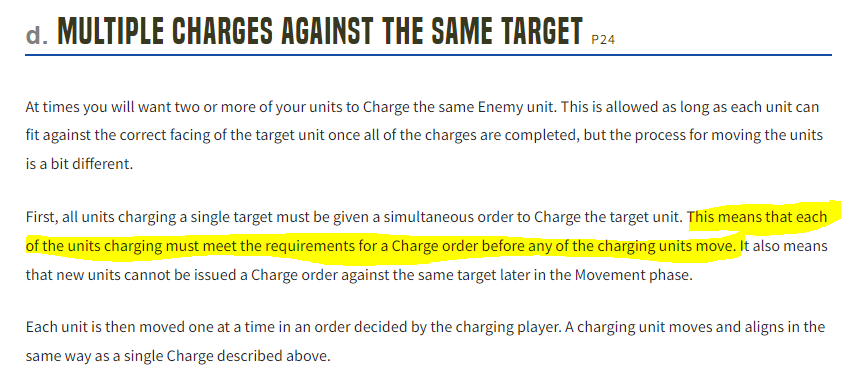
I don’t think he can. In the rules (quotation below) both charges must be legal before any units are moved. In the example above, the cavalry cannot reach the knights as there’s no room between the table edge and the horde and therefore a combi-charge cannot be made.
Of course, the infantry can charge alone. The infantry can also make a sideways move and the cavalry can charge as well. They just cannot charge together.
Did I do this right?
Another question, this is something I’m guilty off and which I even did last Clash of Kings (and the judge allowed me to), but the rules seem to be different.

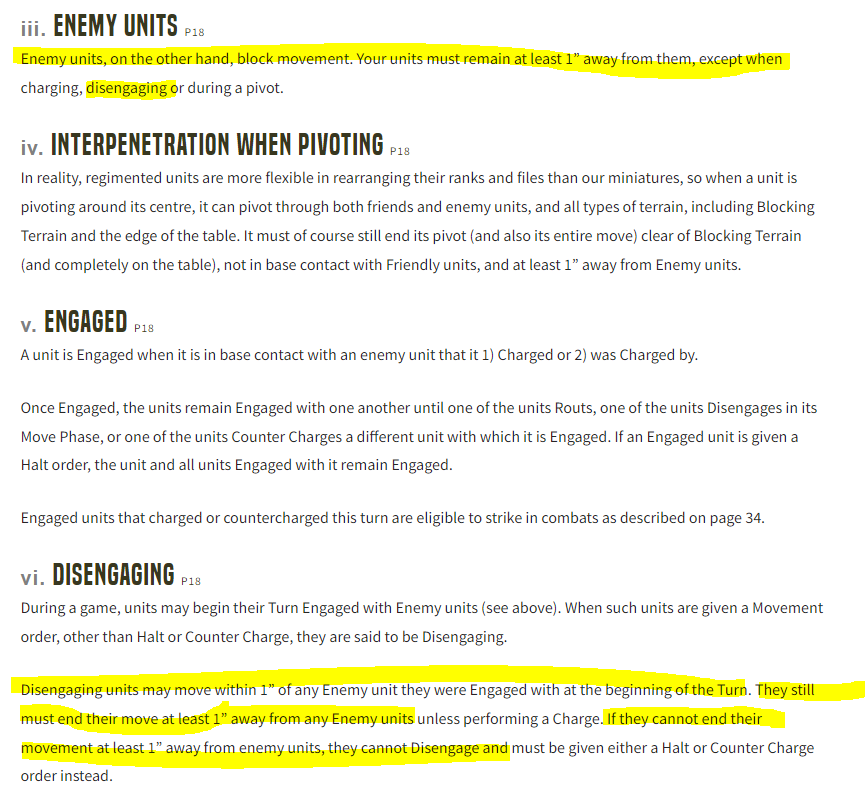
My cavalry troop charged the infantry during my last turn, but survived the counter-attack. I want to make the following moves:
a) Disengage, Move sideways with the cavalry
b) charge in with the large infantry.
Point is, my cavalry can only move 4" sideways. With this move, they cannot get 1" away from the infantry. (movement 10 gur panthers can do this, however) Therefore according to the rules quotation below, I cannot make this movement. Correct? In this example, there’s no way to get info combat with the large infantry horde.
We have always played it that both units in your example can complete the charge move. The rules text you emphasize about meeting charge requirements before any of the charging units move may not be perfectly worded but seems OK to me. The first three conditions (front arc, LoS, distance) are fulfilled. The last one states that the unit has to fit into contact after moving “as described below”. Then, the text below specifies how the units are moved when performing multiple charge, they do it one by one. In my view it is not required that the more distant unit (cavalry in your example) should be able to complete the movement before the other obstructing unit (infantry horde) moves first.
1 Like
I agree, you cannot disengage with the cavalry troop. At least that’s how I interpret the rules … ![]()
Q1 - "When multiple units charge the same facing, each unit must individually make contact, align and then shuffle to its final position before moving the next unit. A units final position is one which means that chargers share the space available as equally as possible. "
The horde charge first and shuffle to final position, the cavalry then charge in
Q2 - Only valid if the optional Withdraw rule is used (which is rarely is in most tournaments)
“While Disengaging, if a unit begins its Turn Engaged with one or more Enemy units on a single facing only, it may make a free Withdraw move of 1”, directly away from the unit(s), before carrying out a Charge, Change Facing, Sidestep, Back, or Halt order. The Withdraw move cannot be used to come within 1” of any enemy units and the unit must travel the full 1”. If it is not possible to travel the full 1” or to maintain a 1” distance from all enemy units (including the unit(s) it was engaged with), then a unit may not make a Withdraw move.”
2 Likes
Q1) The multi charge is probably not possible. Lets first look at the rule as if the table edge was not there. The horde would move in first and slide to cover 60% of the green knight unit. then the cav would attempt to move in to make contact somewhere on the remaining 40%.
When table edge is that close, if those 40% would be less than the 125mm width of the charging cav unit, the space would increase from whatever the 40% were to become 125 mm. The cav may now try to move into contact (this is because what is “available space” was faq’ed to include any obstacles or intervening units, and not always viewed in a vacuum)
In practice however, unless the unit has nimble or is lined up touching the table edge, it would probably not be able to manouvre into contact.
Q2.
Correct, you need to be 1" away from enemy units after any moves (including ones that take you out of contact) so that move was not allowed.
2 Likes