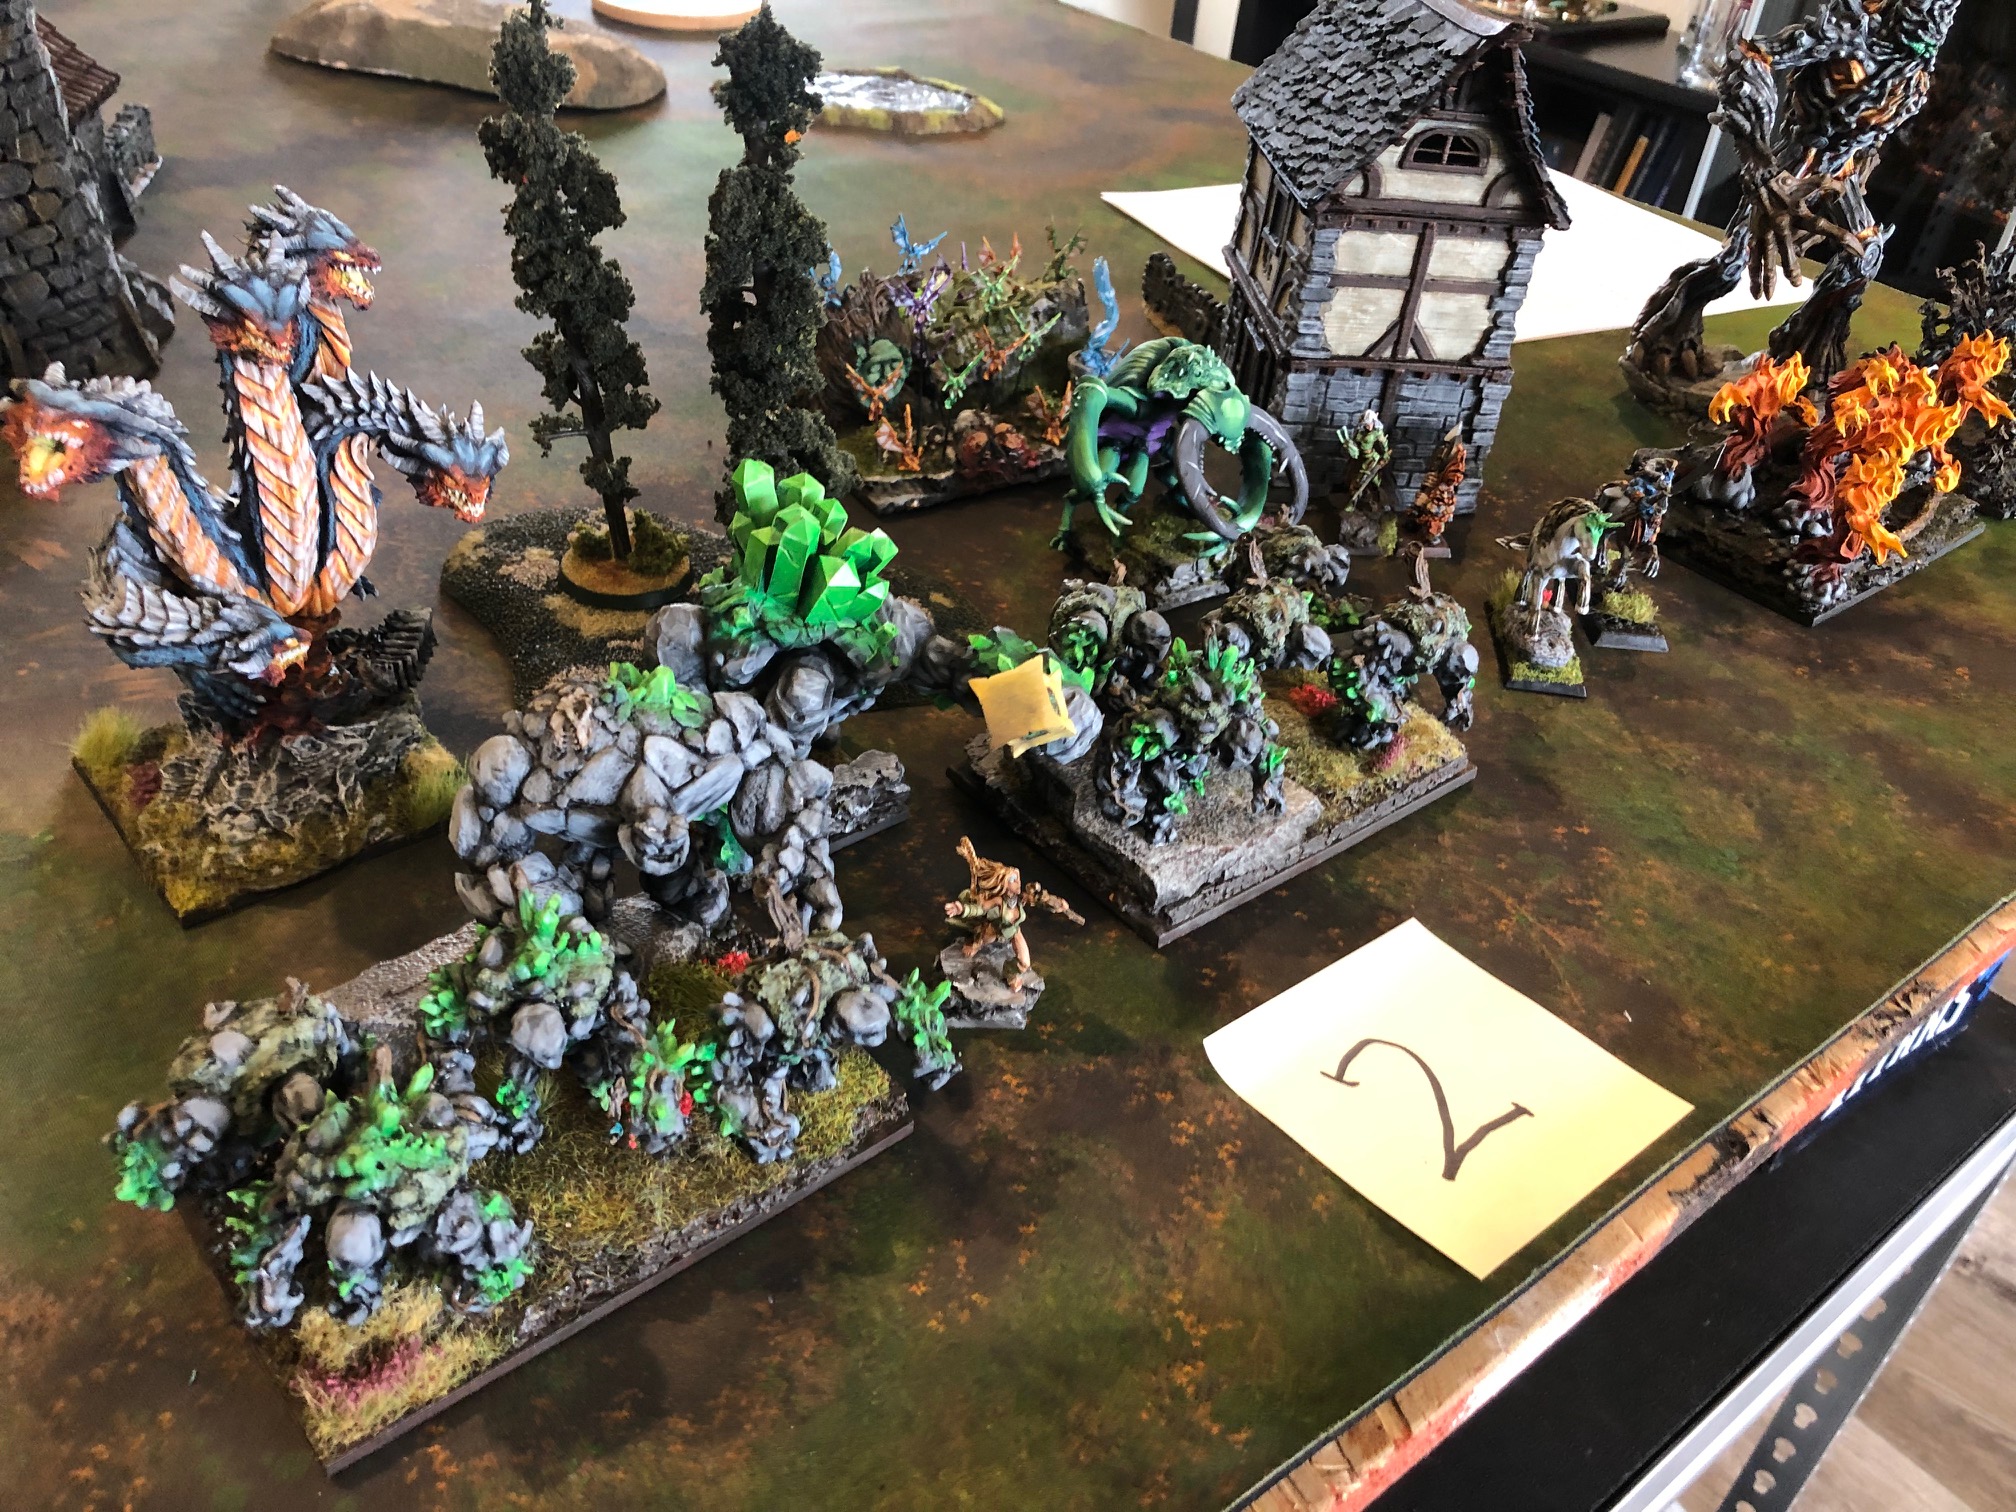
Wanted to share a challenging project after seeing Jeff Swanns Nature army at Masters and running into him at Riddle of Steel (Socal) this year.
( This is Jeff Swann’s Army - check him out his work when you get the chance. )
Jeff has an amazing army, and I feel like my photos don’t do it justice, but I really wanted to put my own expresion into a nature army that inspired me. I hope you like it.
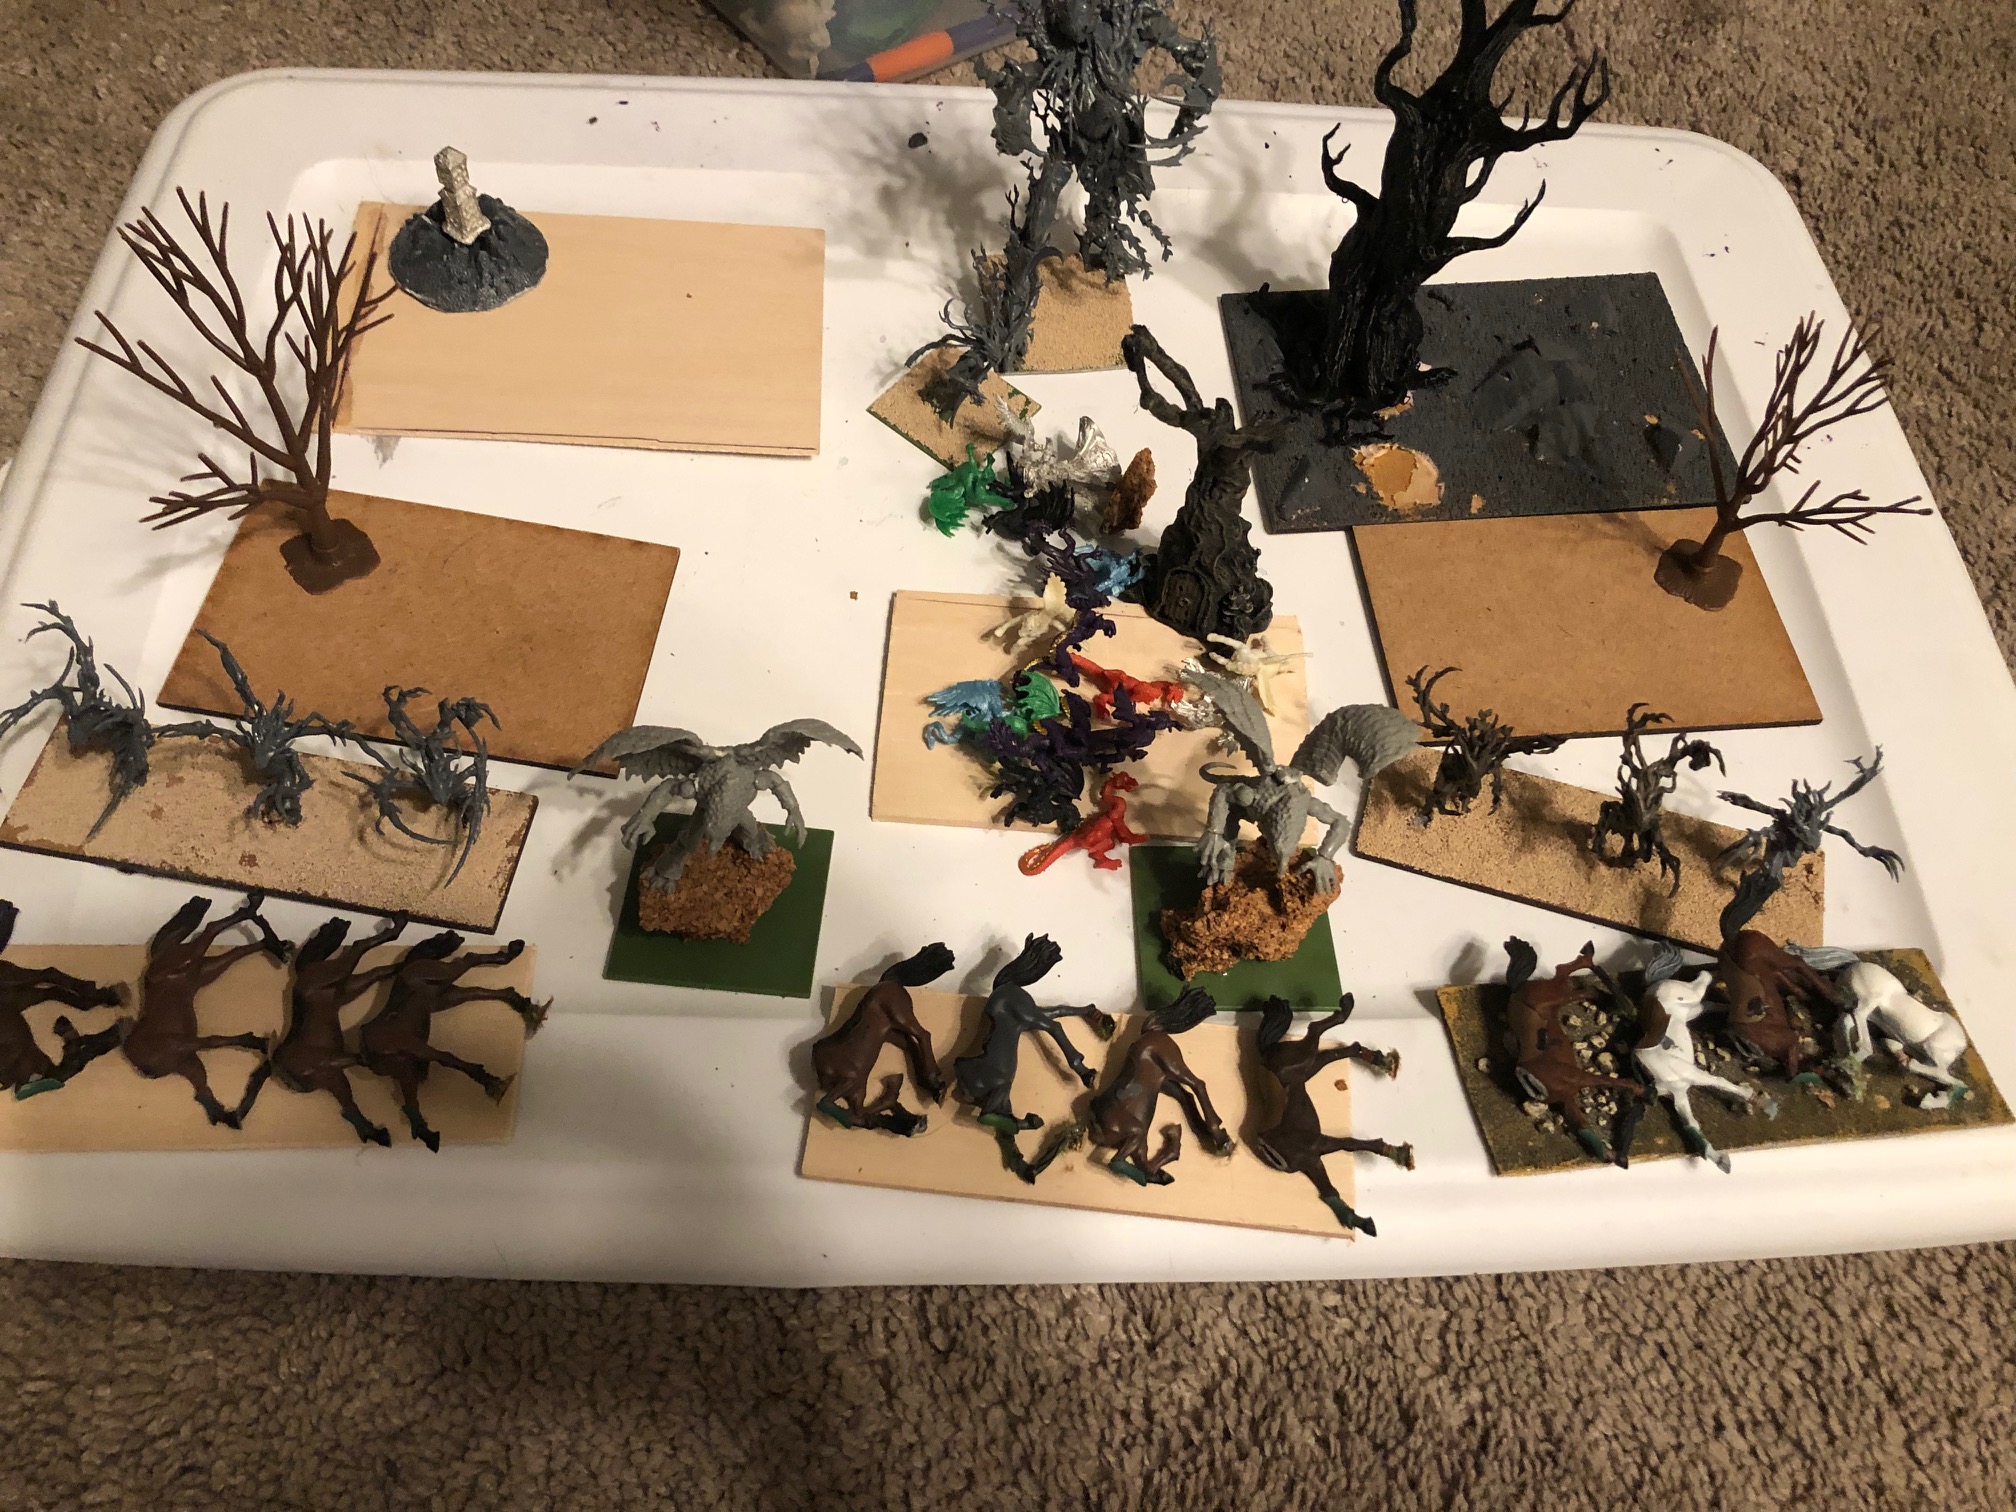
I started with my list that I wanted to play. To this day, I havent even playtested it yet. Its about expression. I hope its fun, it has all the things I want to play with and some chalenging and appealing models.
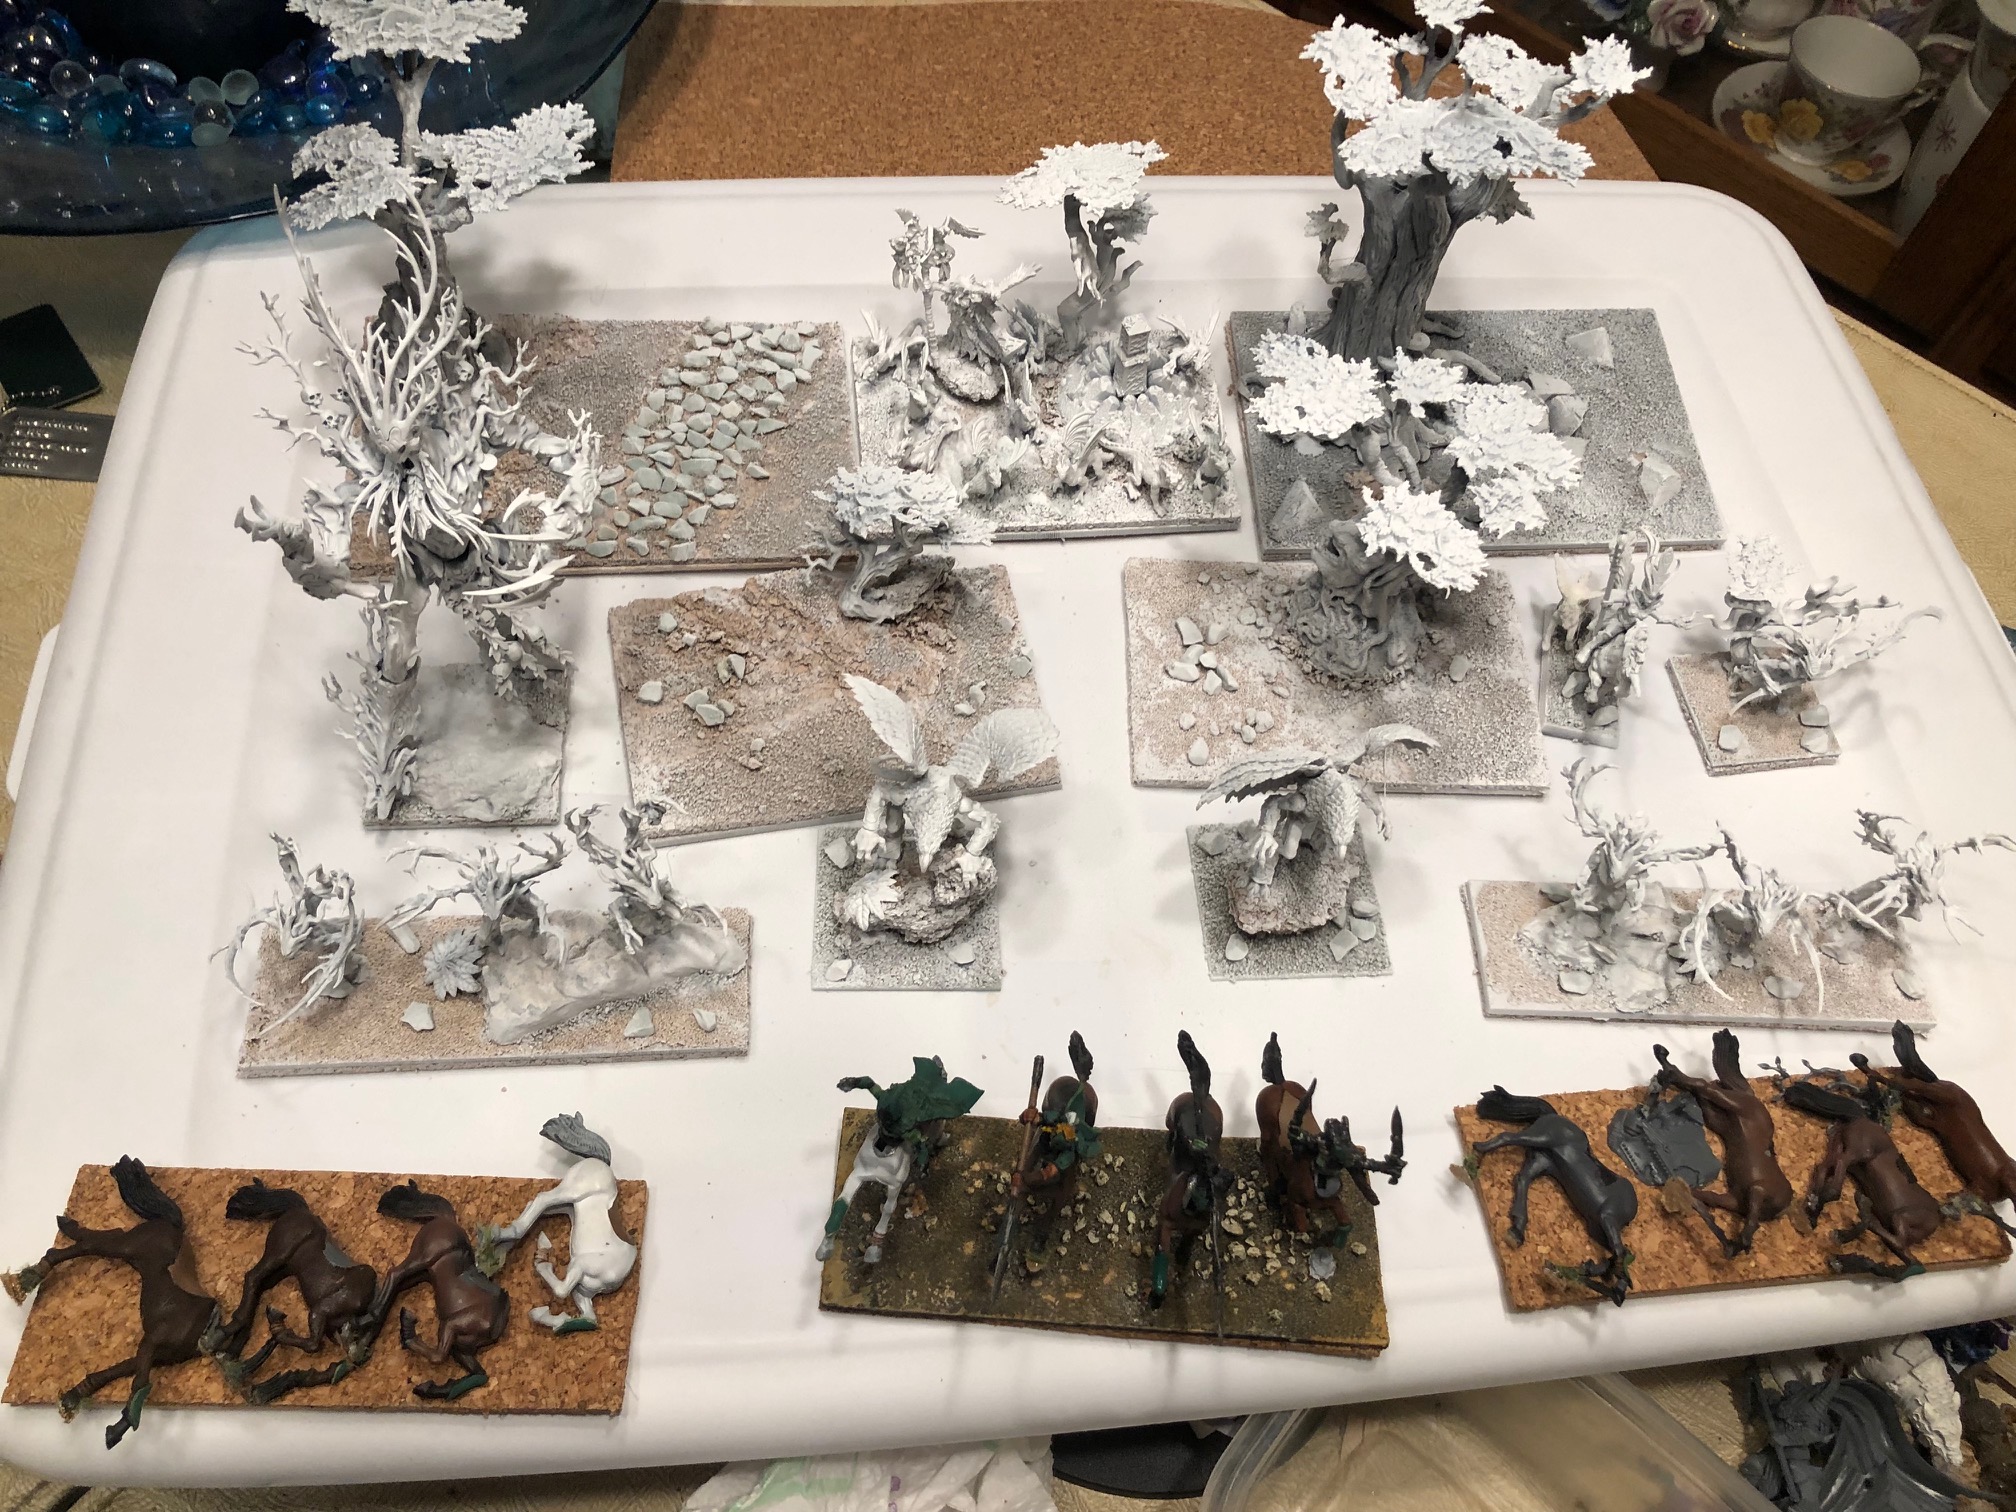
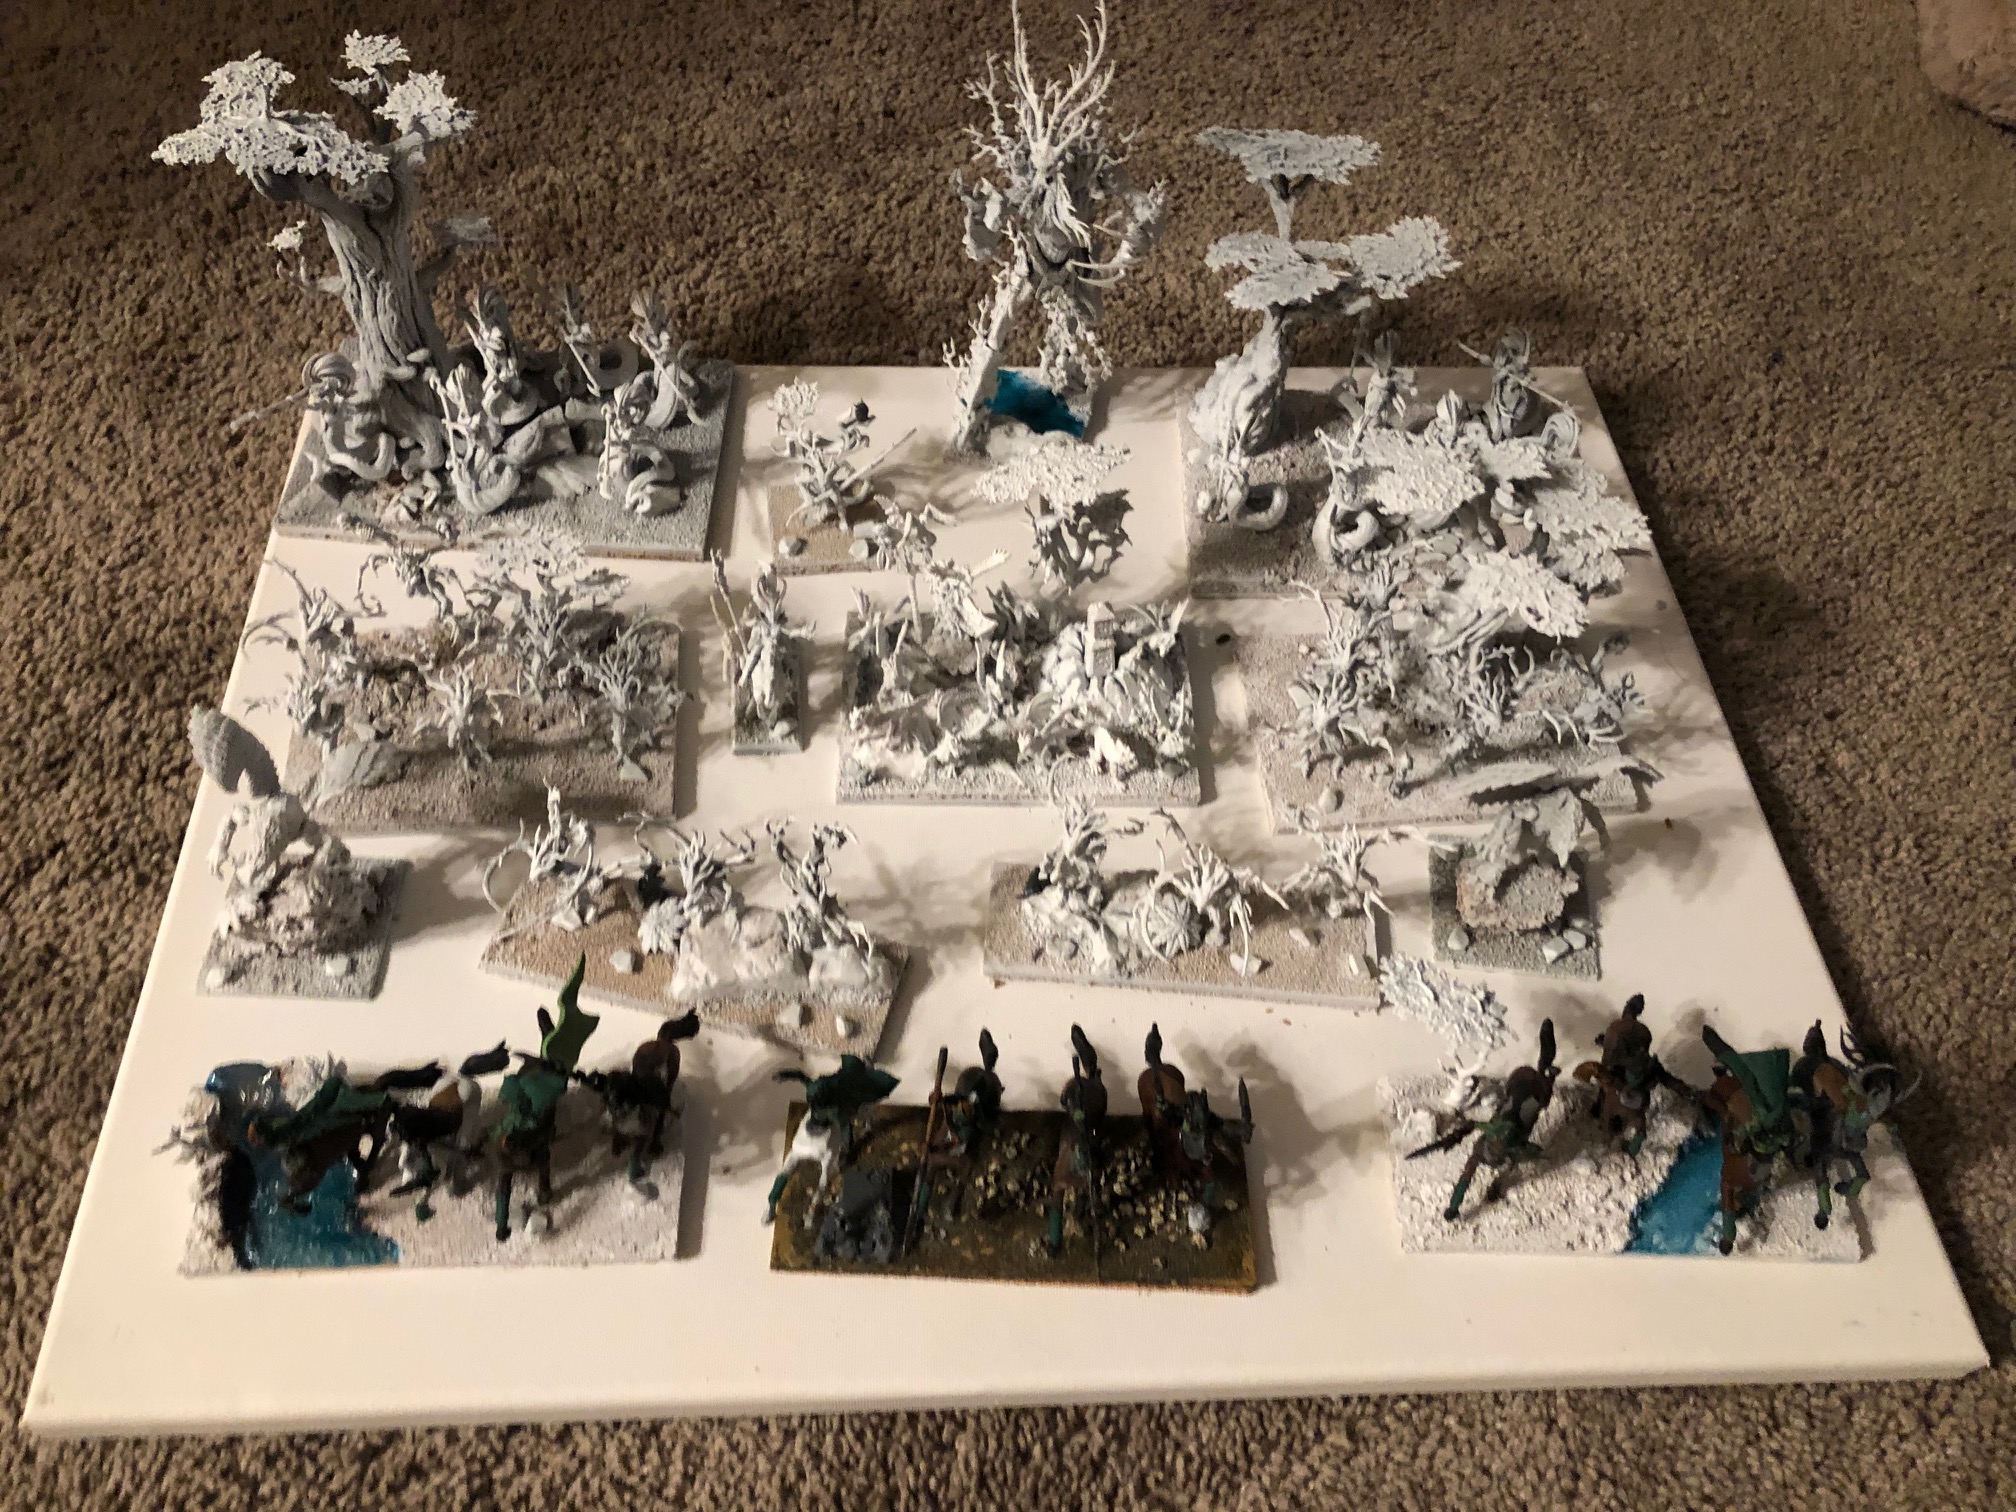
I’ll post some pictures, and work through the “how and what” I did here.
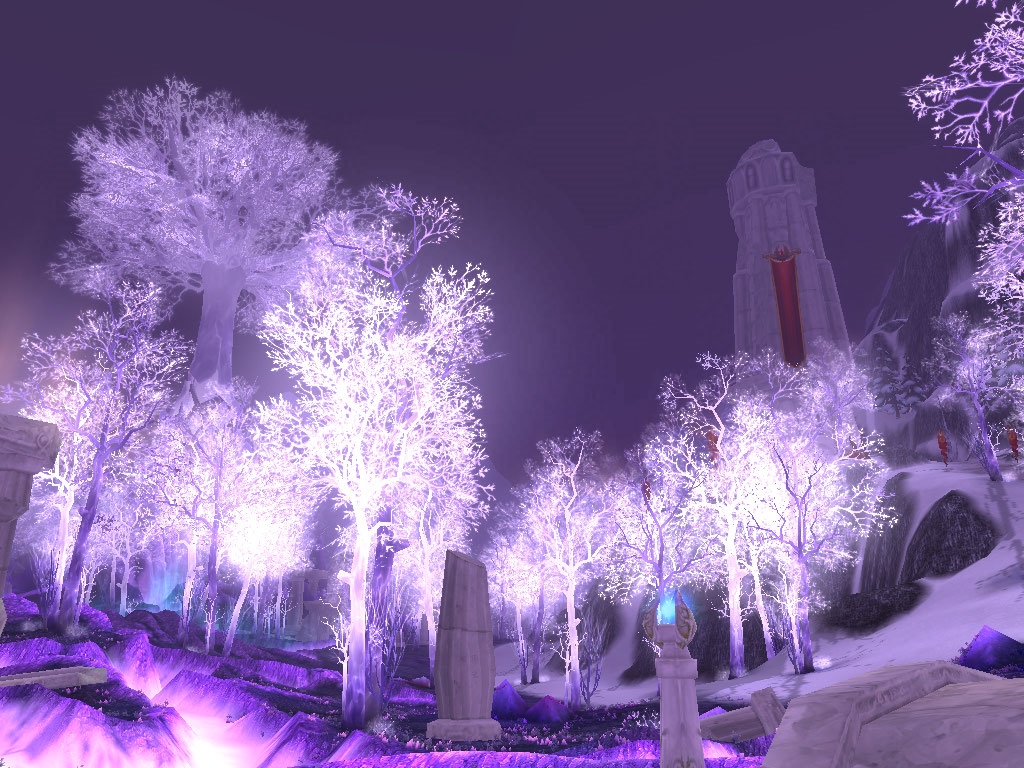
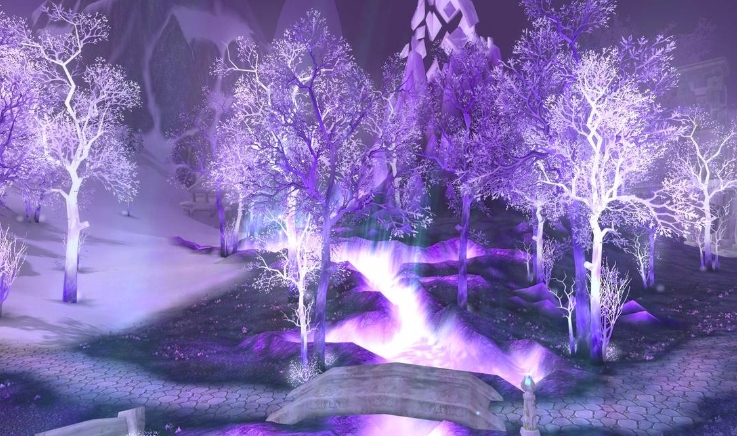
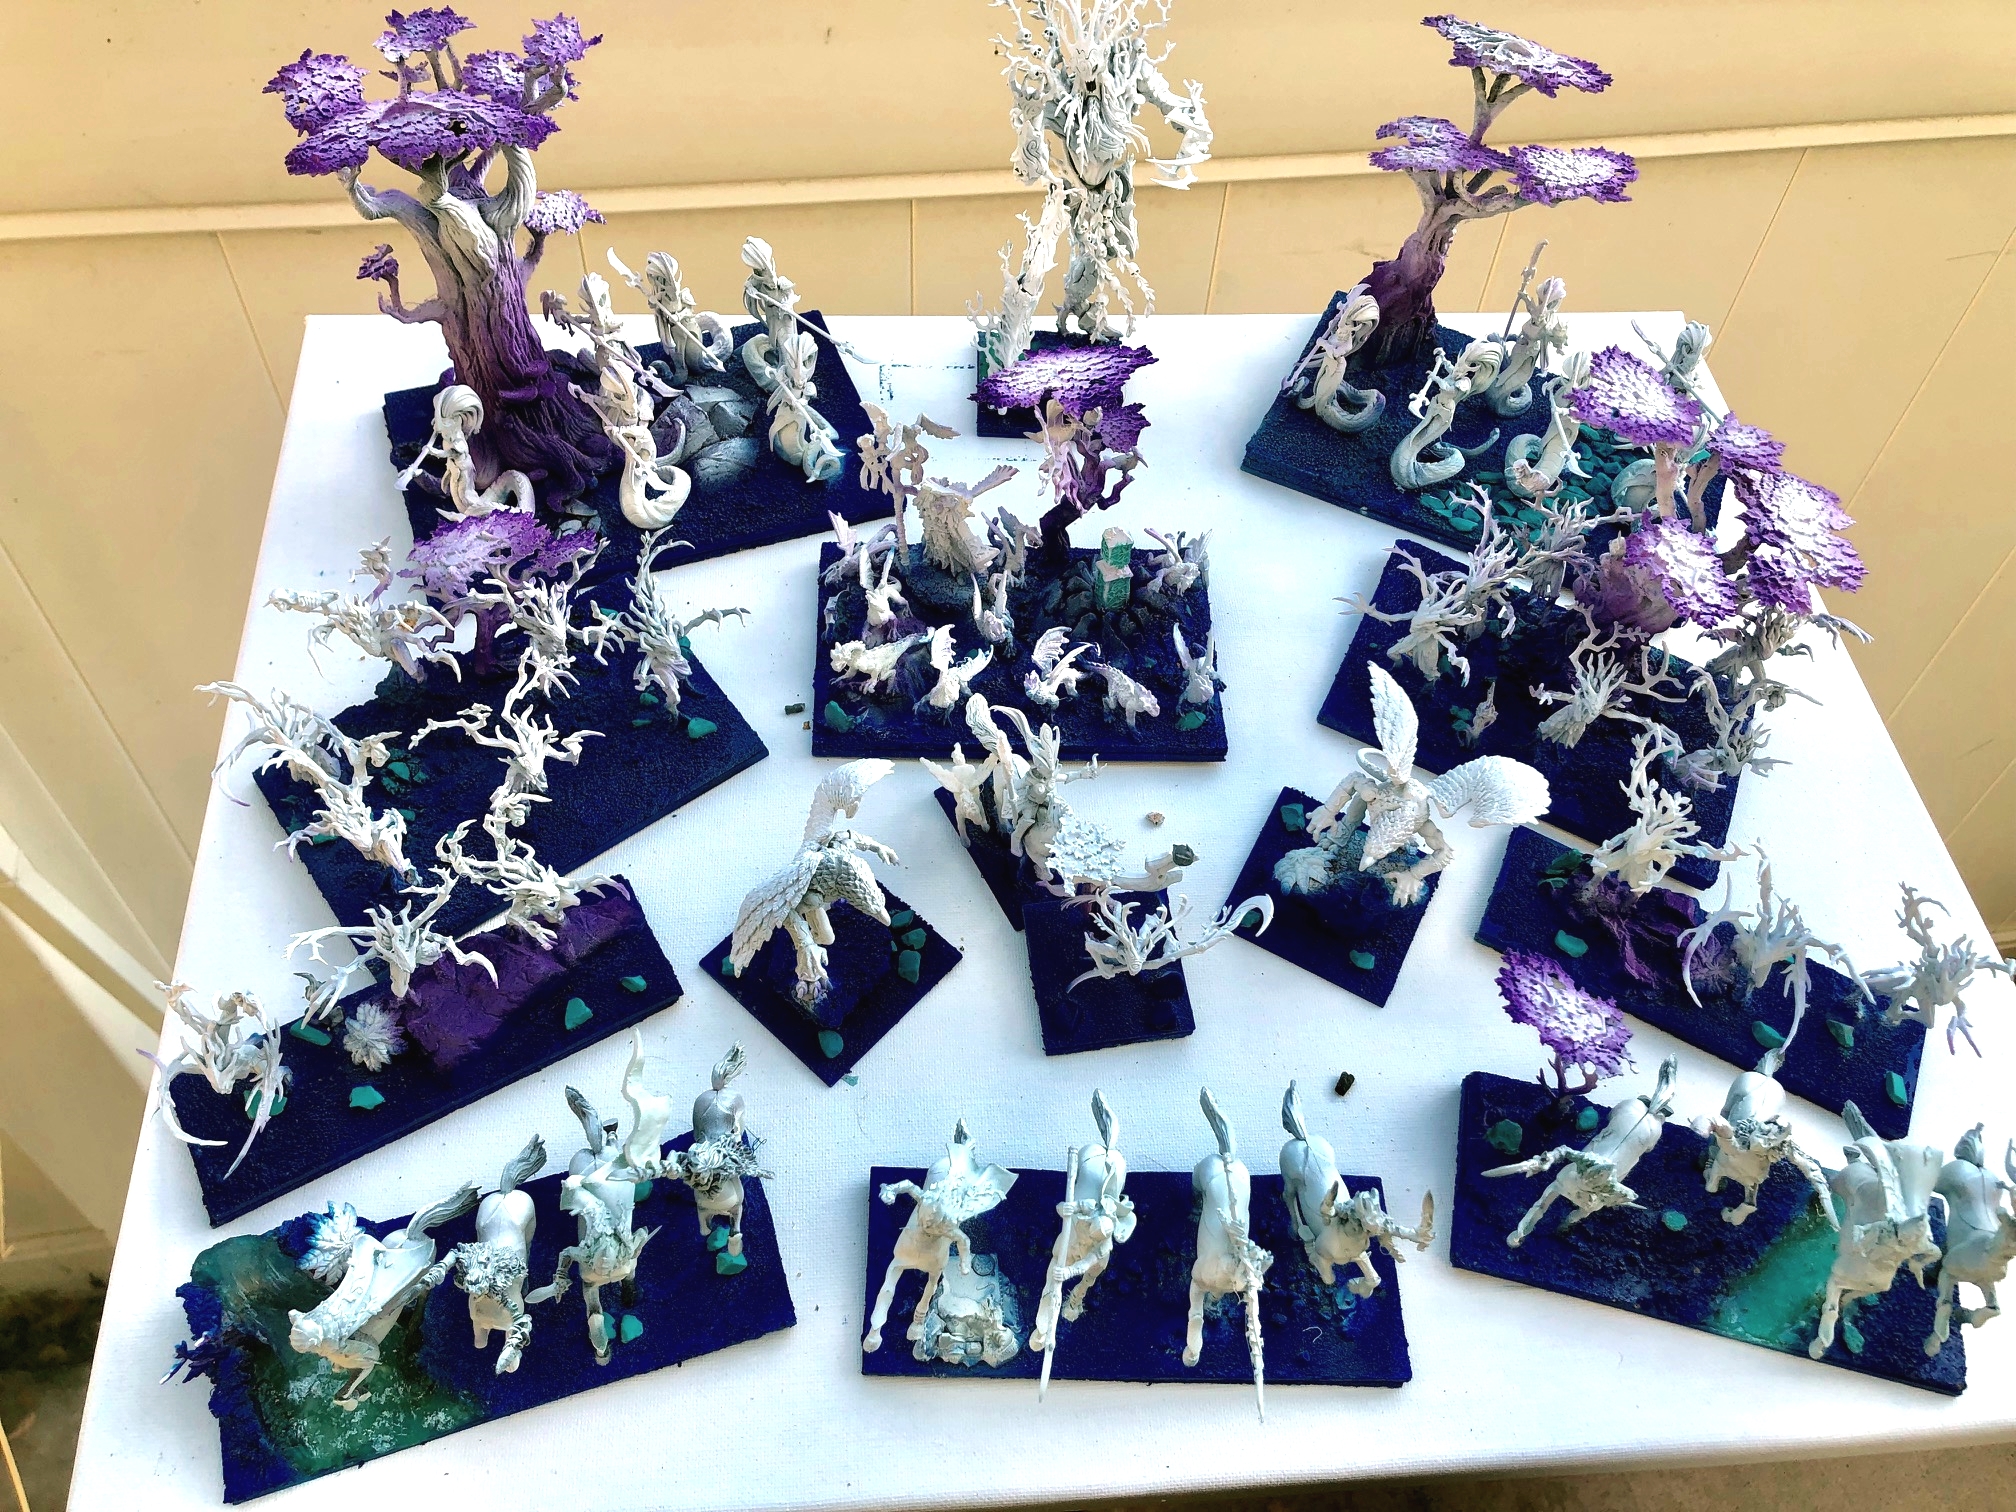
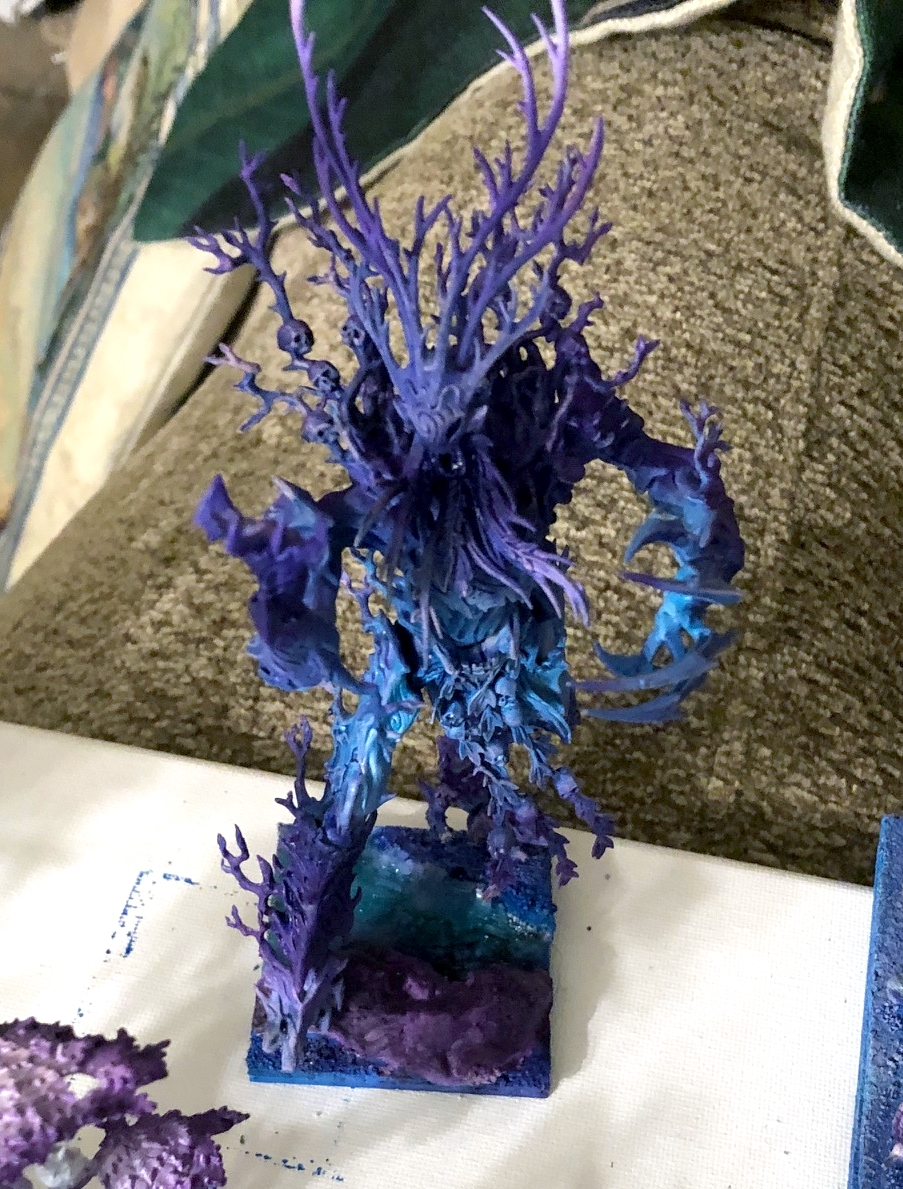
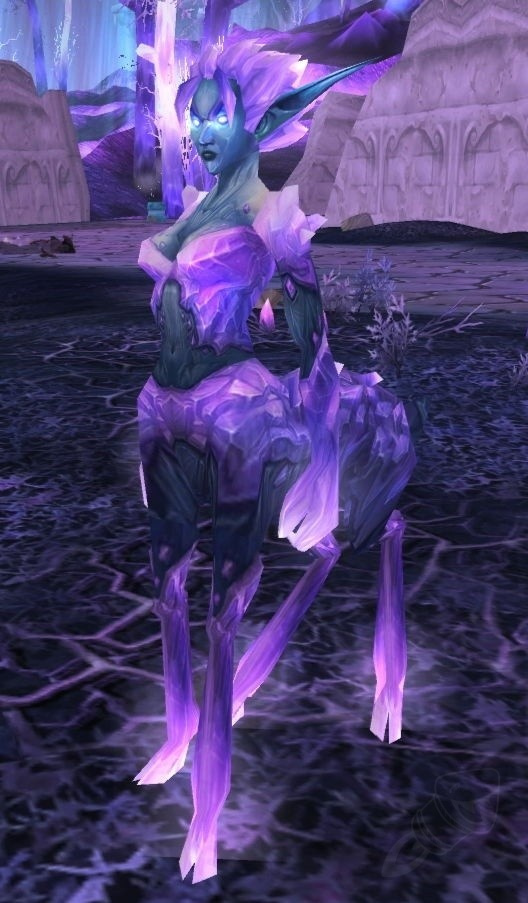
Here were the concept images. I limited the whole project to just a 3 colors. Purple Blue and Turquois (white/Black)
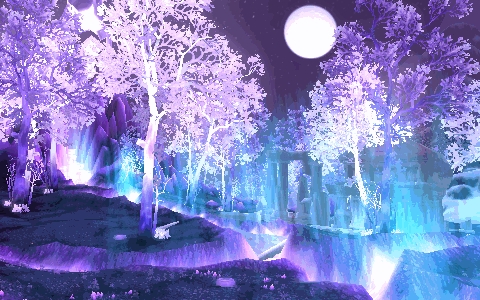
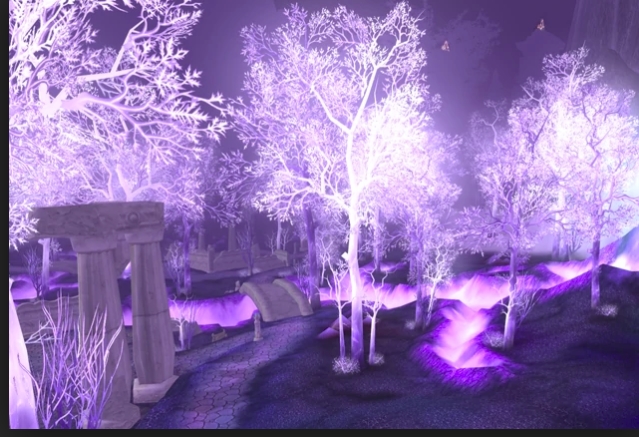
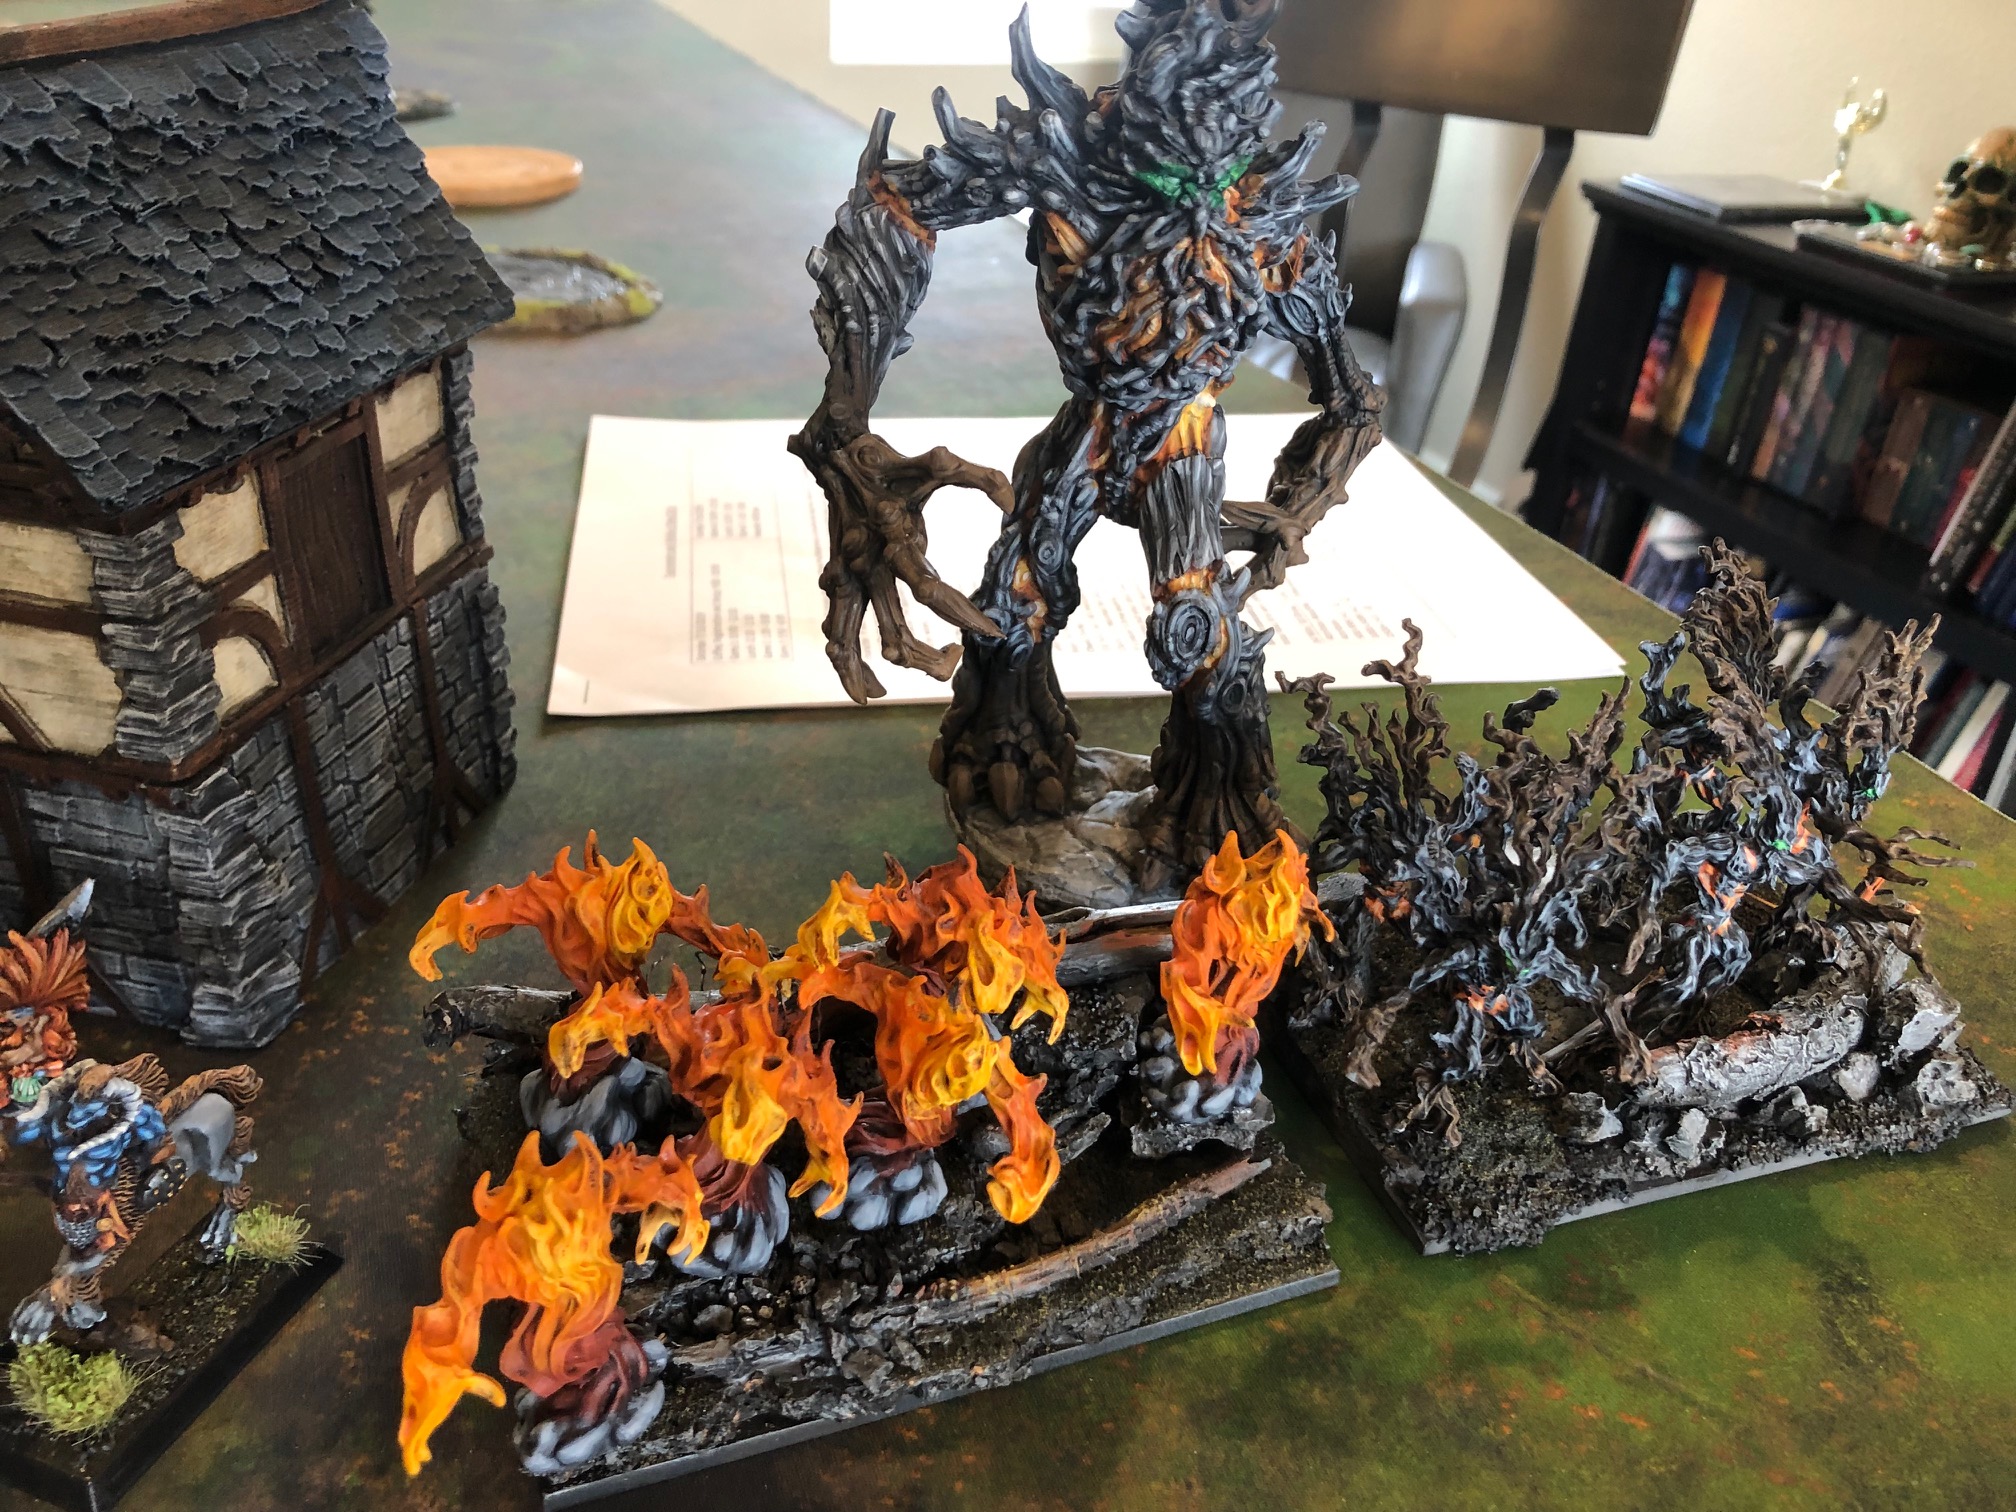
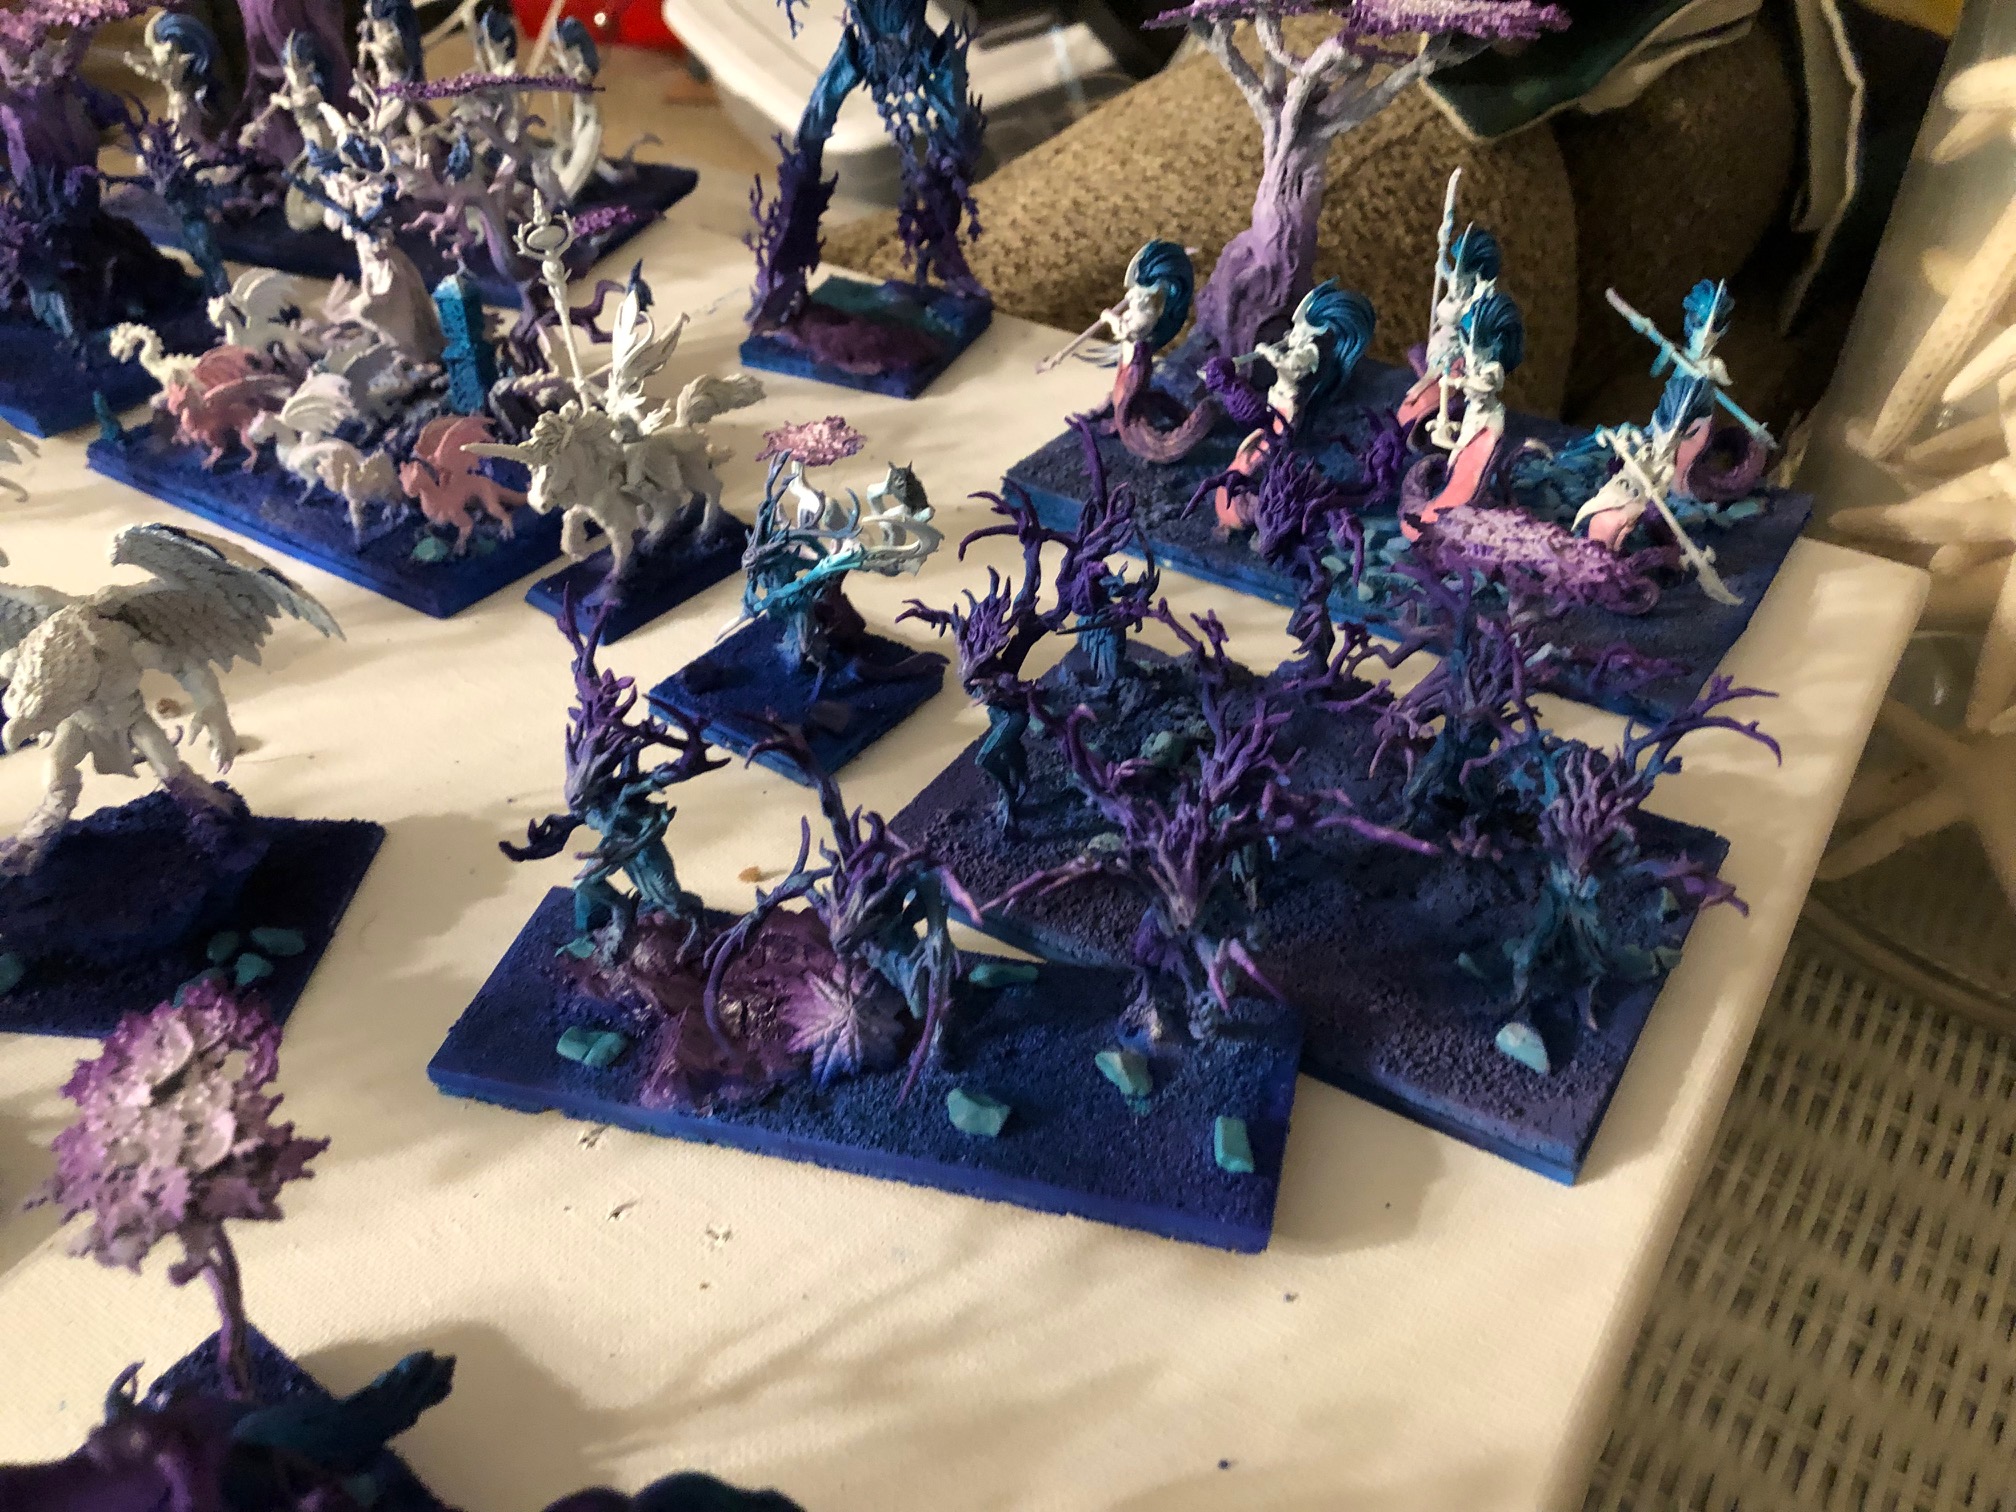
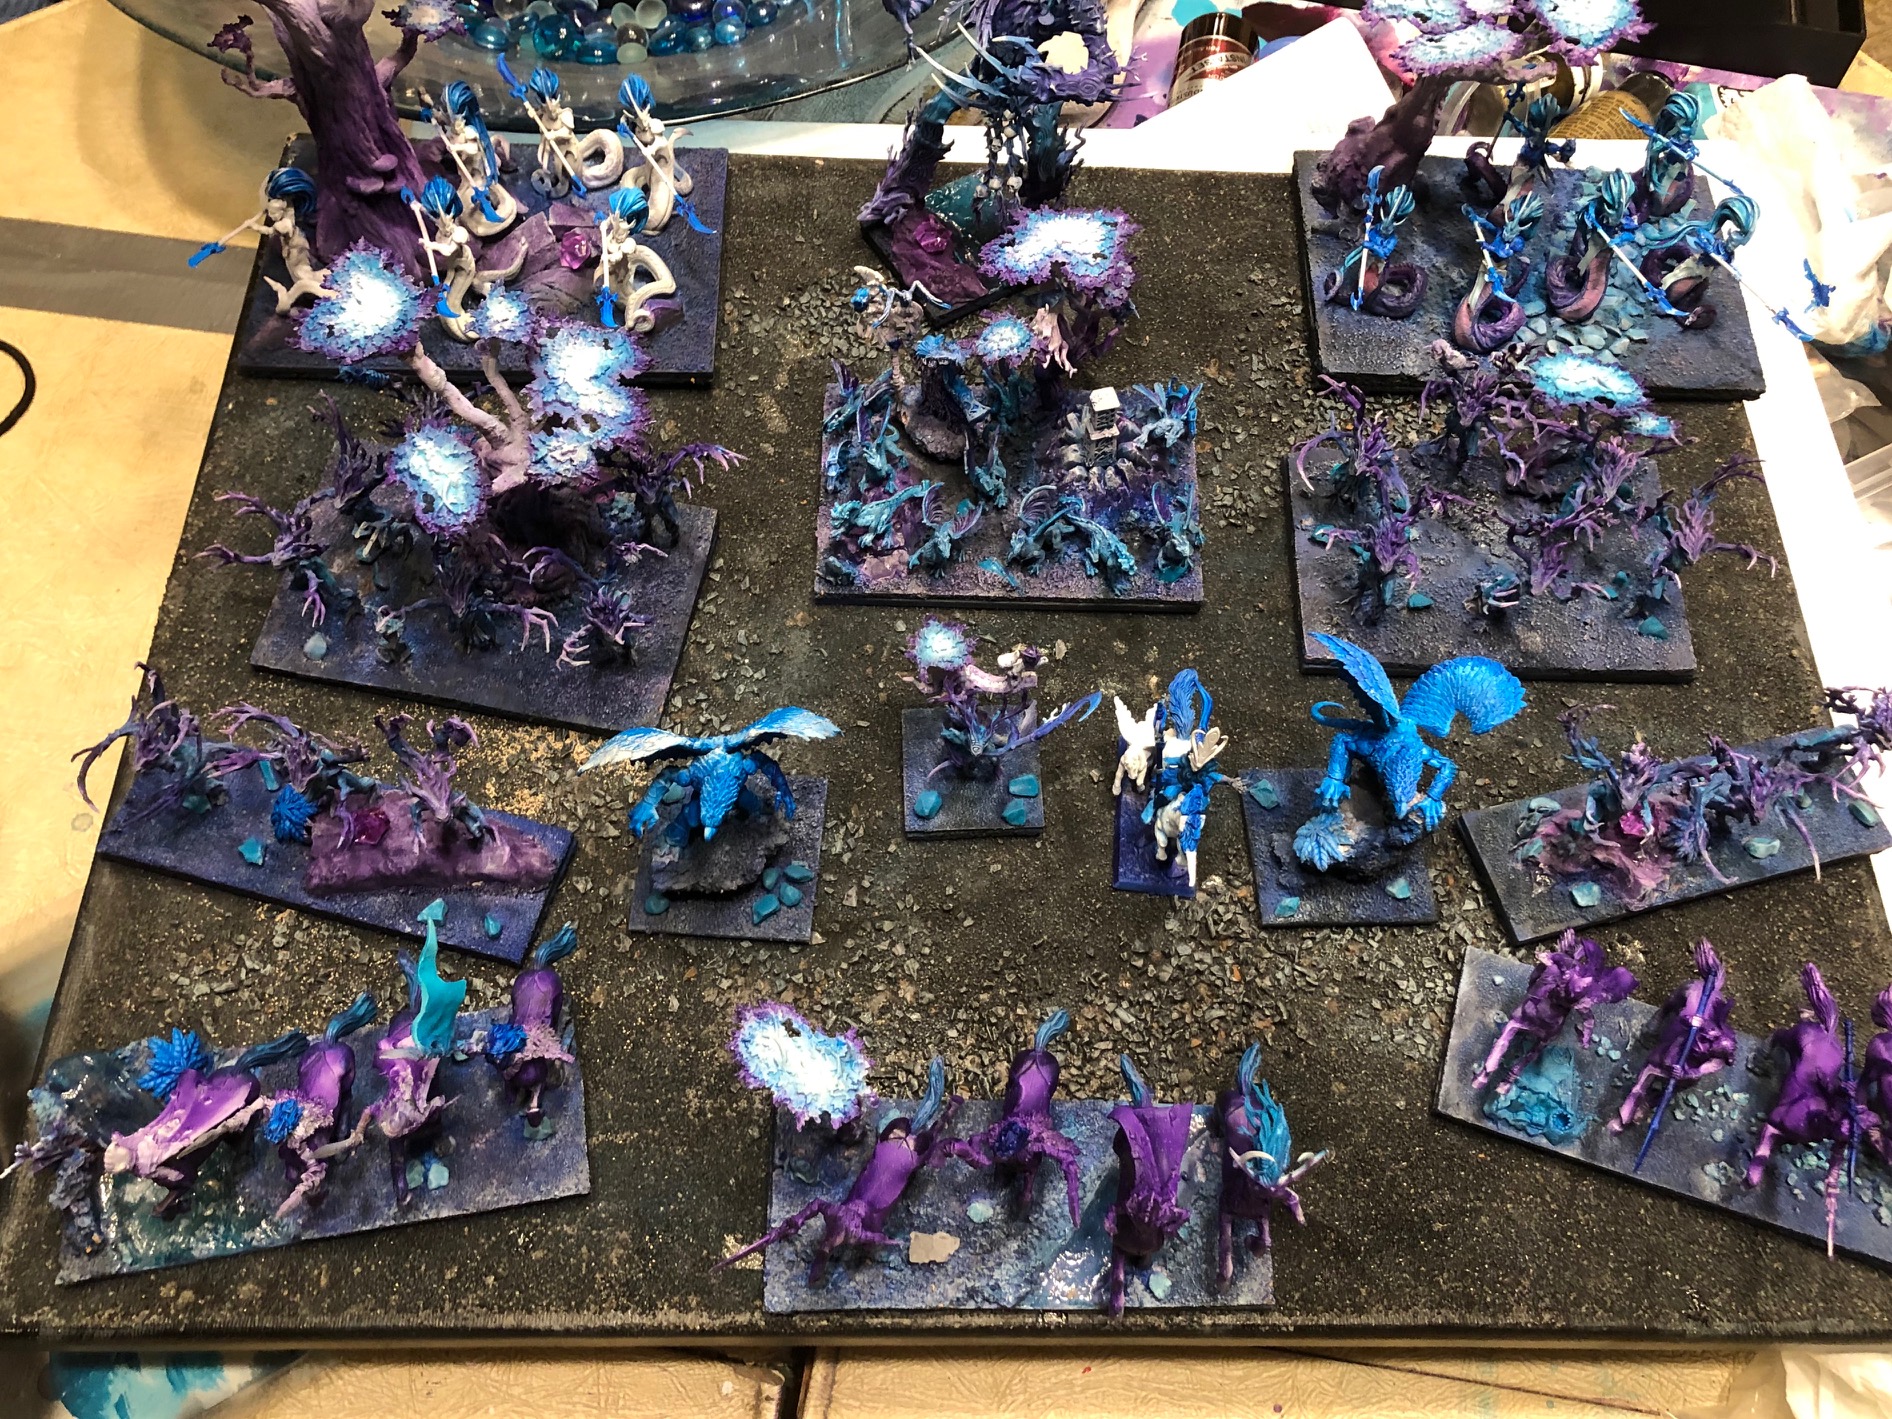
Here we go in to the progress. The whole thing is about 3 weeks old from the start to the last image.
10 Likes
When I got to those middle shots and BAM all the colors hit @_@
Some really tasty stuff, impressed at how close to the art inspiration you’ve gotten. Looks like there’s still some work to go on the minis themselves? Re: pale snakes, centaurs, etc.
1 Like
Well that’s just GORGEOUS!!
1 Like
Thanks guys.
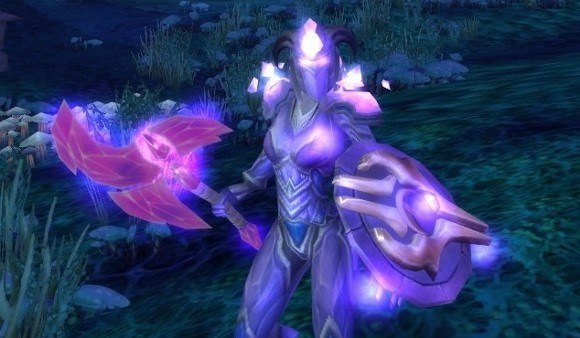
I’m doing details on the army now. I have a long way to go for the time in - For example, Getting to something like this for the Centaurs is a task.
I’ve been considering weapon colors. Danced around a bit. For example.
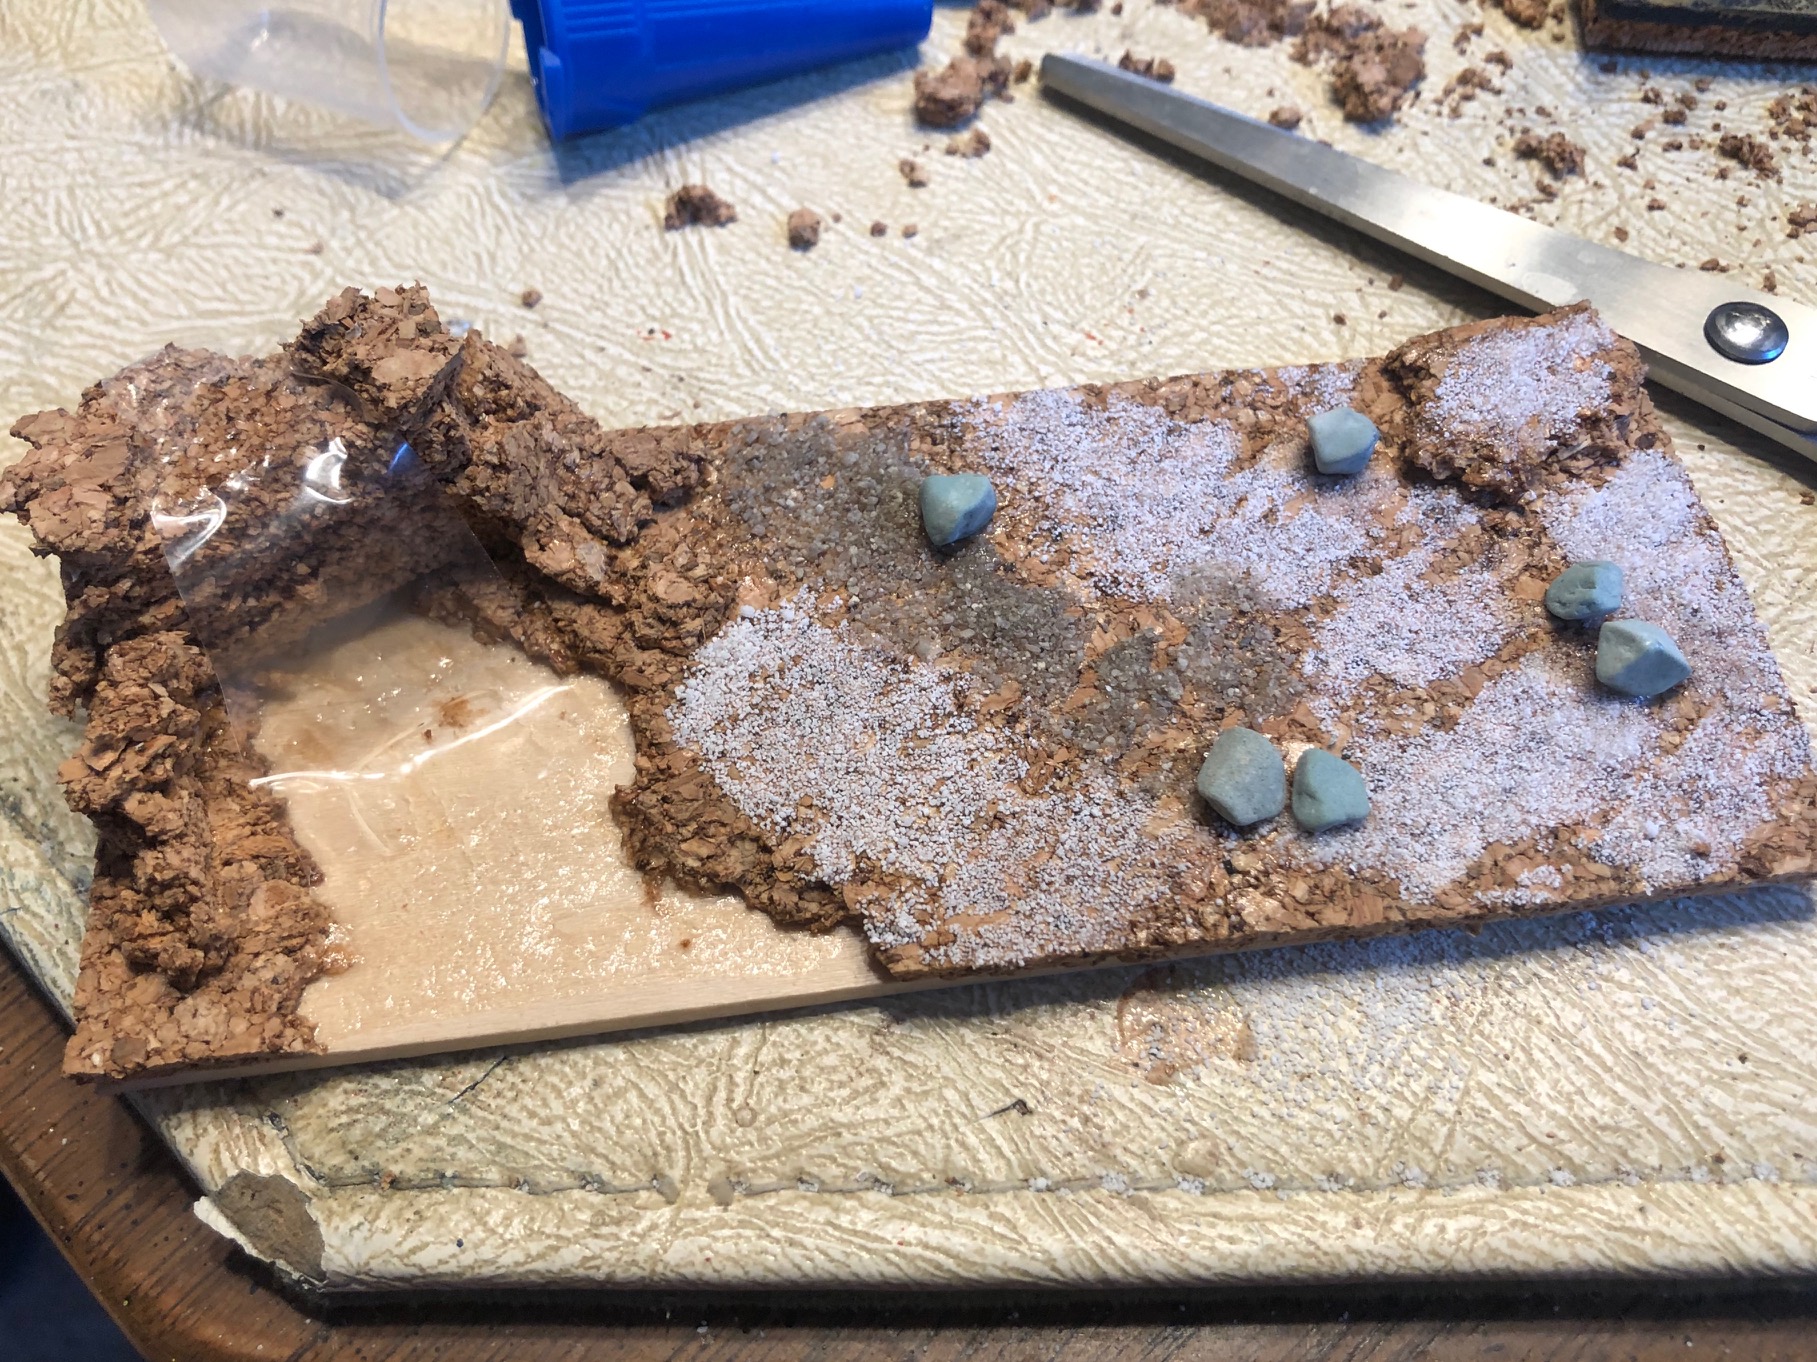
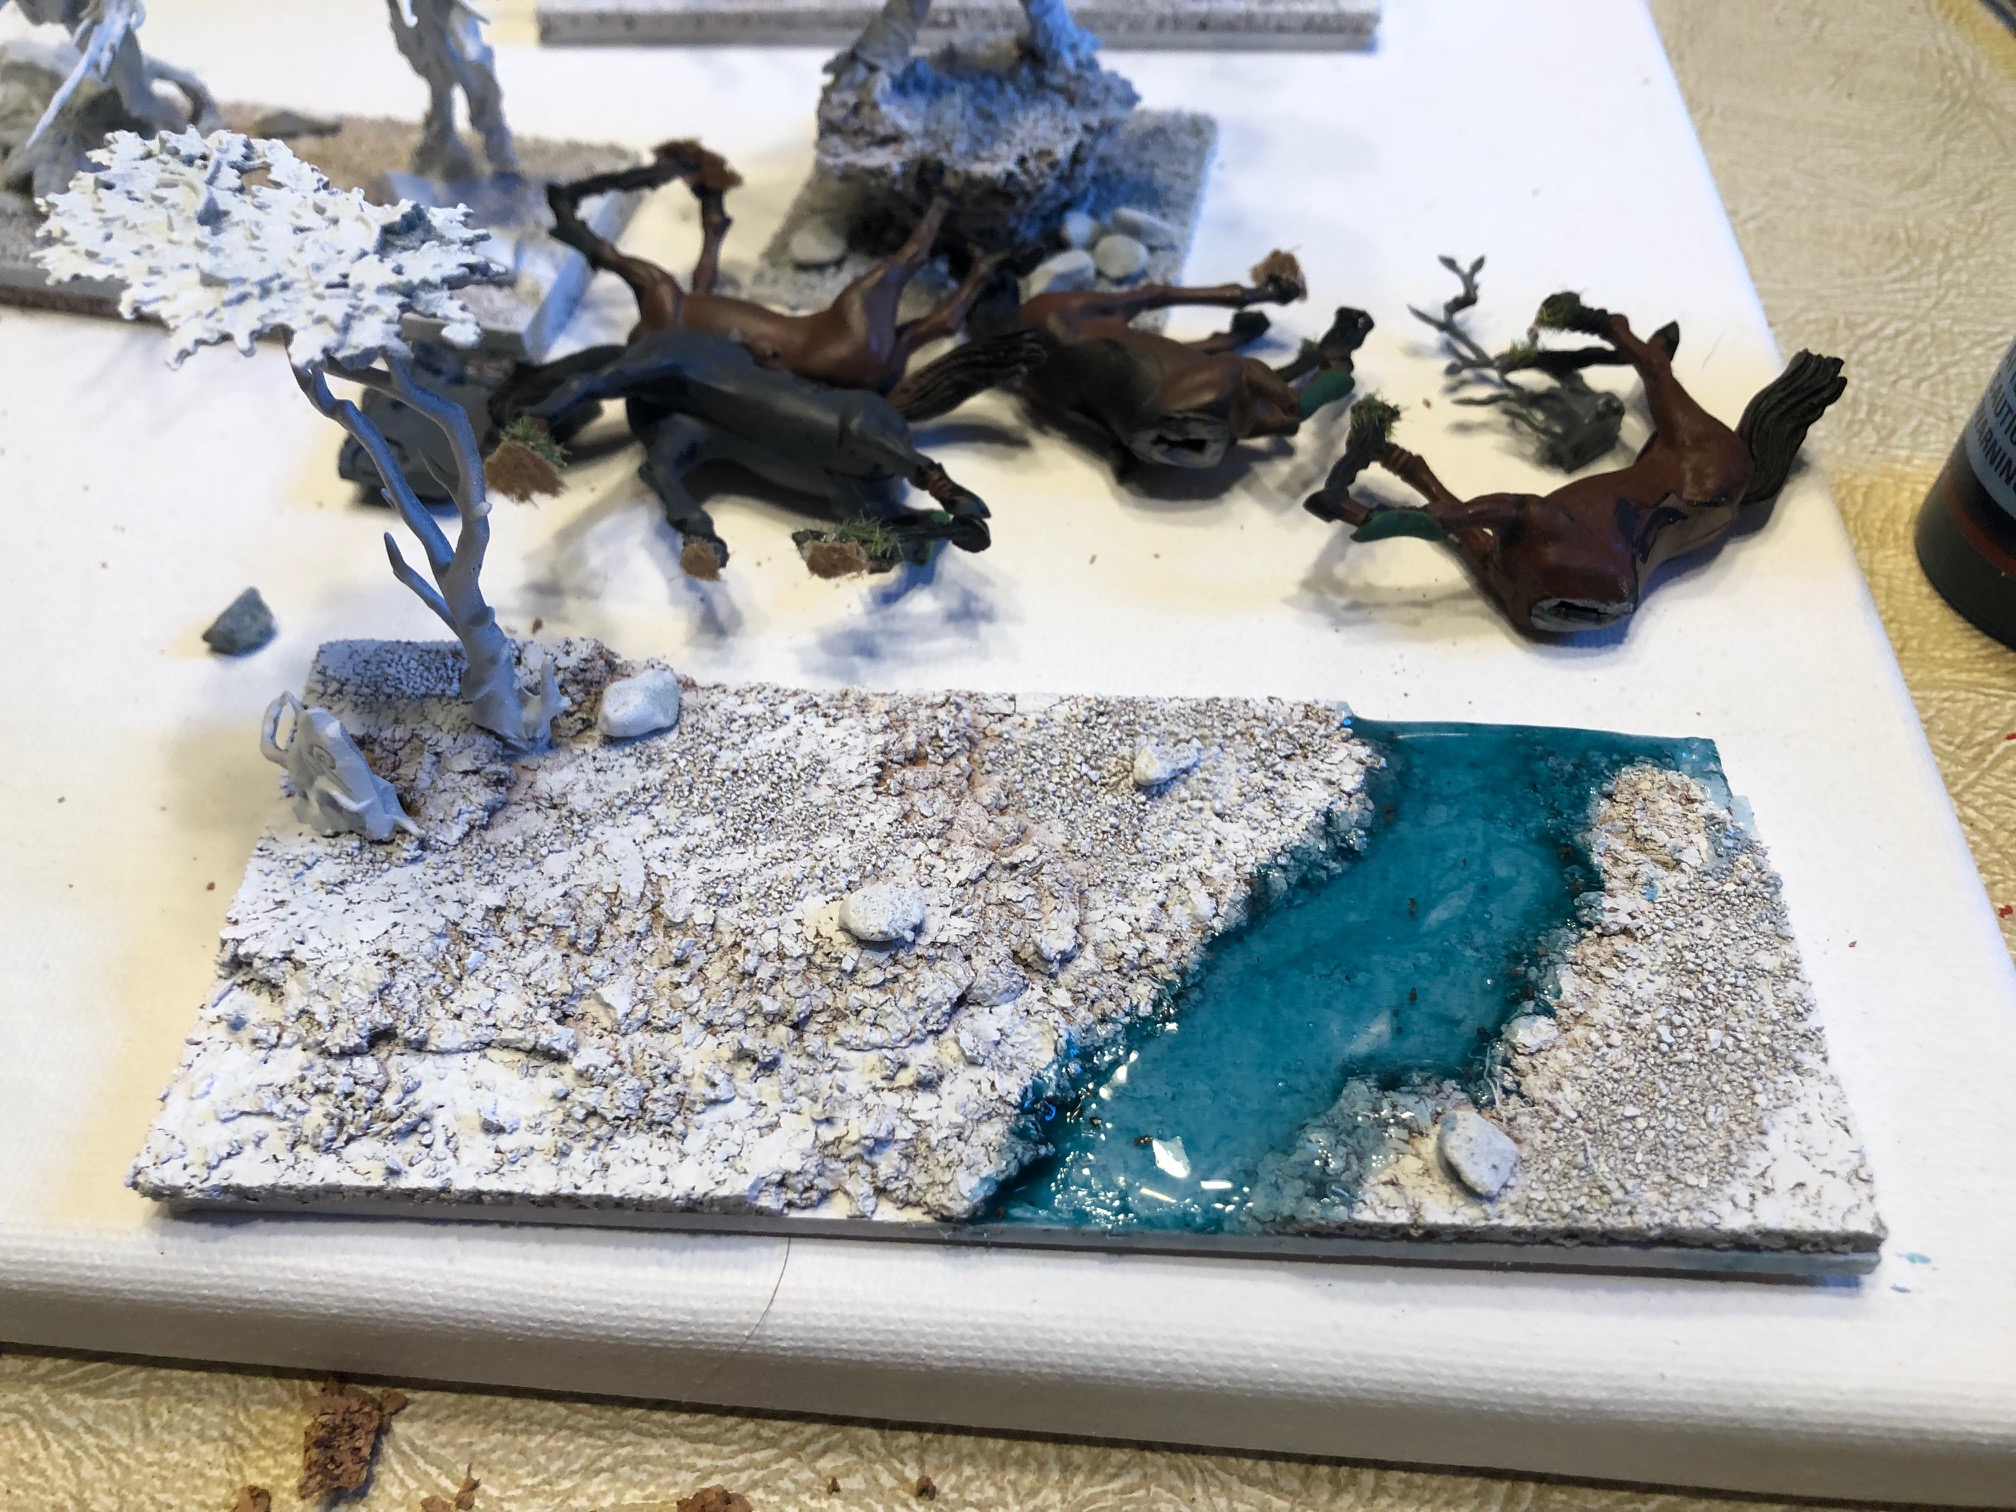
I’m doing a waterfall on one of my bases as well. Got any protips for a first timer?
Sure.
I did a small one.
I used a cheap small hotglue gun. Mid temp is fine. Get some cork board. Dont need a lot. Shape it how you wish. The bigger the movement tray, go larger.
Get a plastic clear bag and cut it and shape it where you want. Others use clear plastic cup. It’s up to you. glue that in place where you want the water to be. Now you want use your clear hot glue sticks. Also at walmart! no big deal right. 1-2 dollars for 10 I think. I didnt even use half of one for this effect.
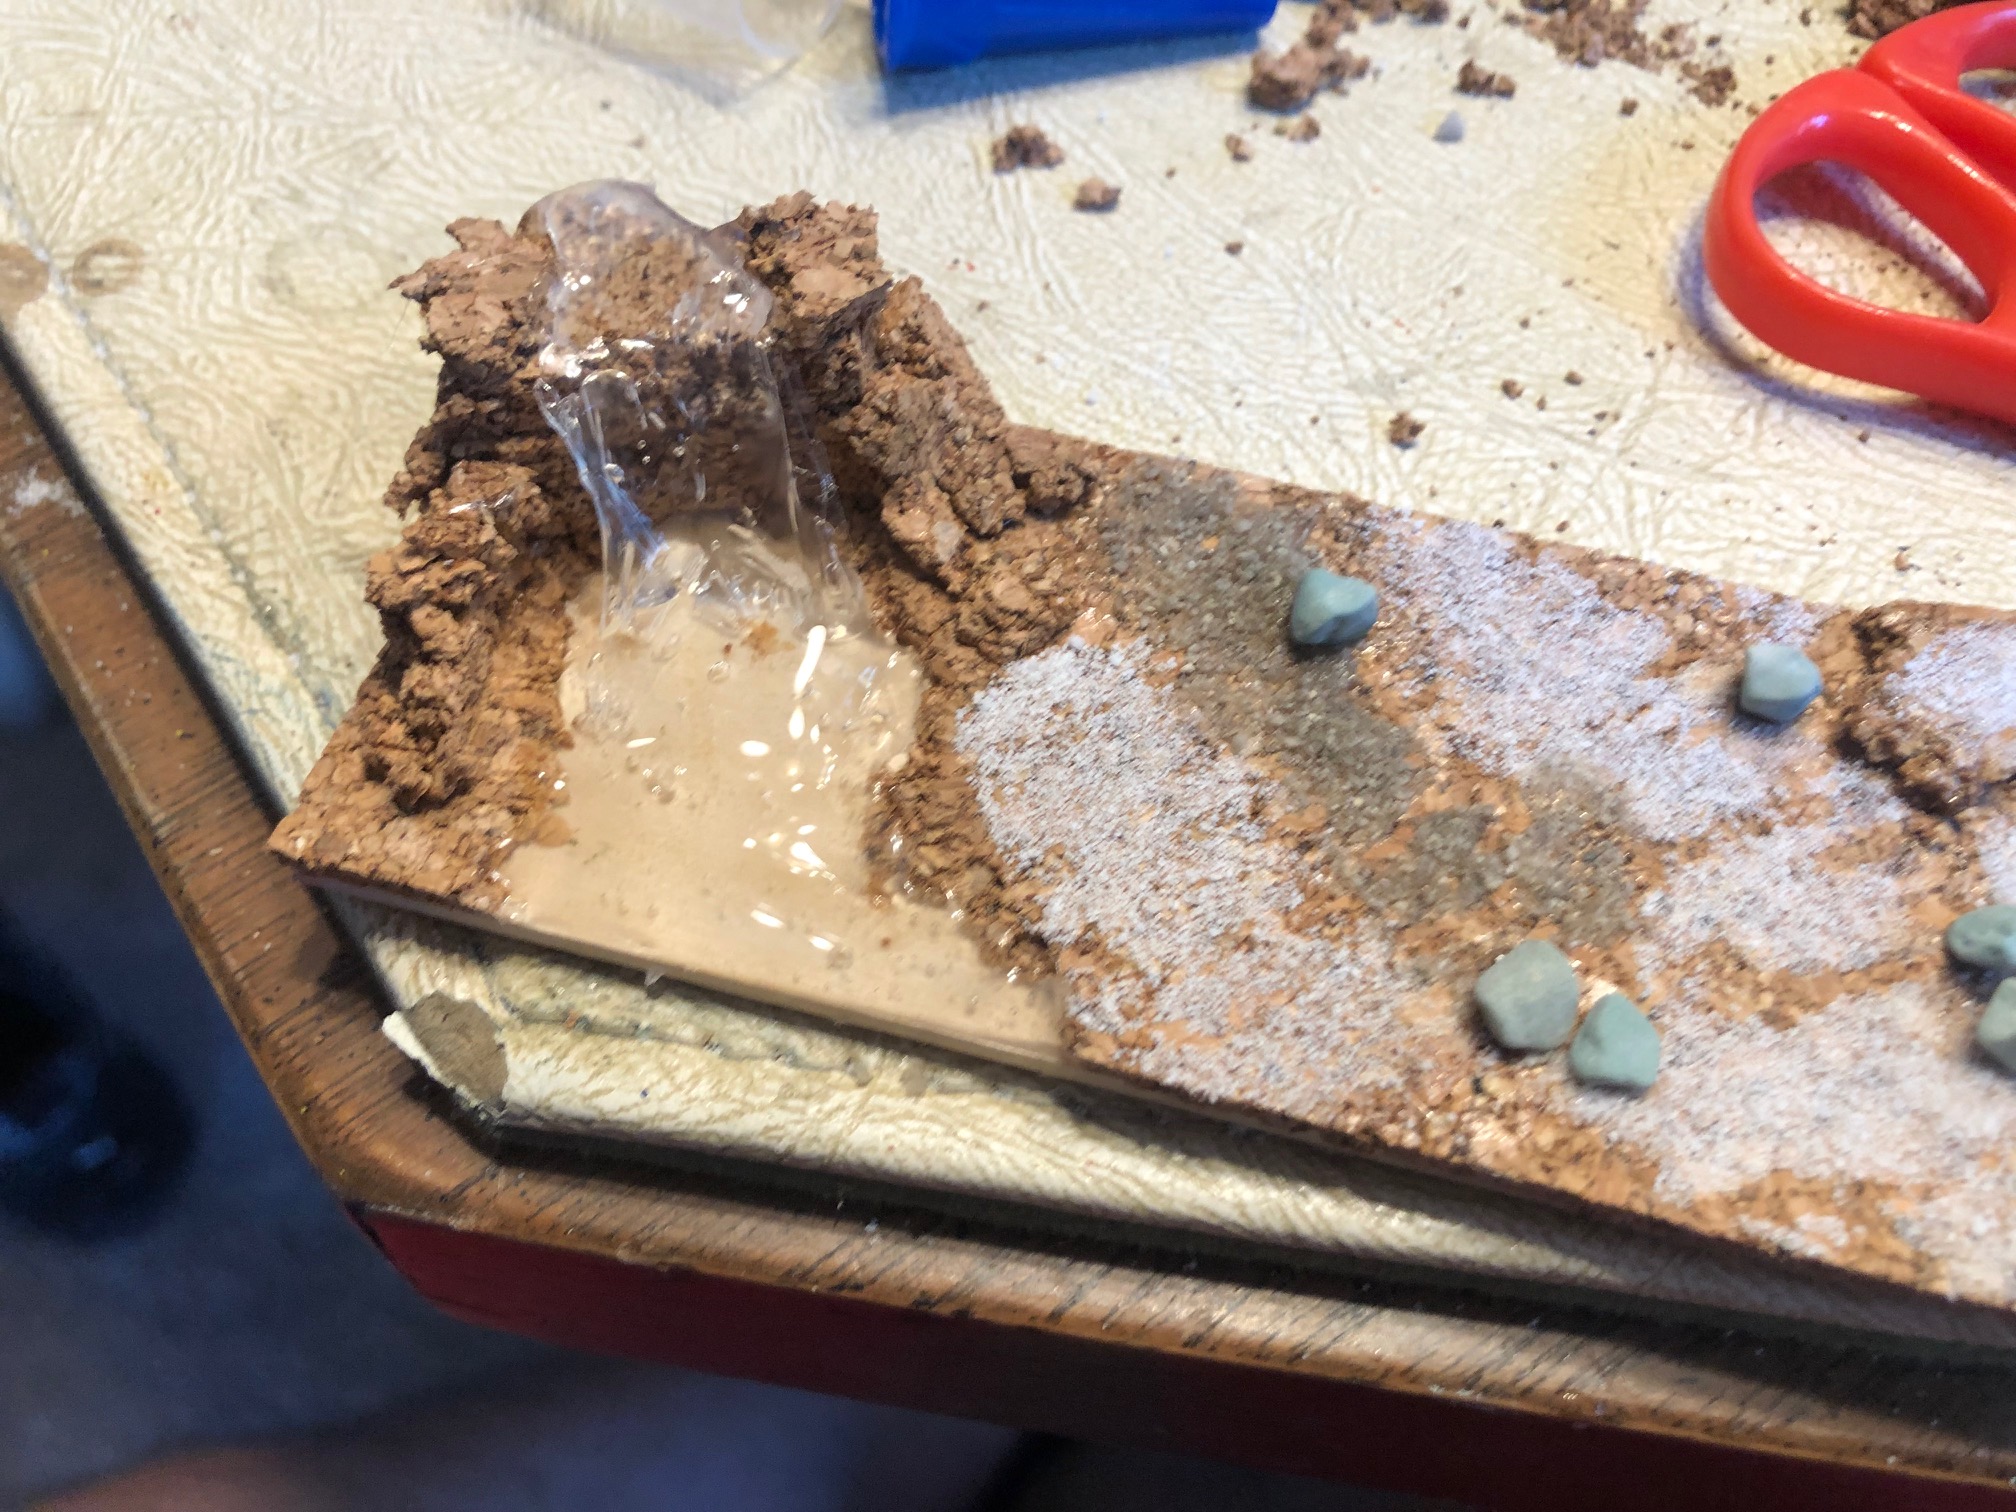
I did buy some water effect from Hobby lobby. It comes in a small jar. Looks like jelly so you can shape the water. I placed it where the falling water makes contact. I go back after 15 of setting, and shape it. Then I use white paint to give it a foamy look if thats what you want.
So your read to hotglue. So practice first and get a toothpick so you can spread it around. It will be easier than it looks. Try not to over do it because really thin plastic doesnt like over heat. I would say it goes on easy, but you’ll expeperiment on wax paper or something before you try to actually do it. It tried like you see it. Use a small hot glue gun.
Later I went back over the water areas I wanted with the water effect, same one, with a thin layer. Keep in mind, you will want to paint the under area of the water or use a few drops of Color ink, wash in the water effect you want to use. I would say this is a 20-30 min job when all the stuff is right in front of you. I think I did it in 15 min or less - not to say rush, but its not nearly as hard as it looks.
2 Likes
Thanks, man. I appreciate your insight. I have the Woodland Scenics Water Effect to make the fall, but I will compare the hot glue method too on my practice sheets. My fall isn’t big, maybe 4 inches max.
1 Like
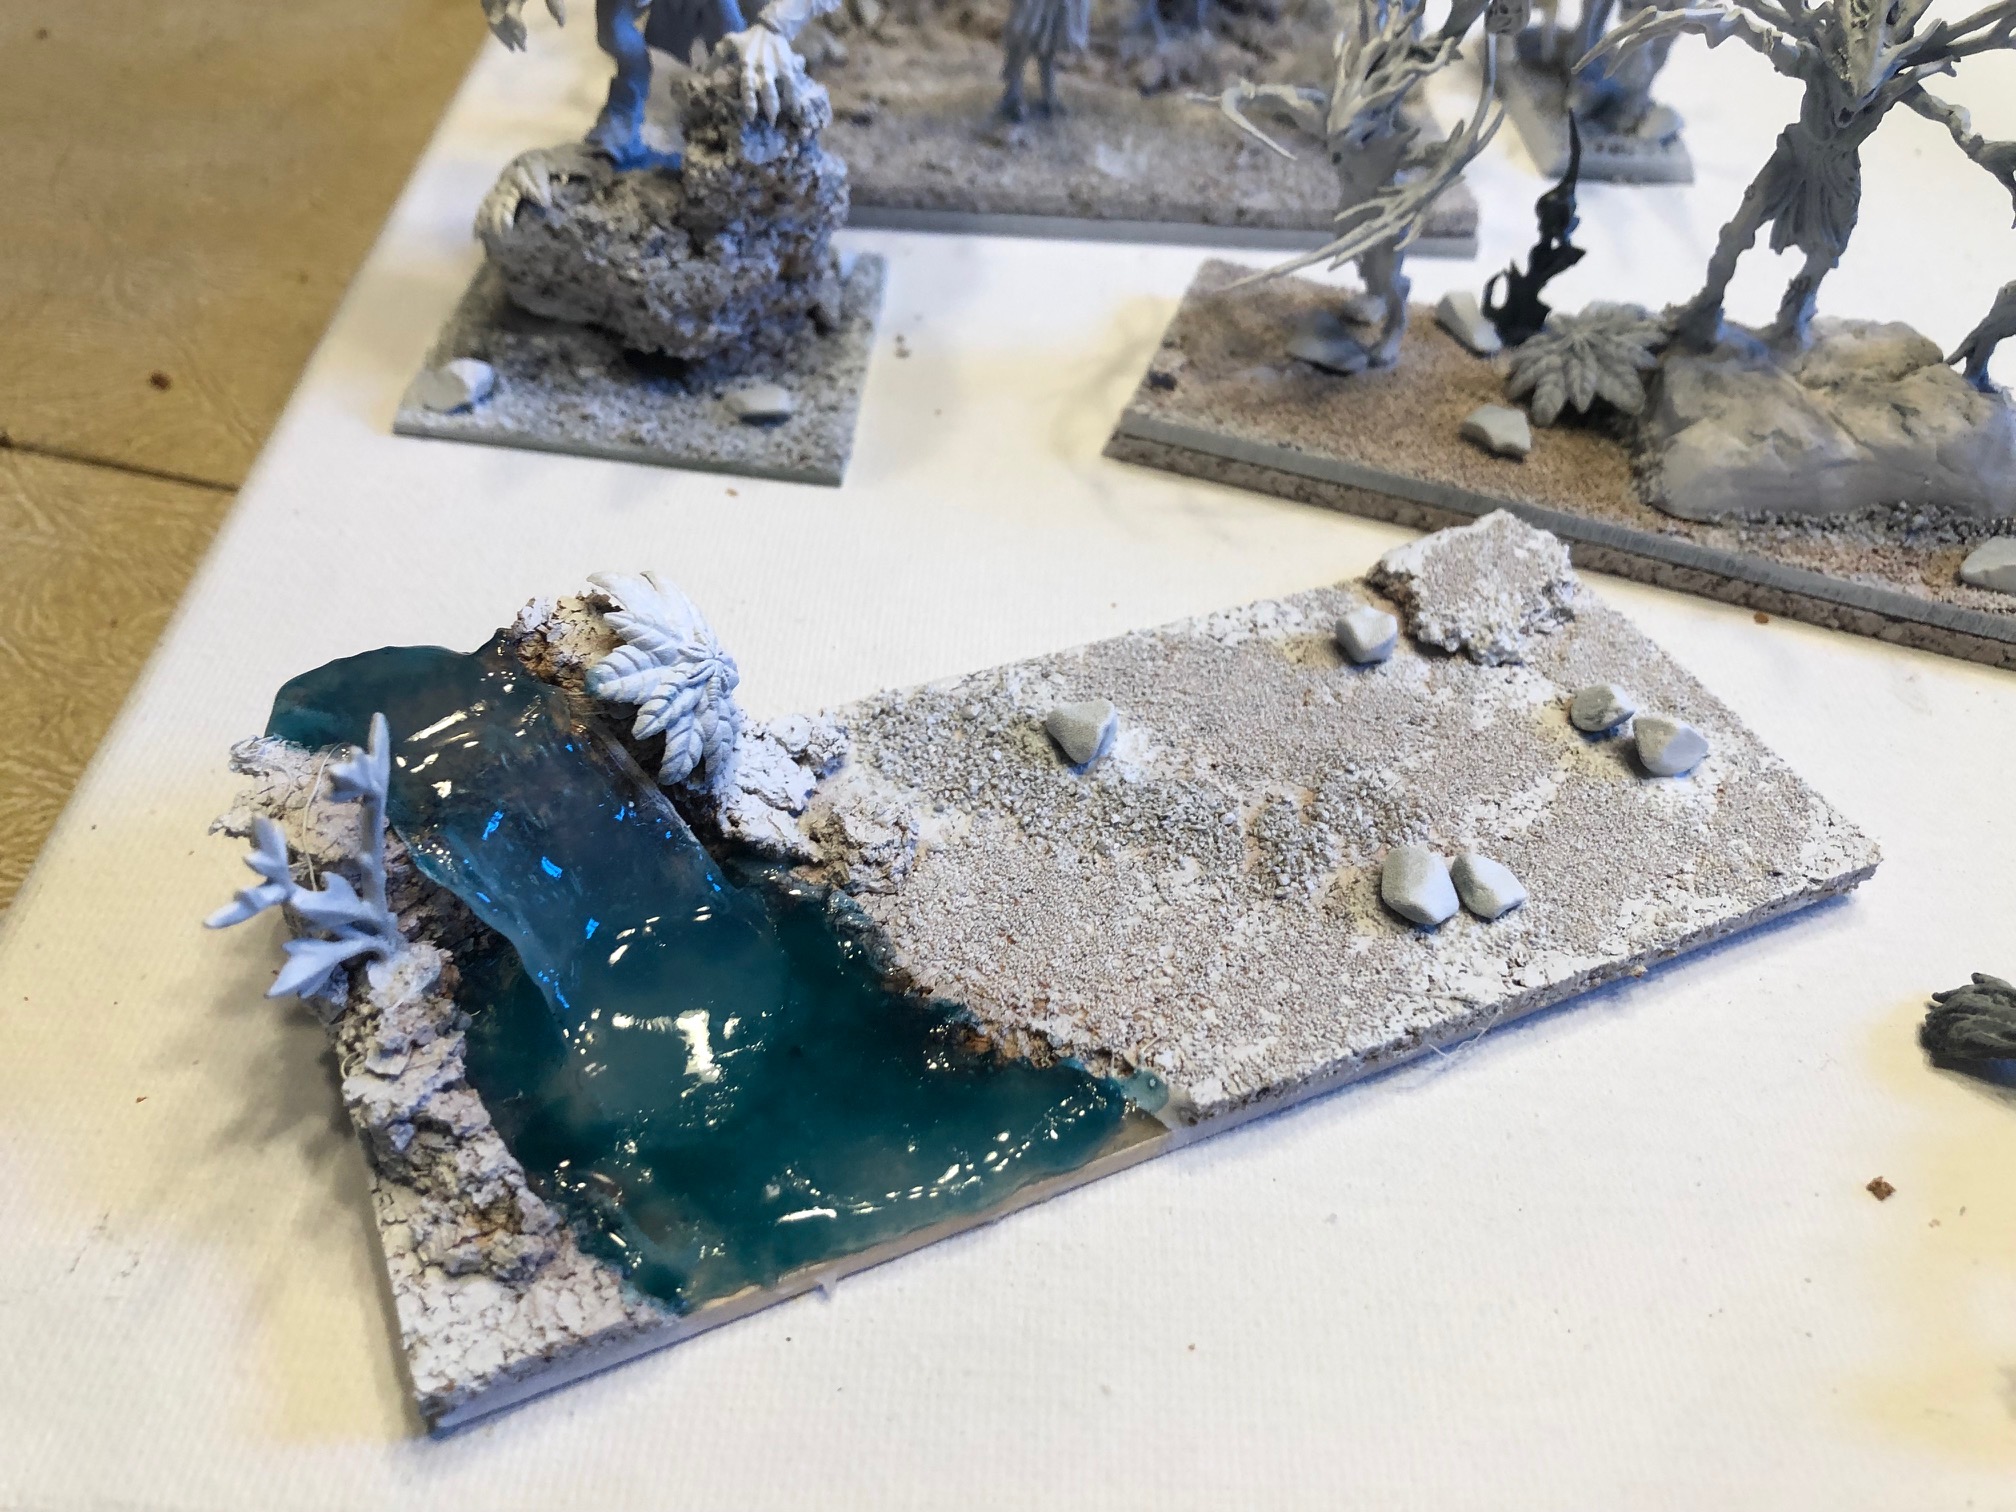
I really, really like your use of water effects. Will keep an eye on this one.
1 Like