Hi, I’ll hope to make a series of Breps here. They will be worked on whenever I got some time, so I might not finish one in one go ![]()
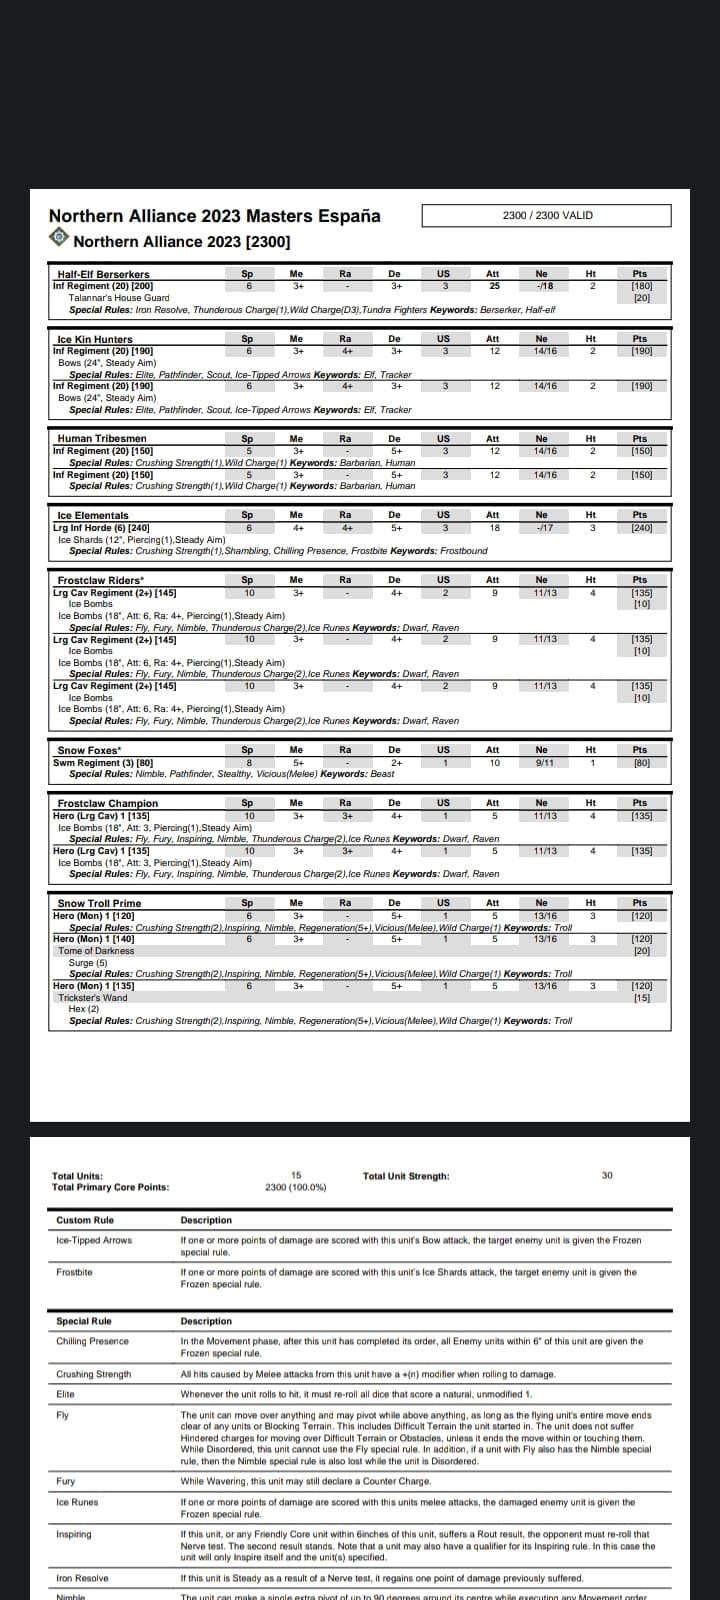
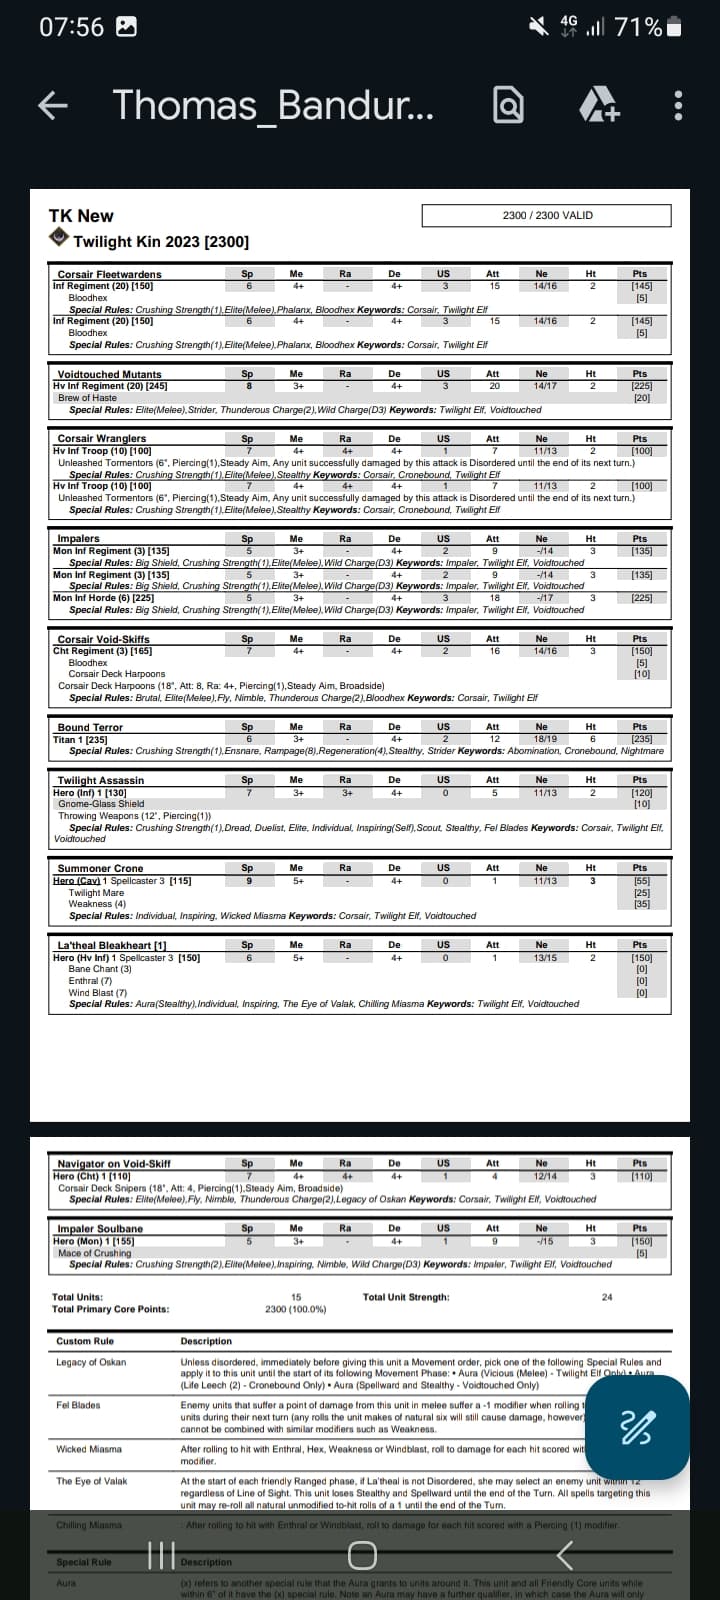
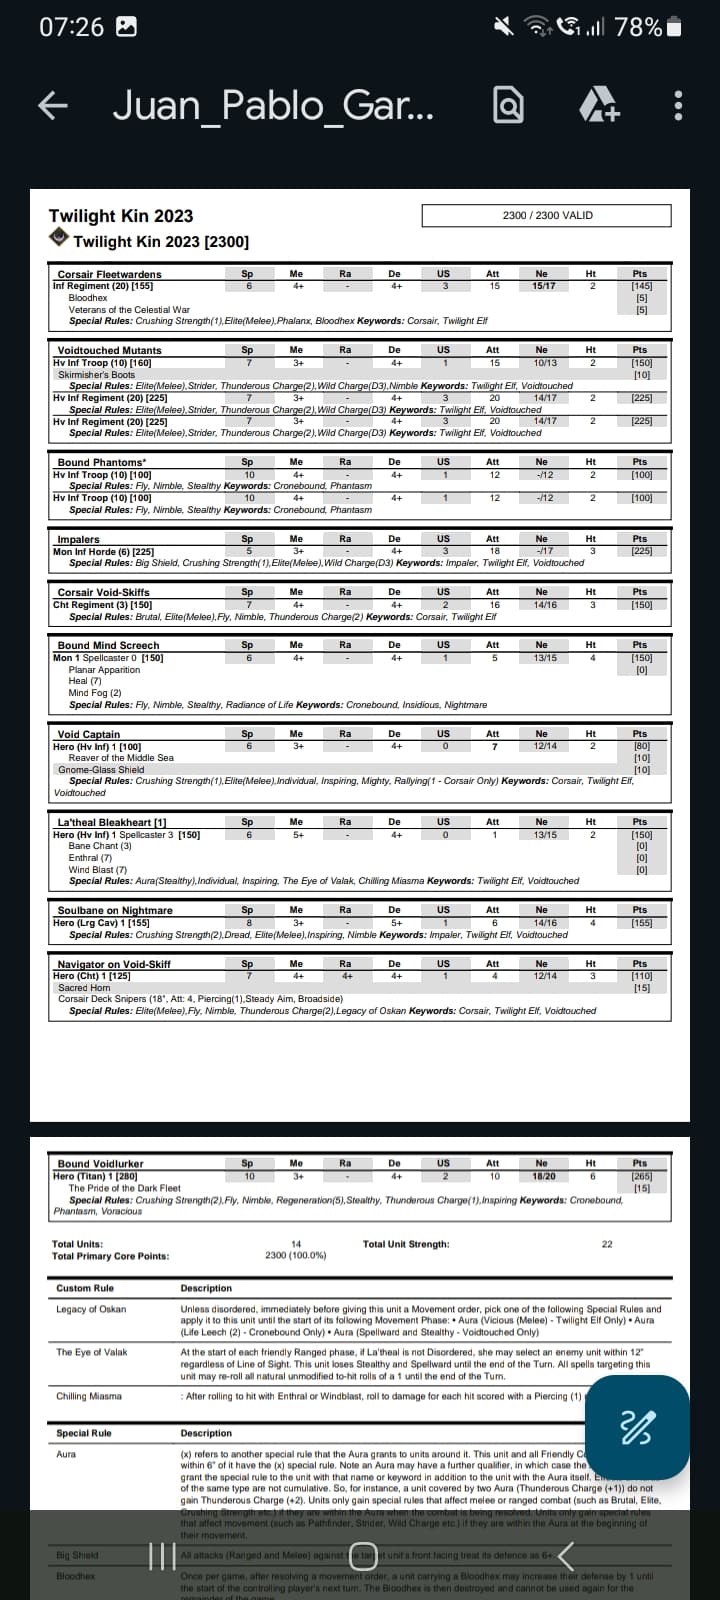
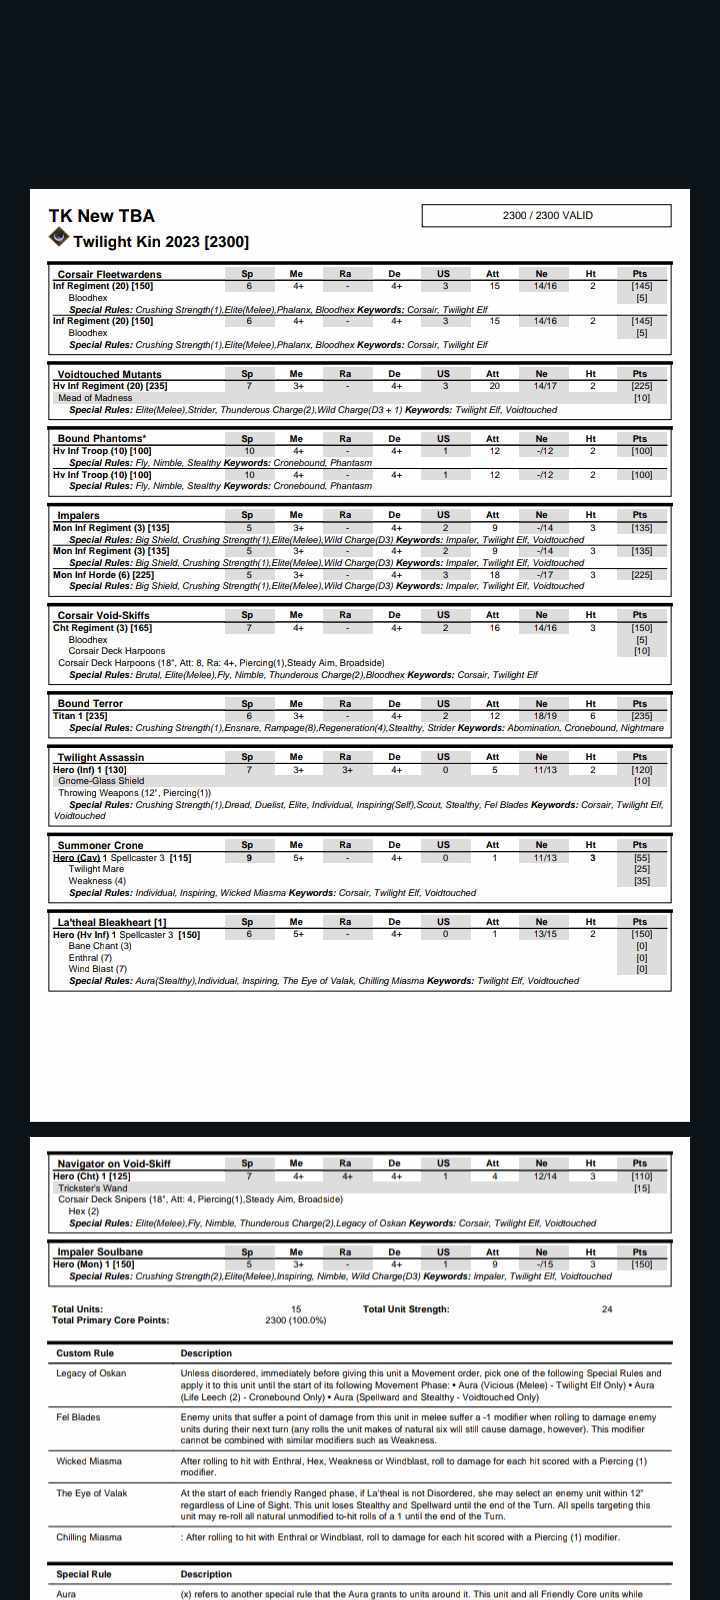
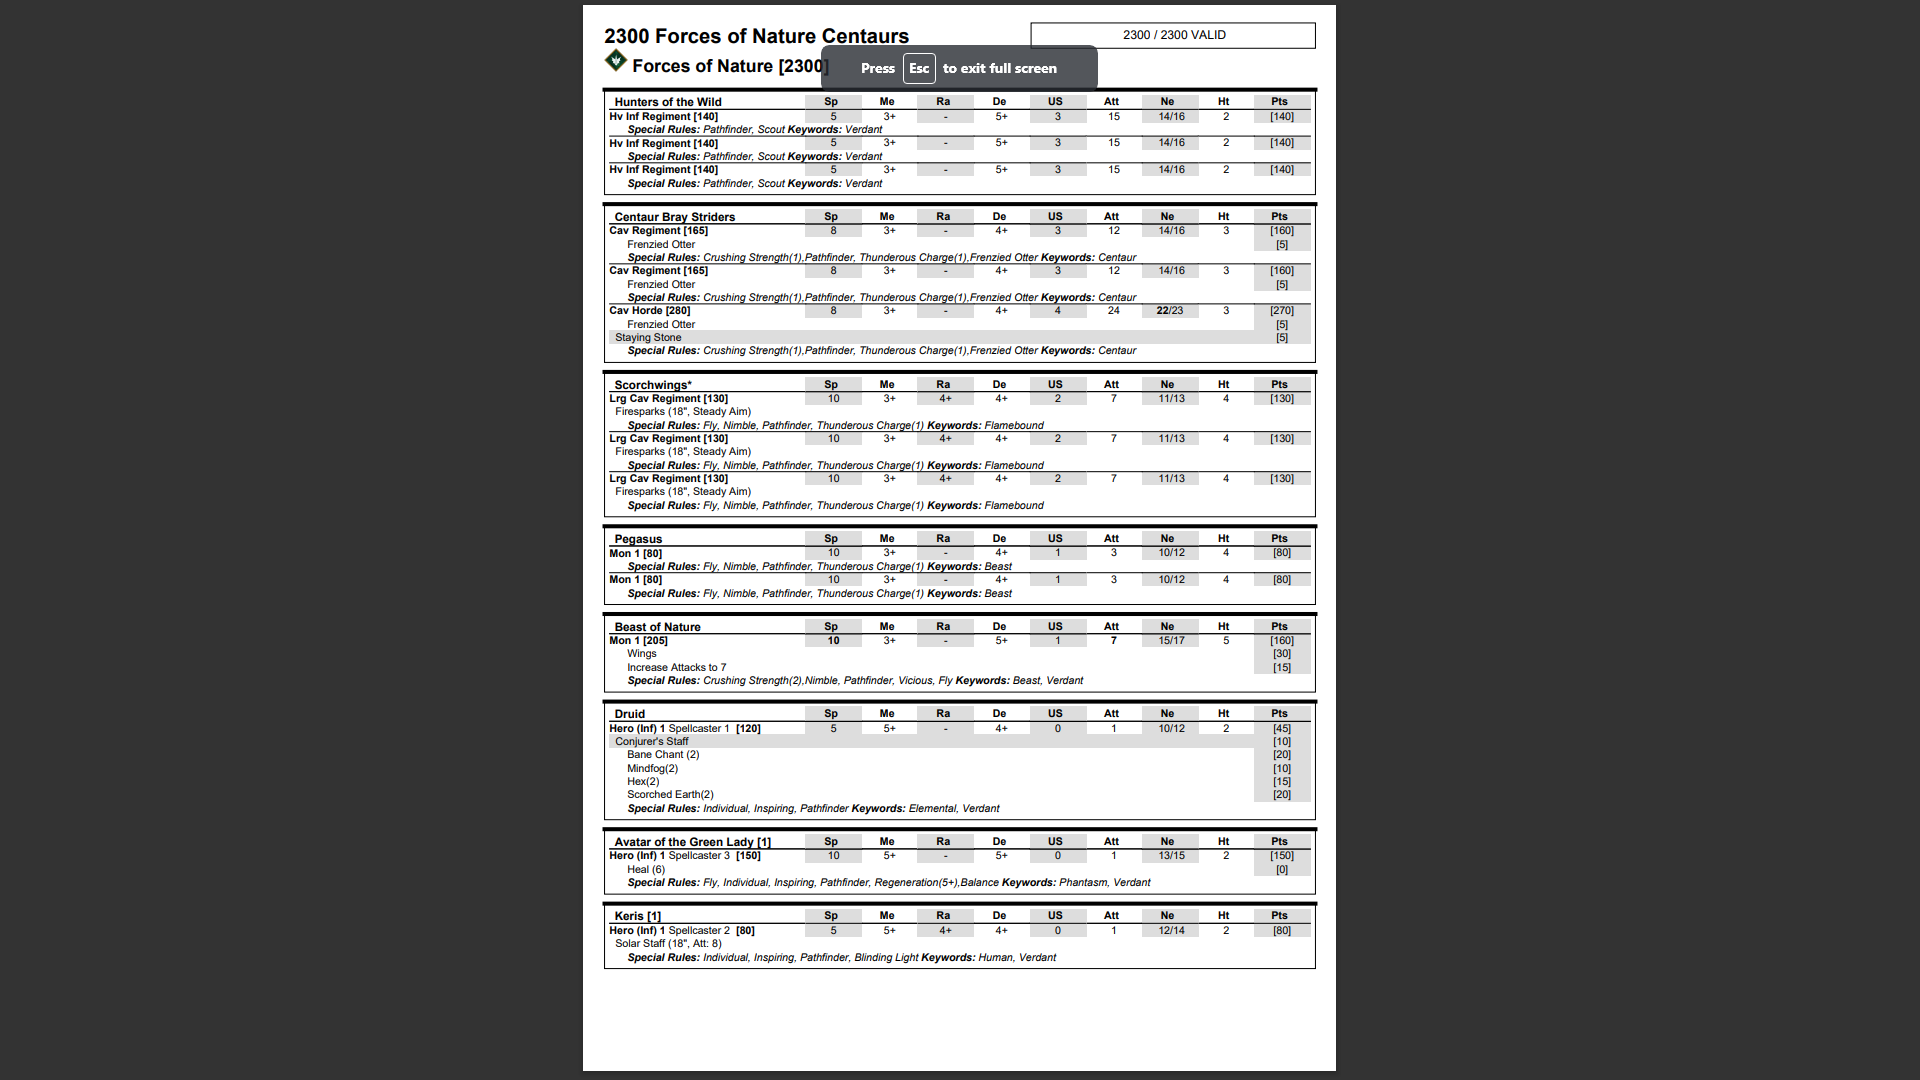
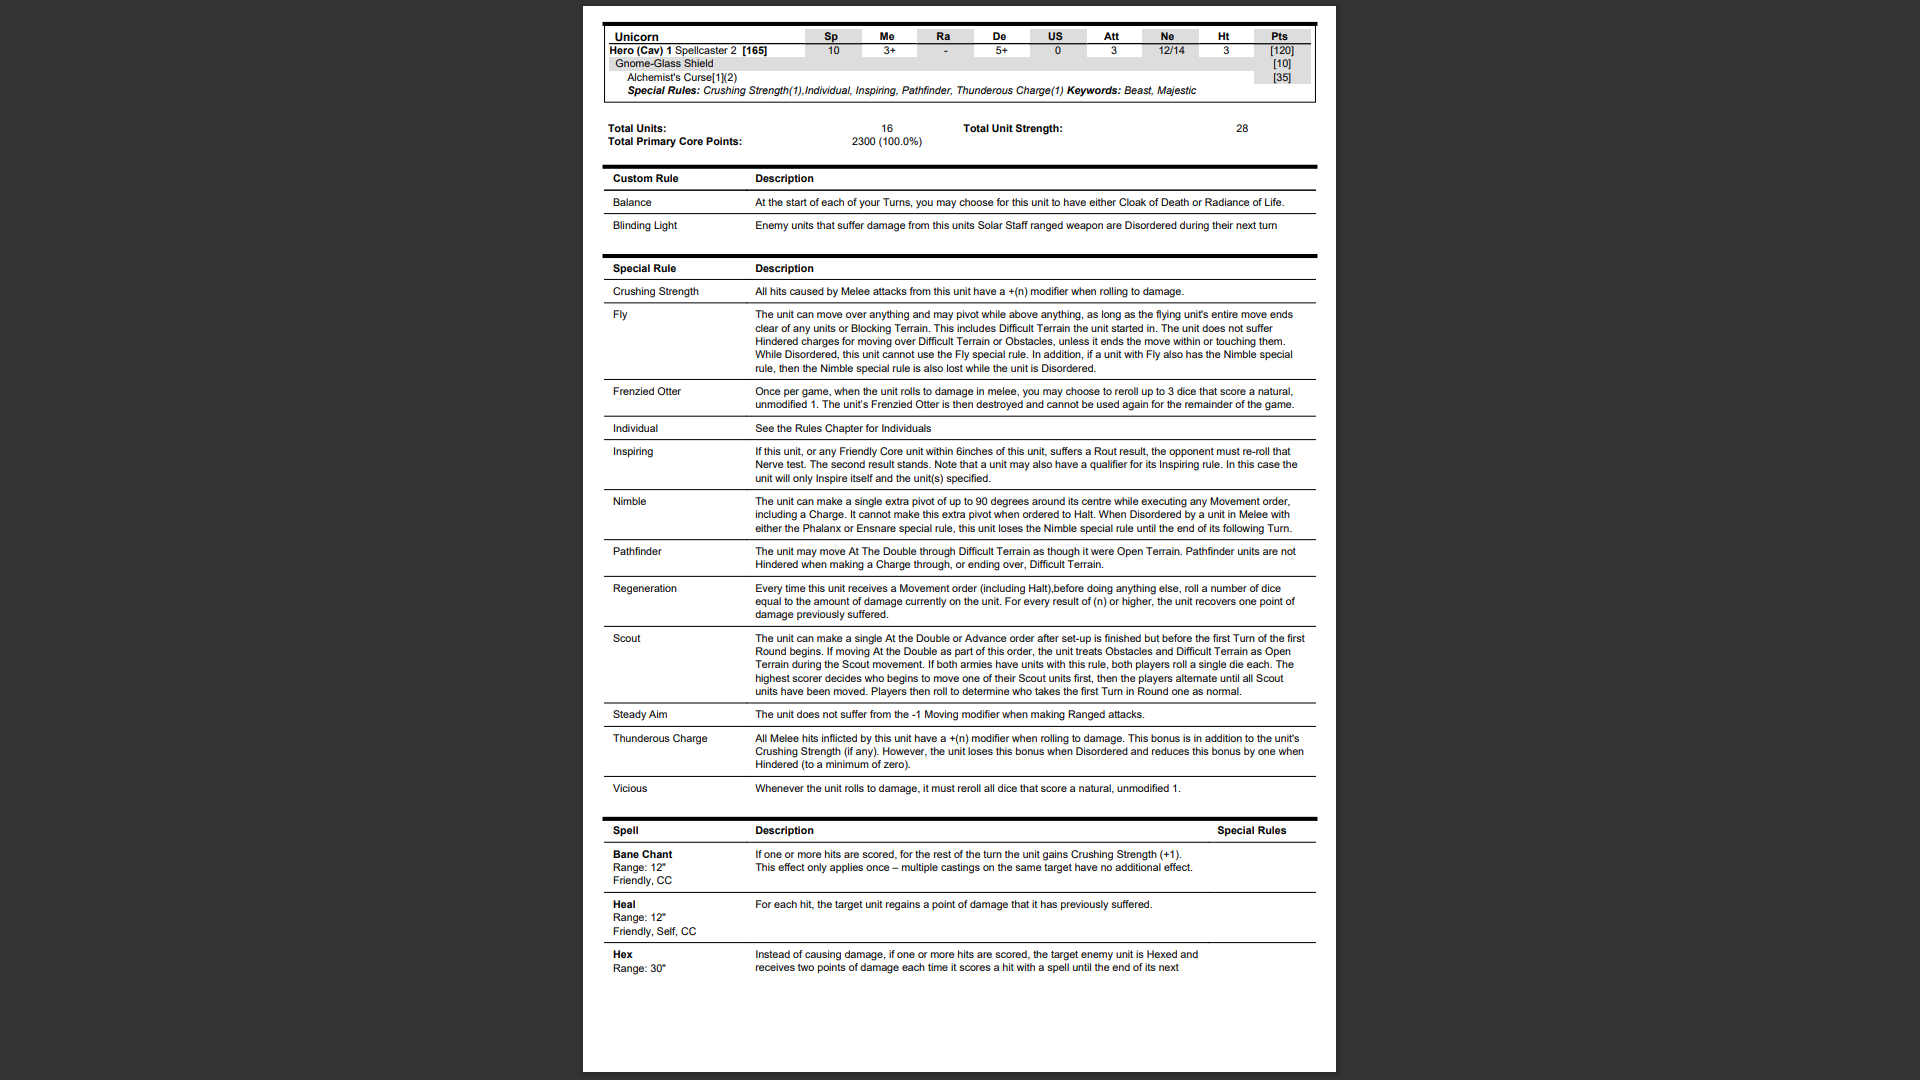
First battle was Against Mike’s RFO, lists Below
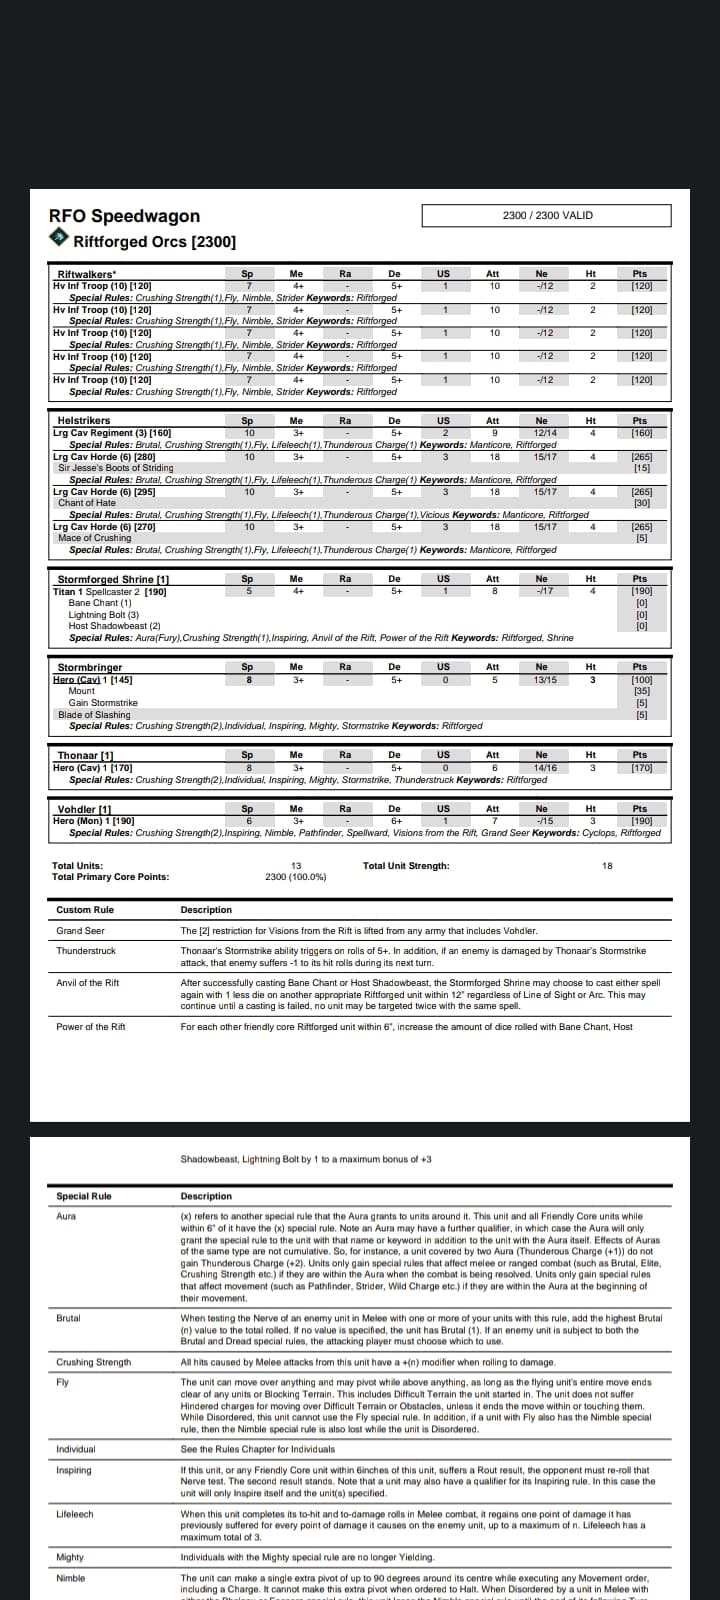
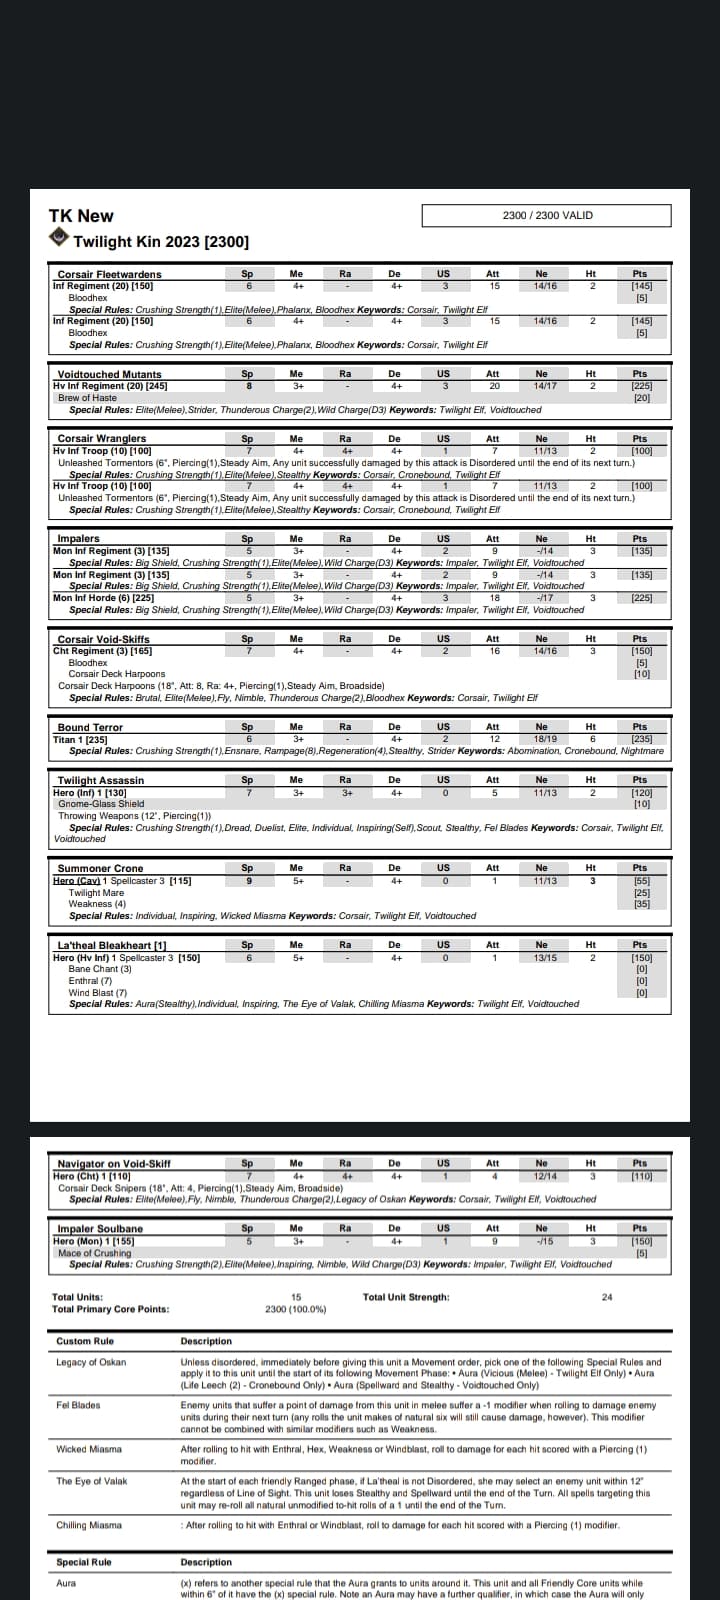
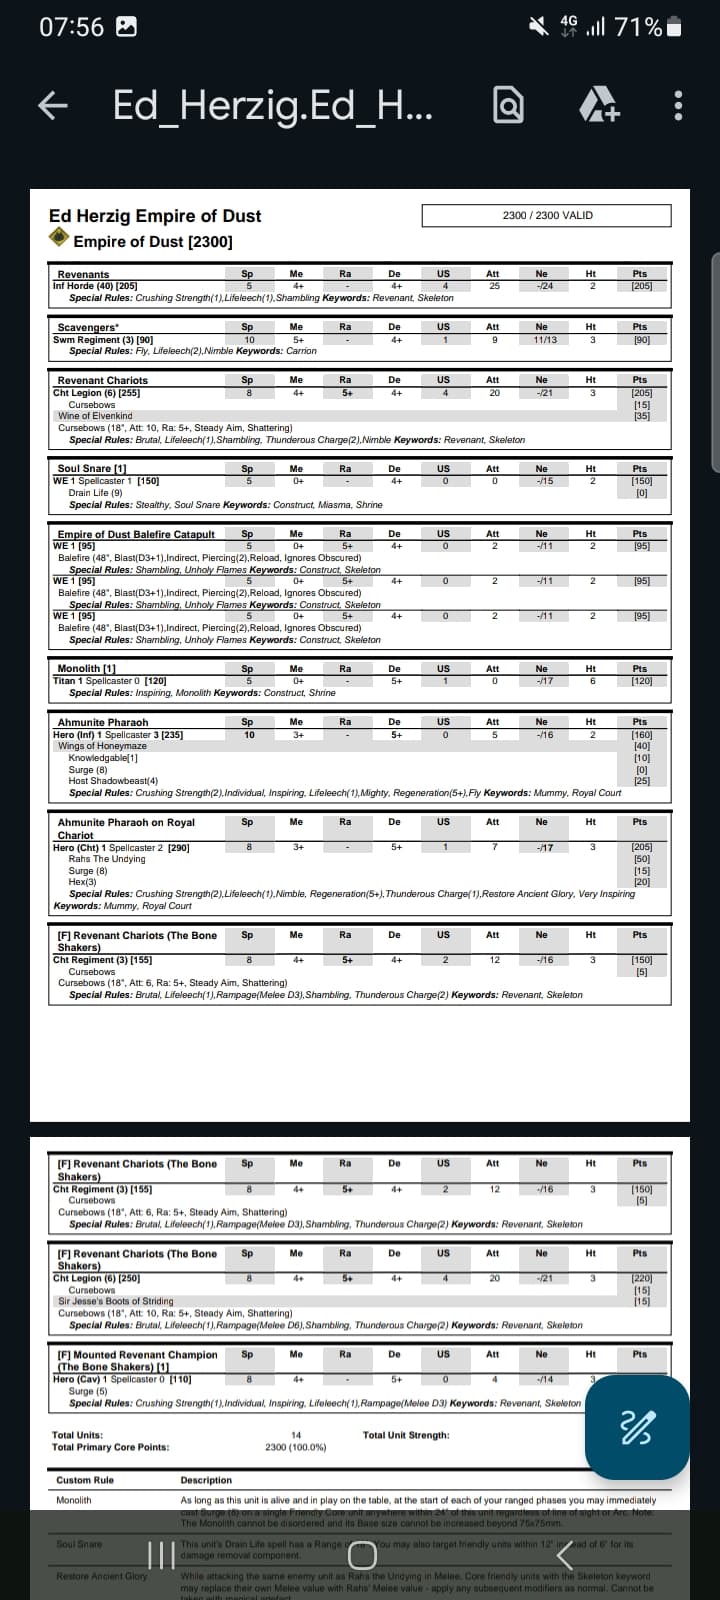
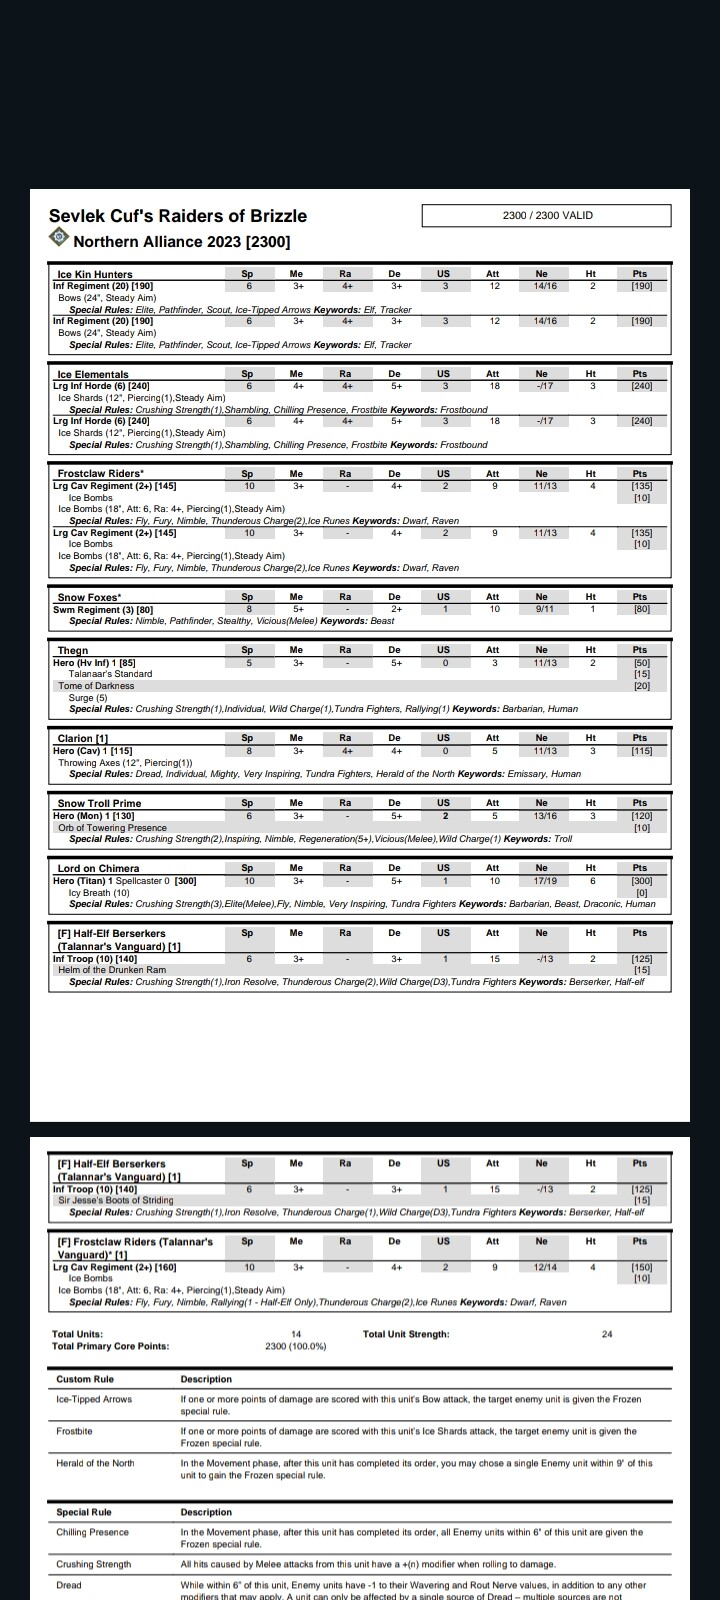
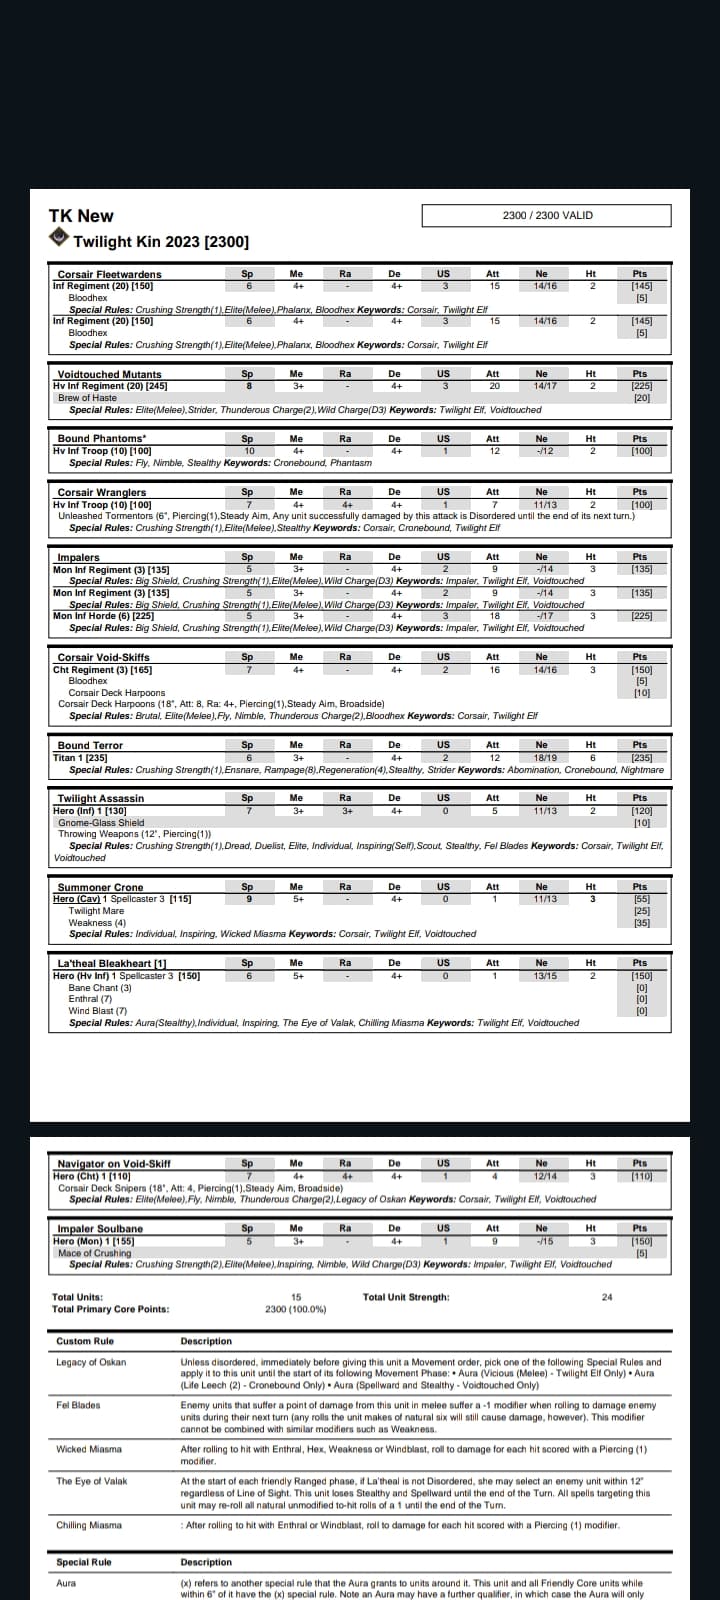
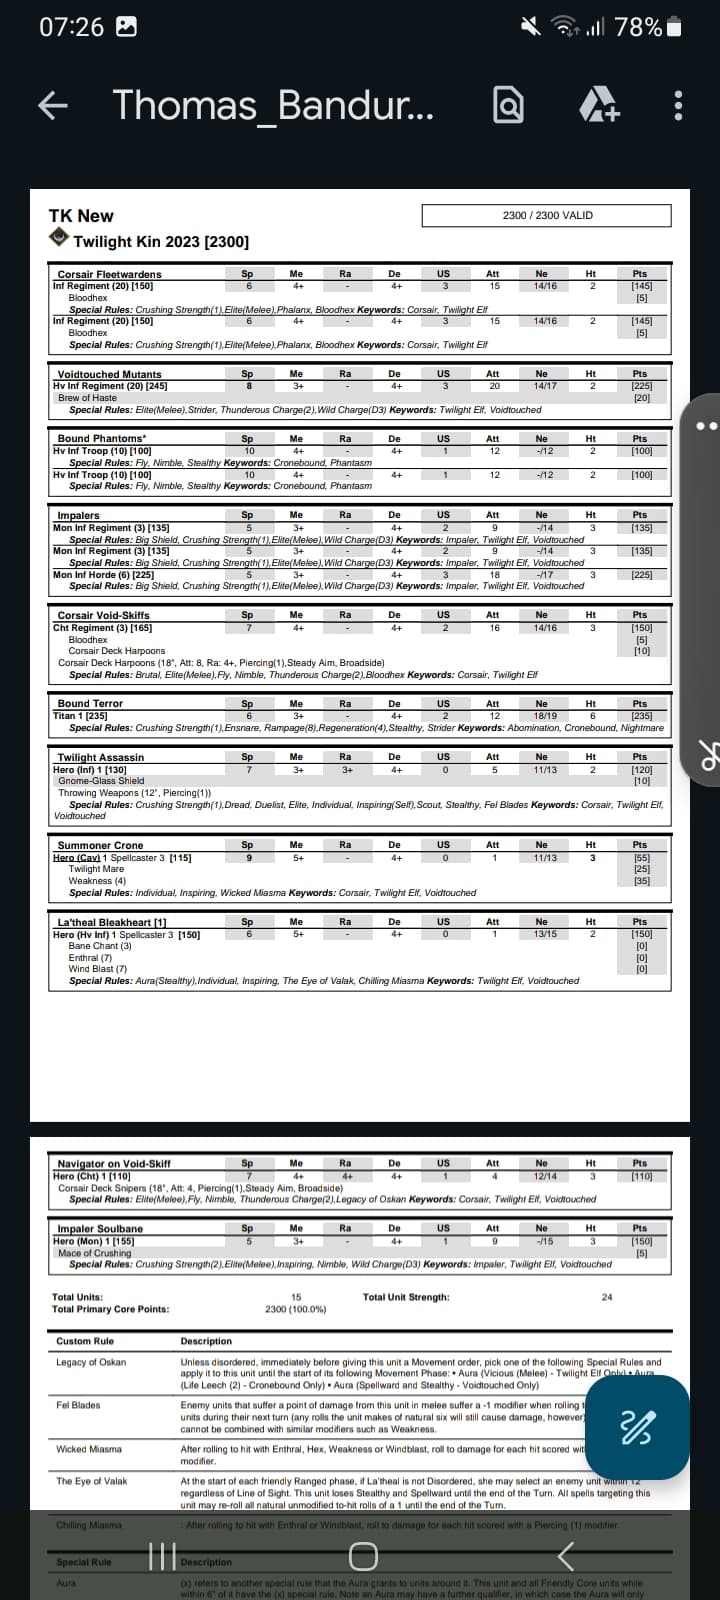
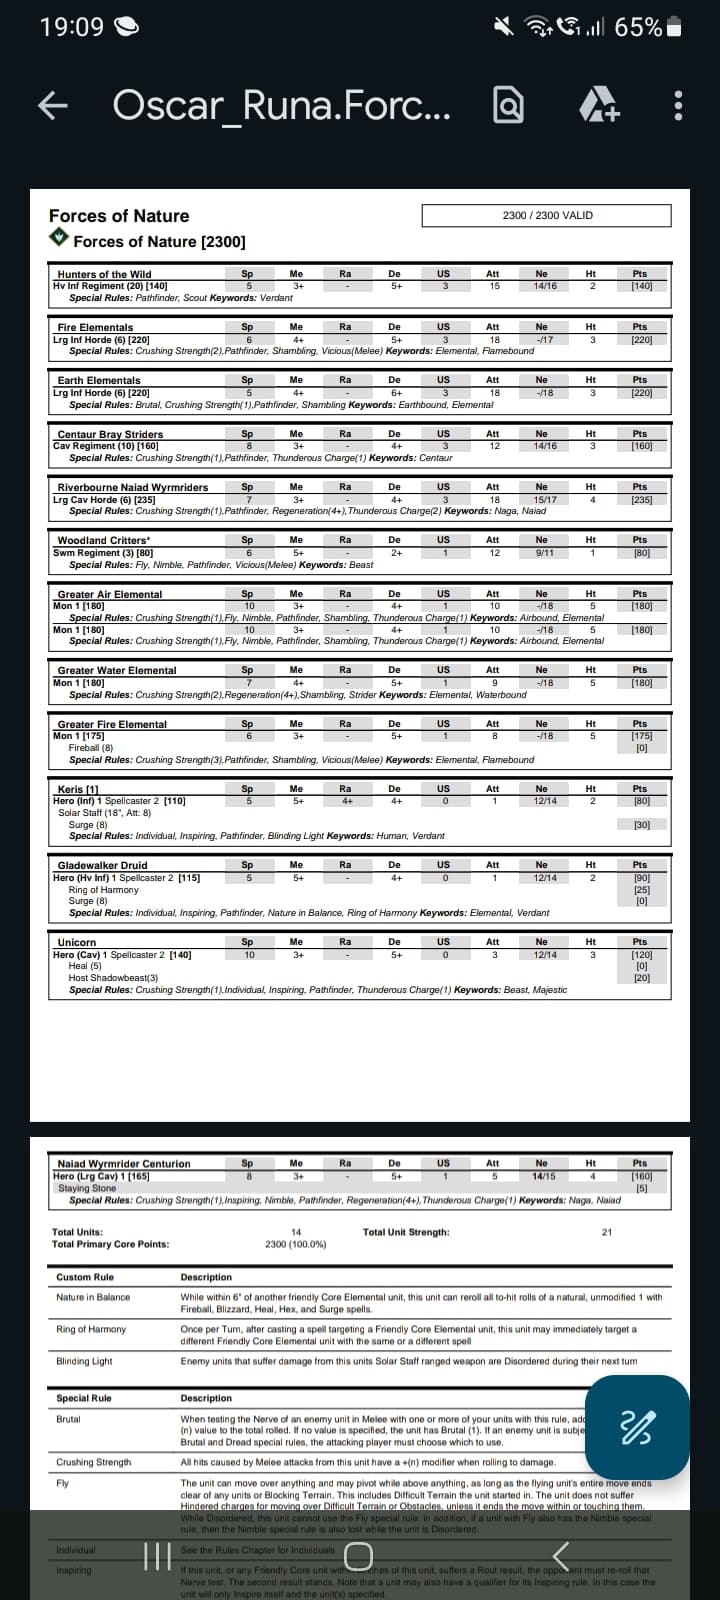
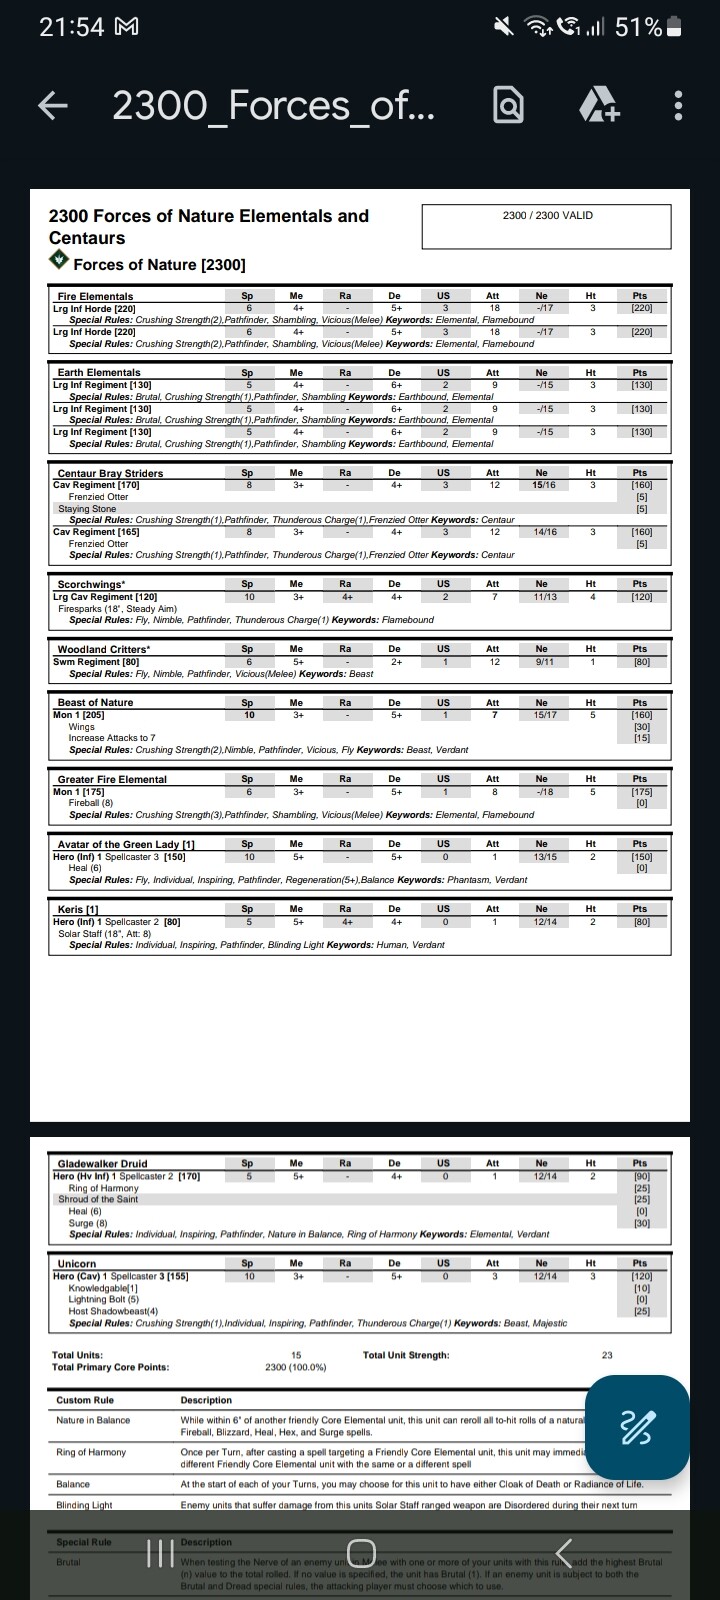
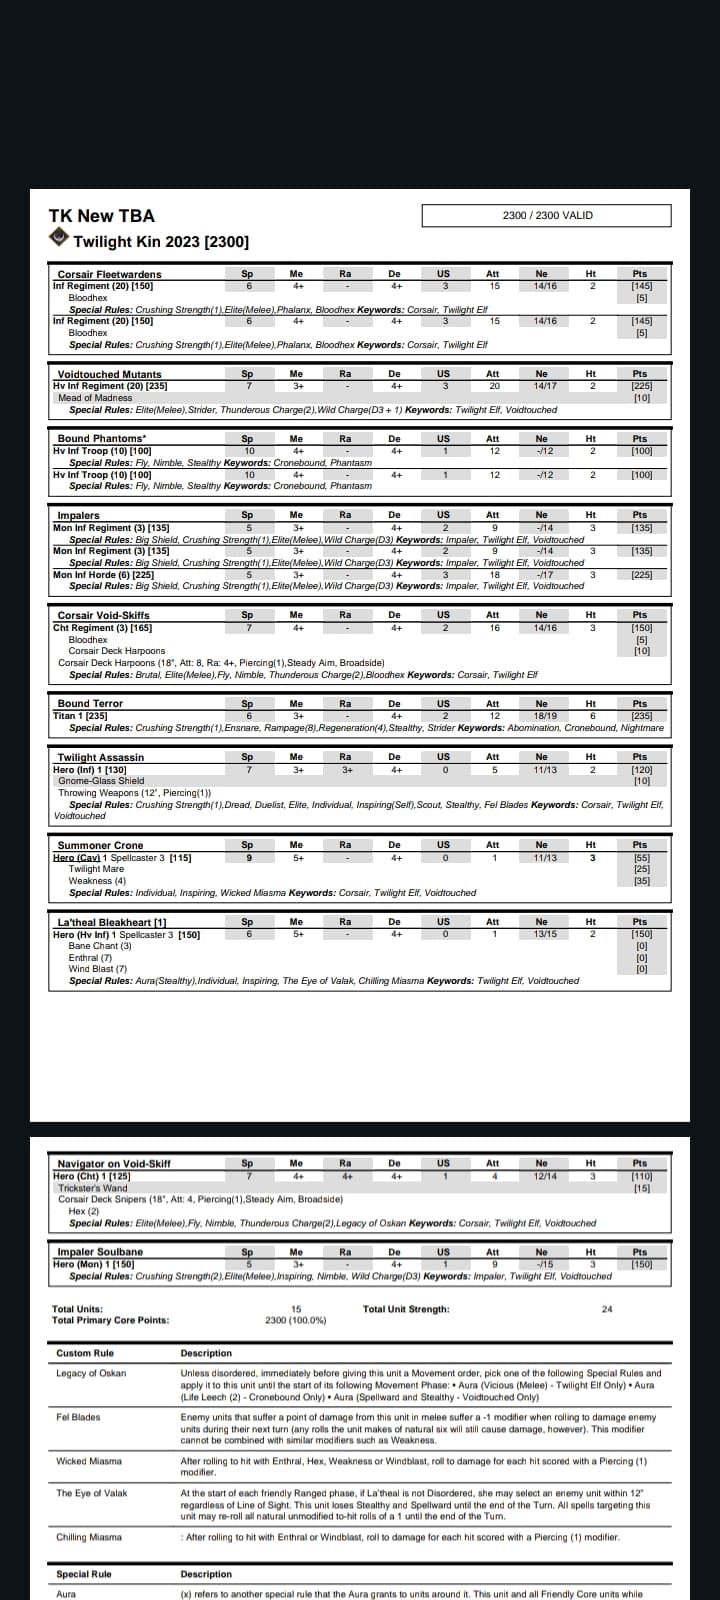
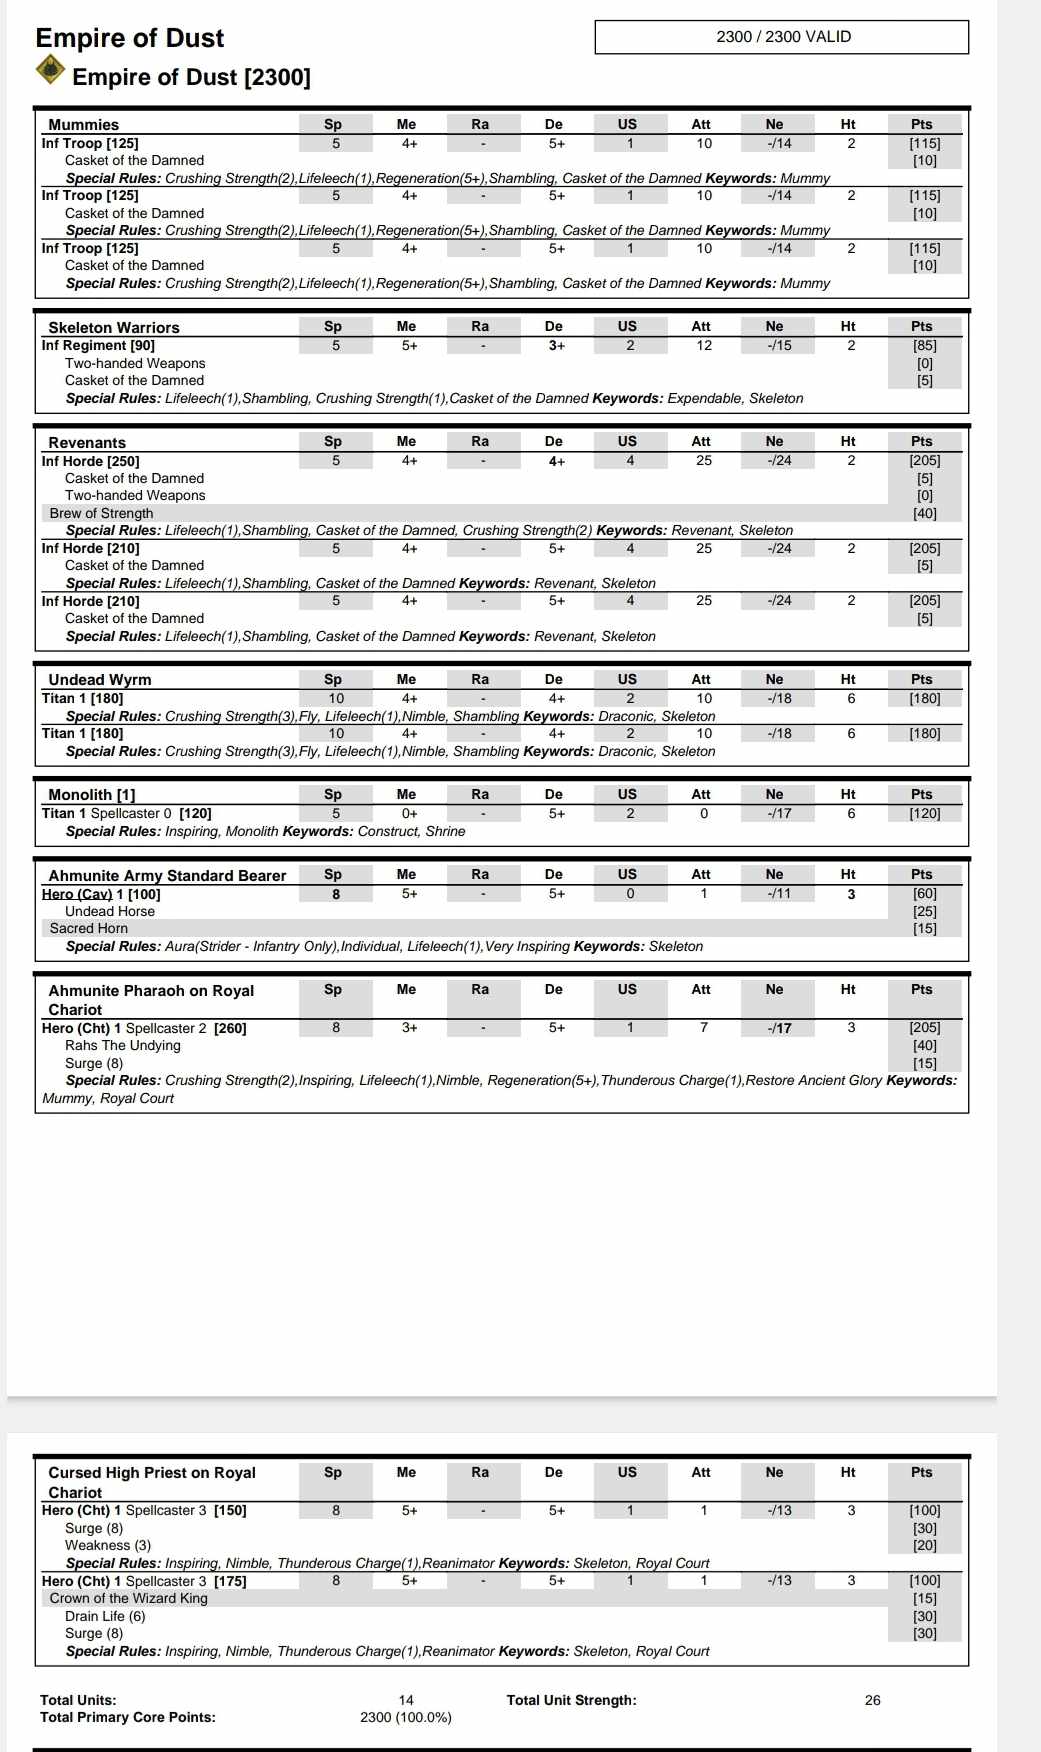
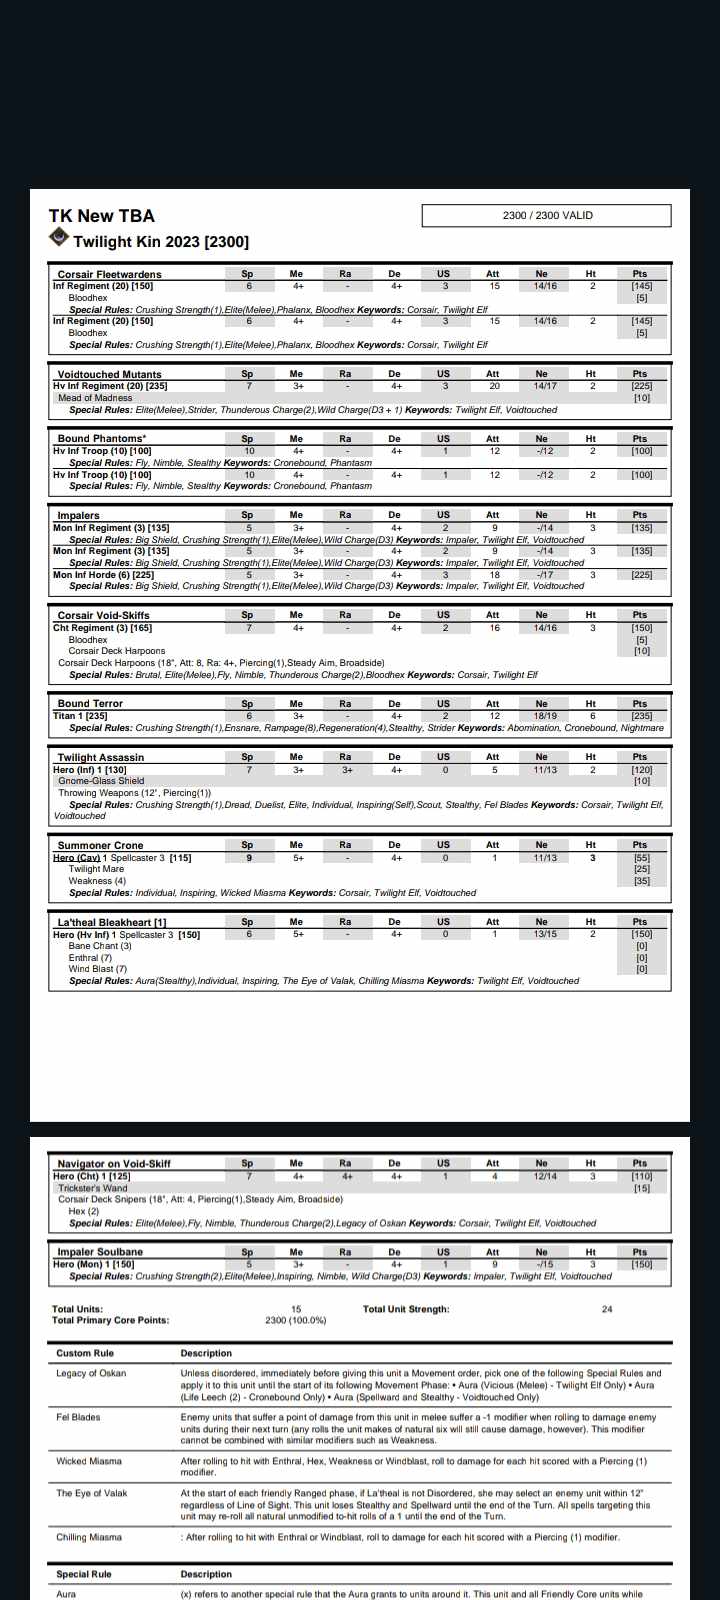
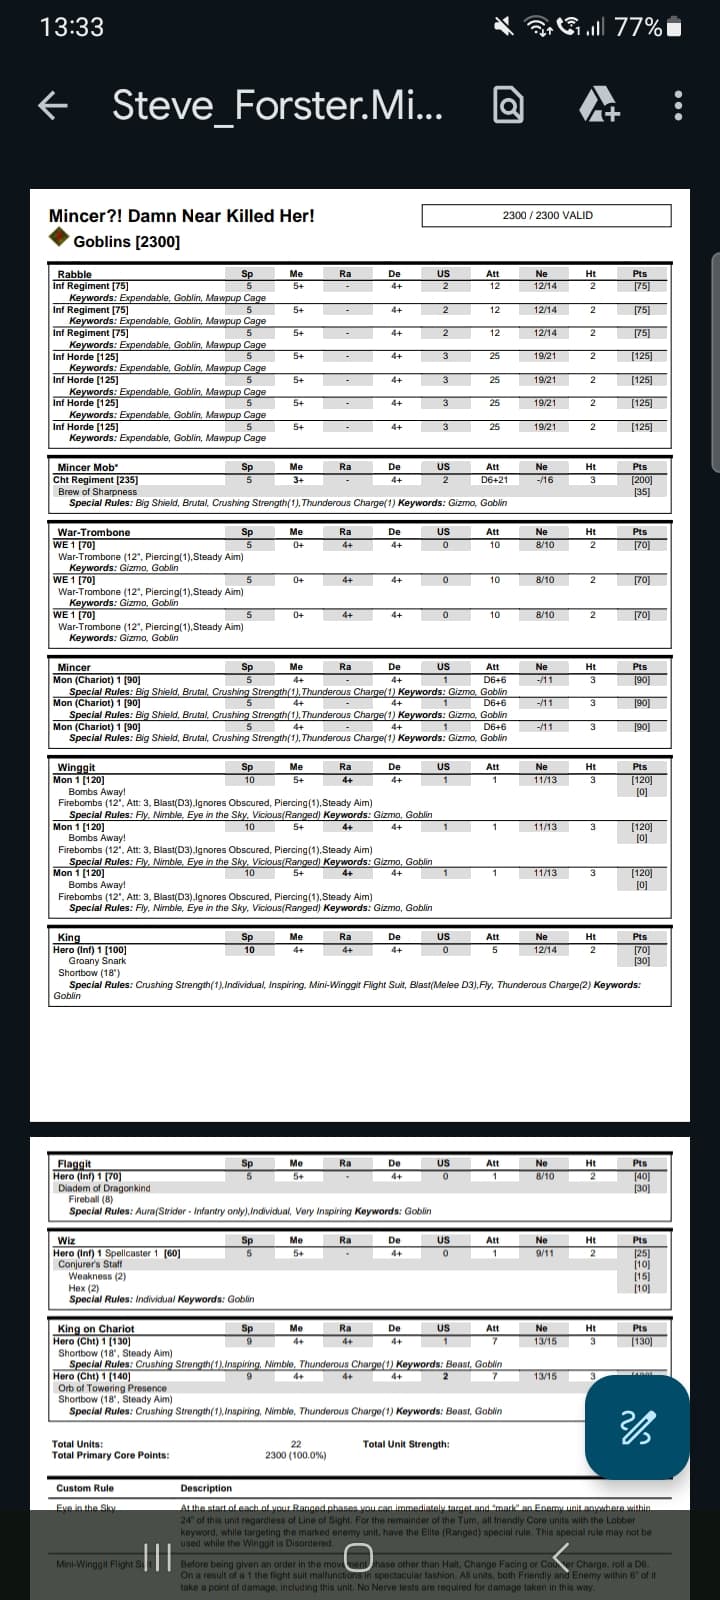
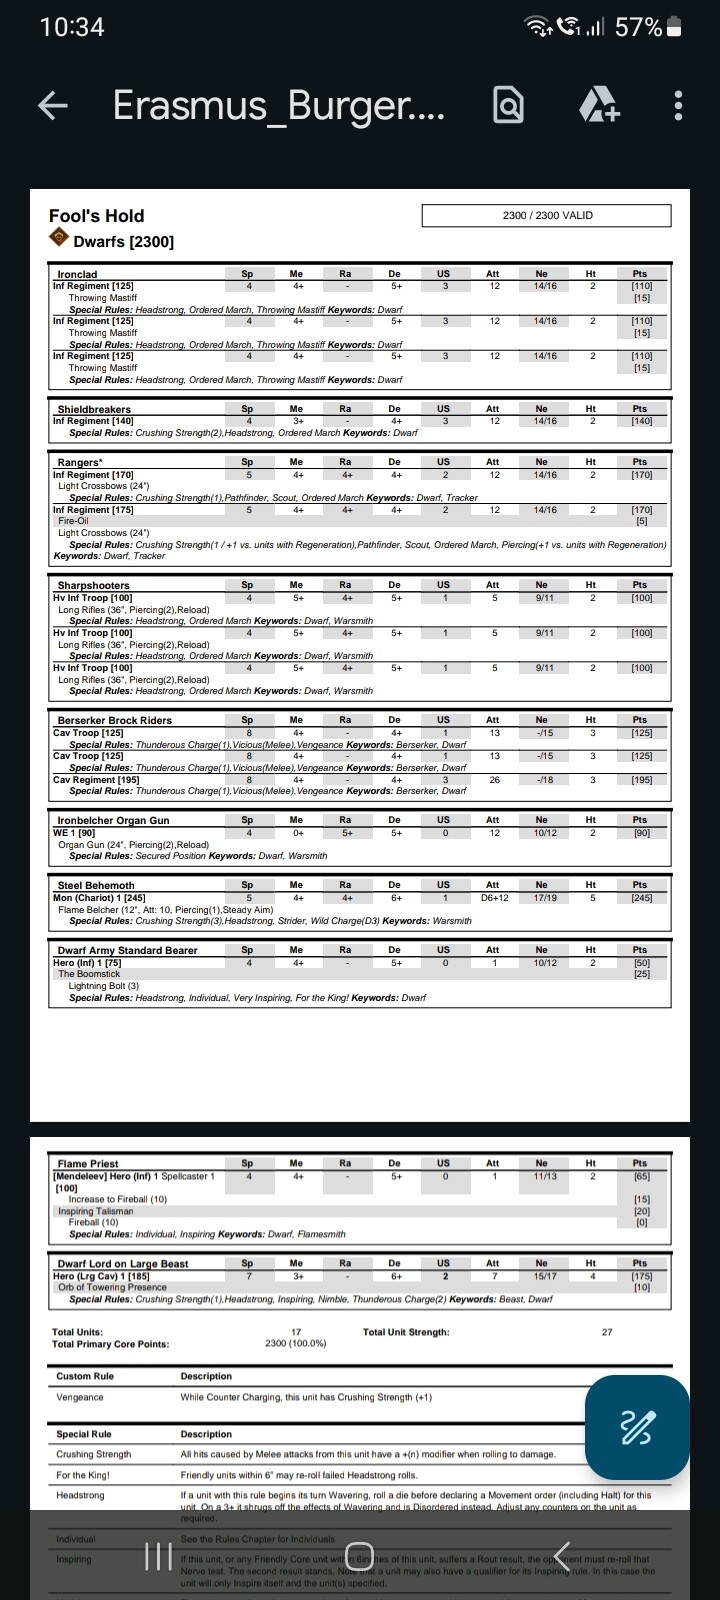
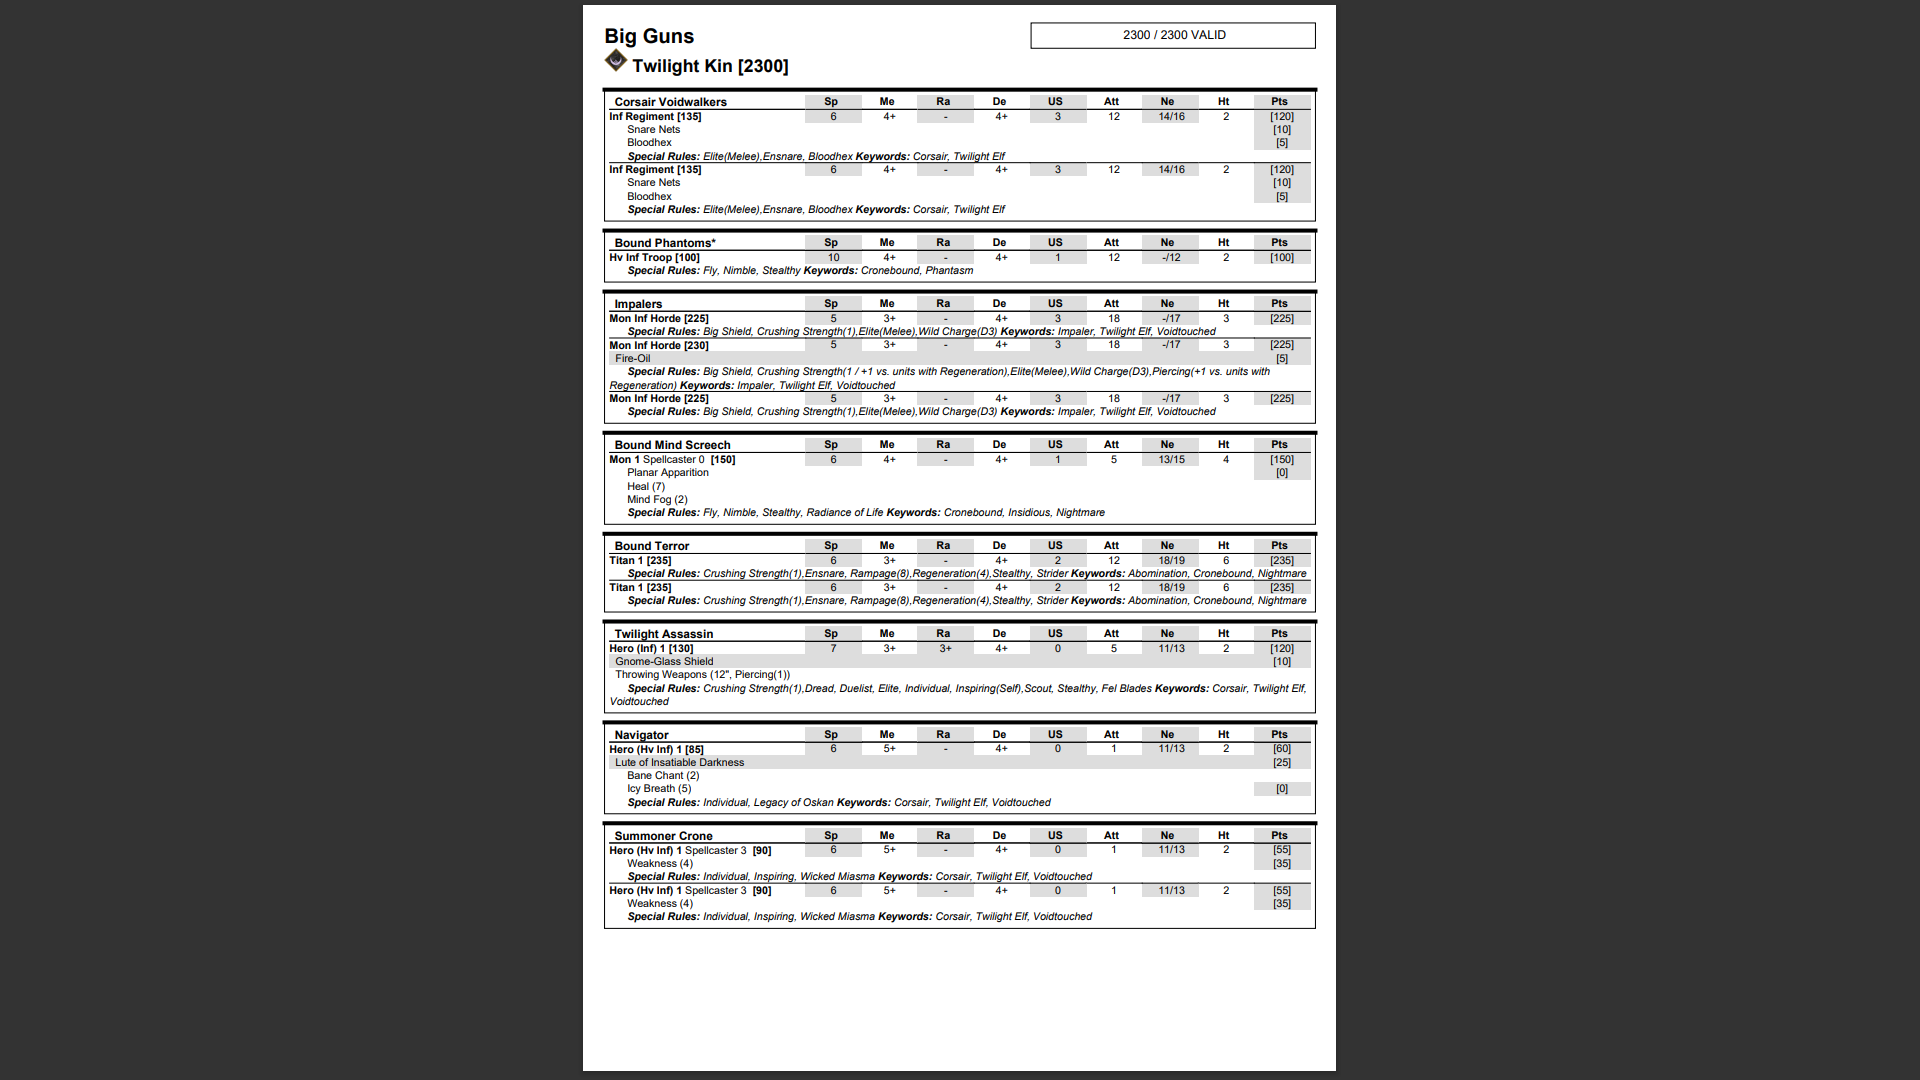
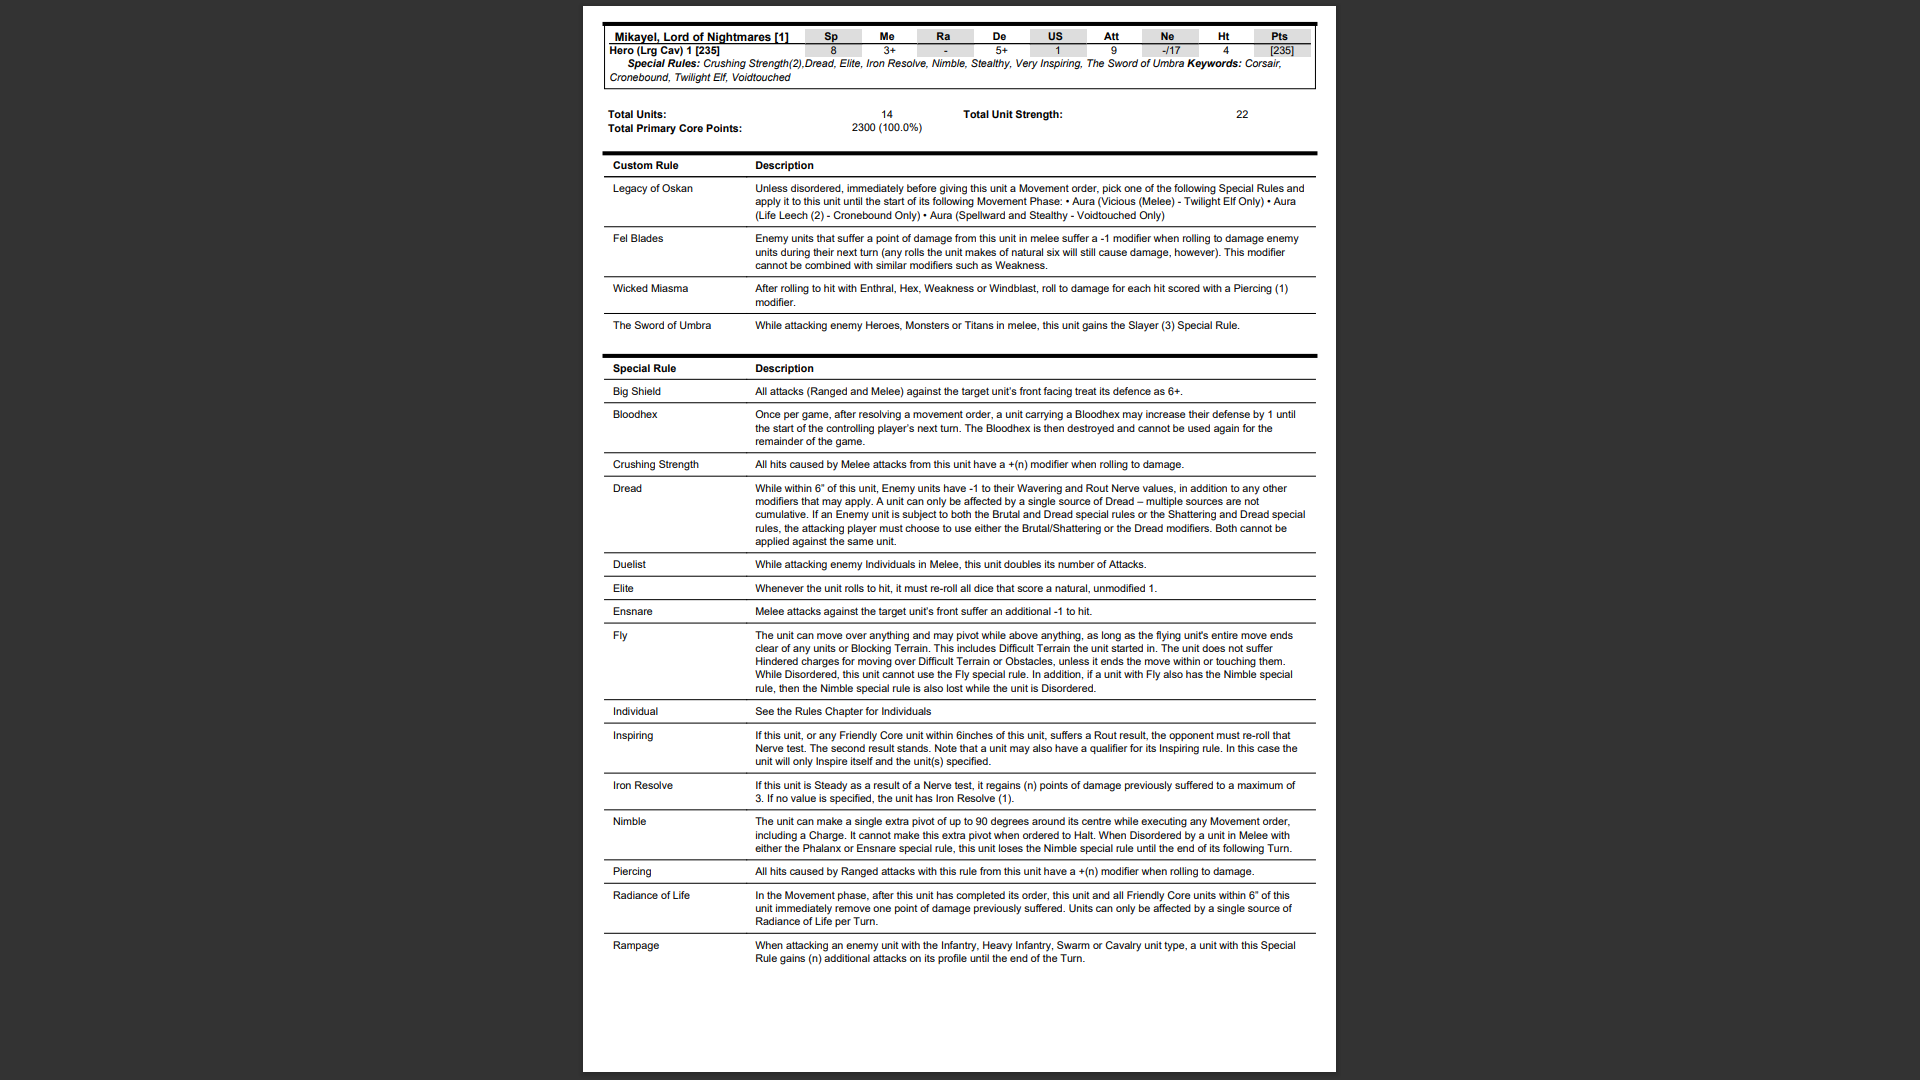
My list
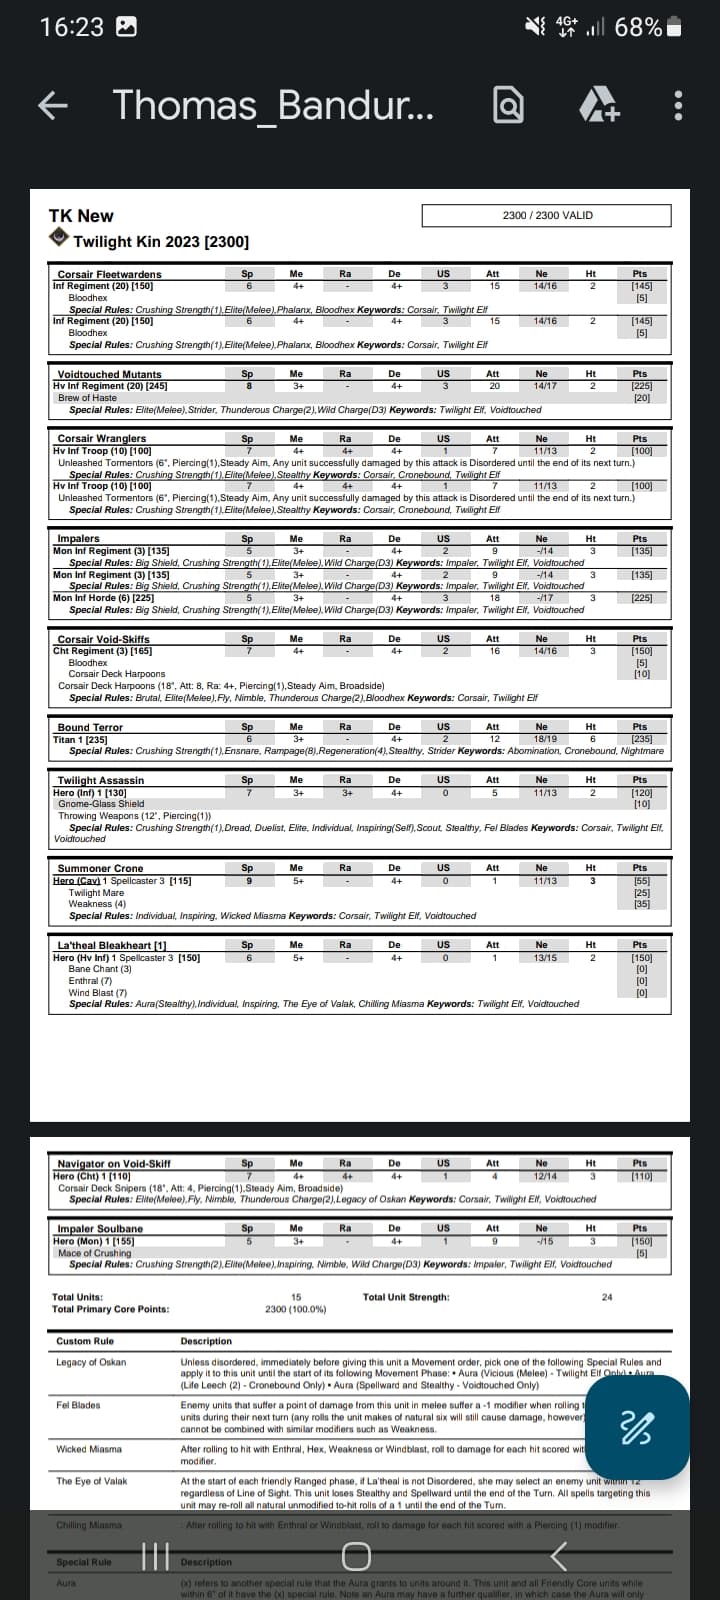
I wanted a list where I could test a lot of the new stuff, and also Include the mega army and terror that I ordered.
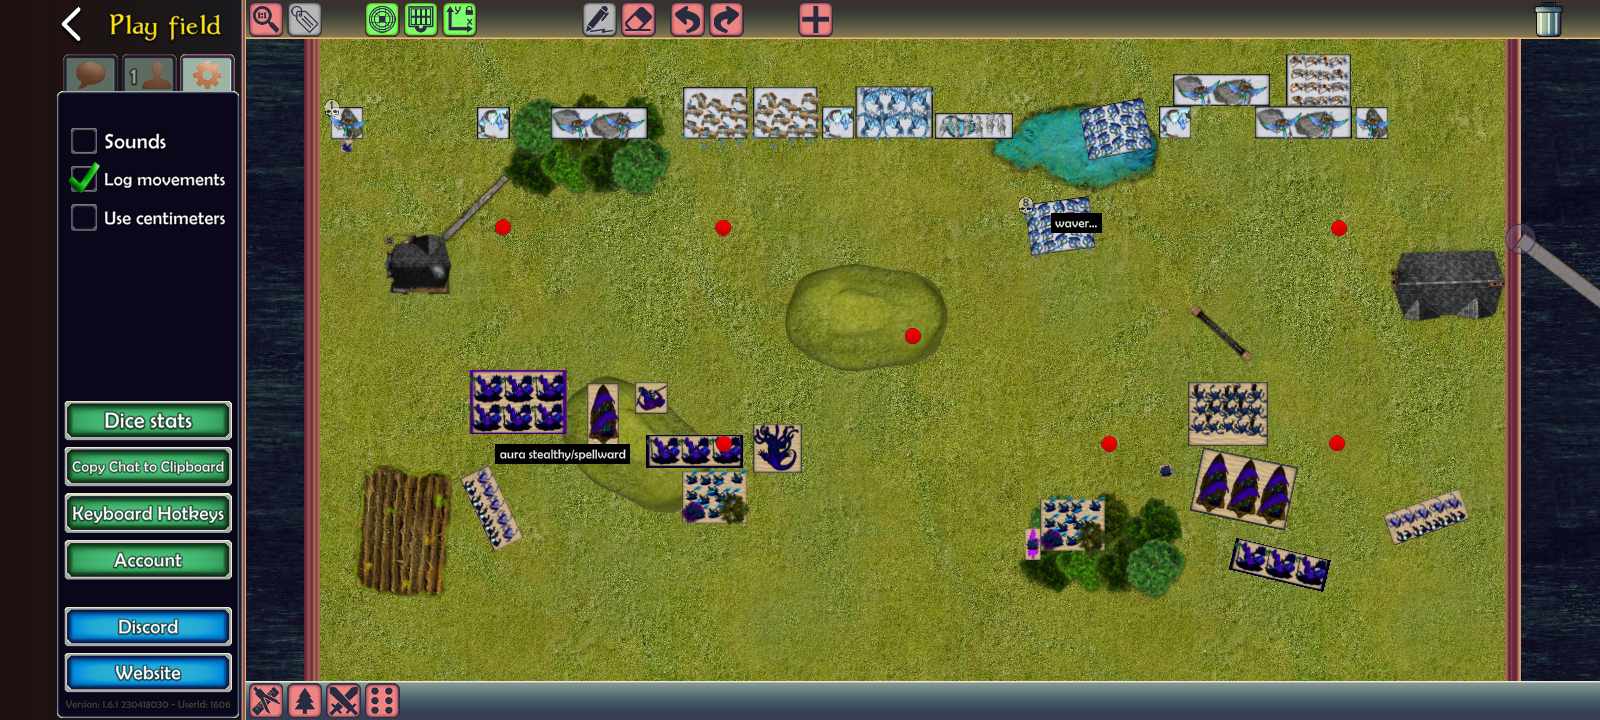
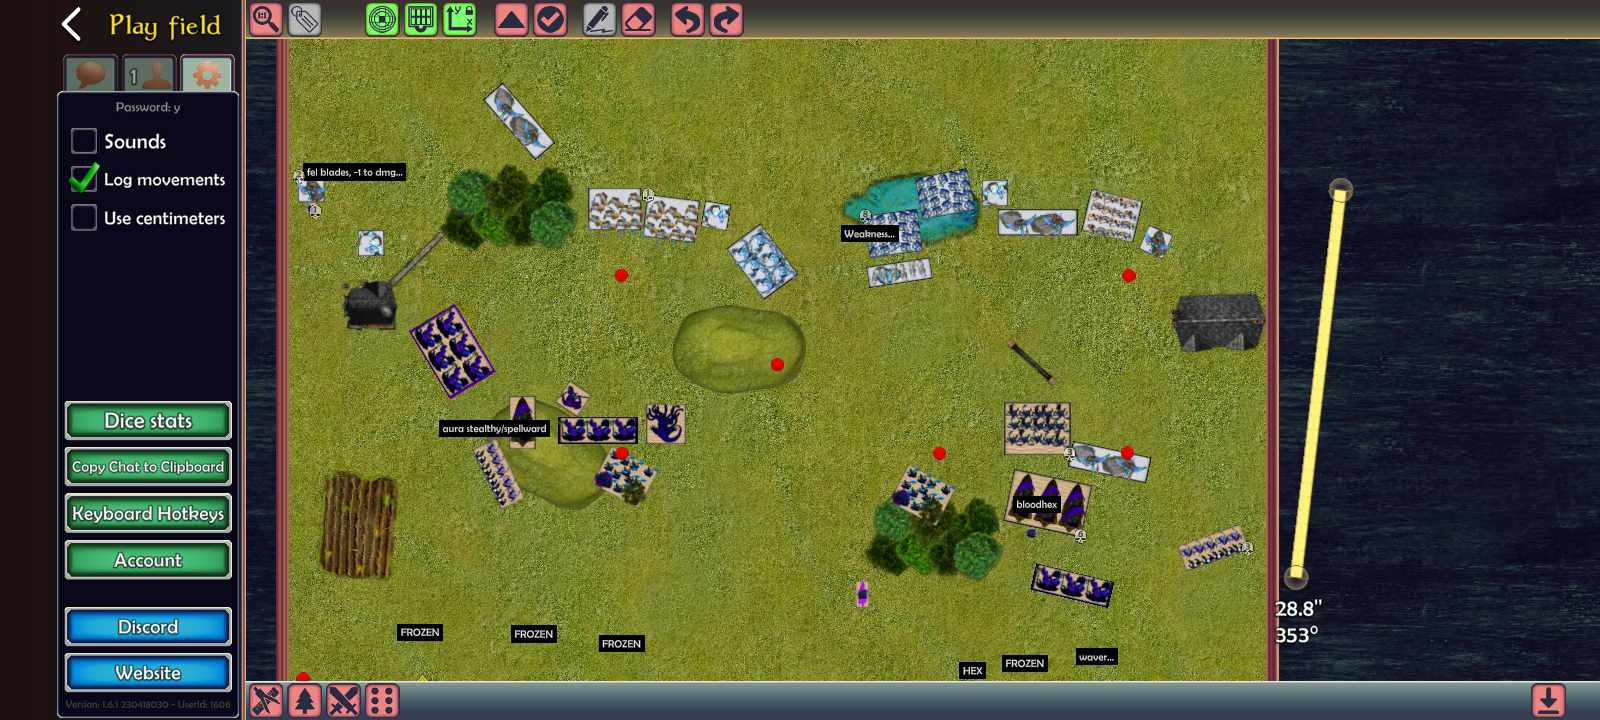
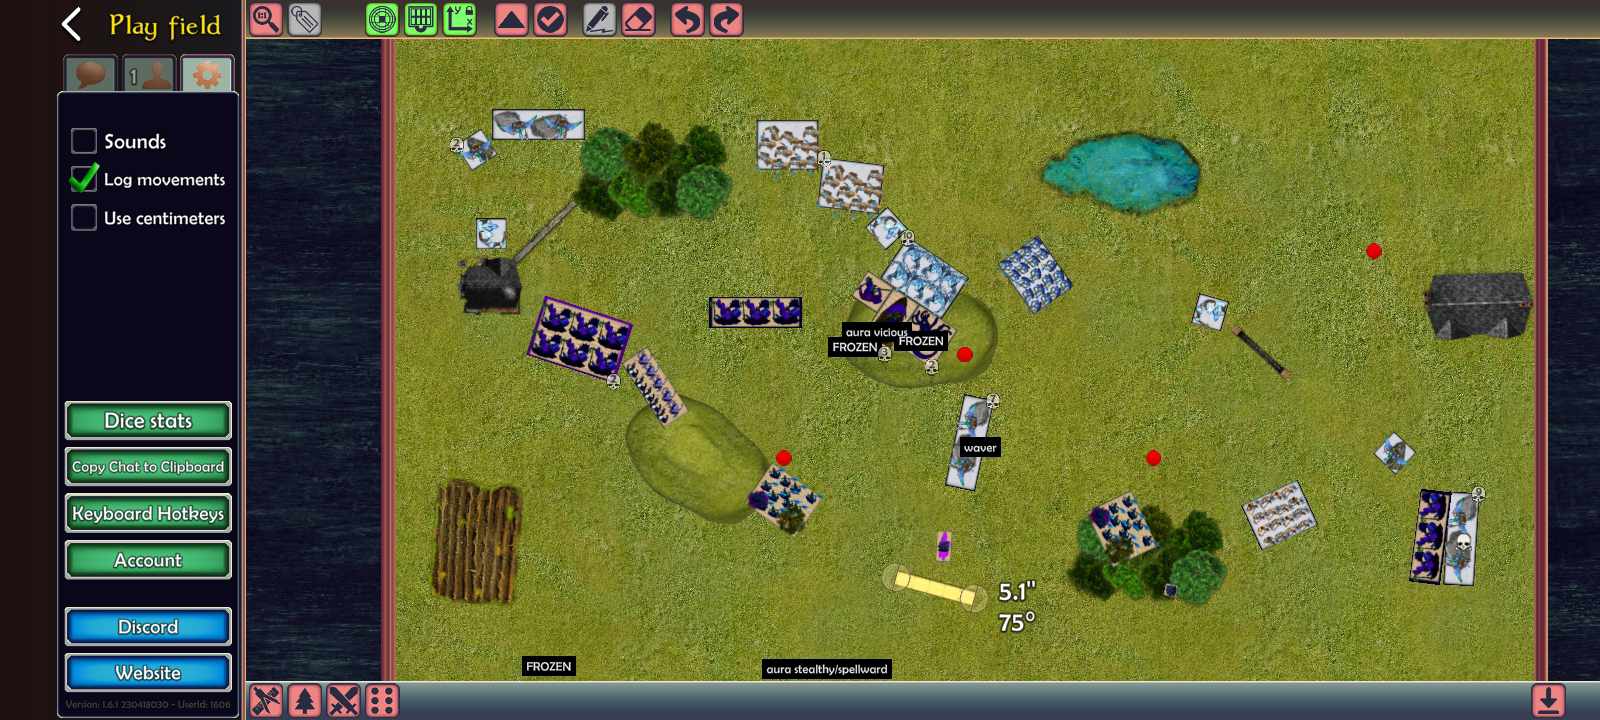
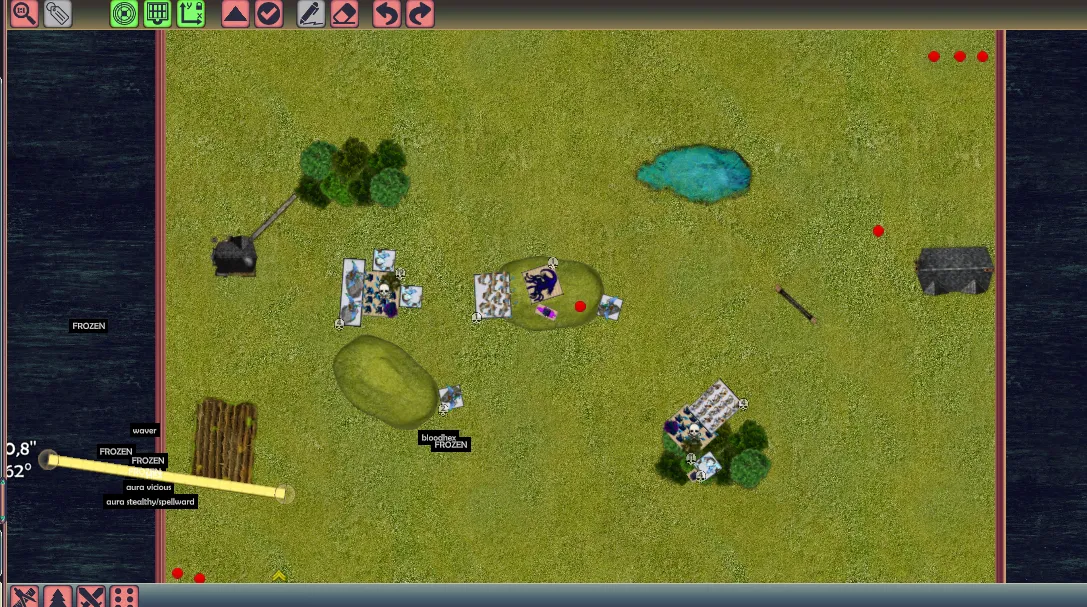
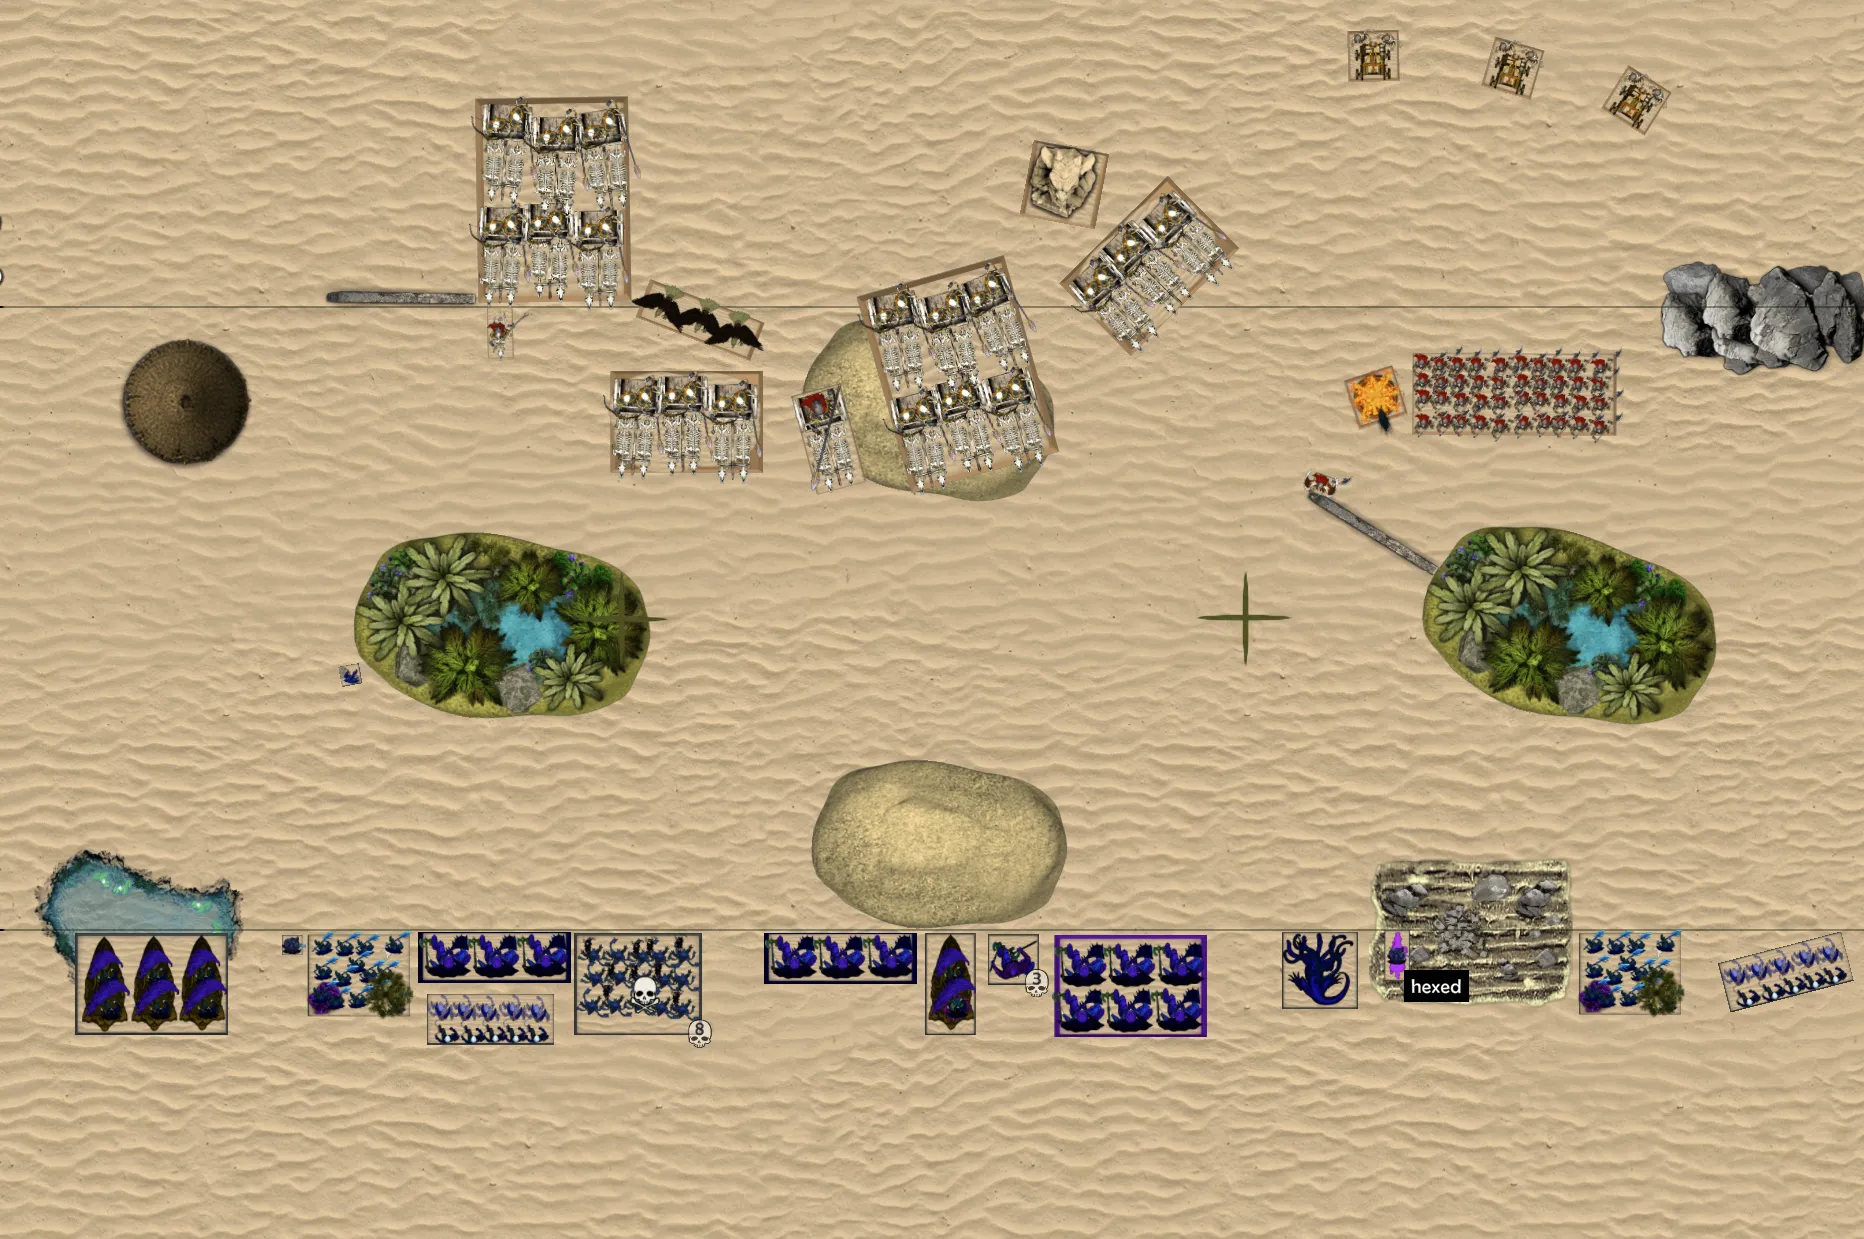
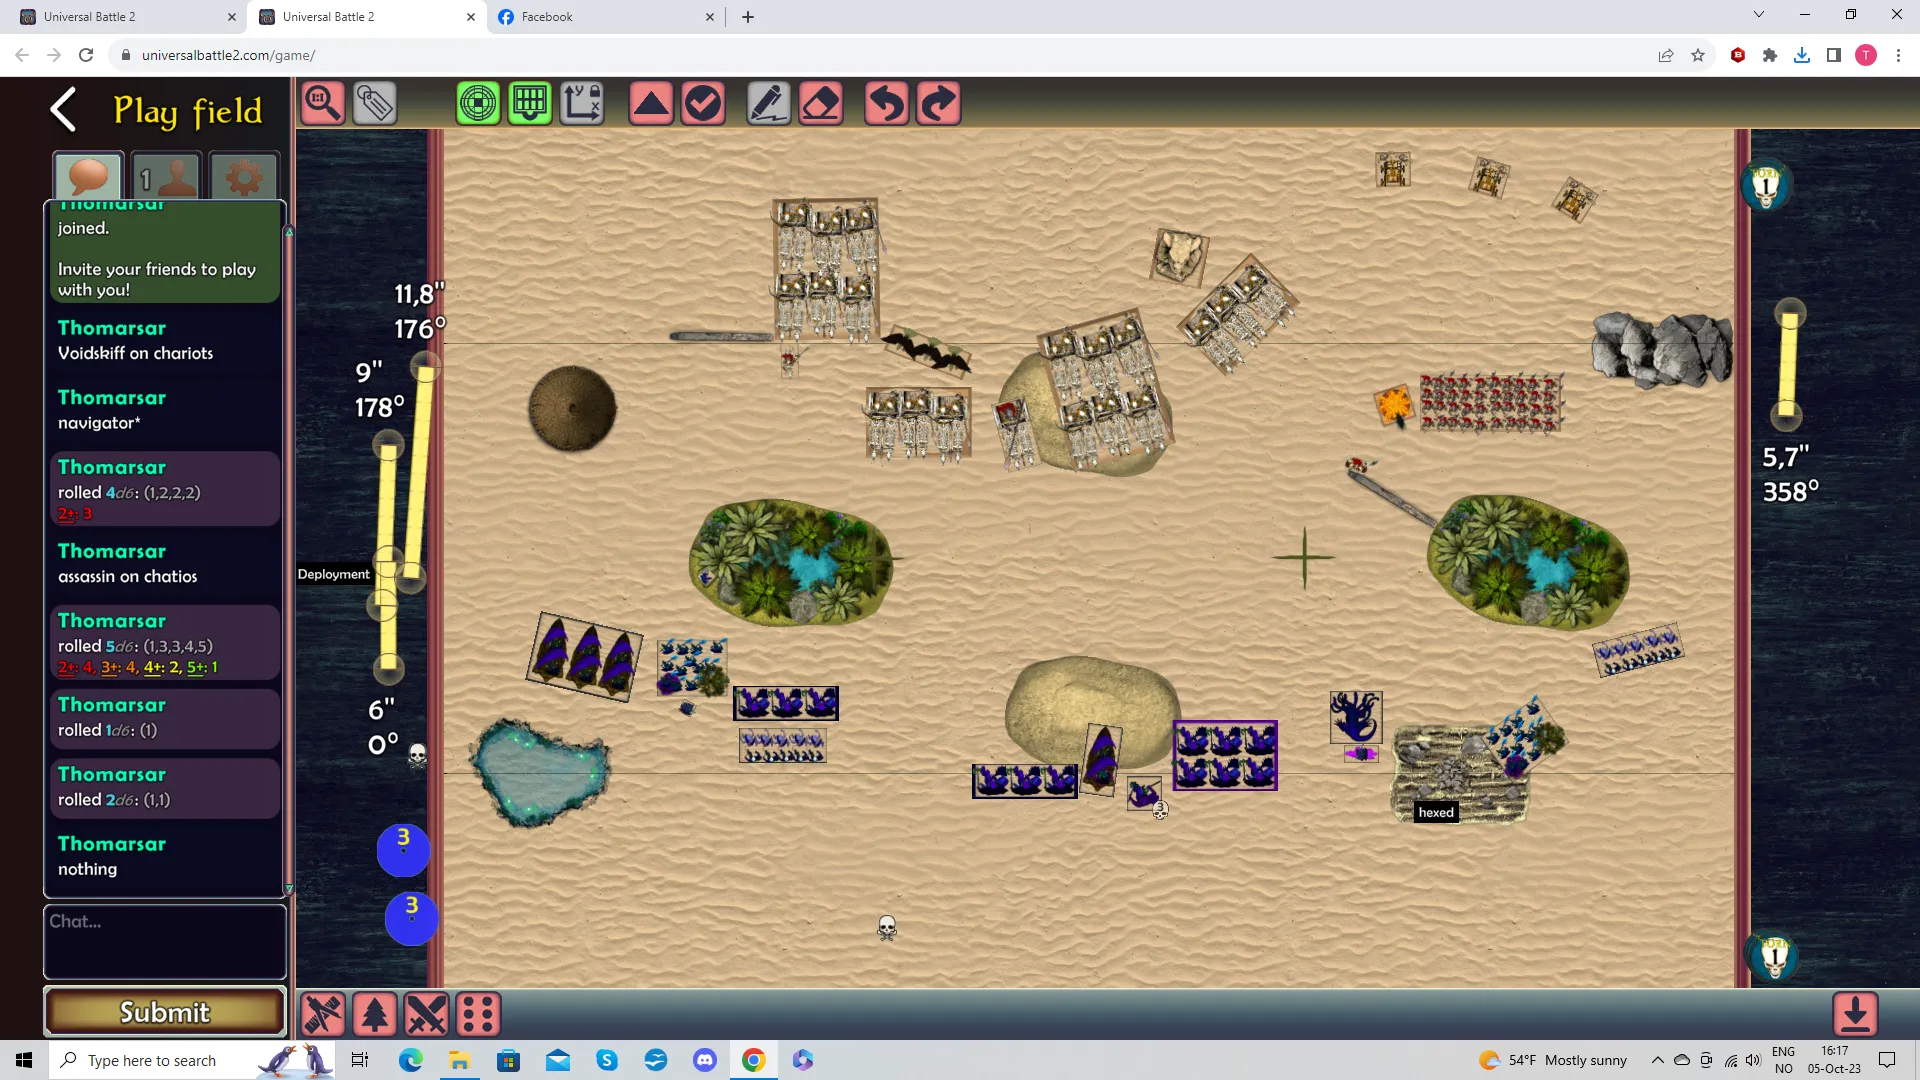
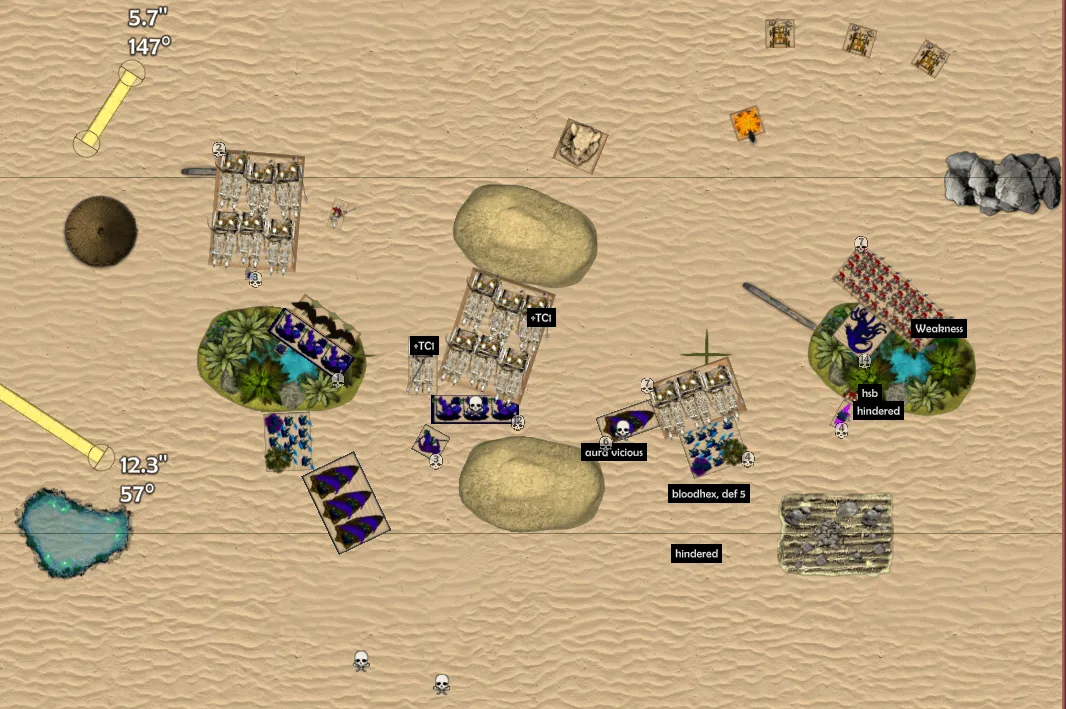
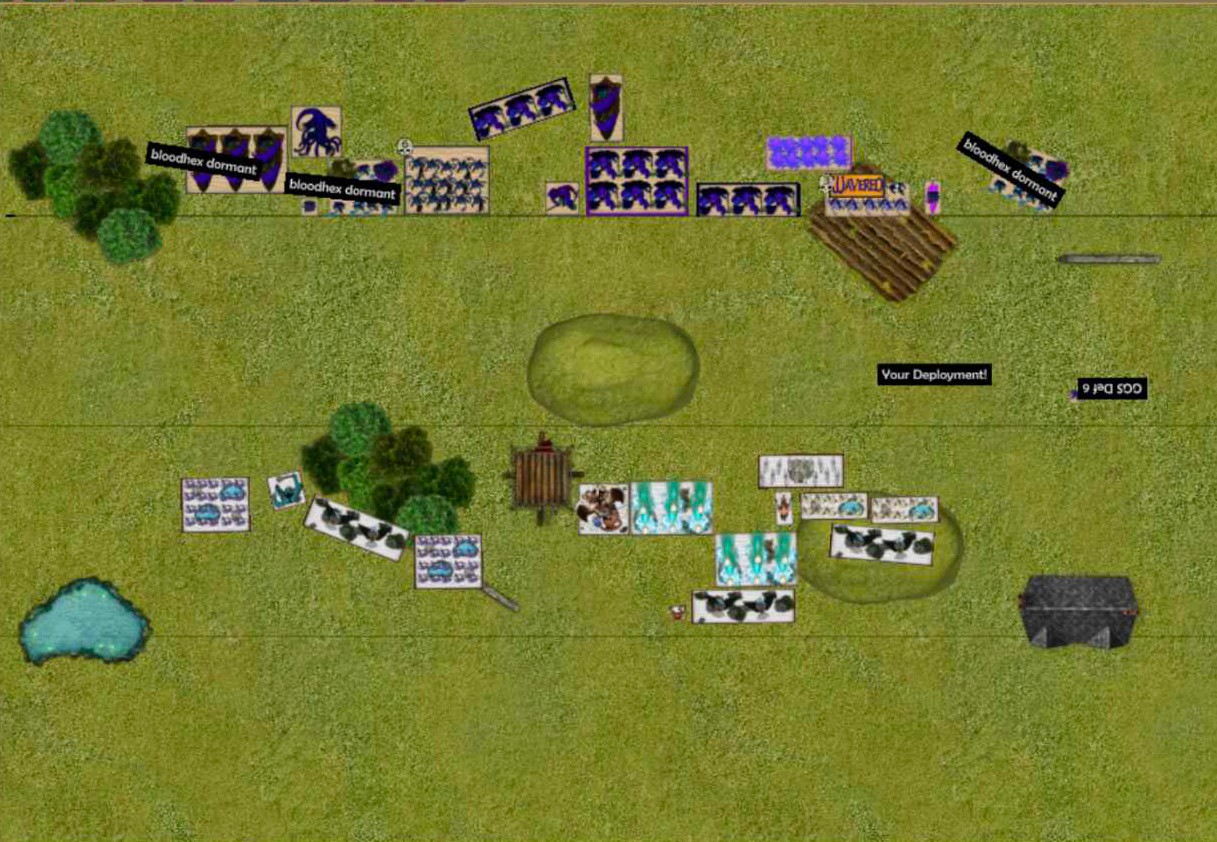
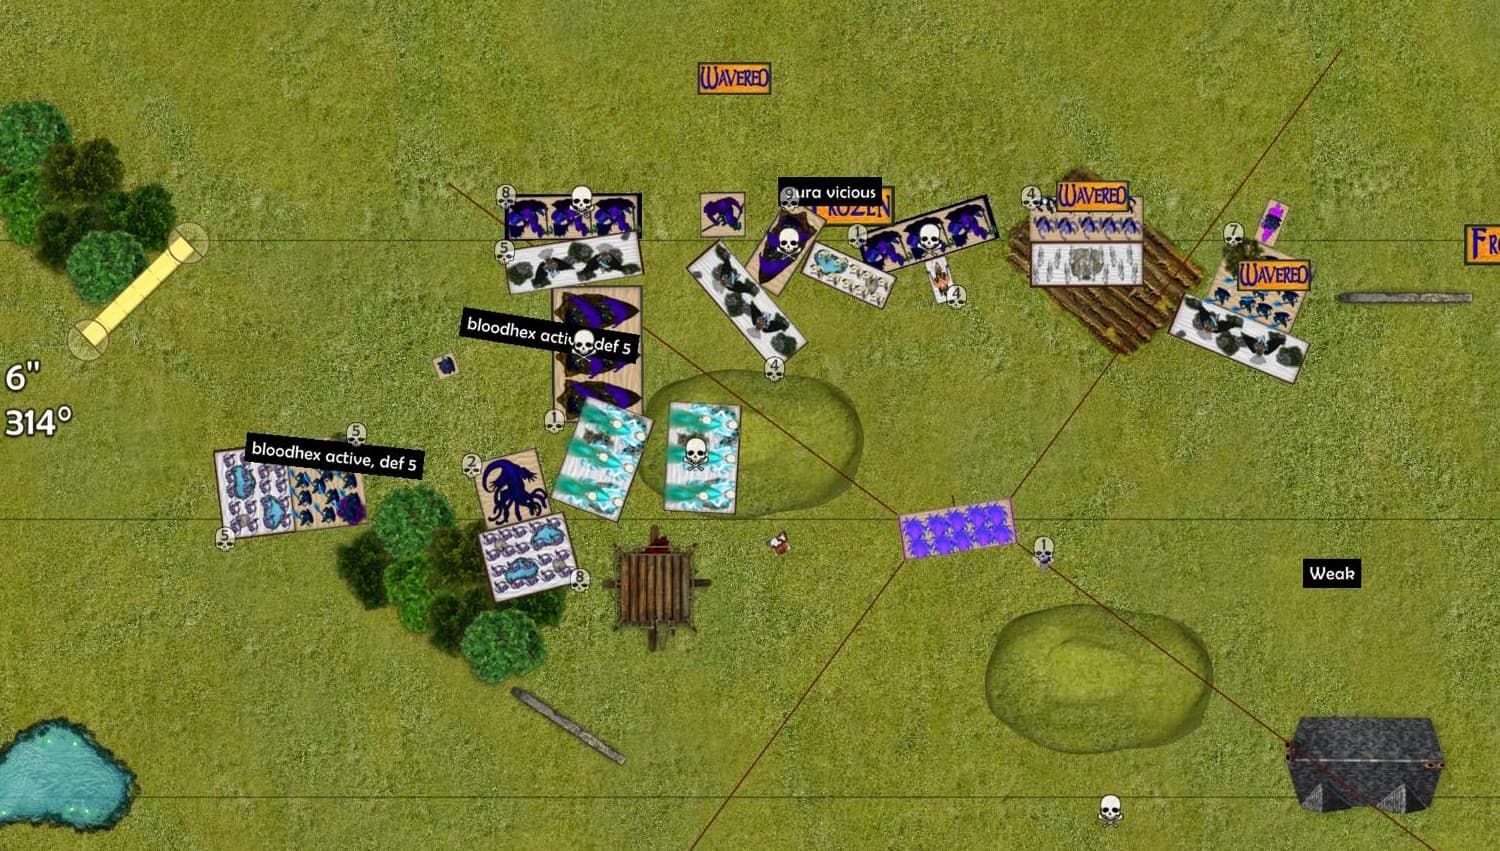
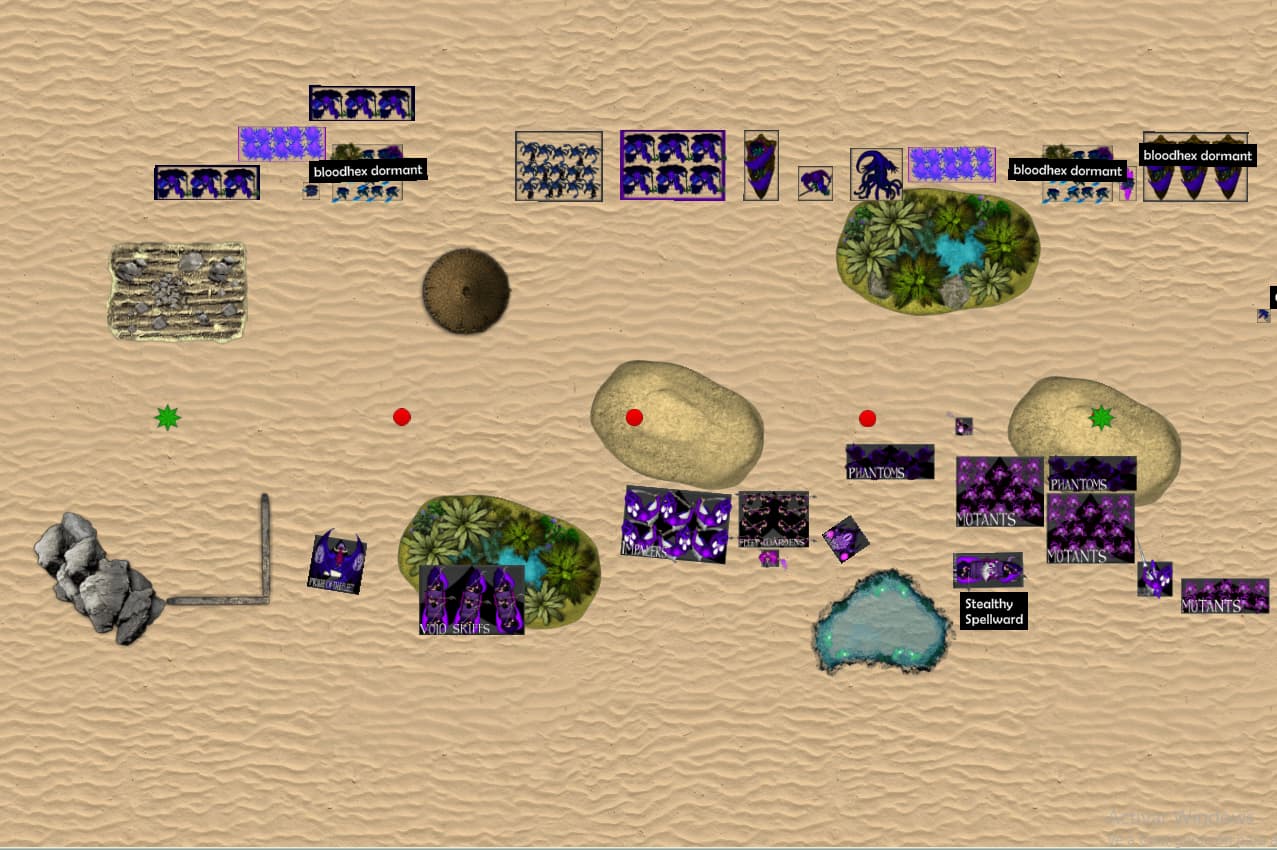
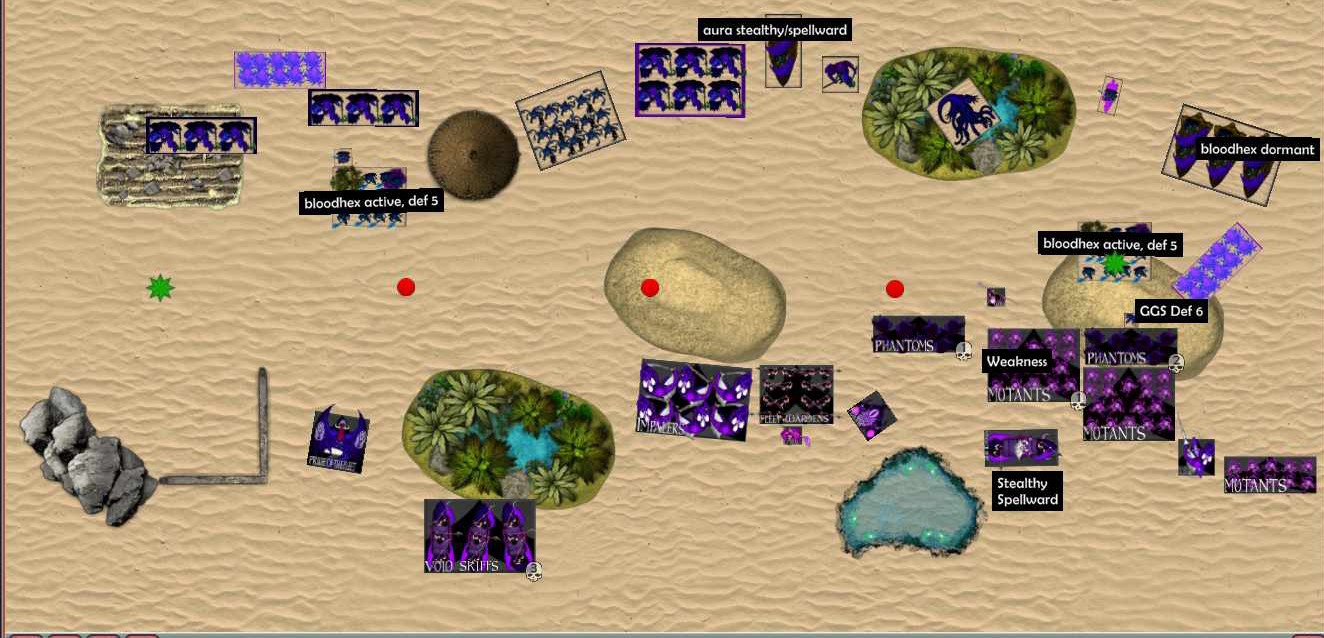
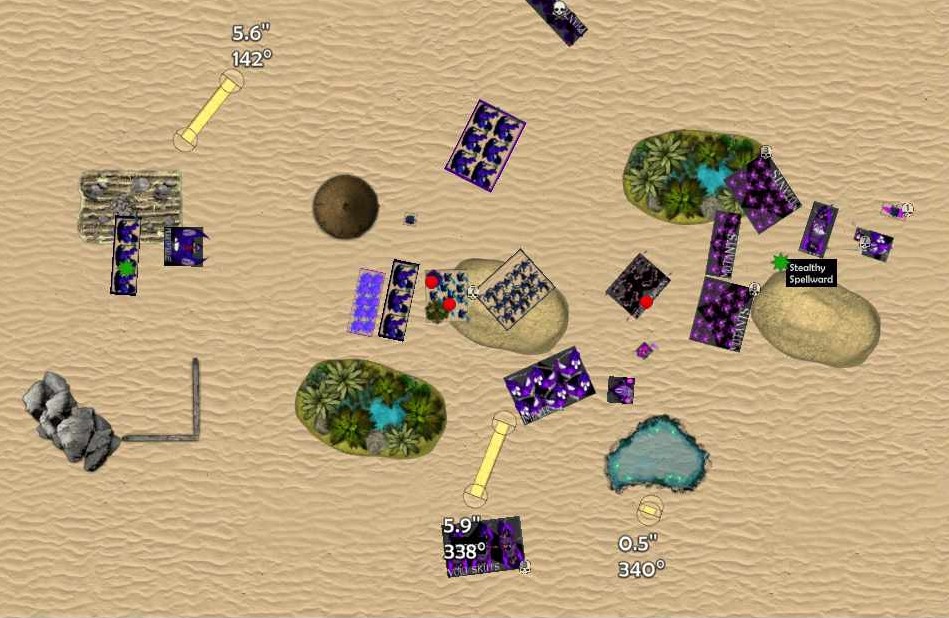
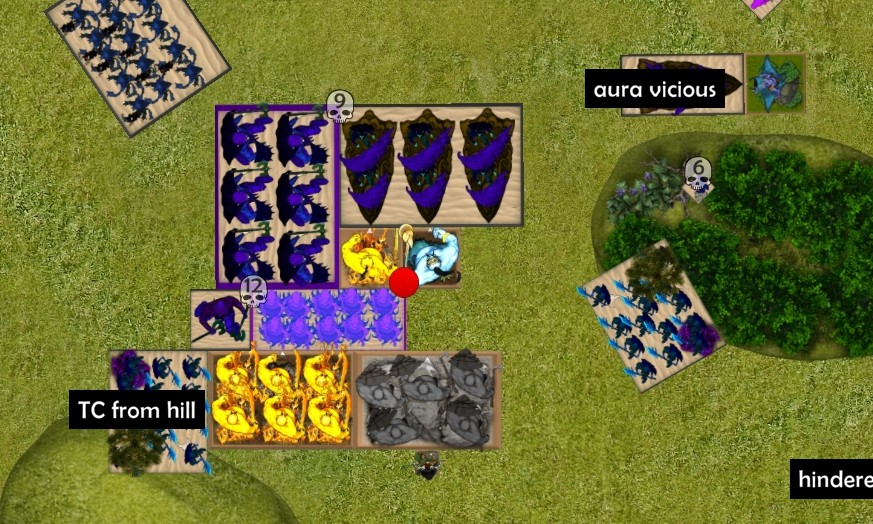
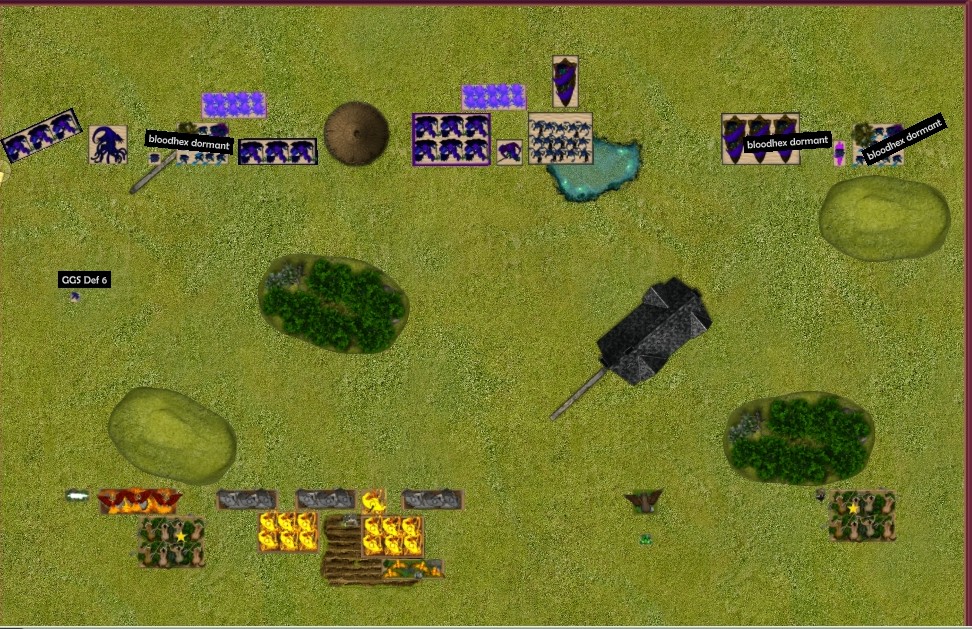
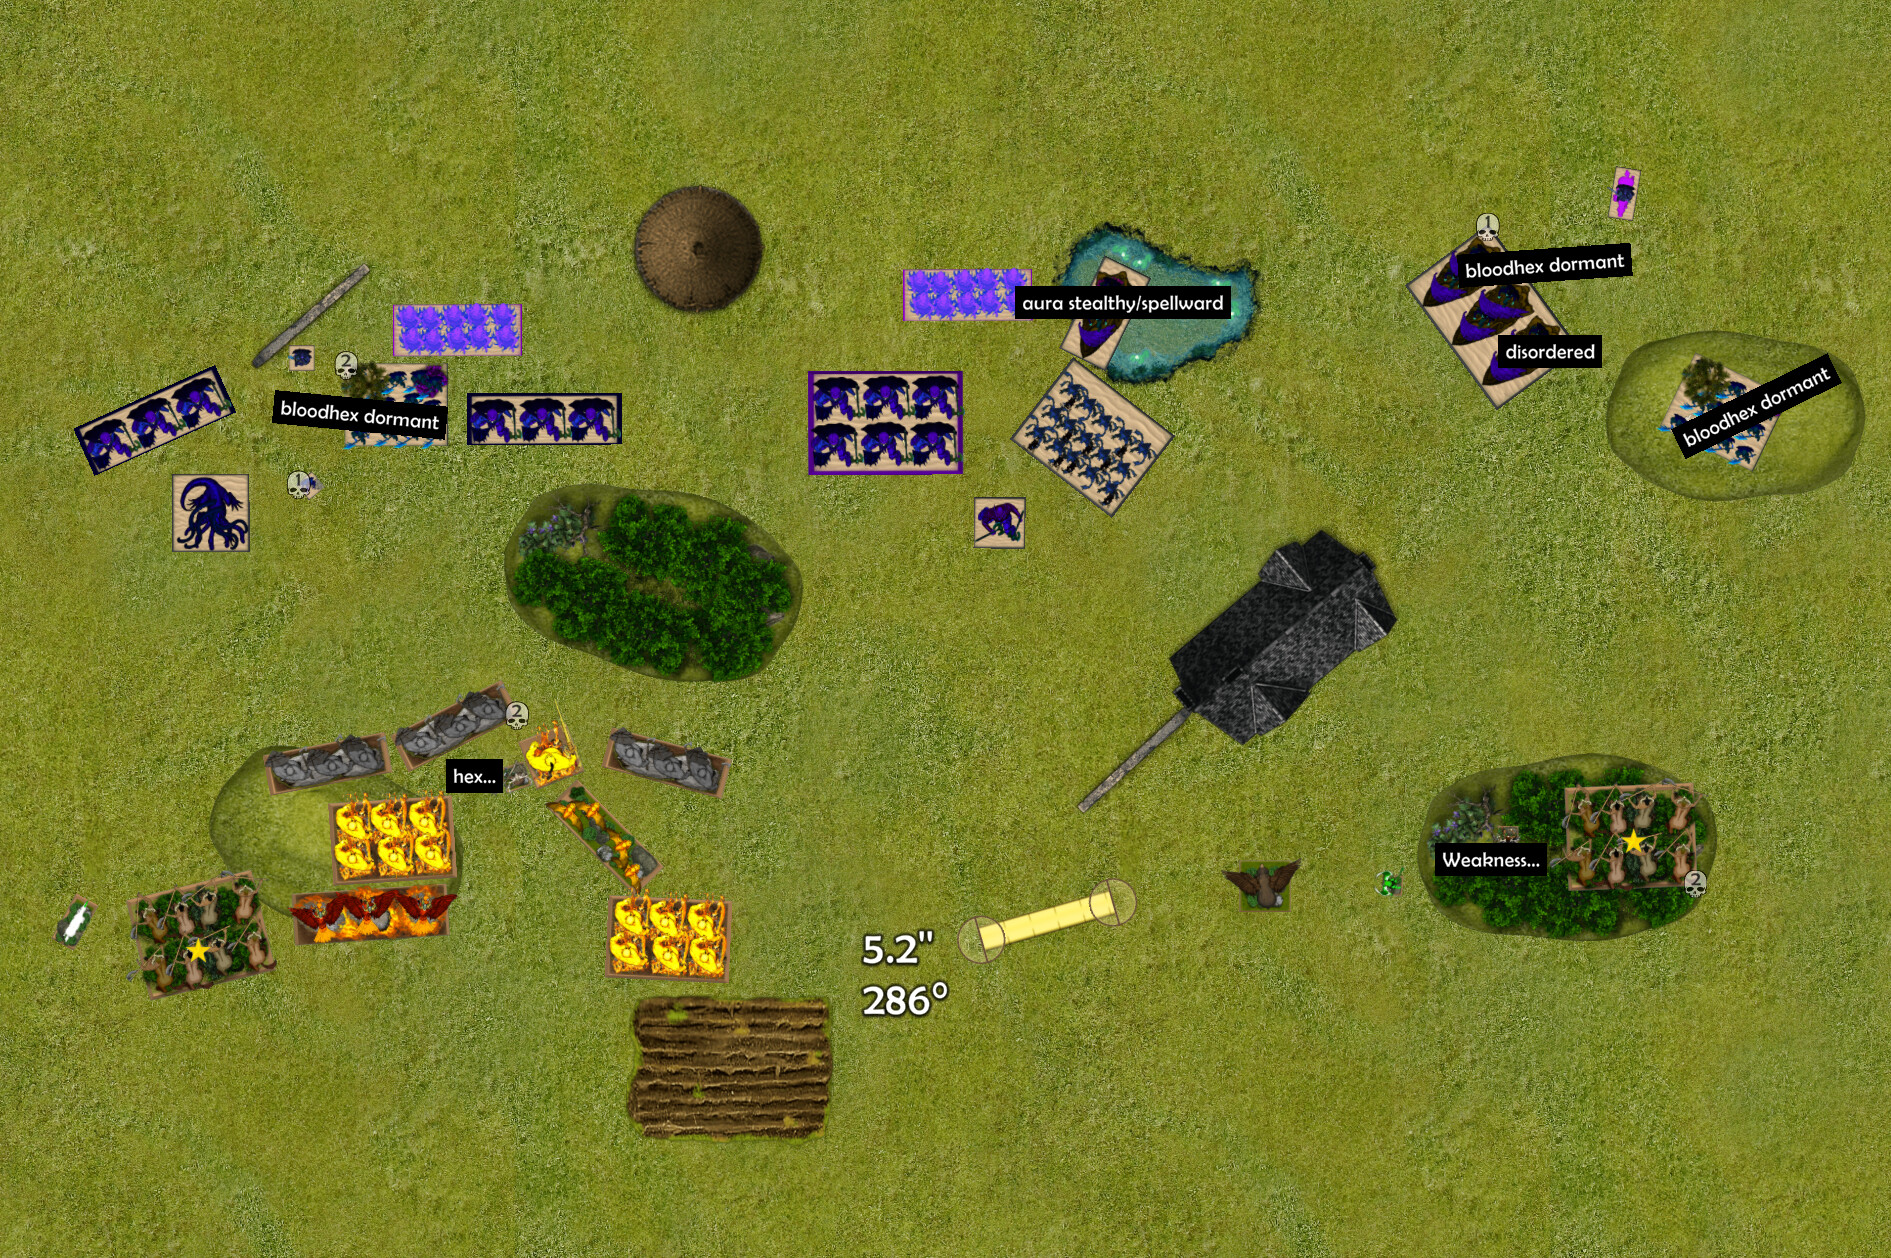
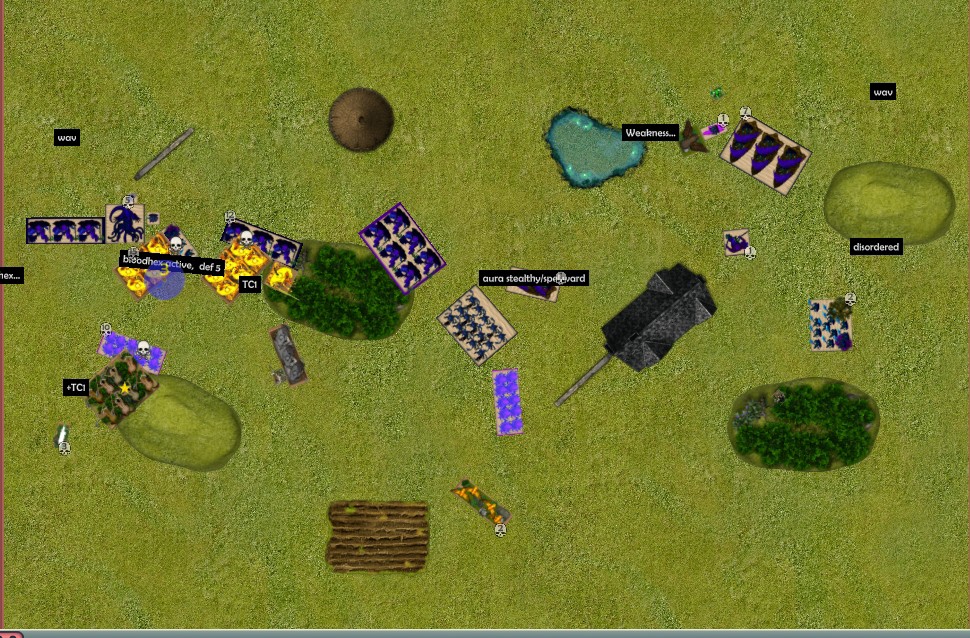
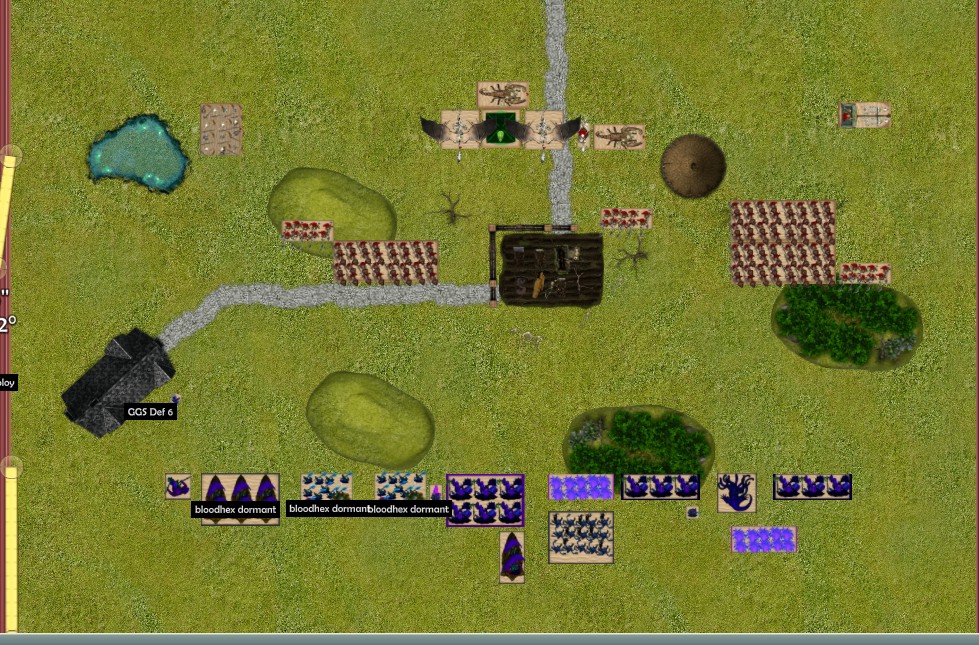
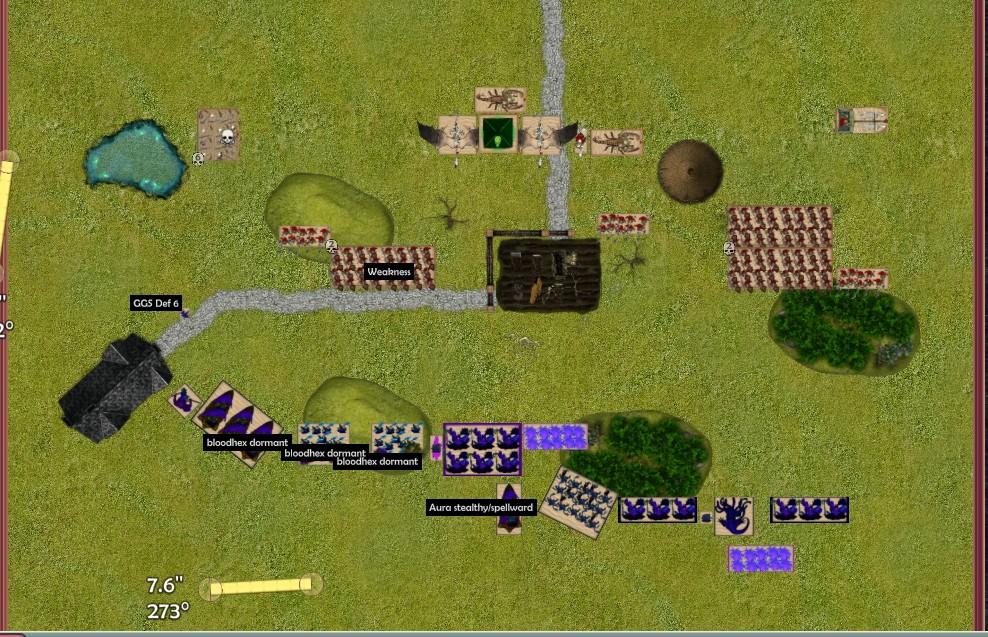
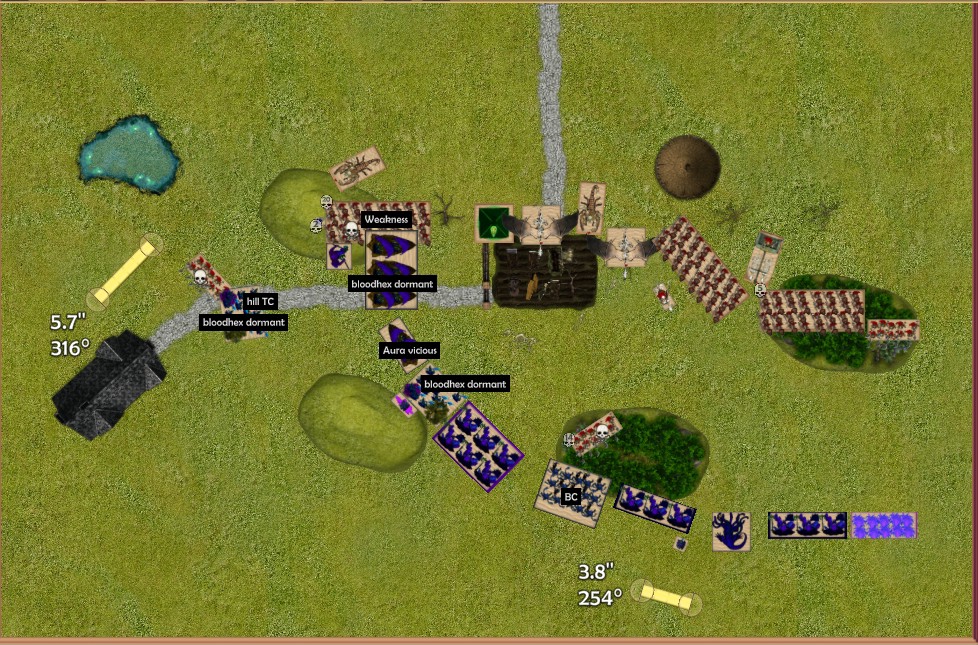
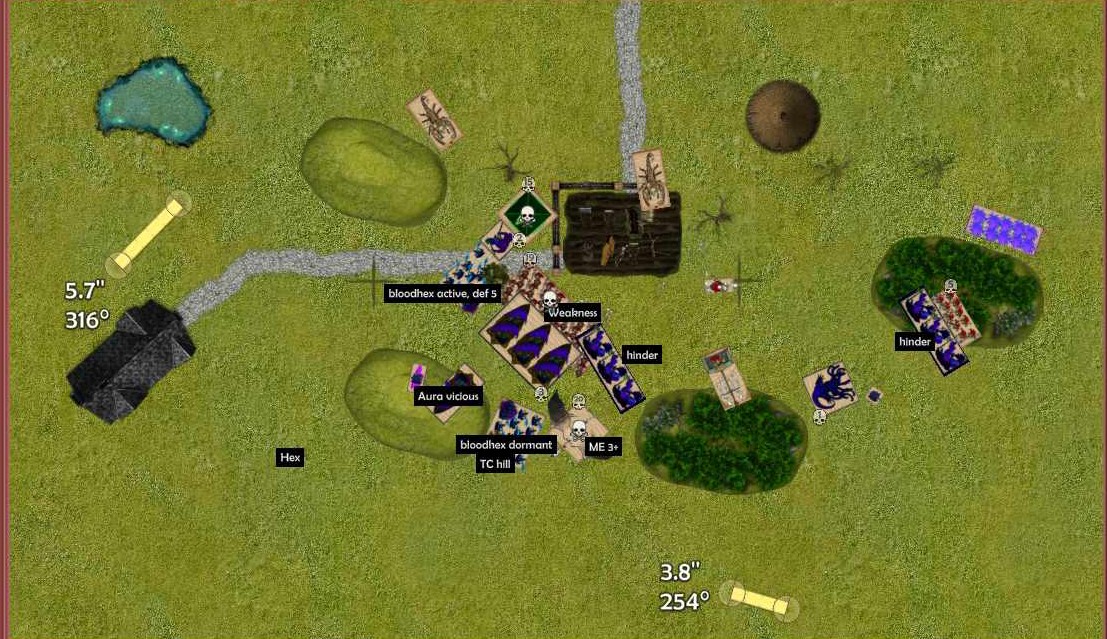
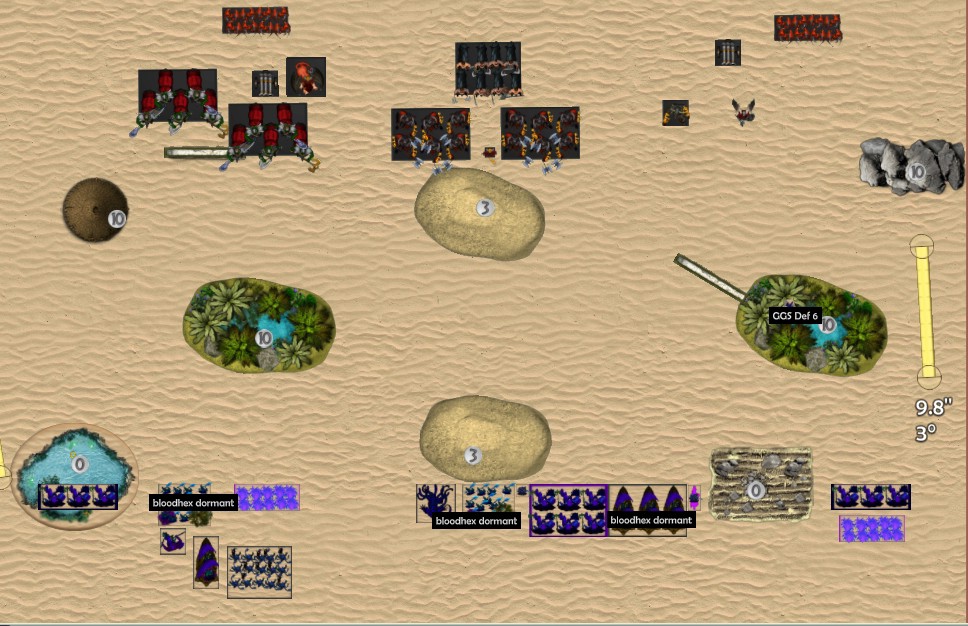
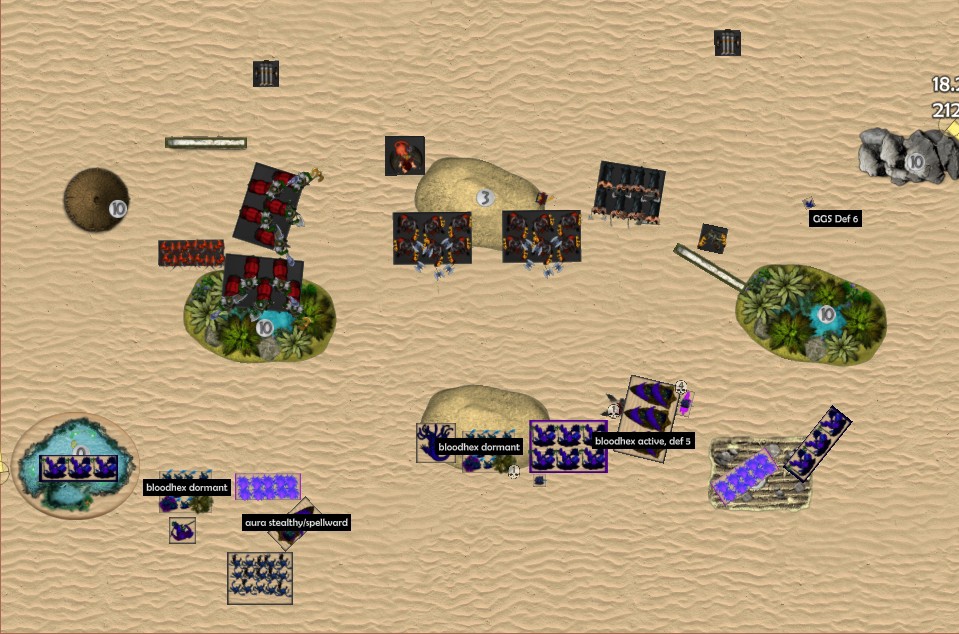
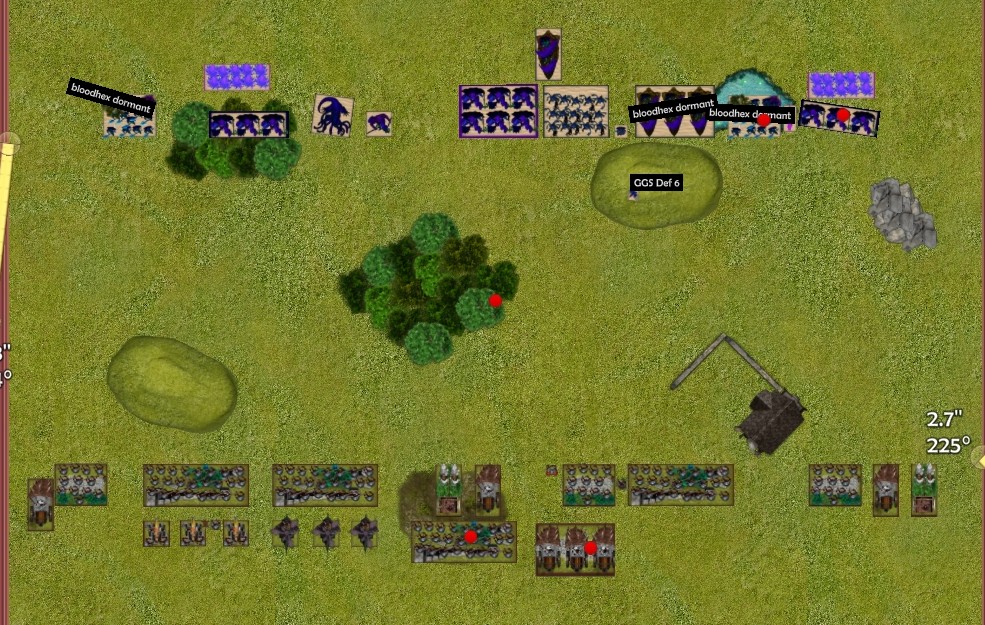
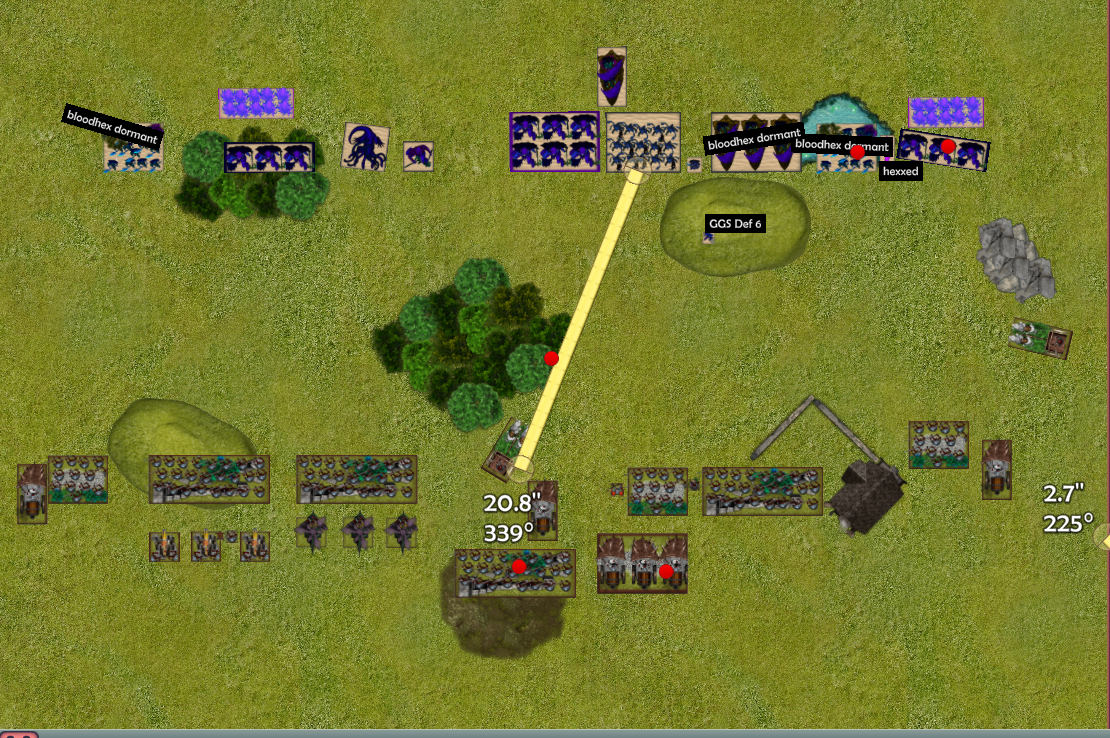
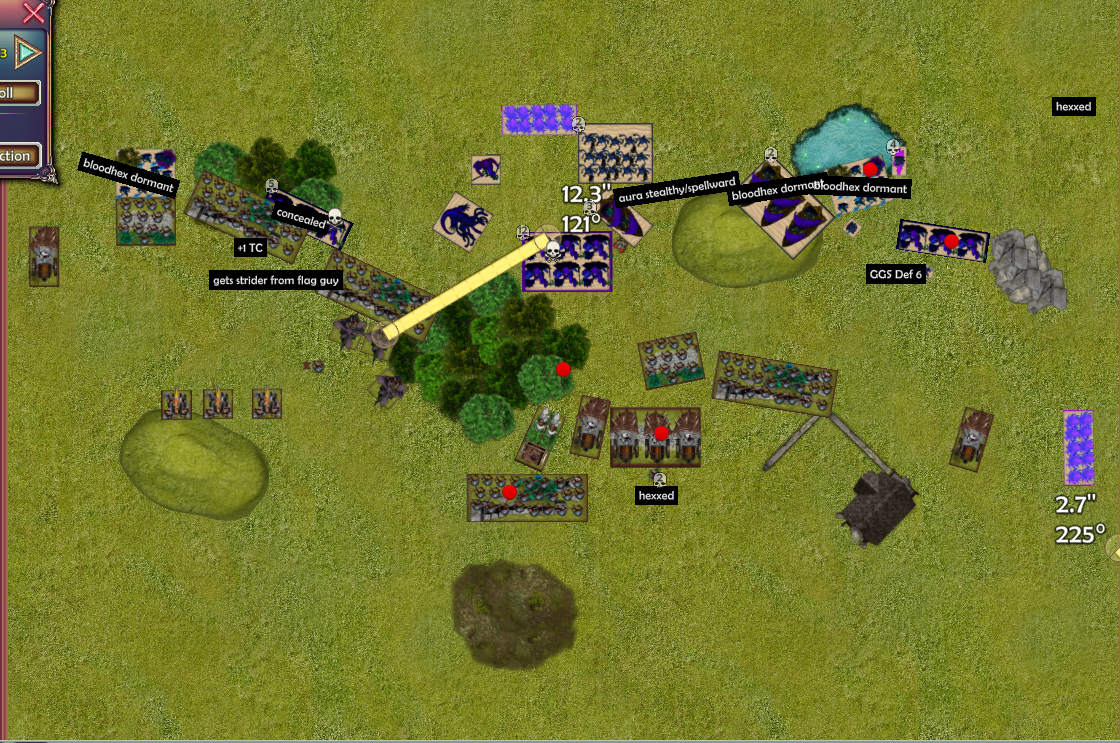
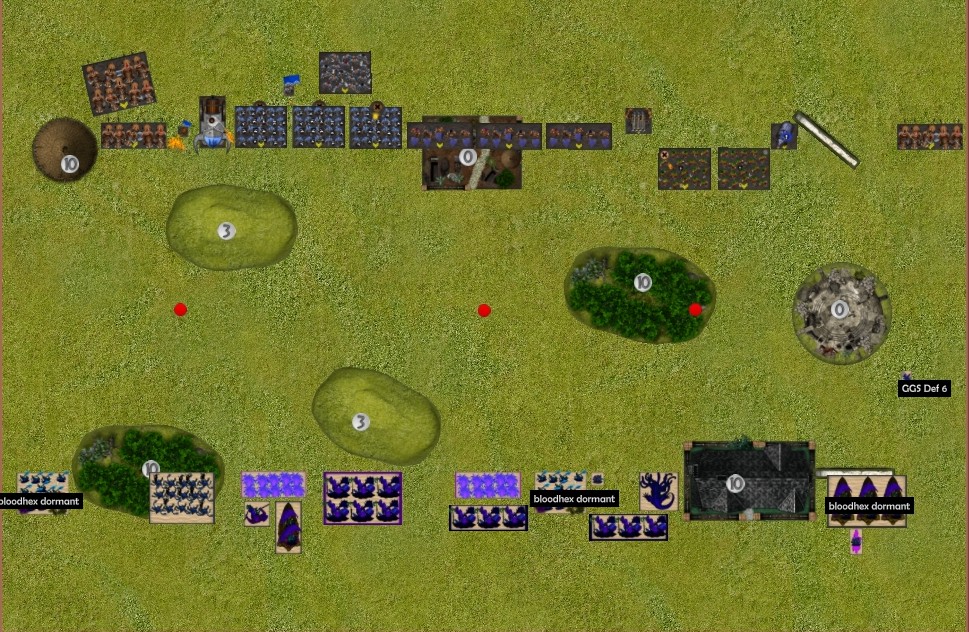
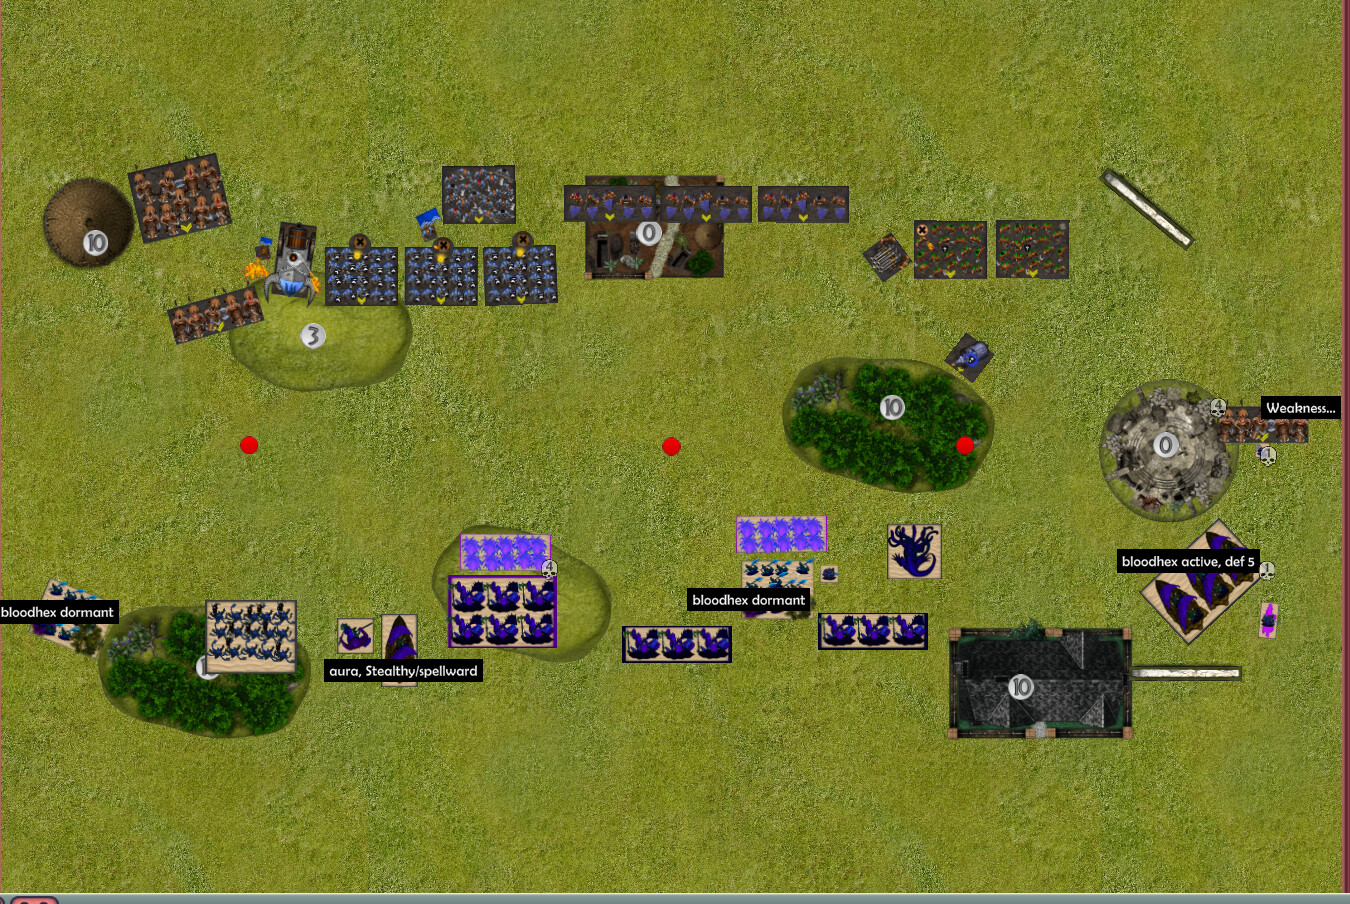
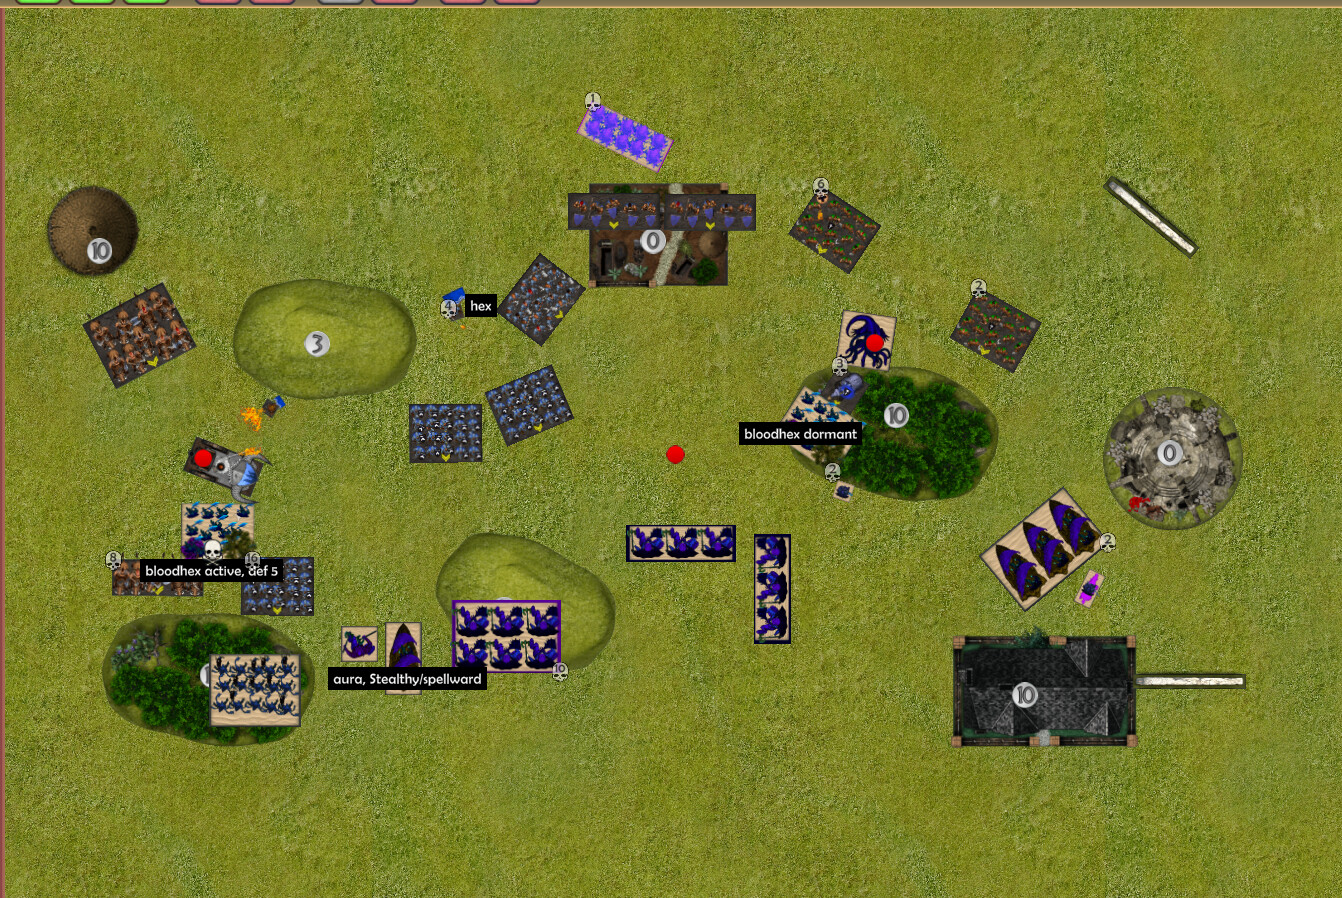
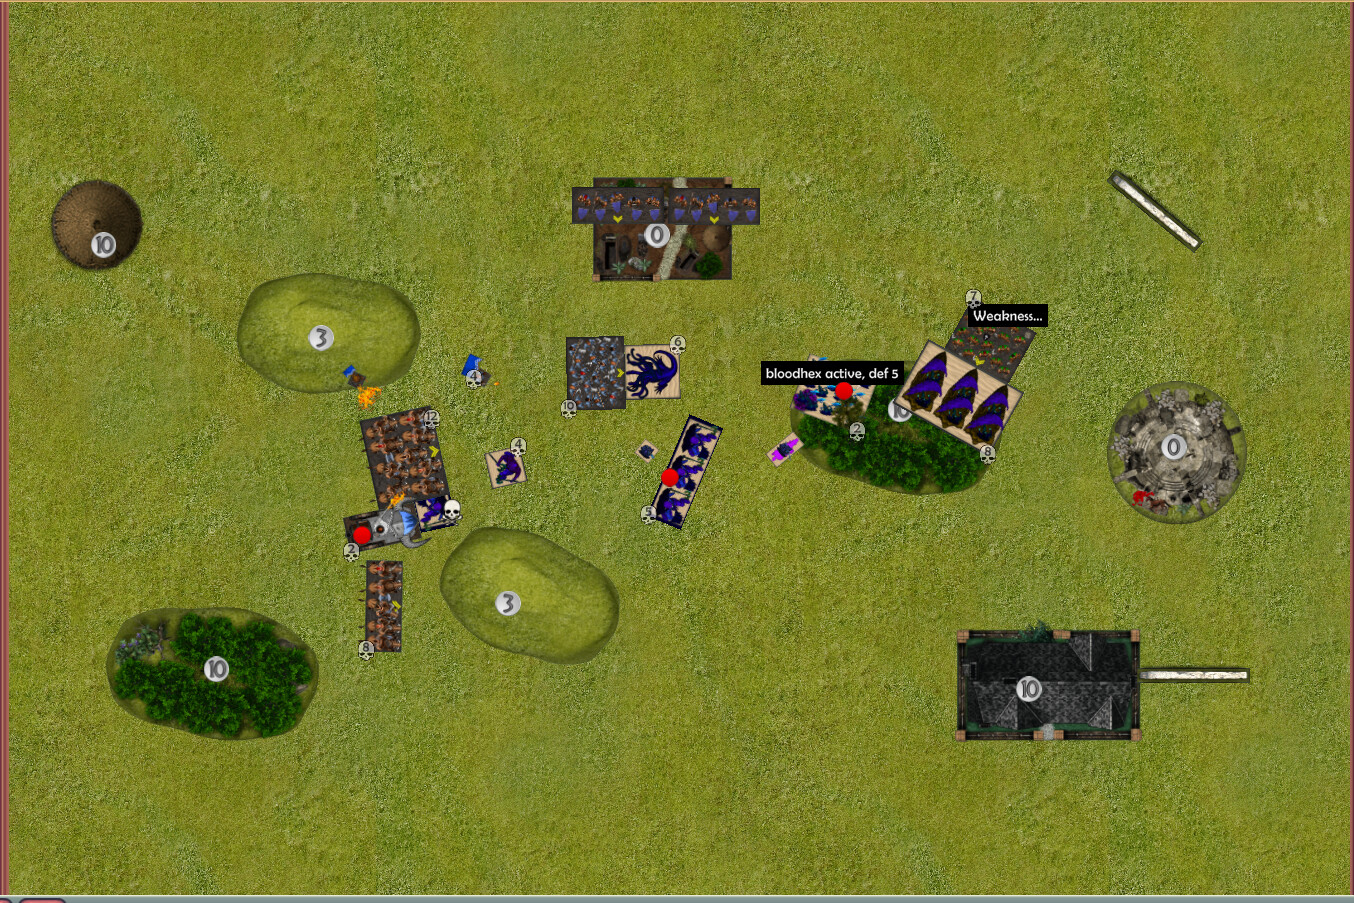
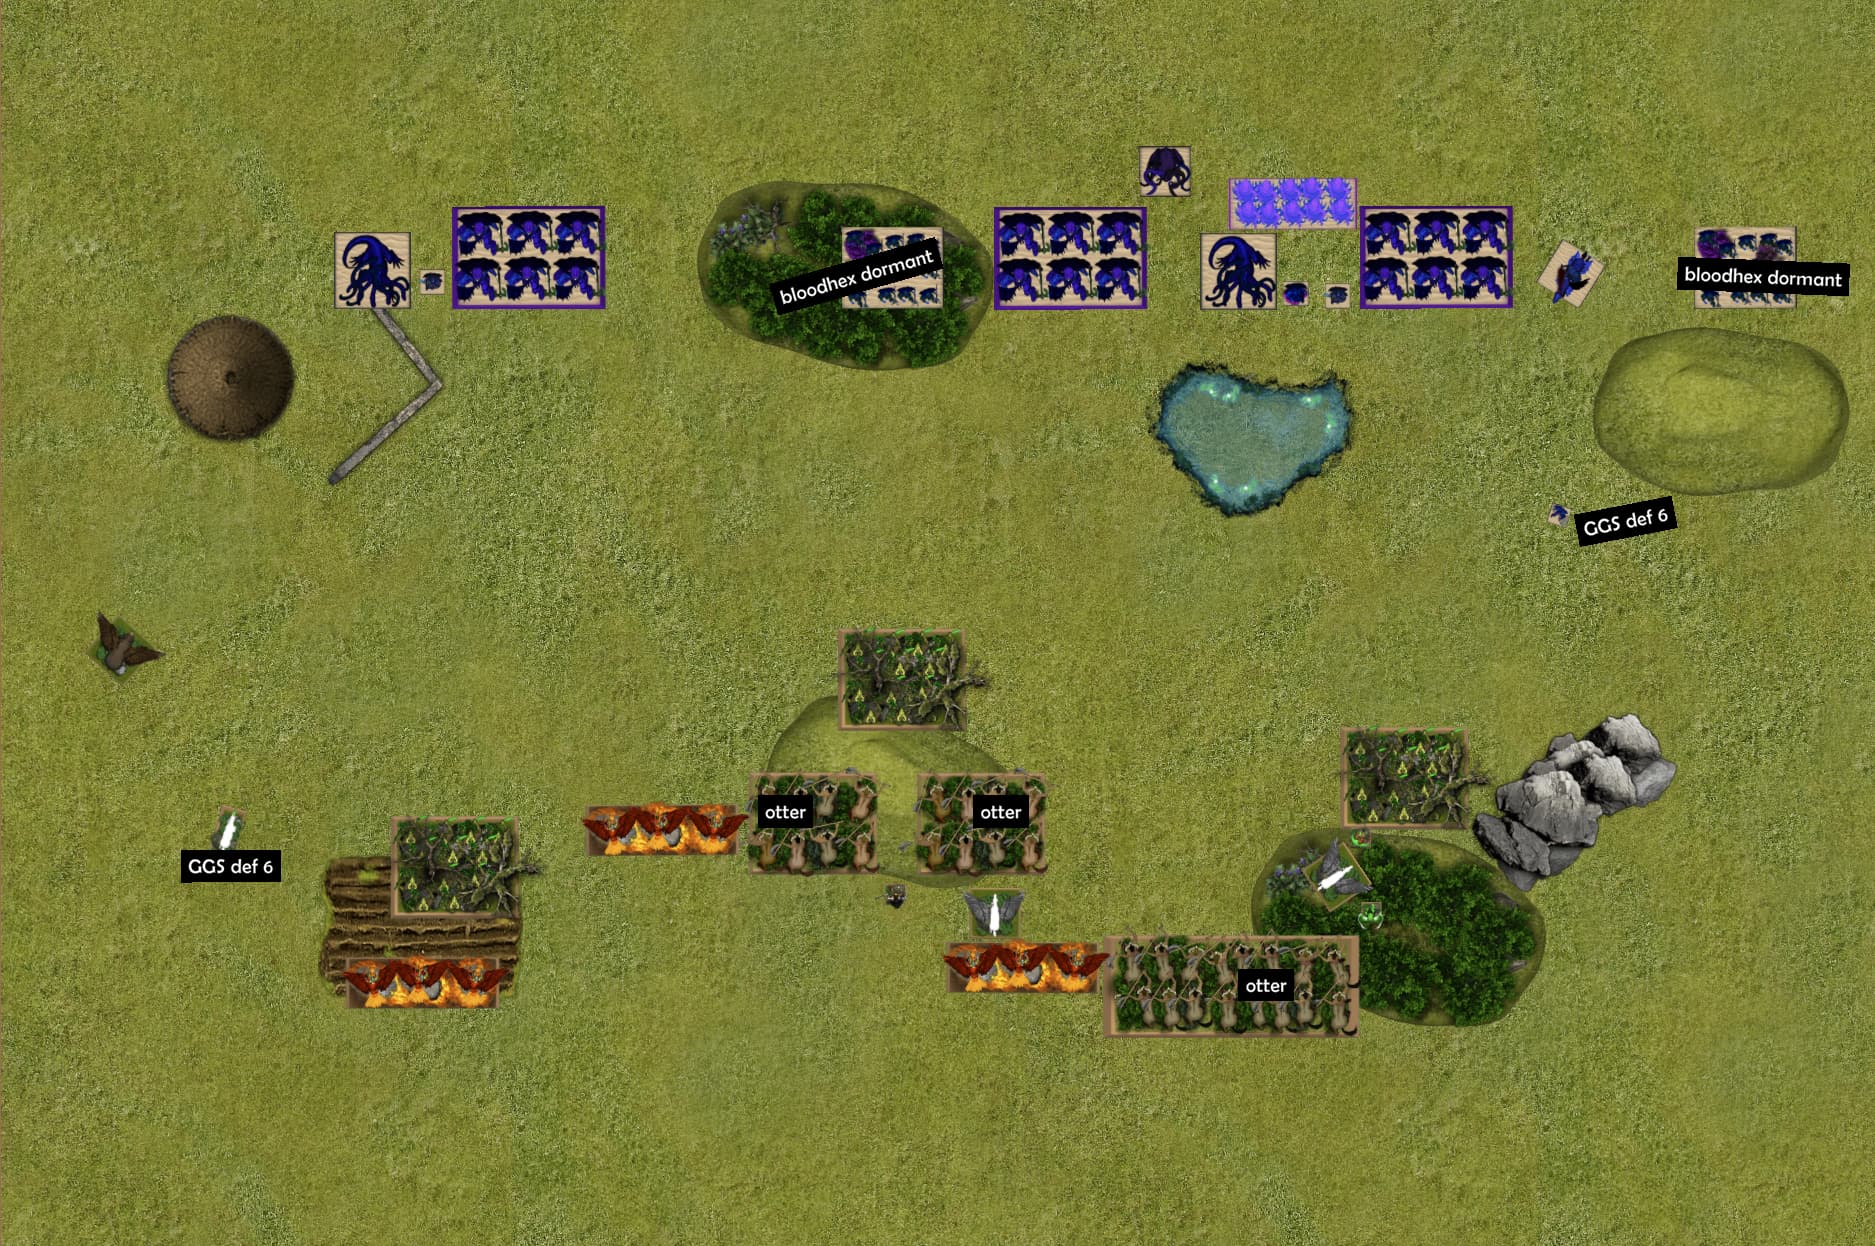
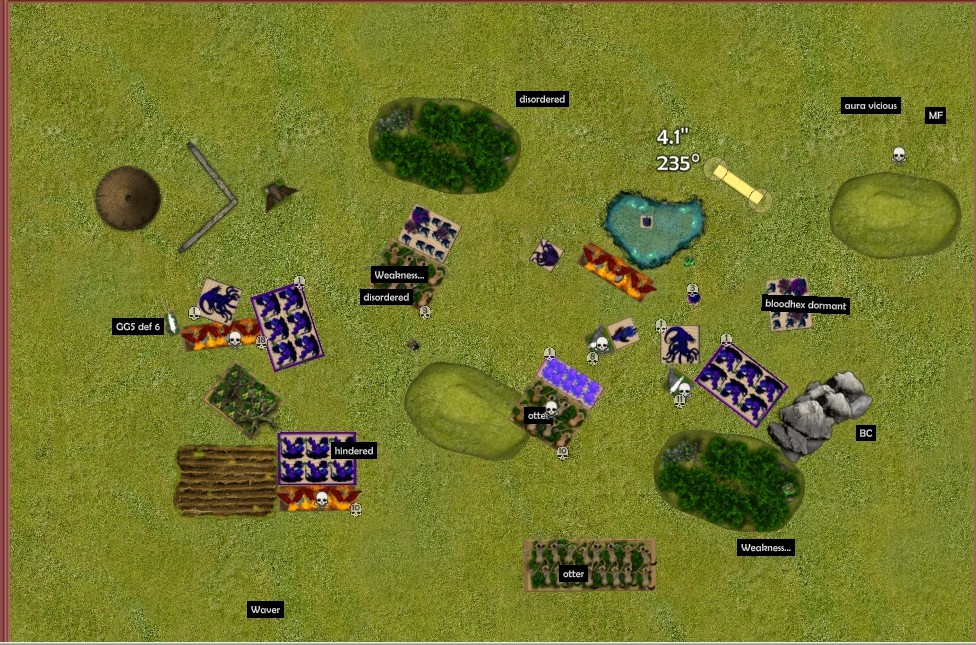
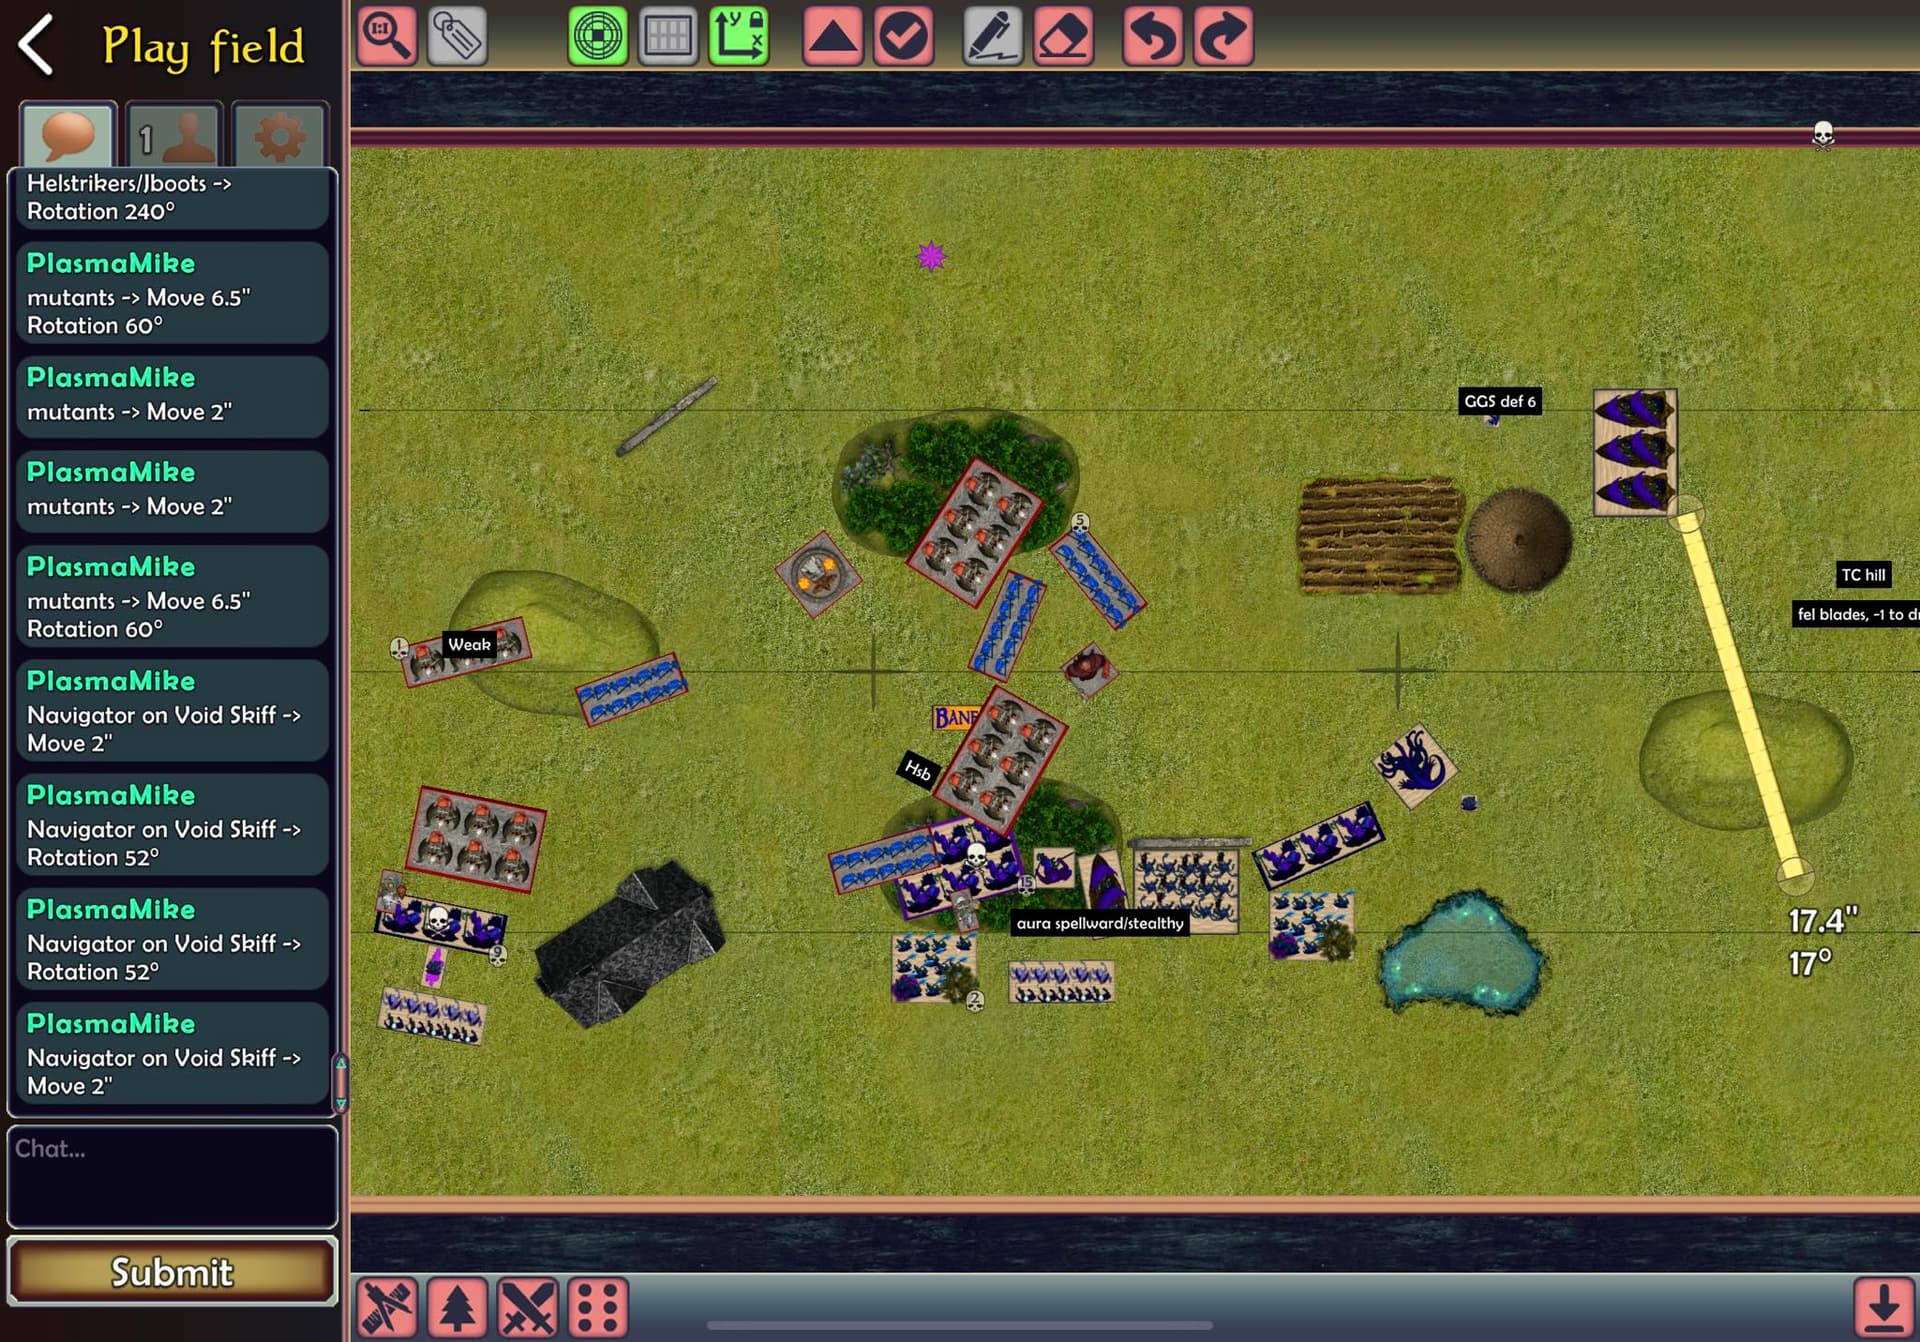
In this game I was severely outranged, but that is something I think I will have to be used to with the new TK. I deployed mostly by a planned design,and less reactive, except for the assassin, hoping for a T1 charge on a unit all alone.
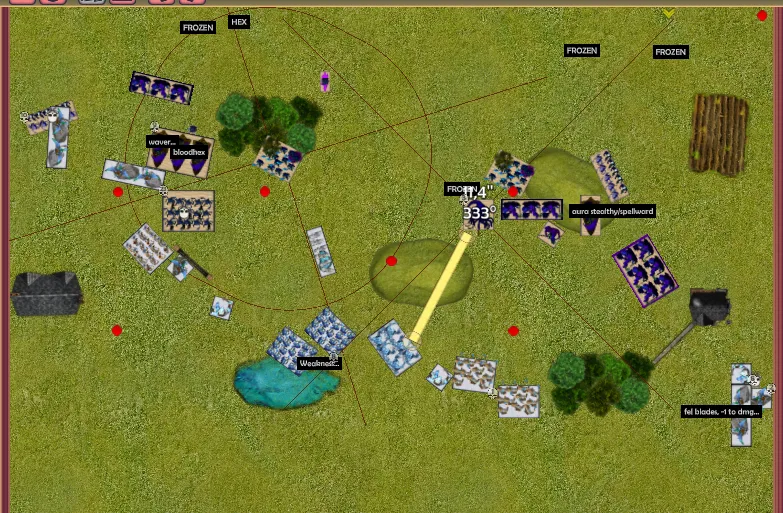
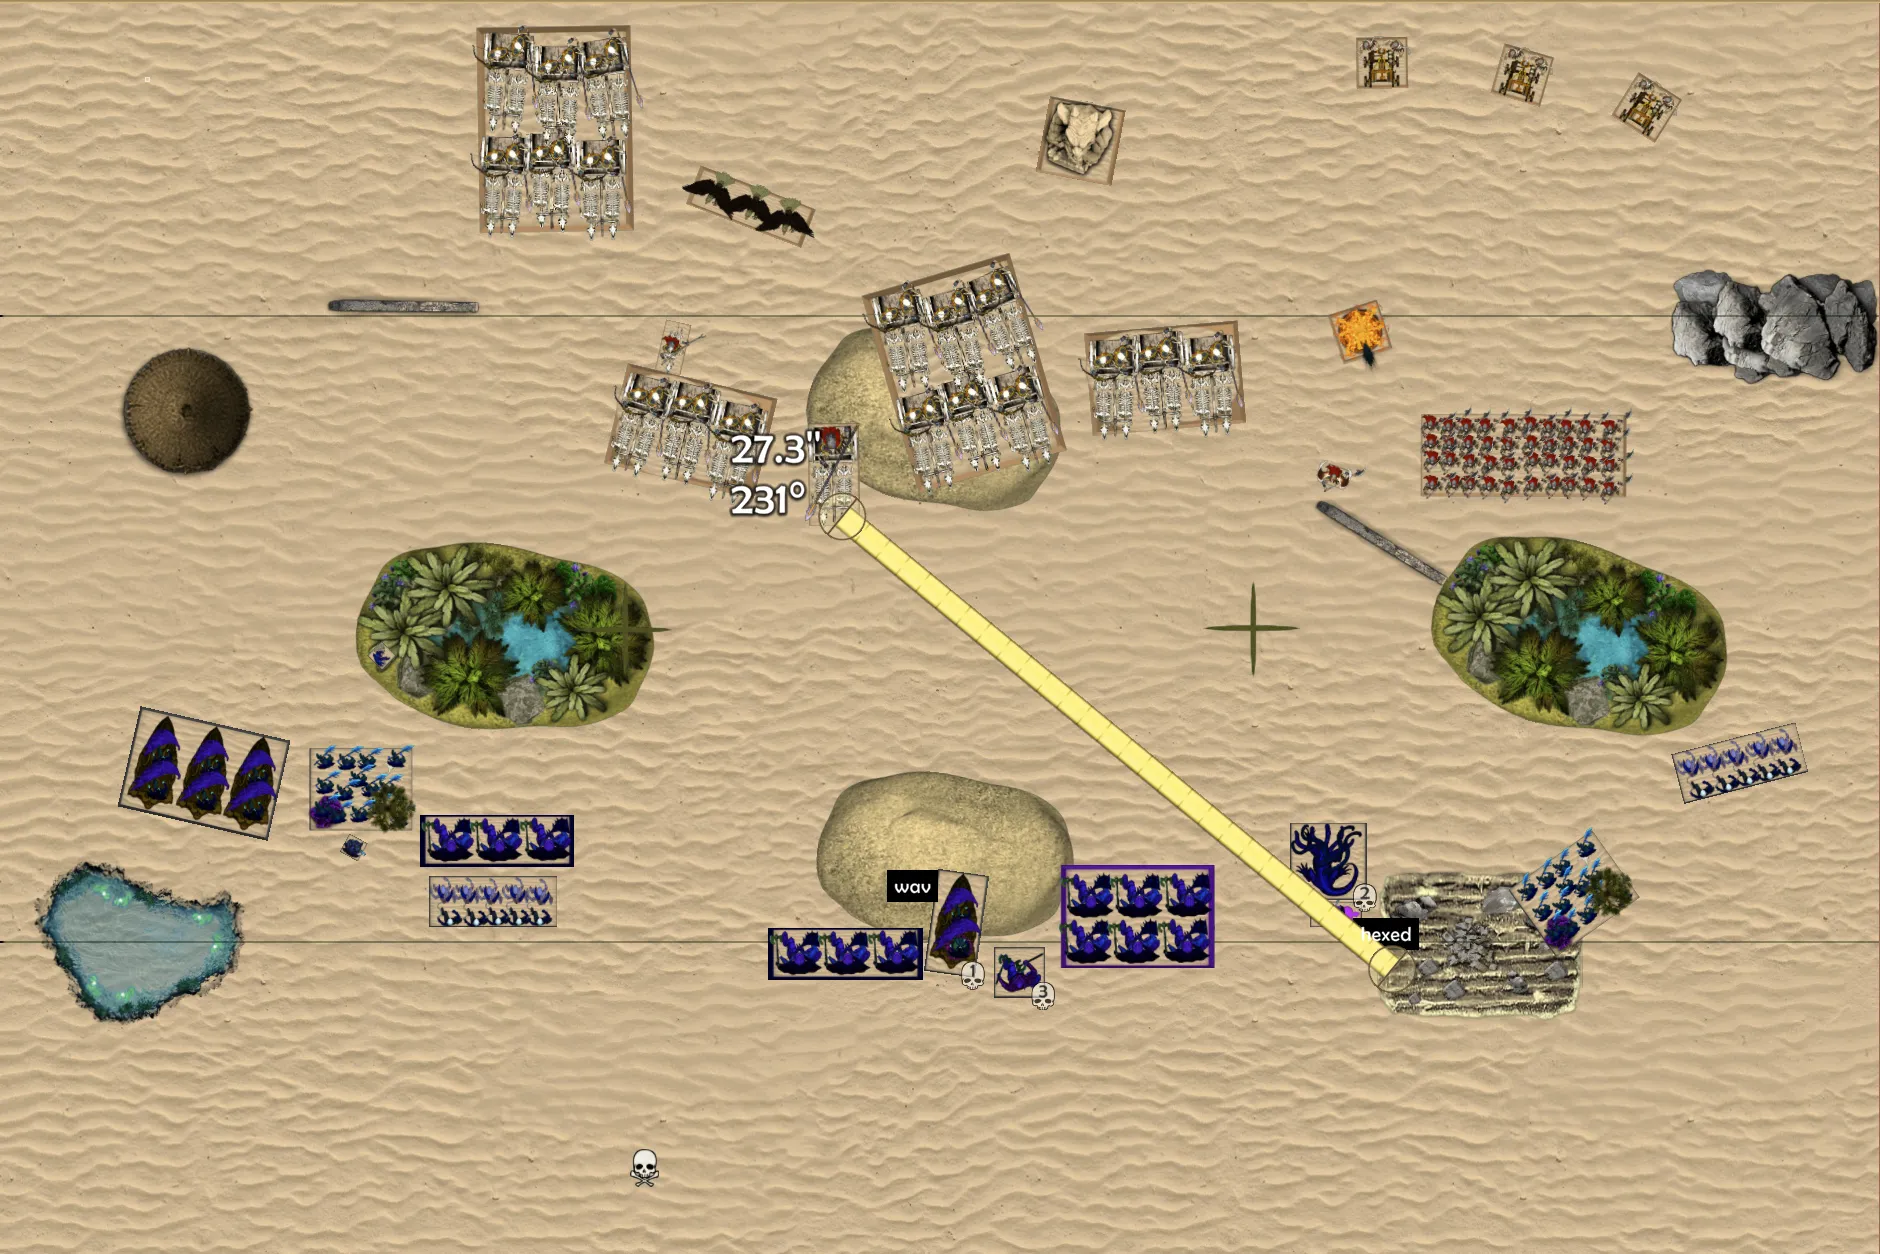
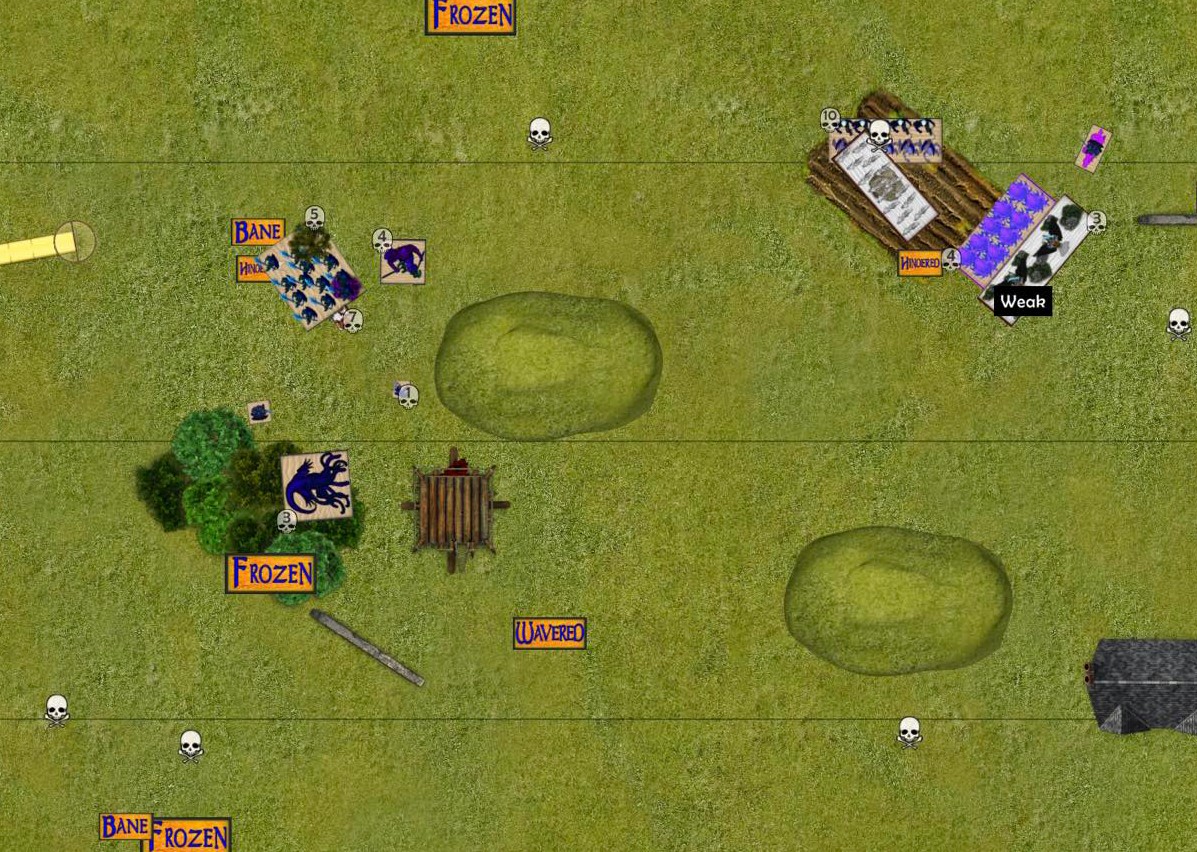
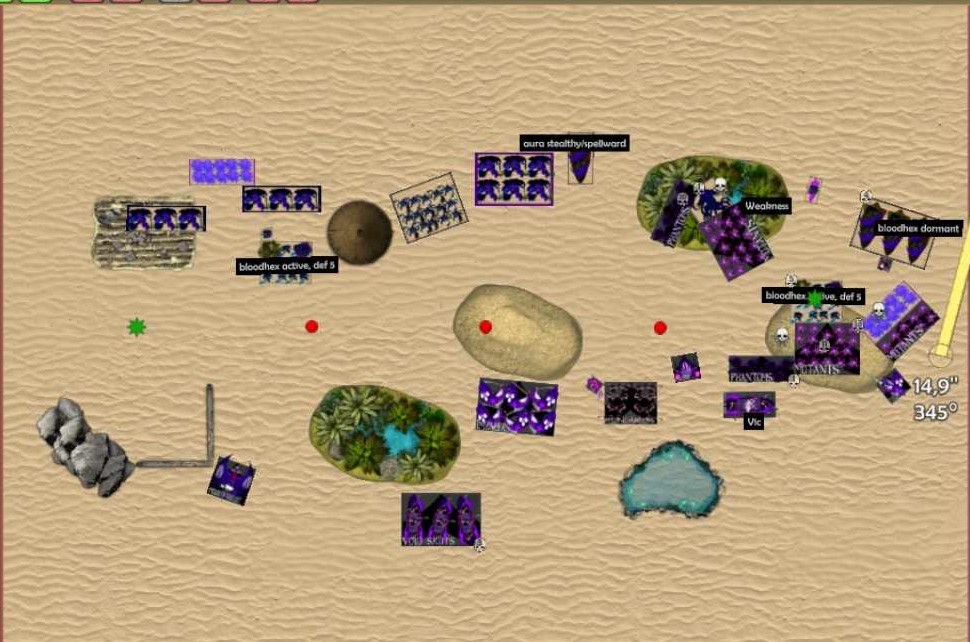
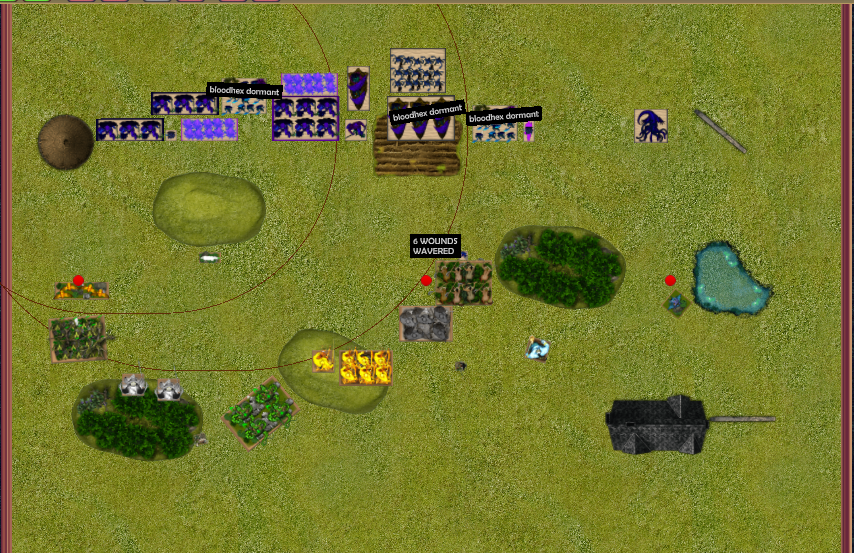
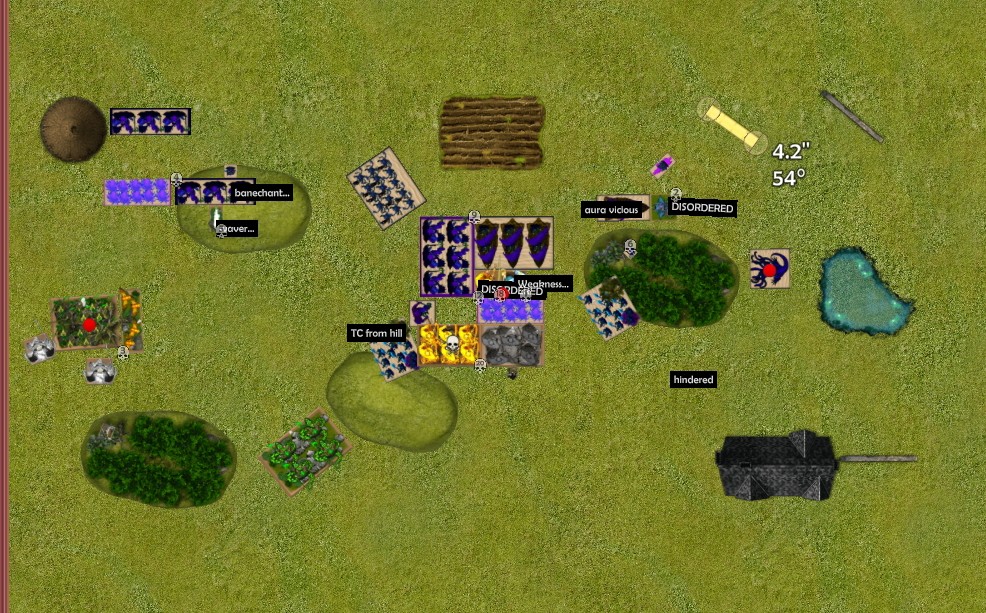
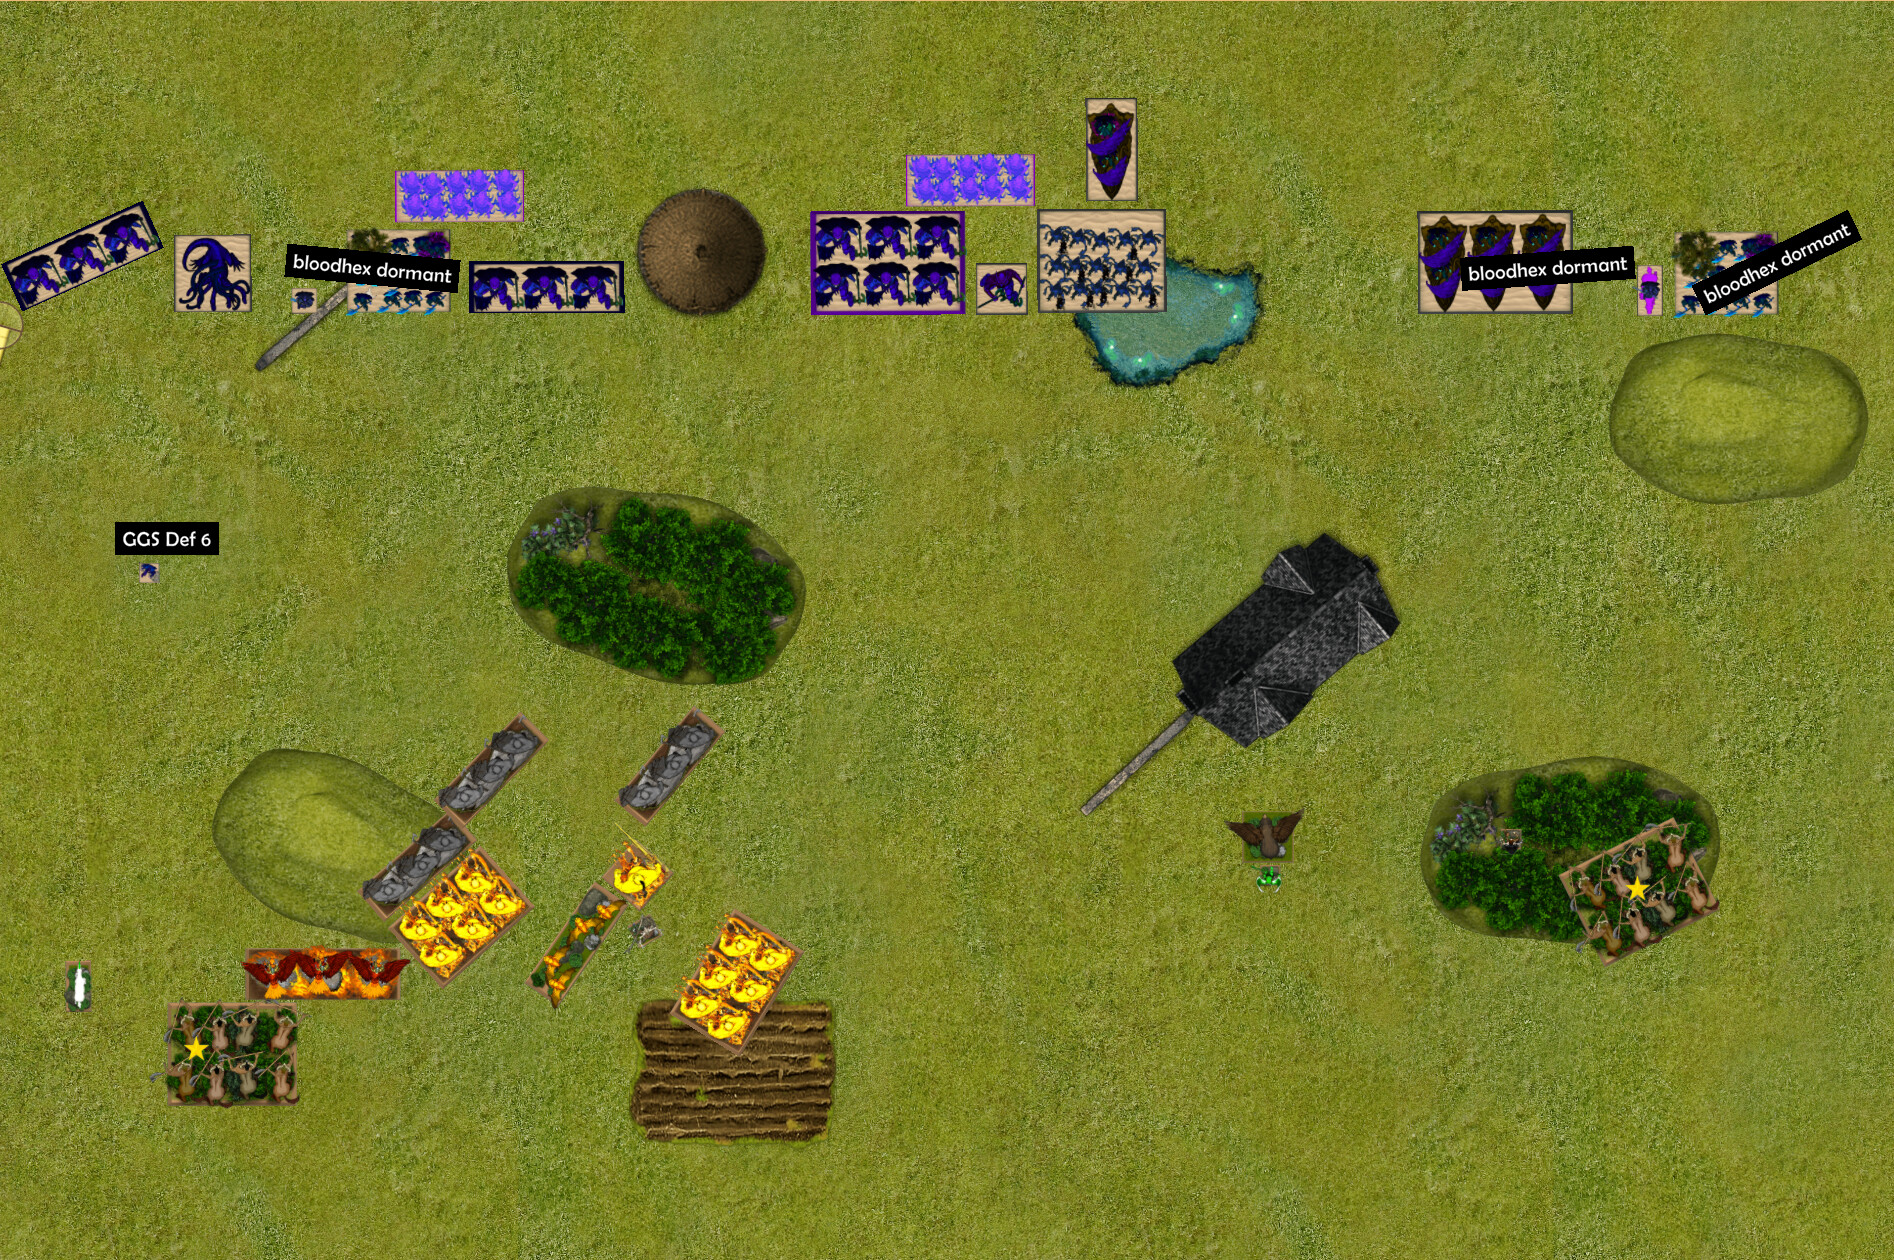
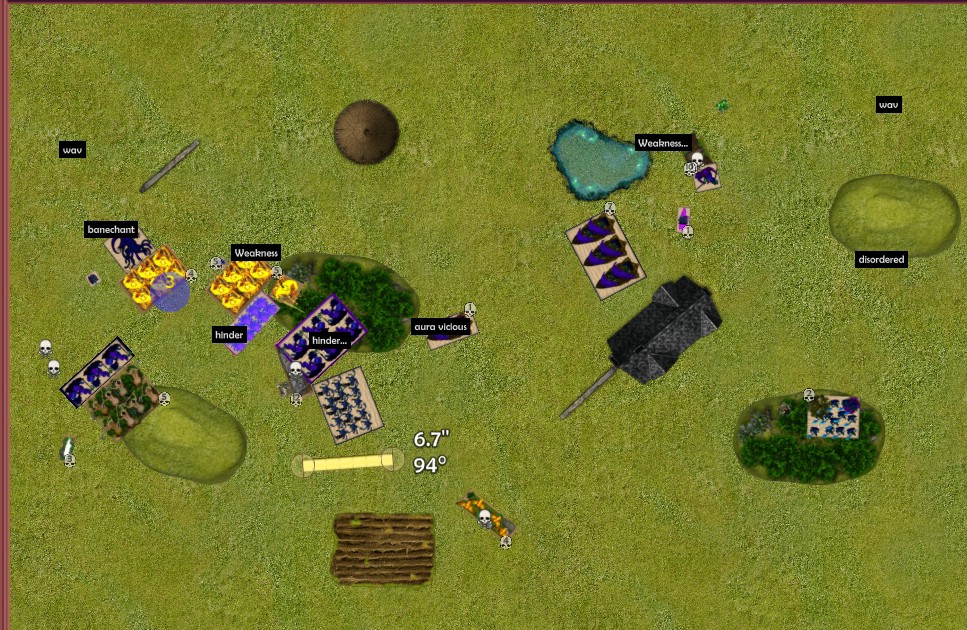
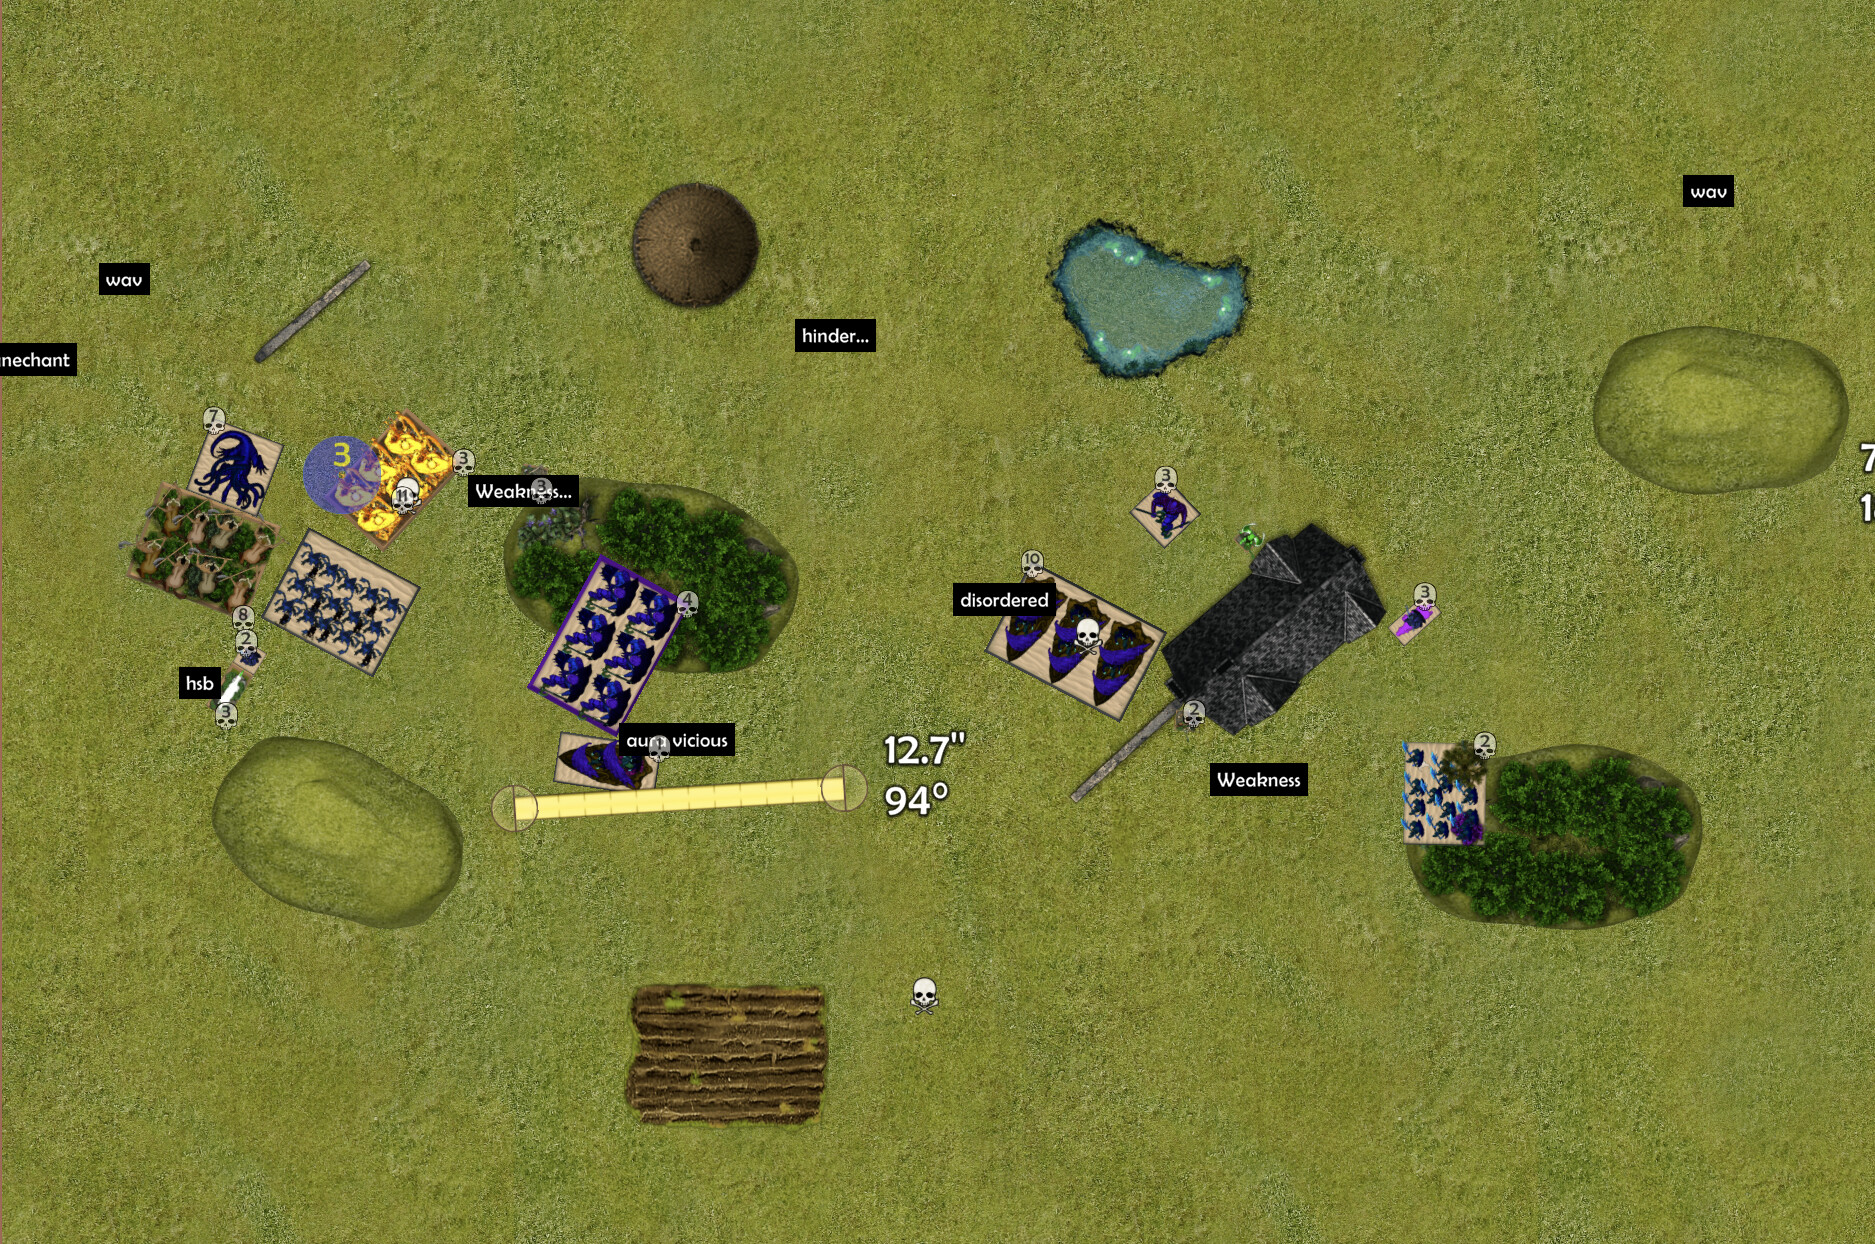
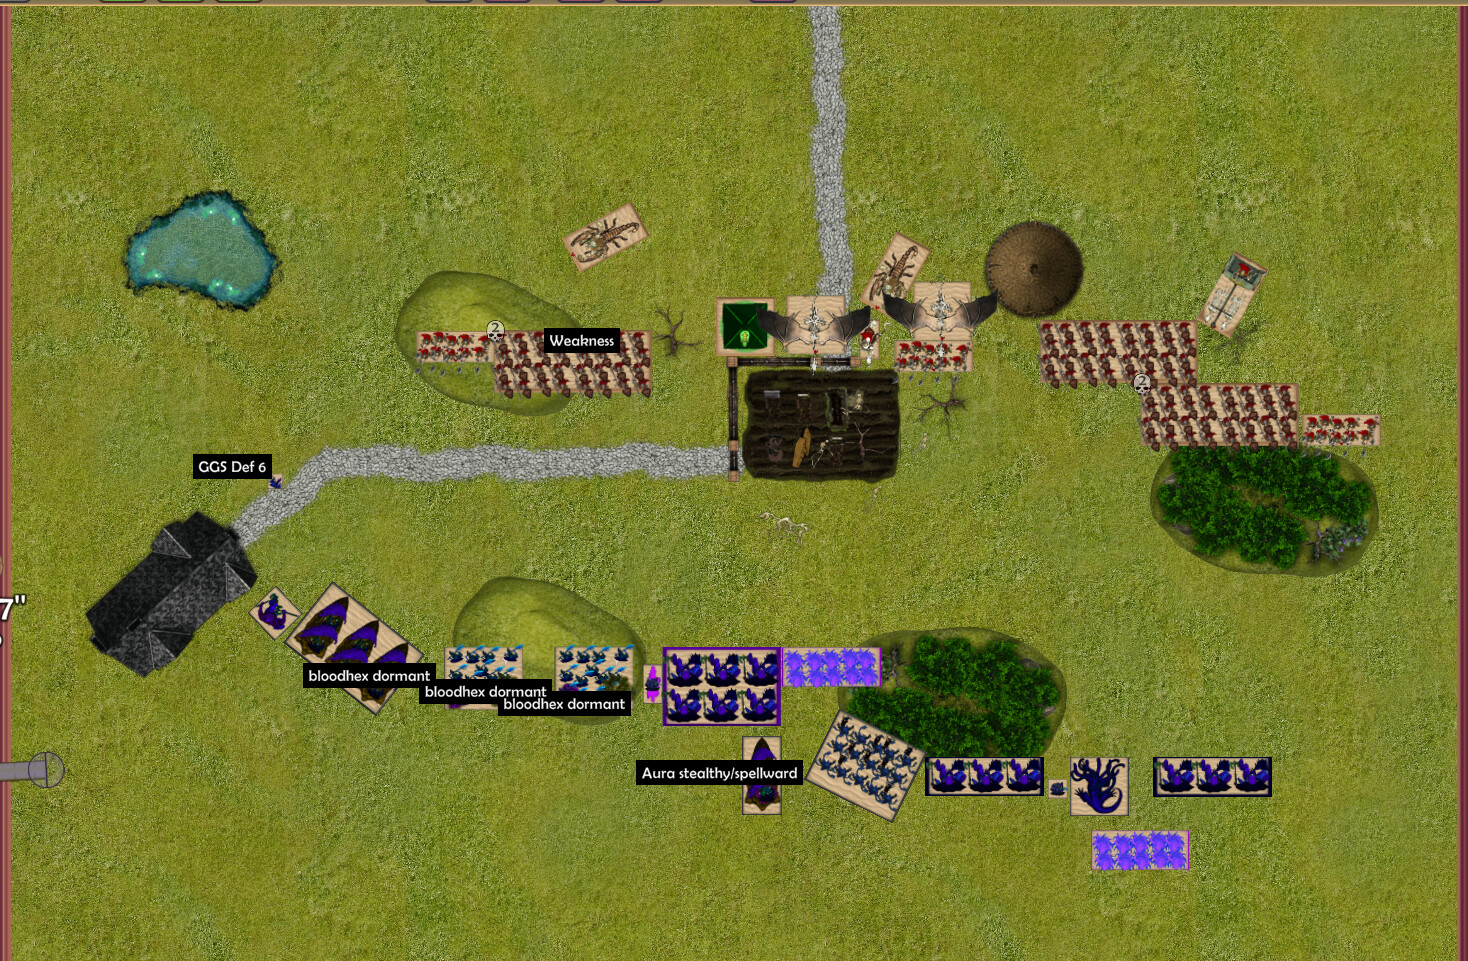
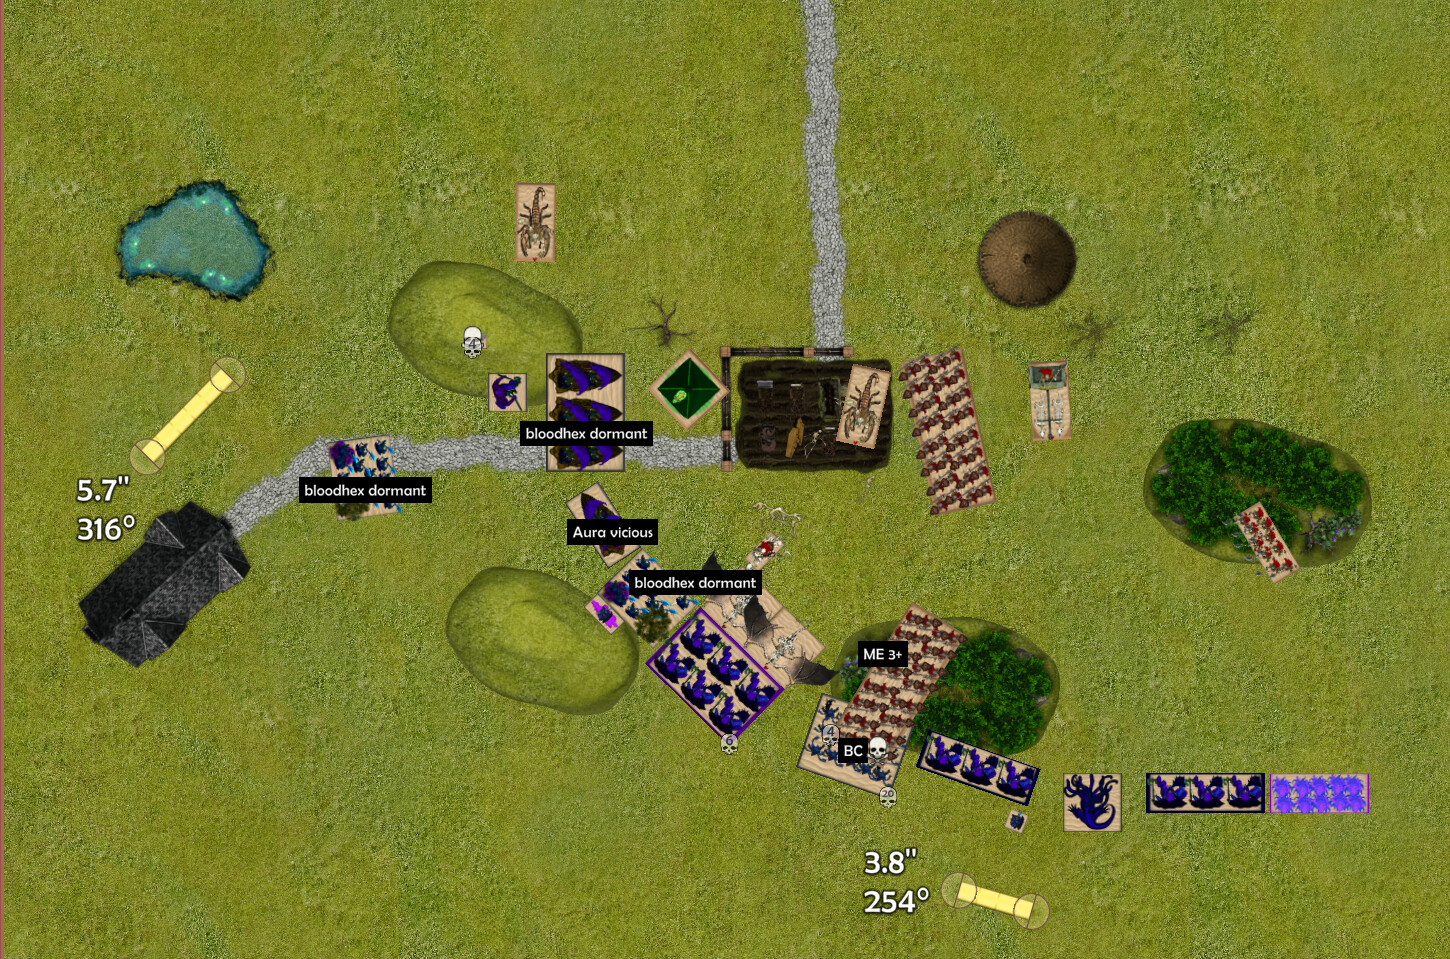
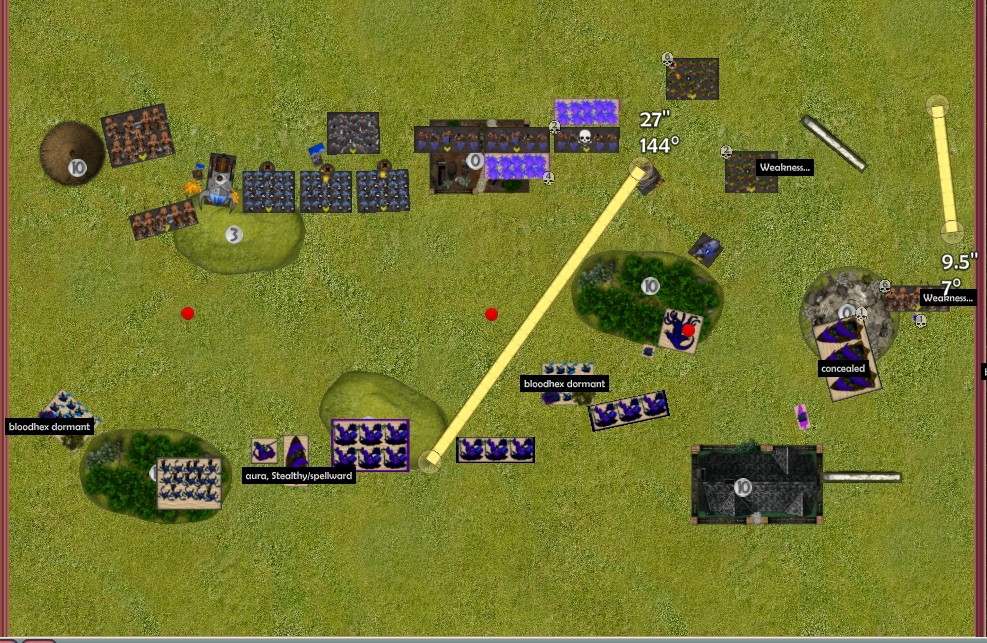
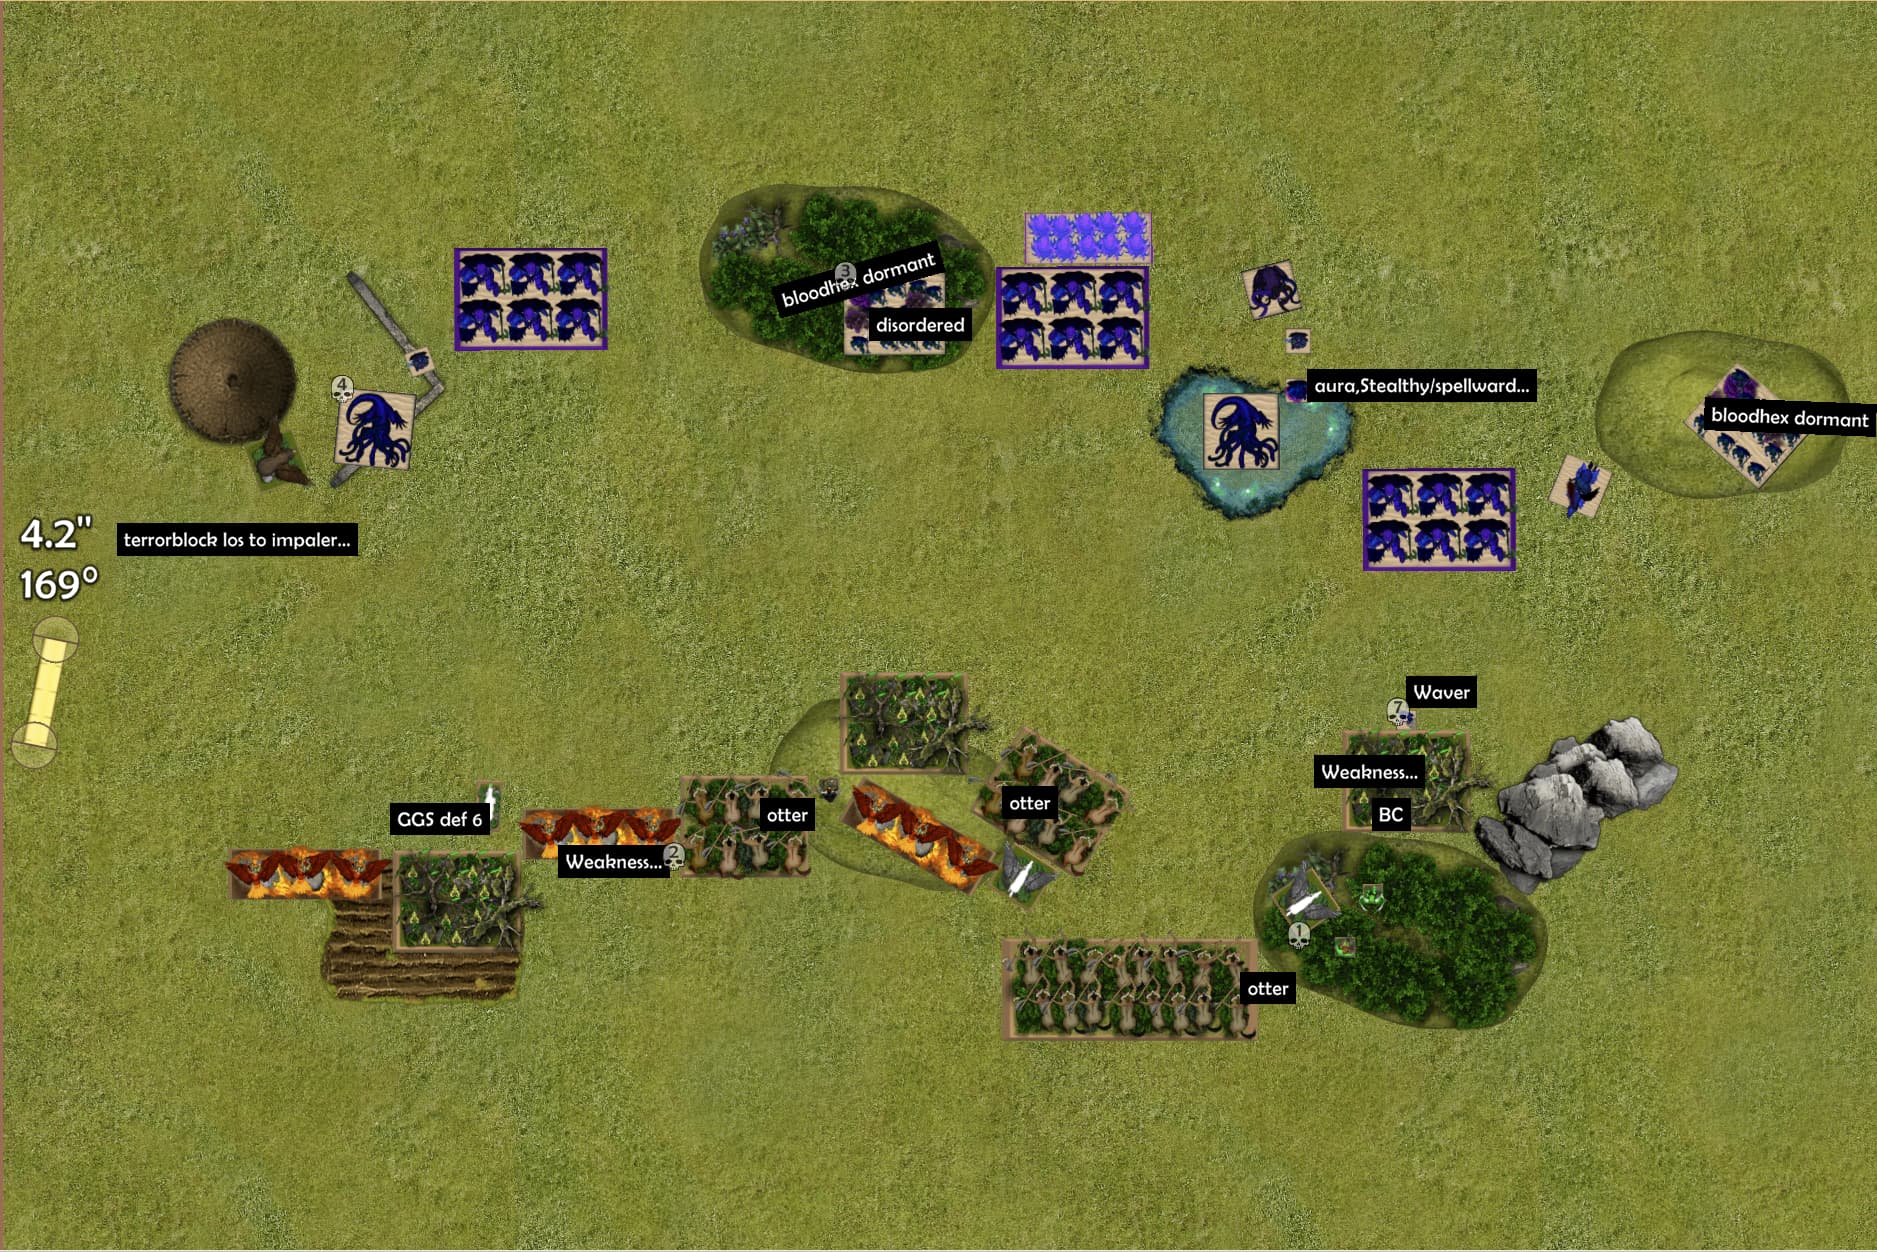
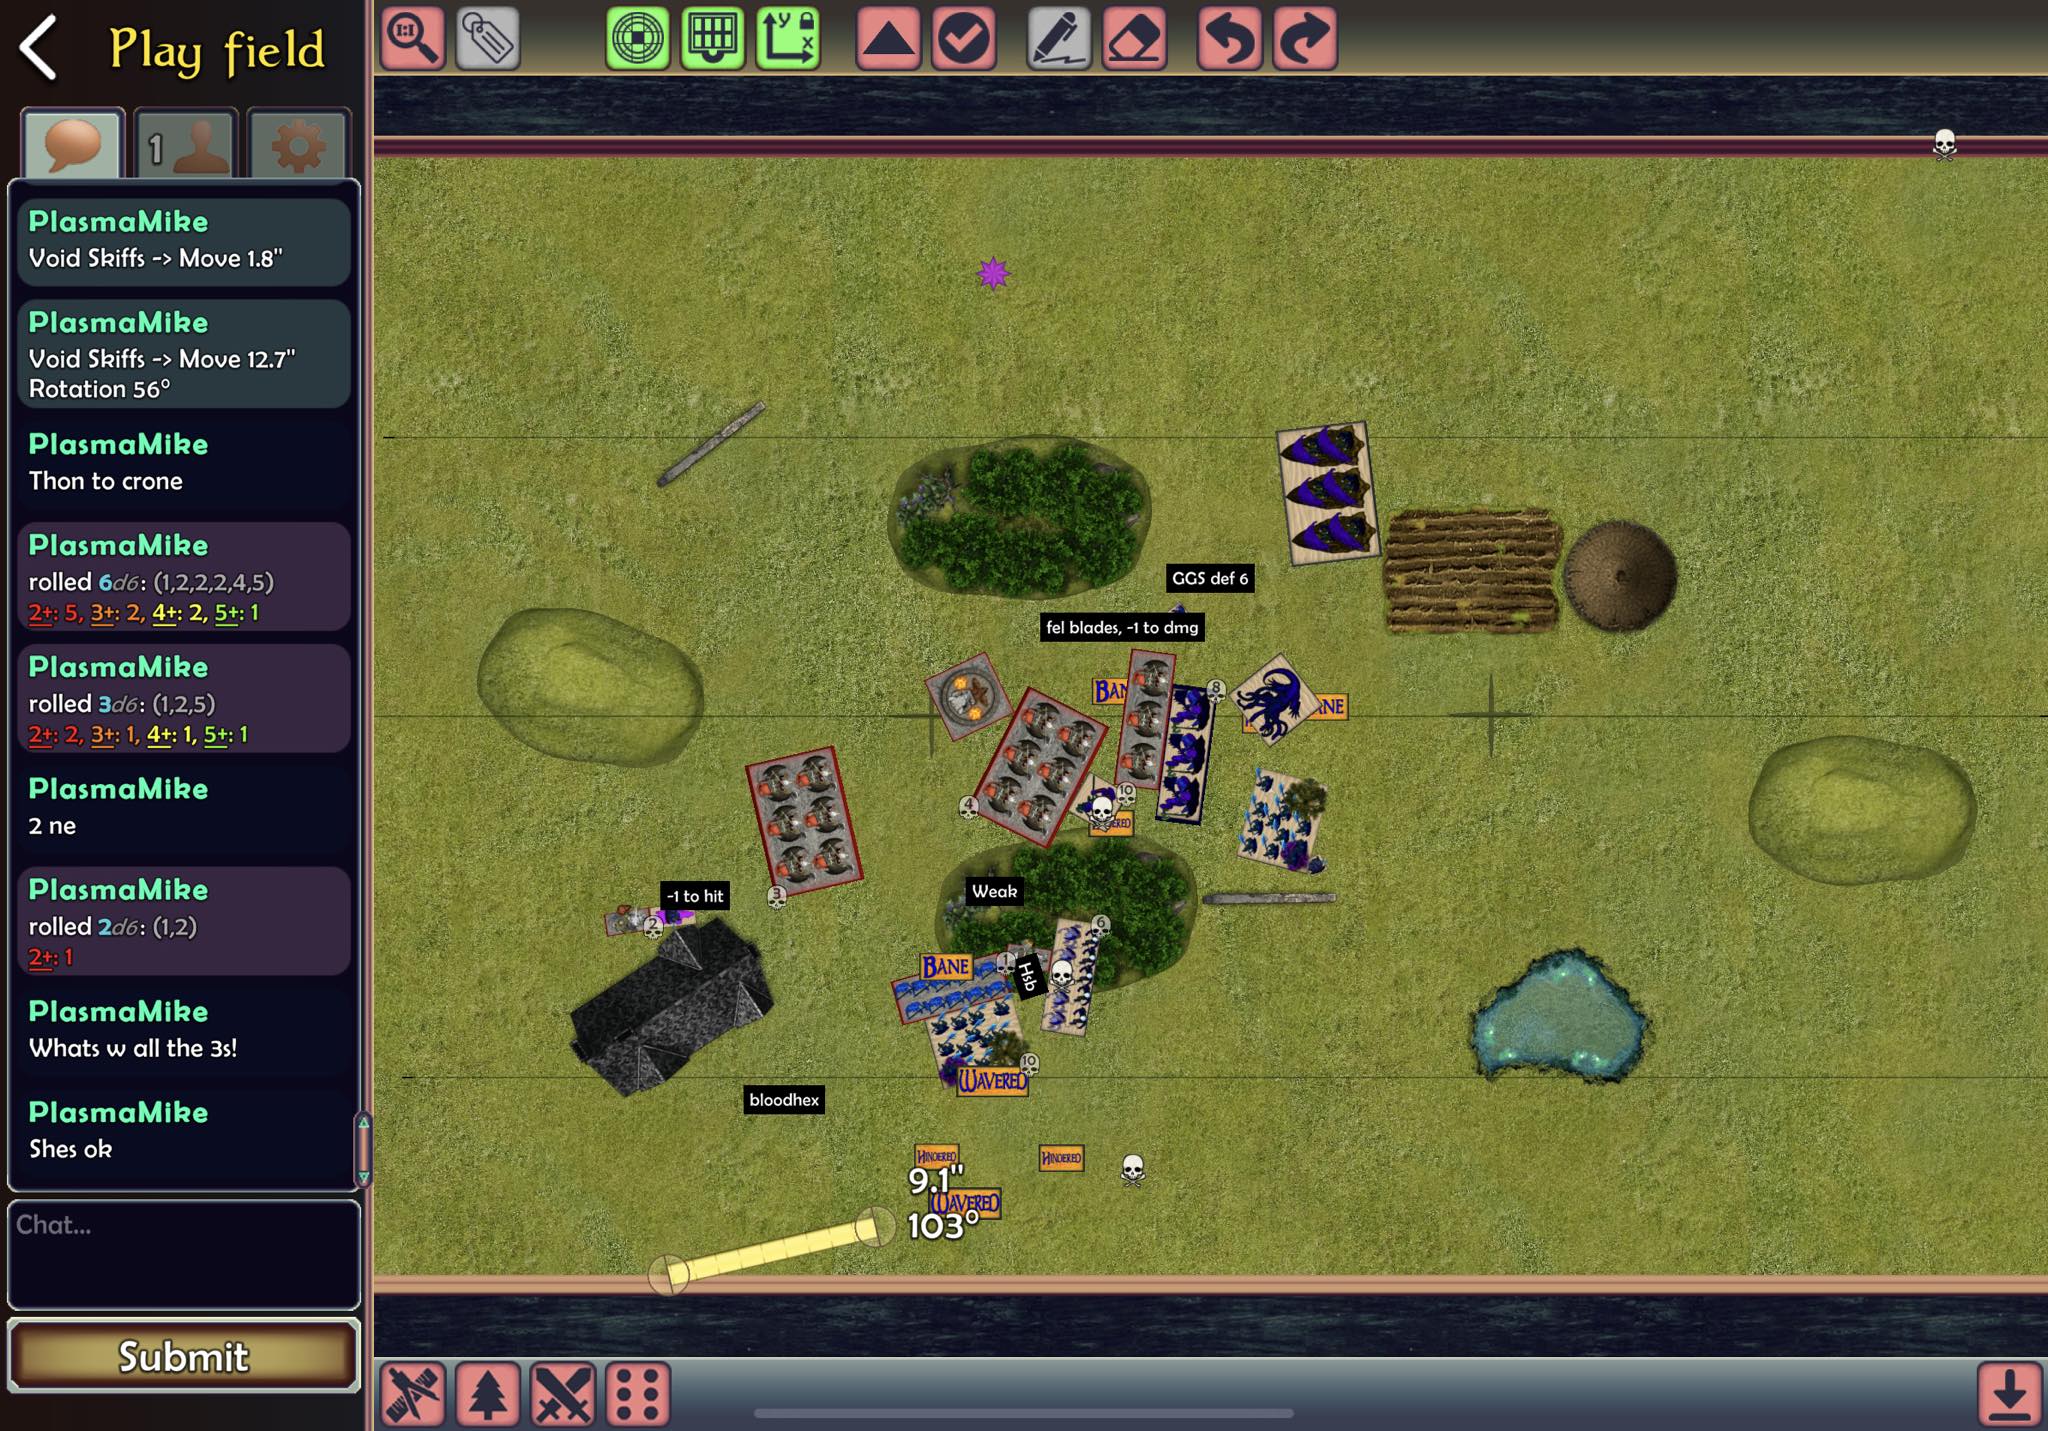
After T1 which I got
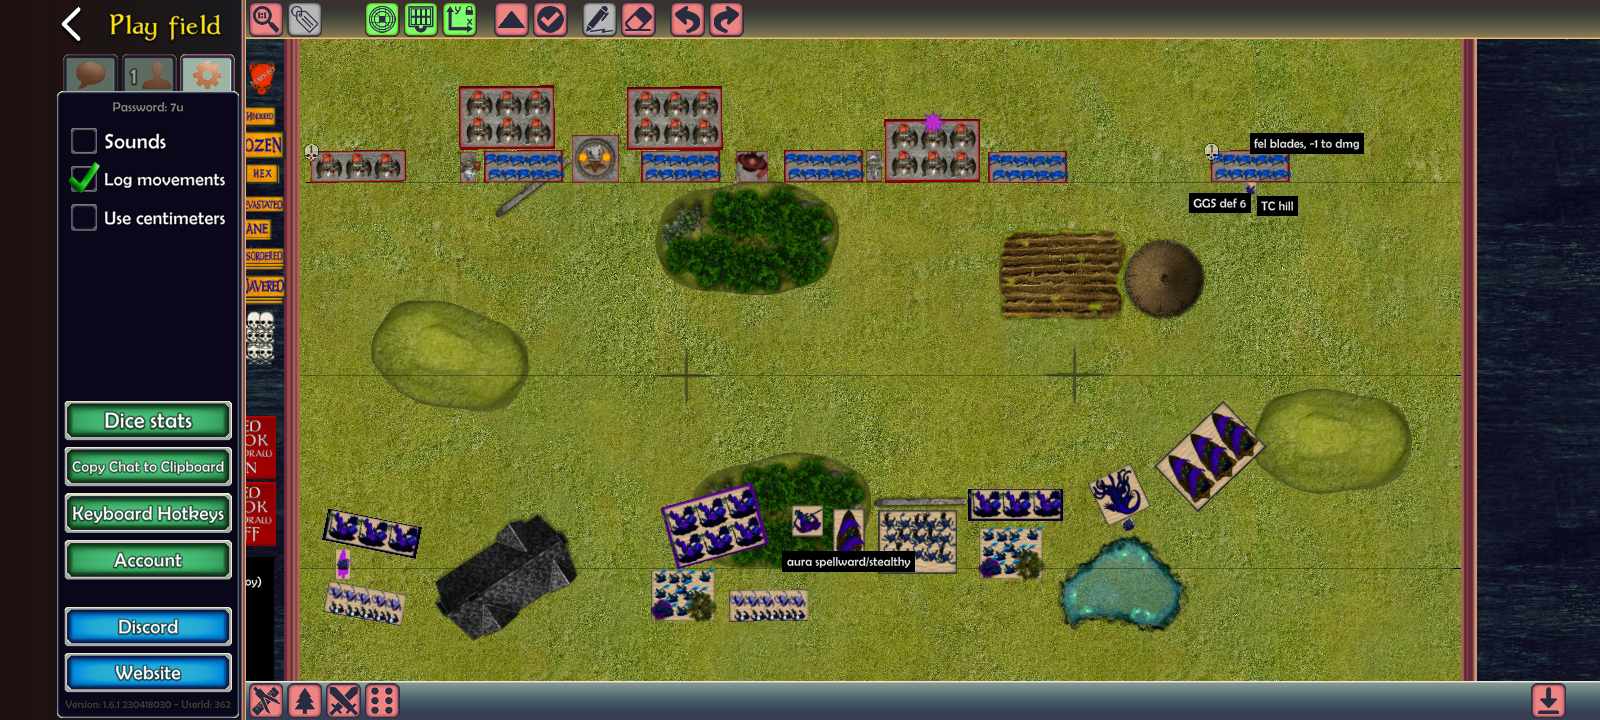
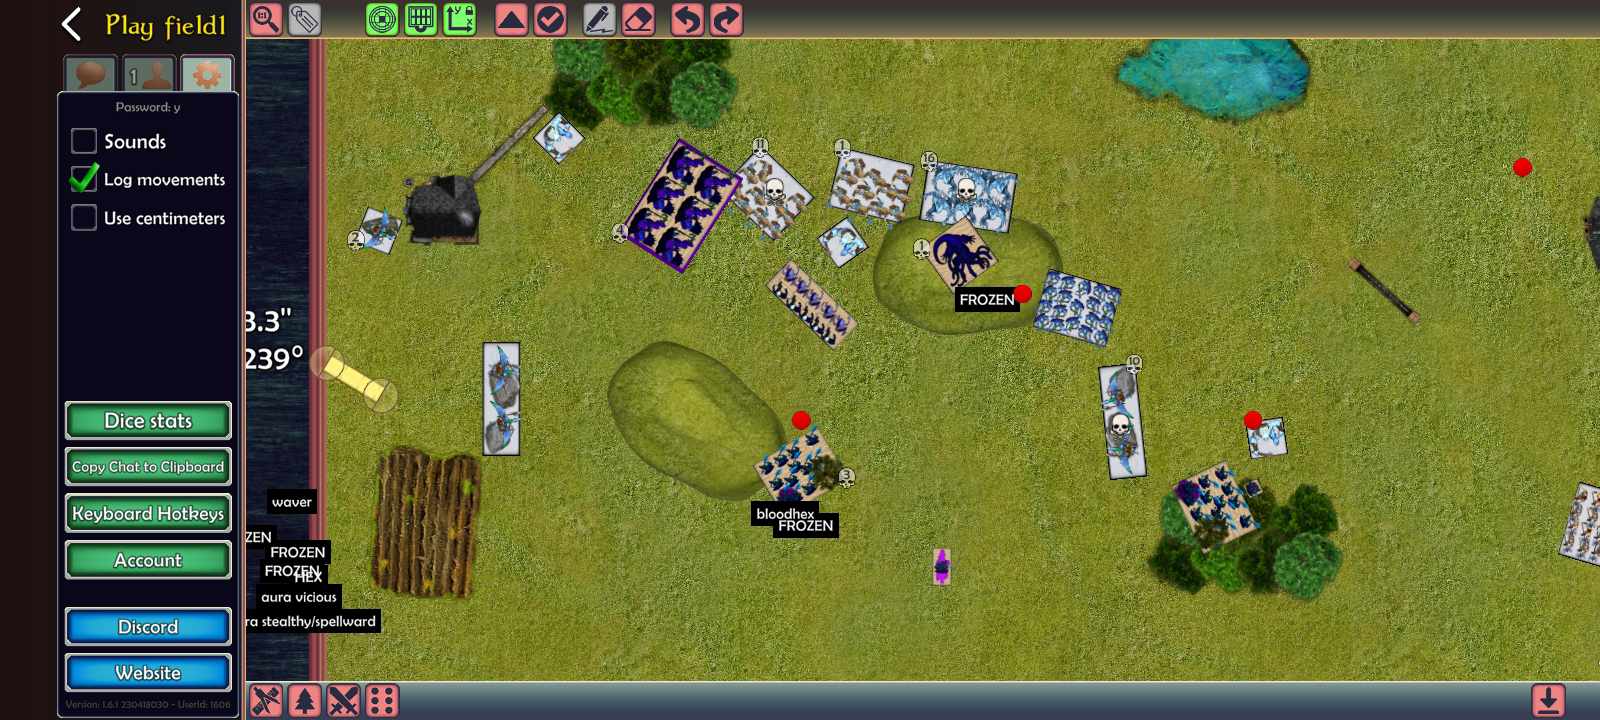
I hoped the assassin would’ve got a lucky, but not unreasonable kill, but at least I did one important dmg there. Rest of the army moved carefully forward, the mission is control and I got more shooting, so no rush.
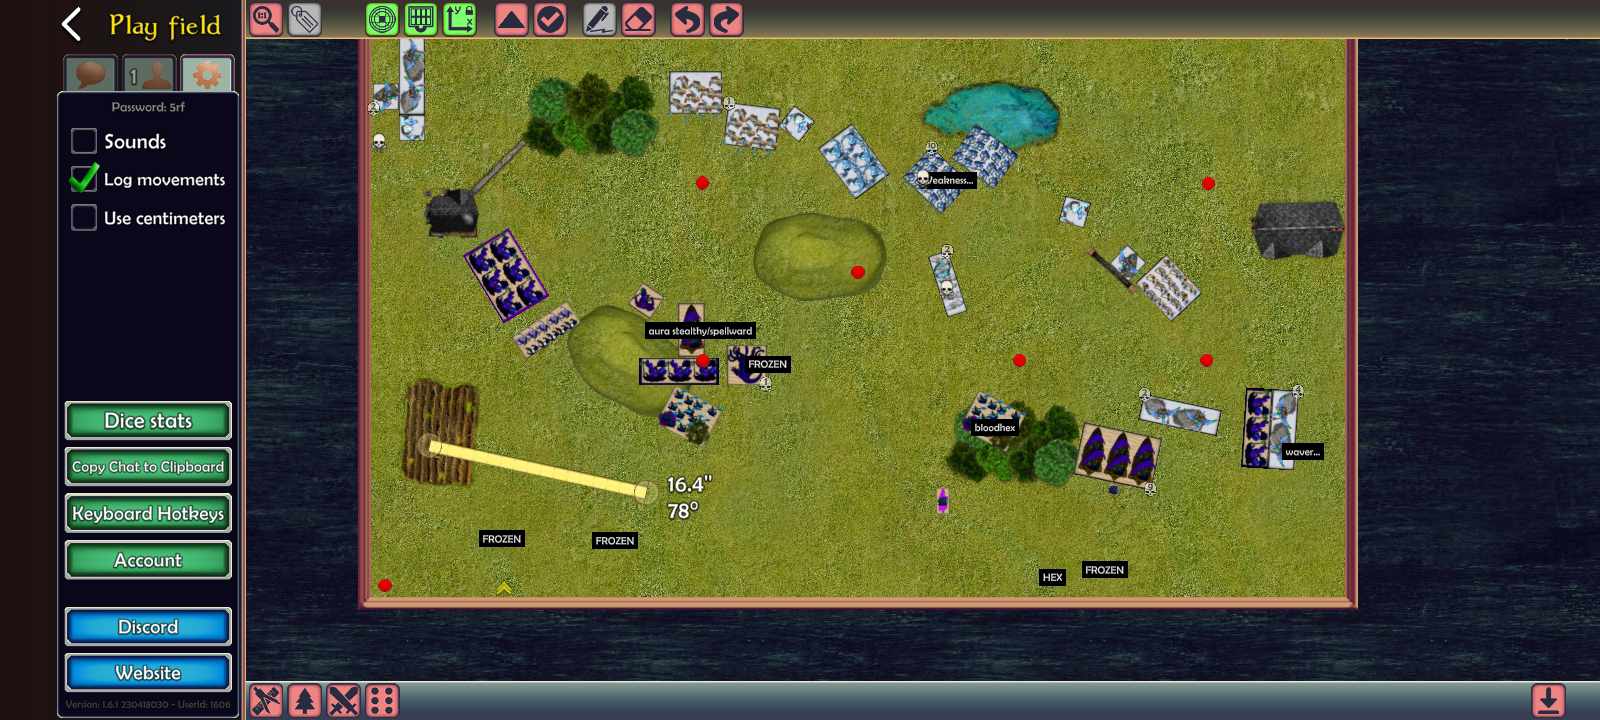
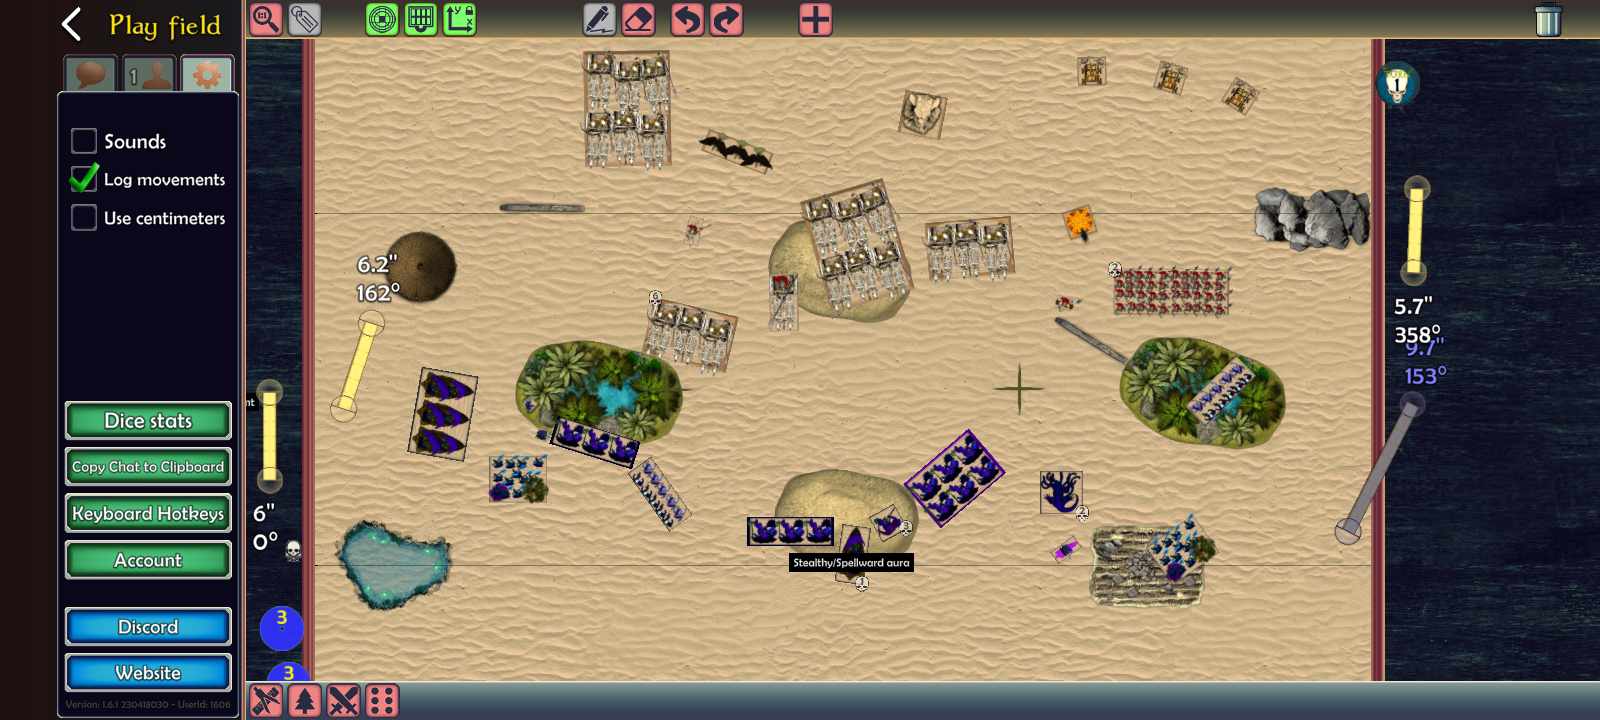
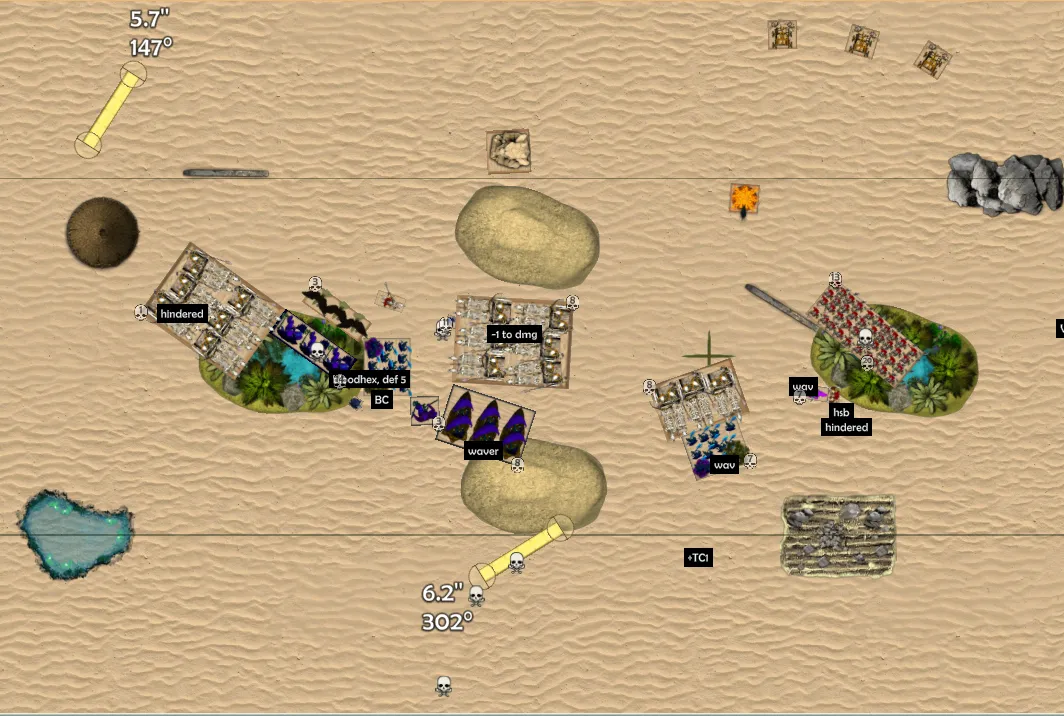
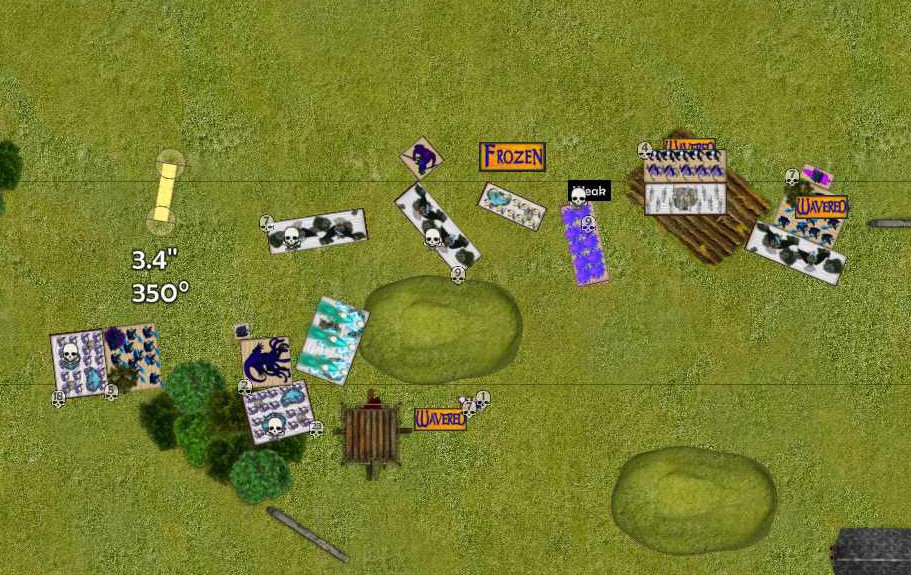
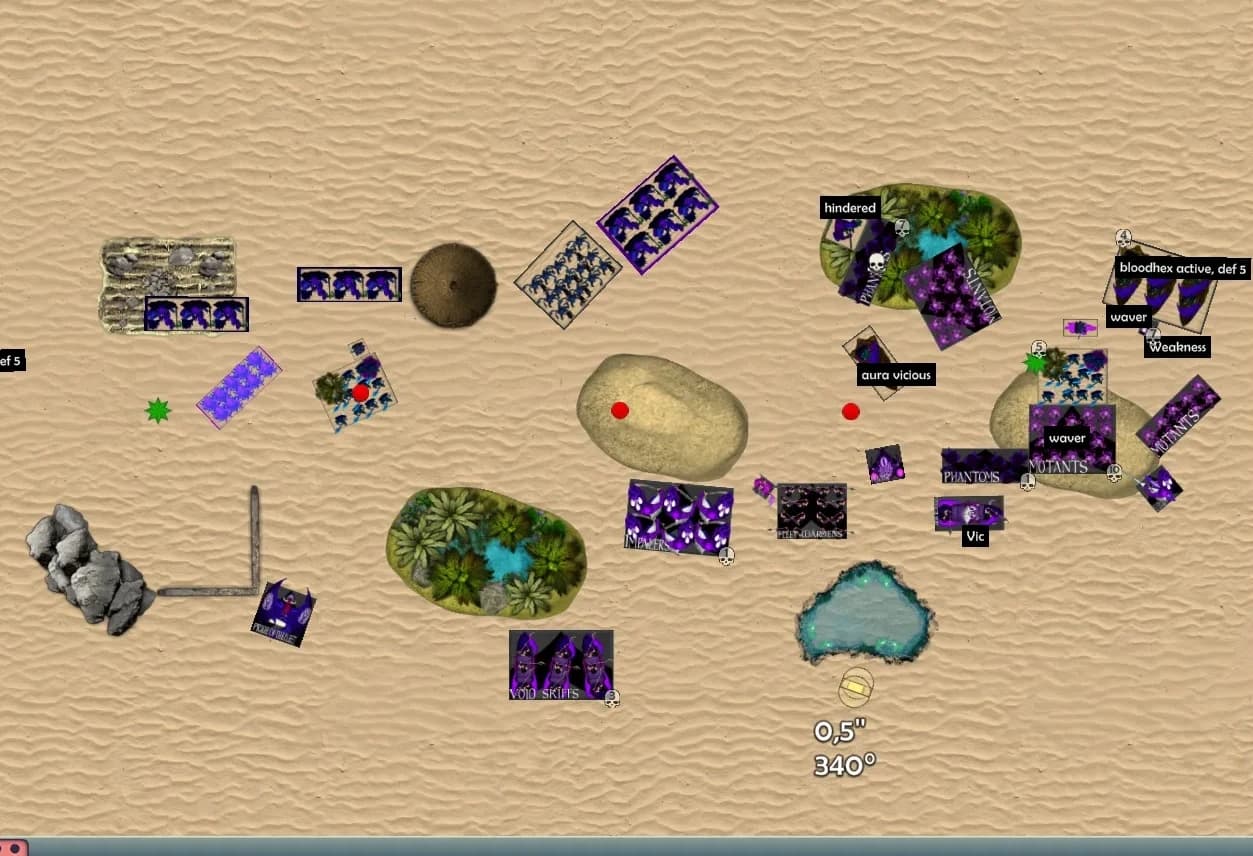
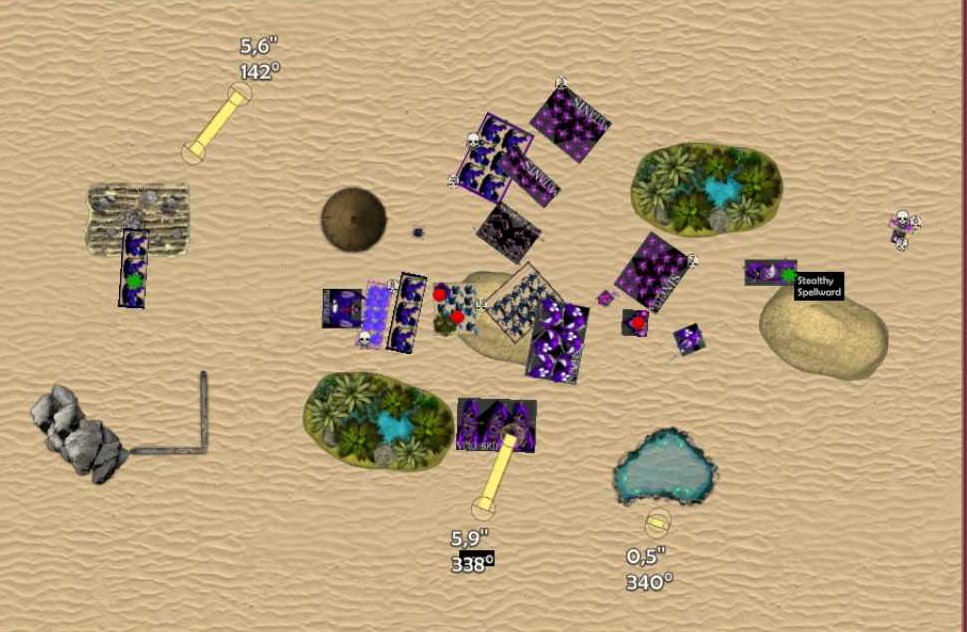
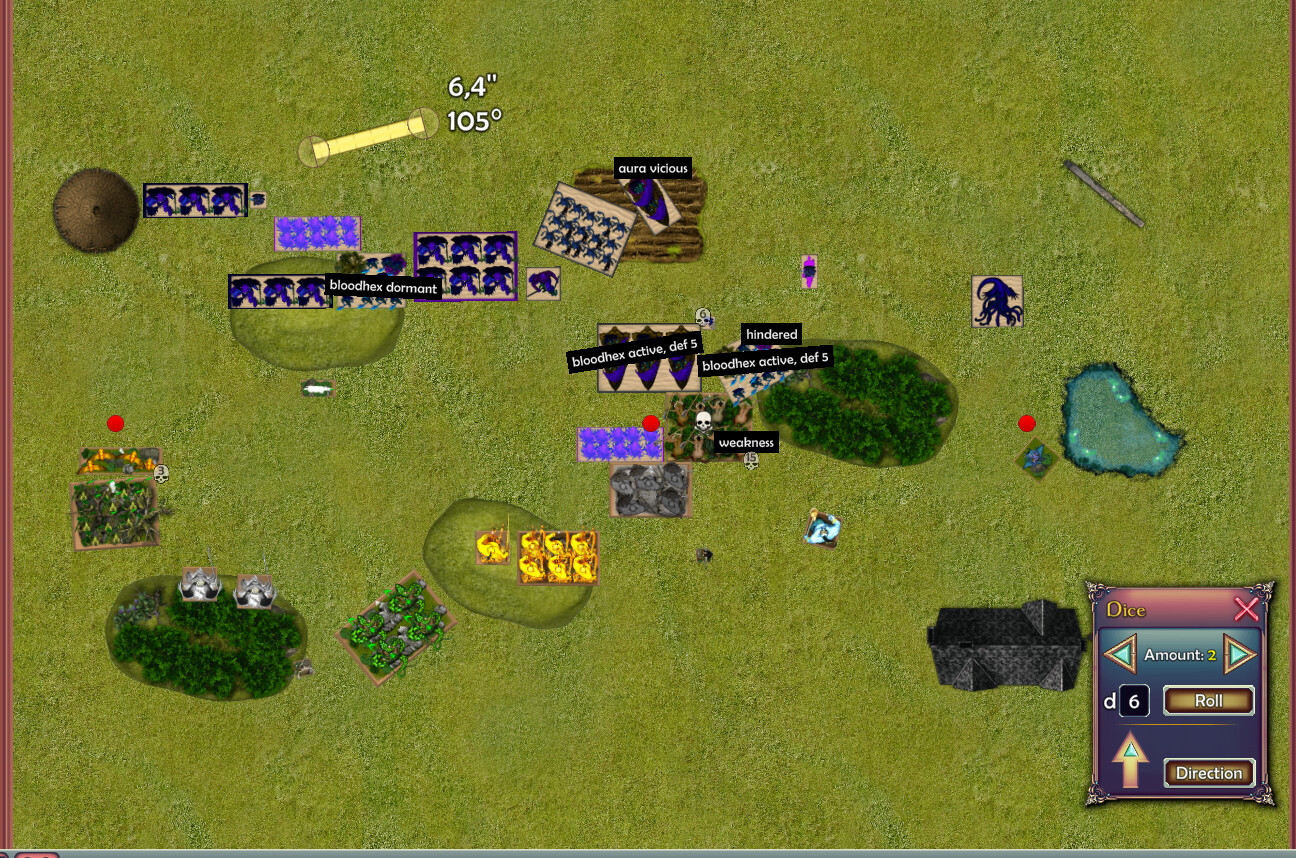
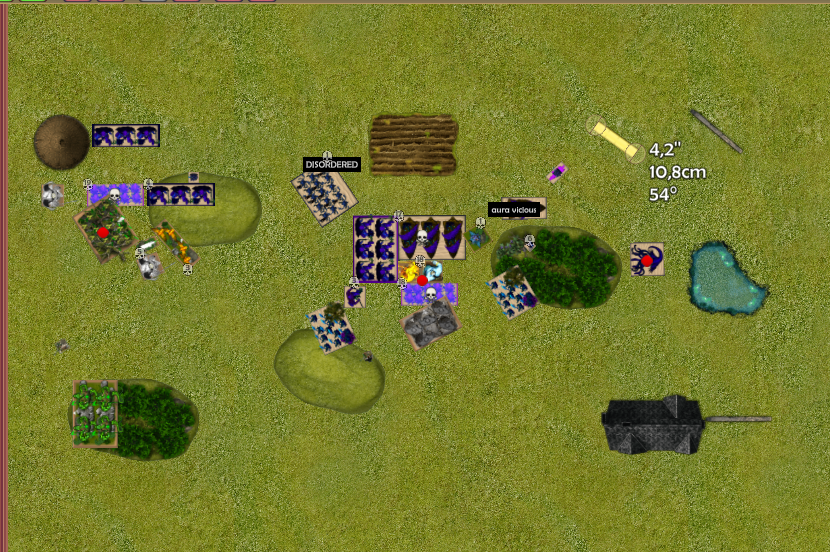
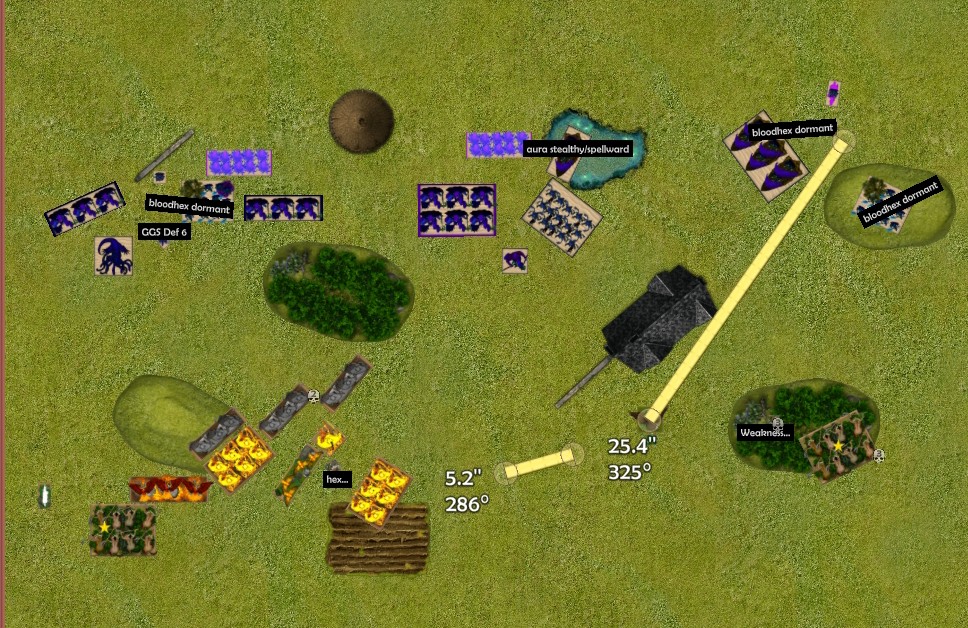
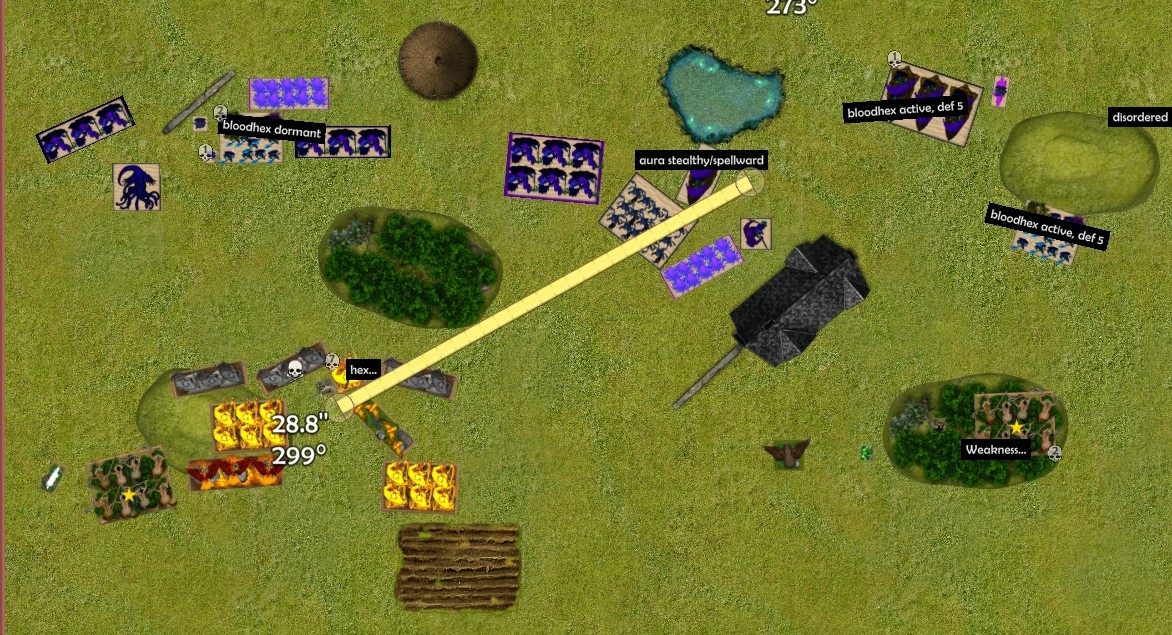
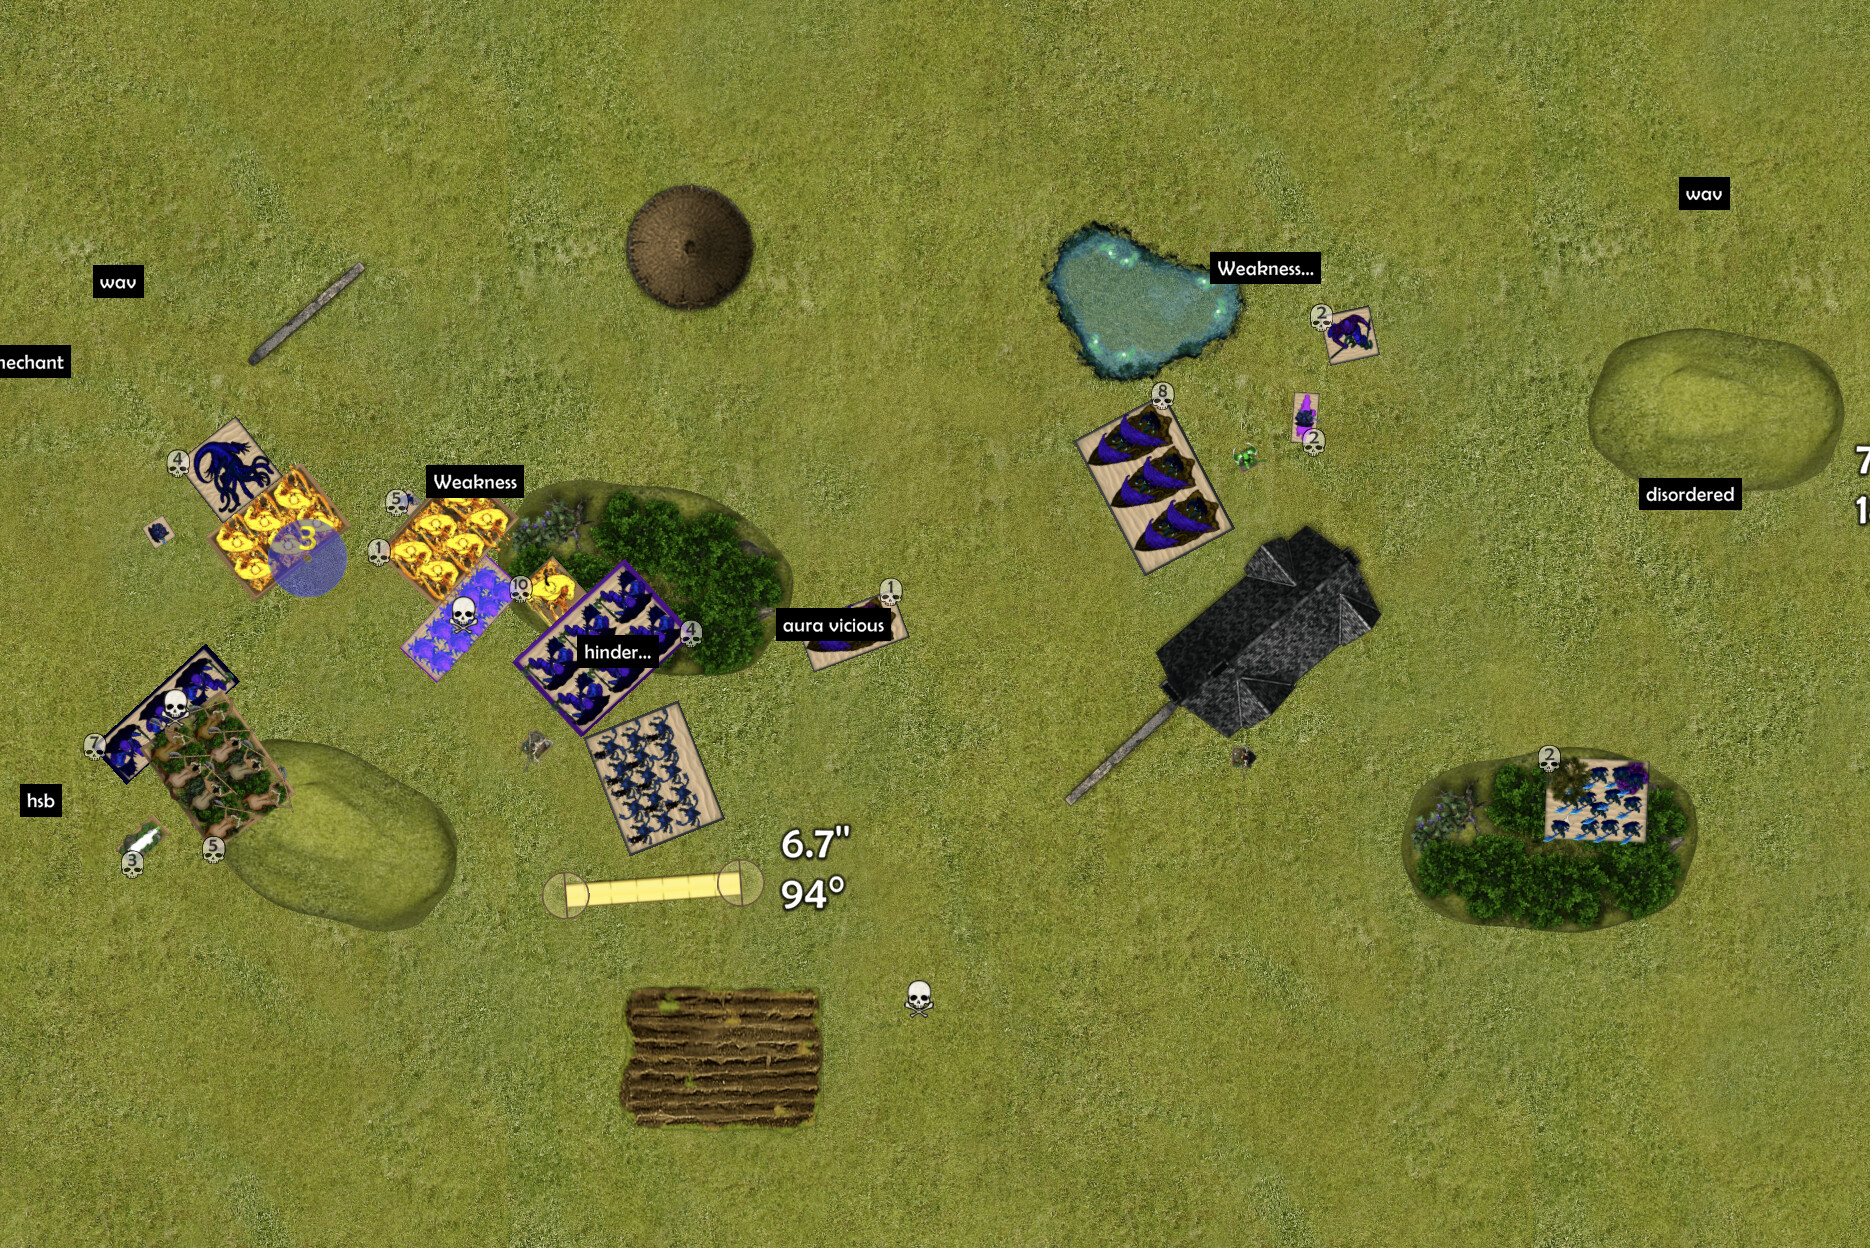
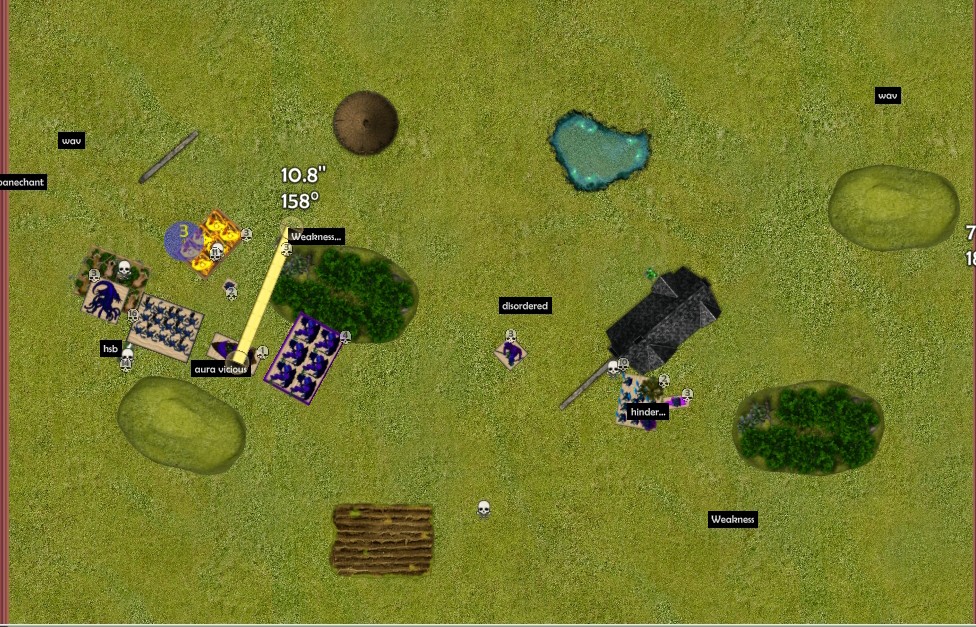
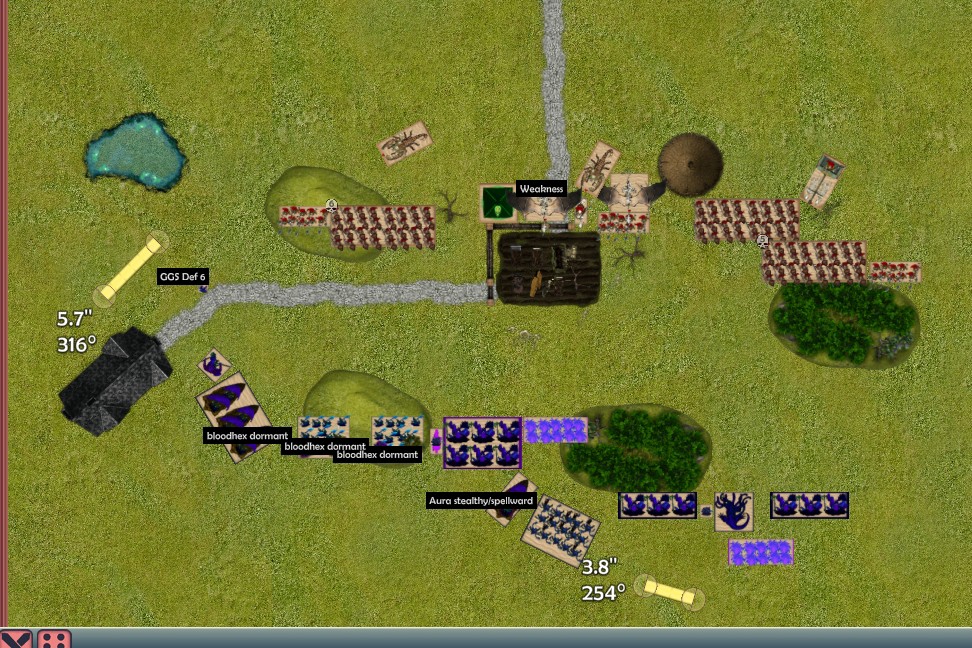
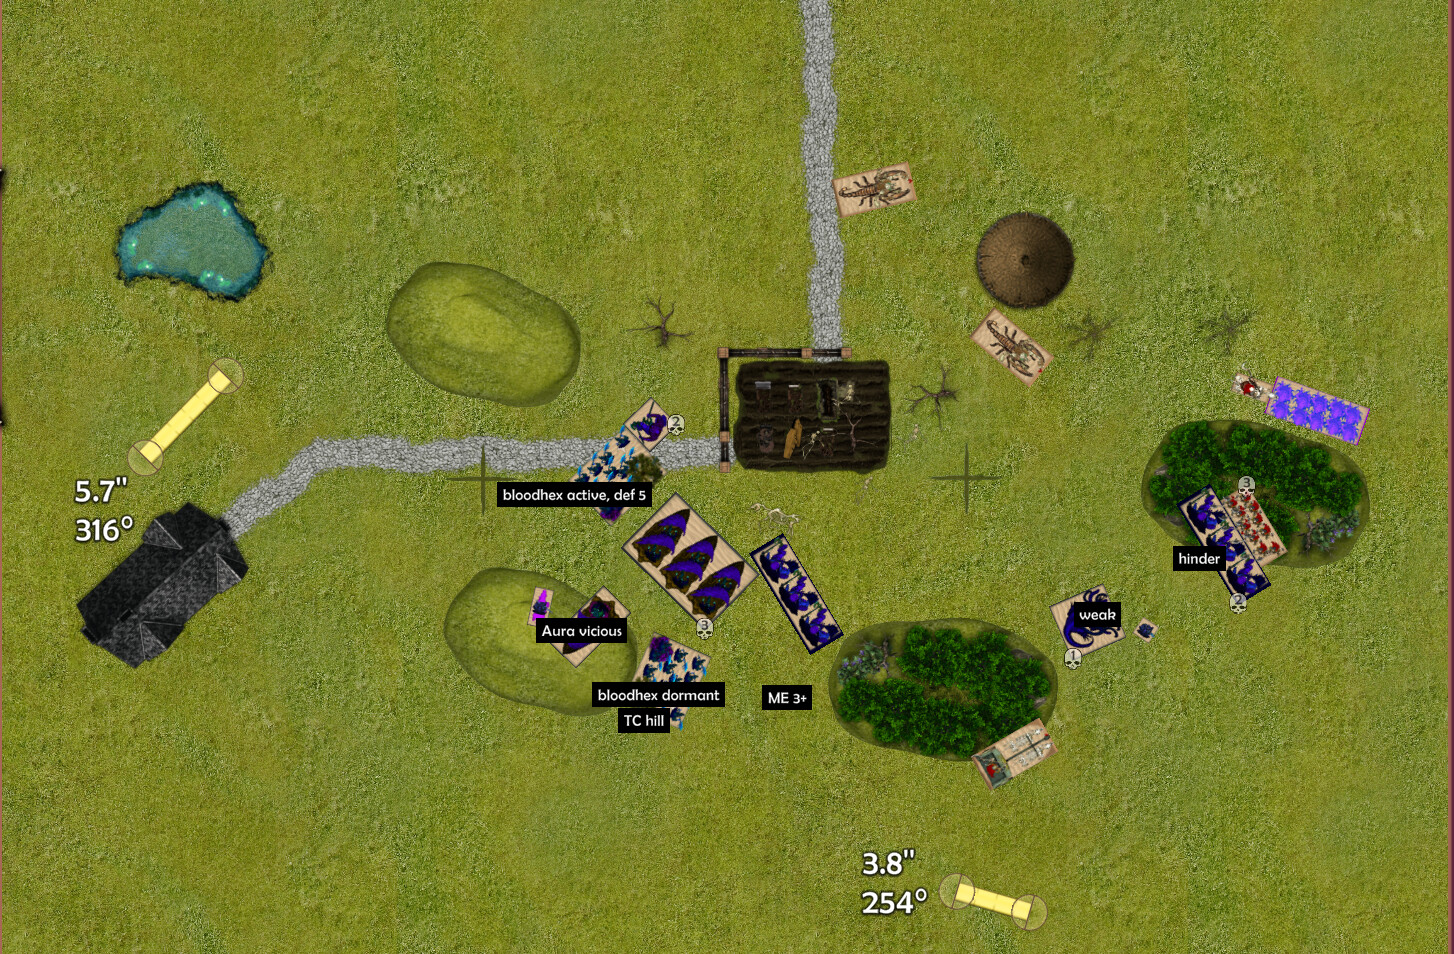
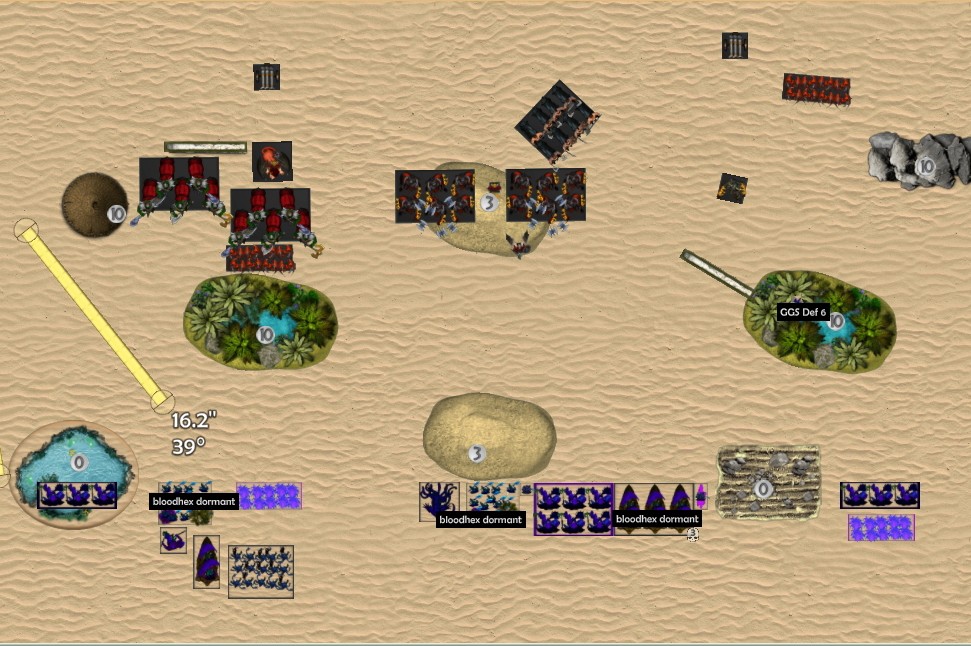
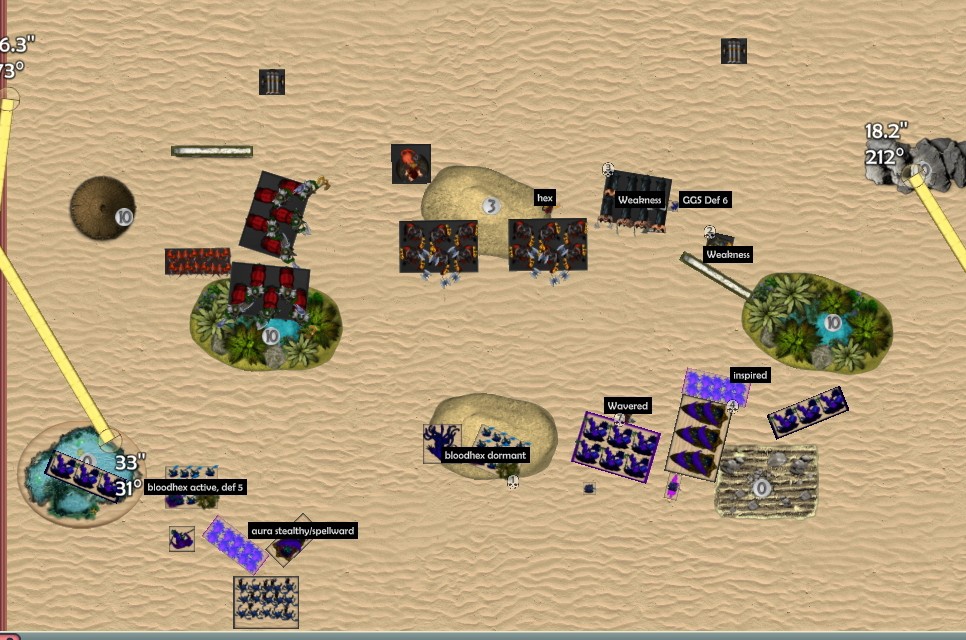
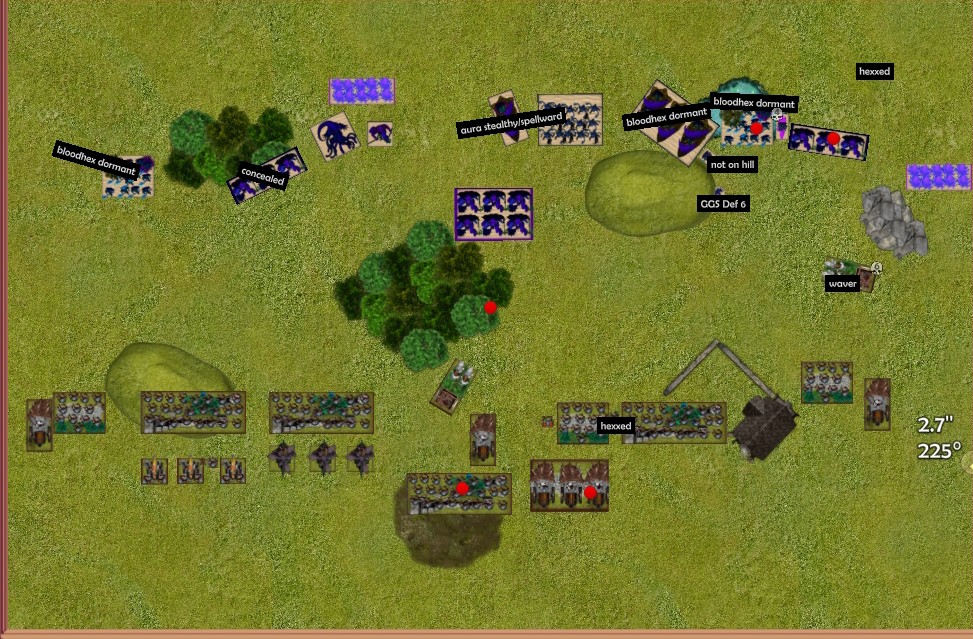
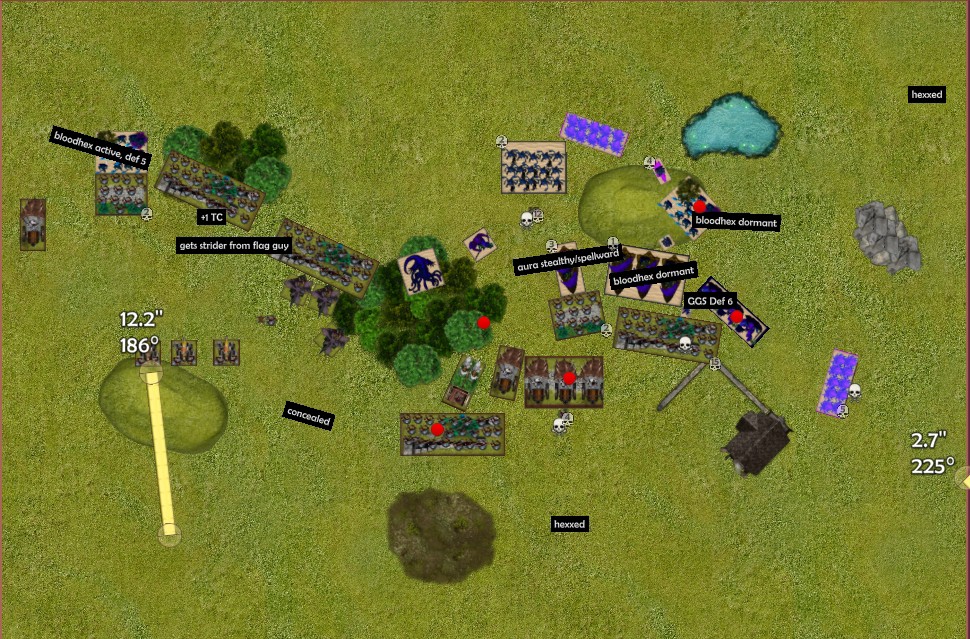
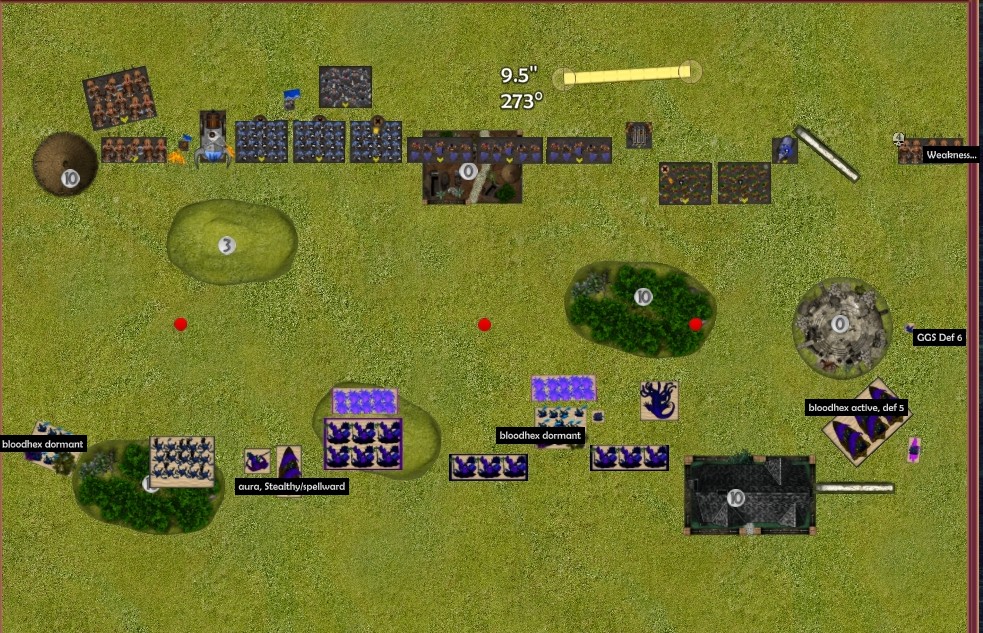
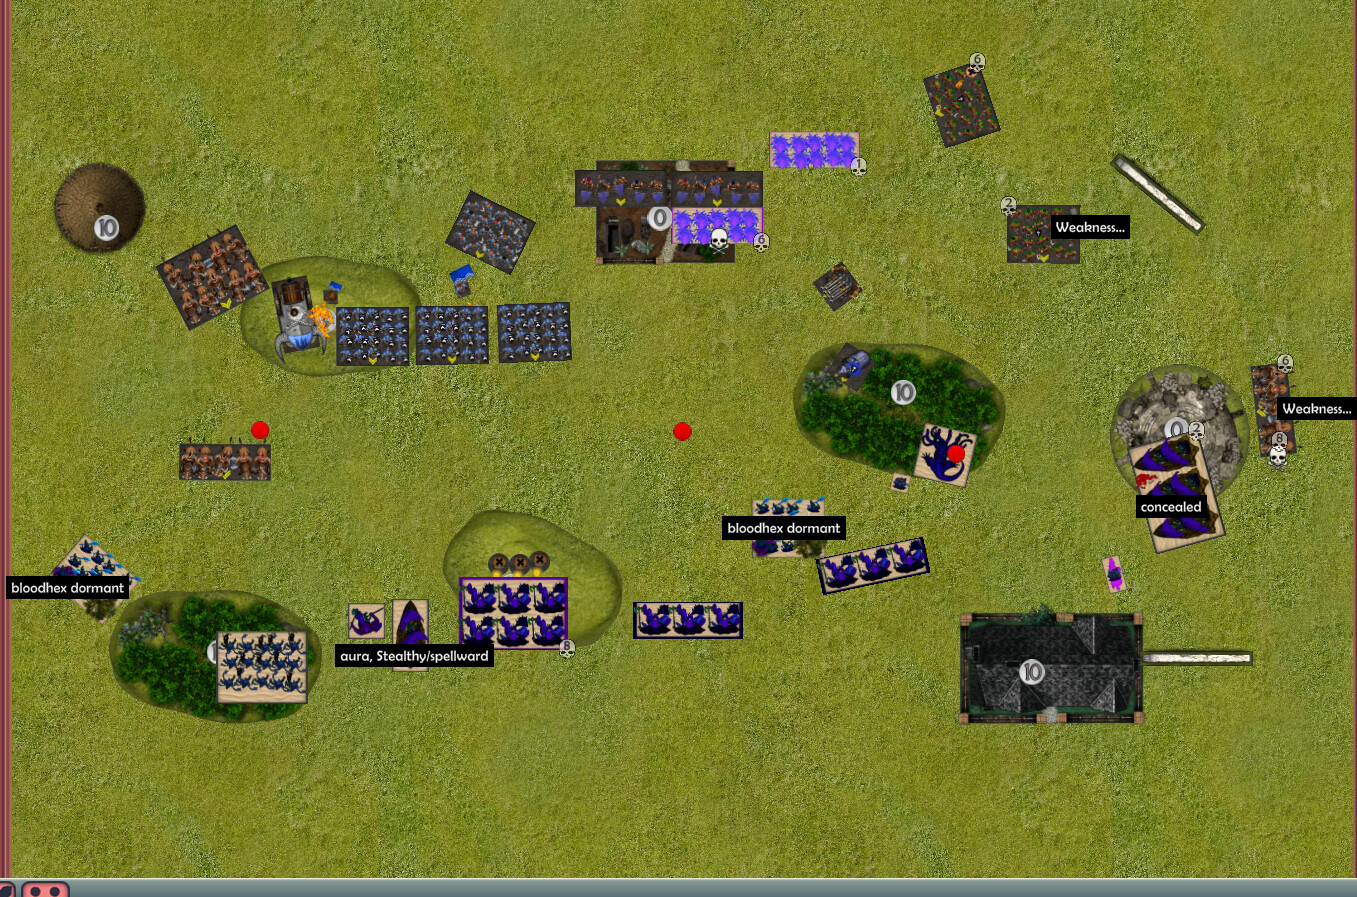
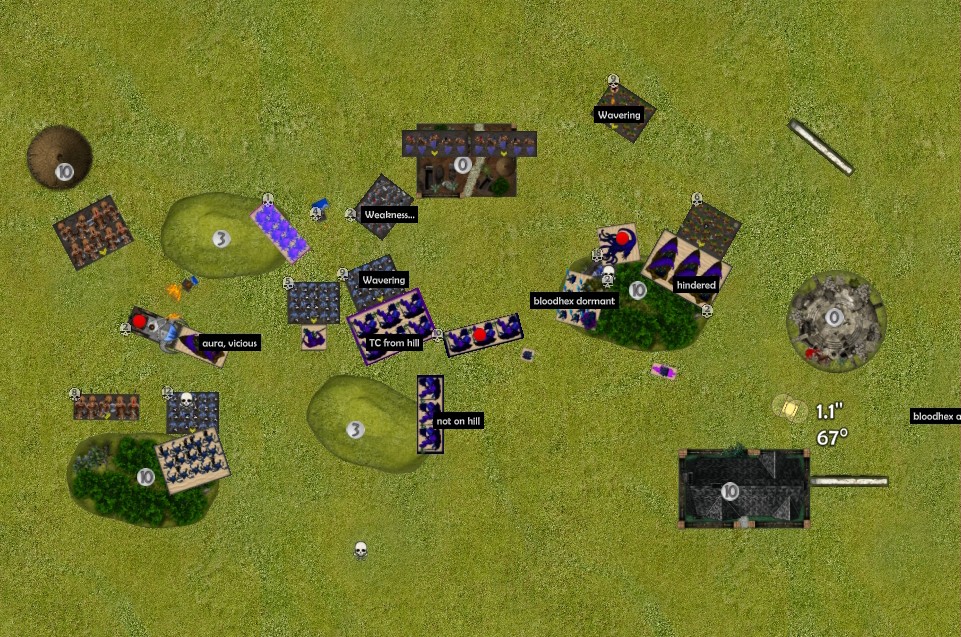
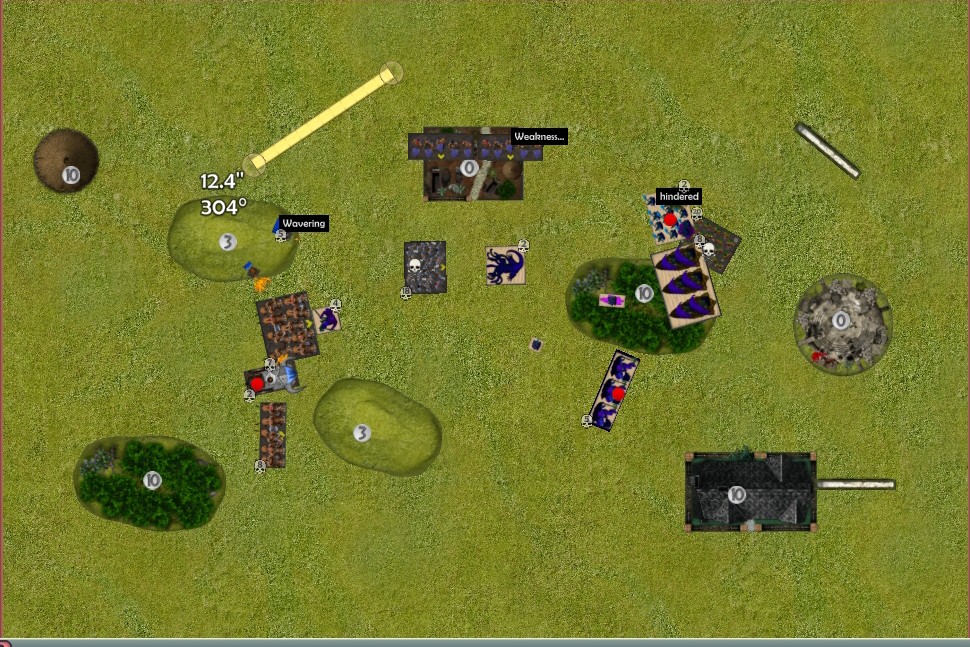
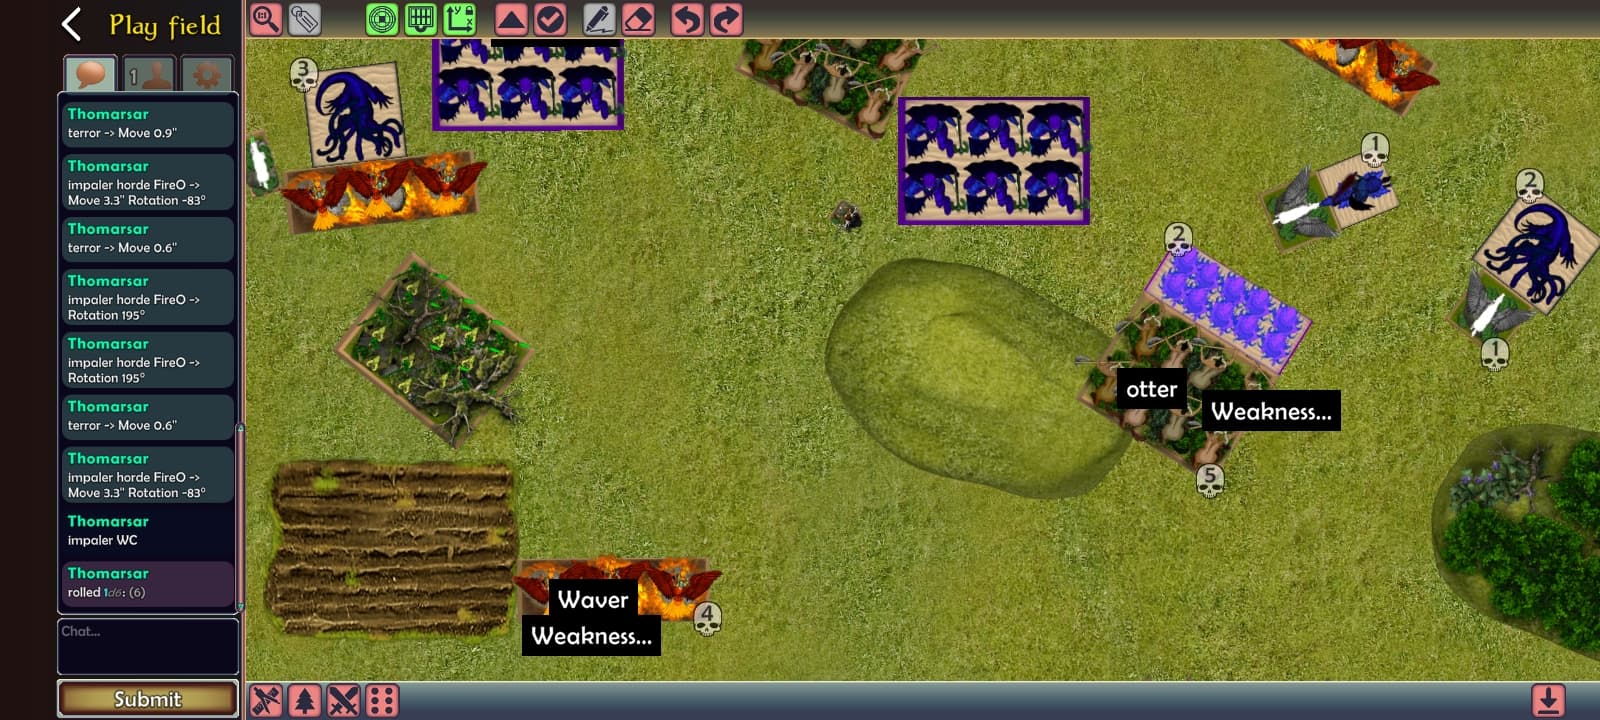
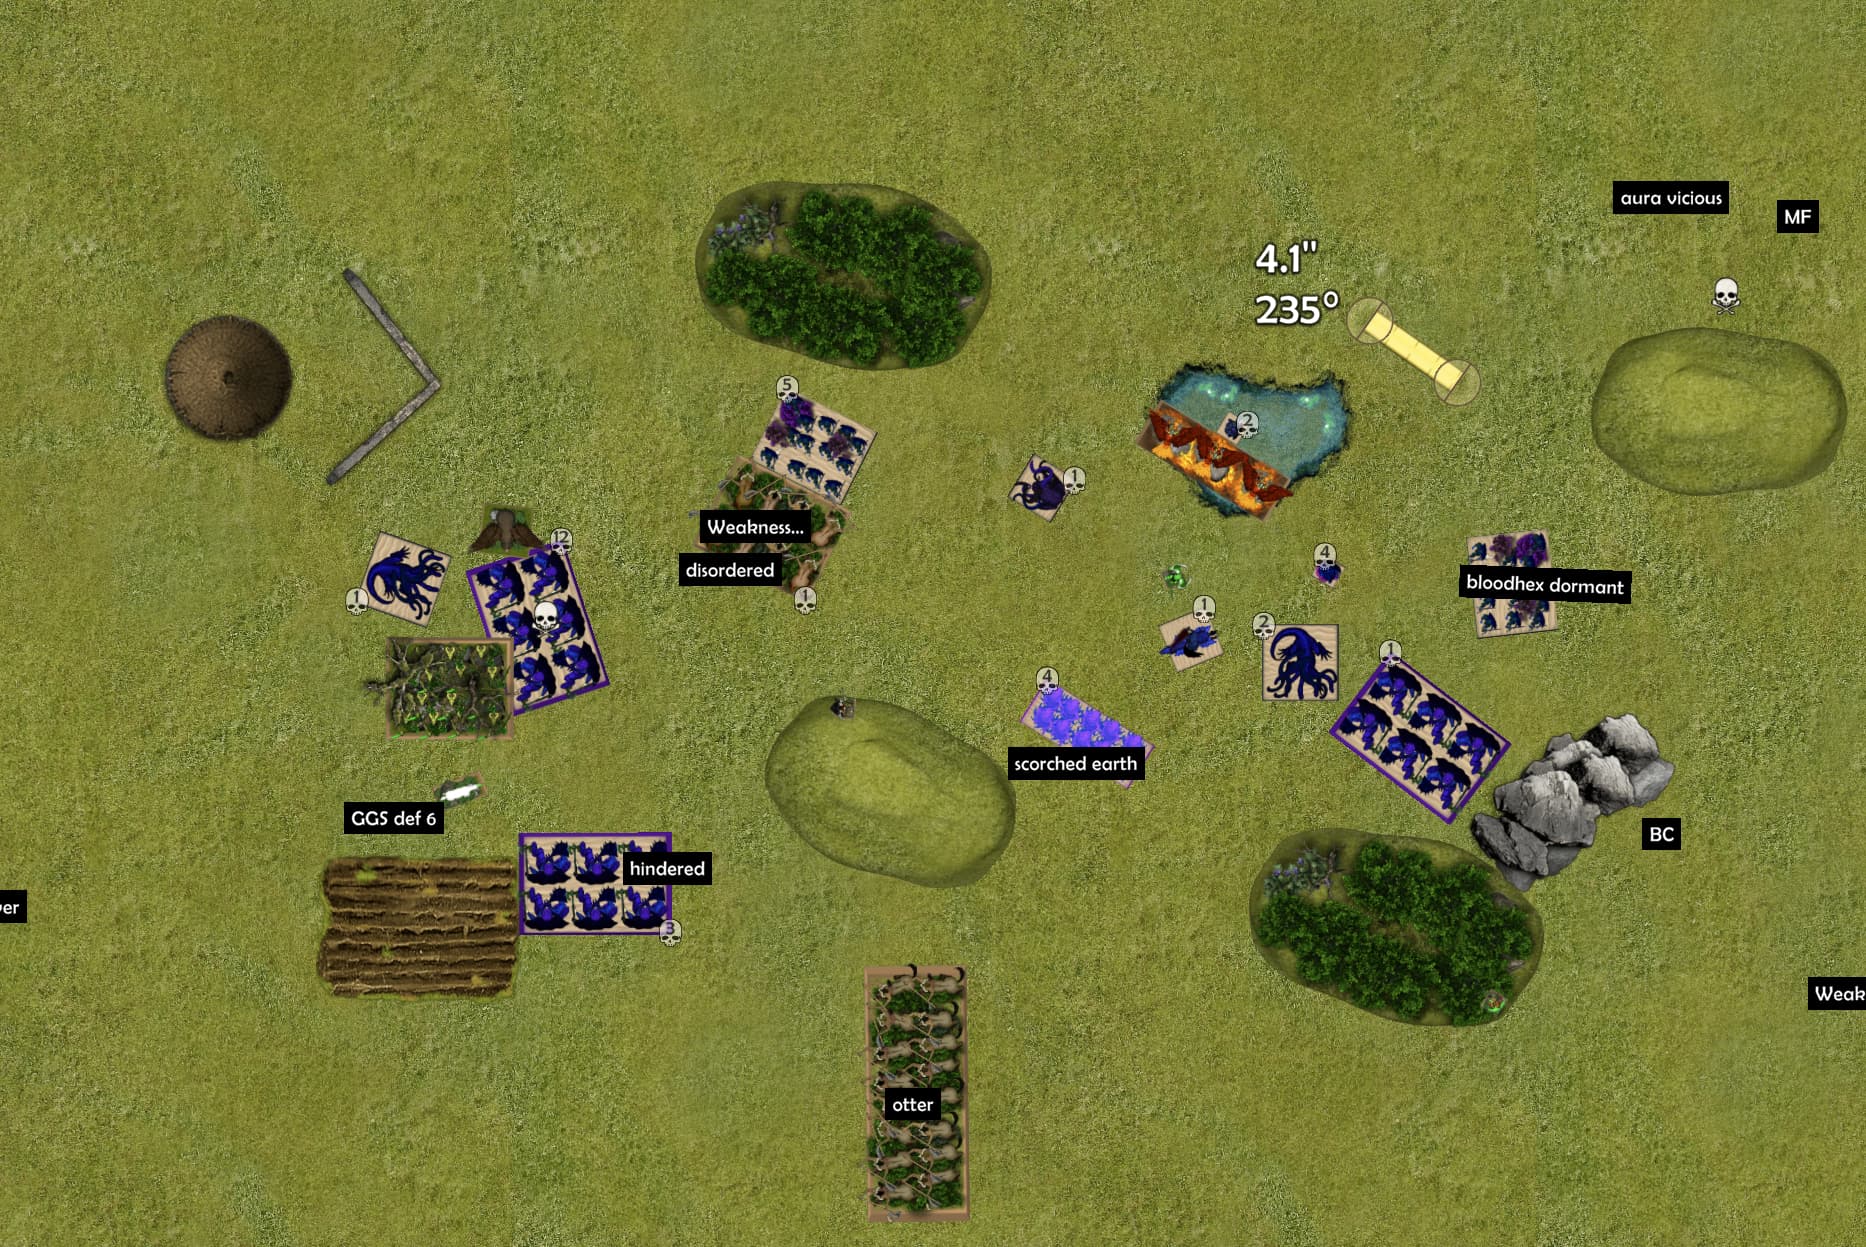
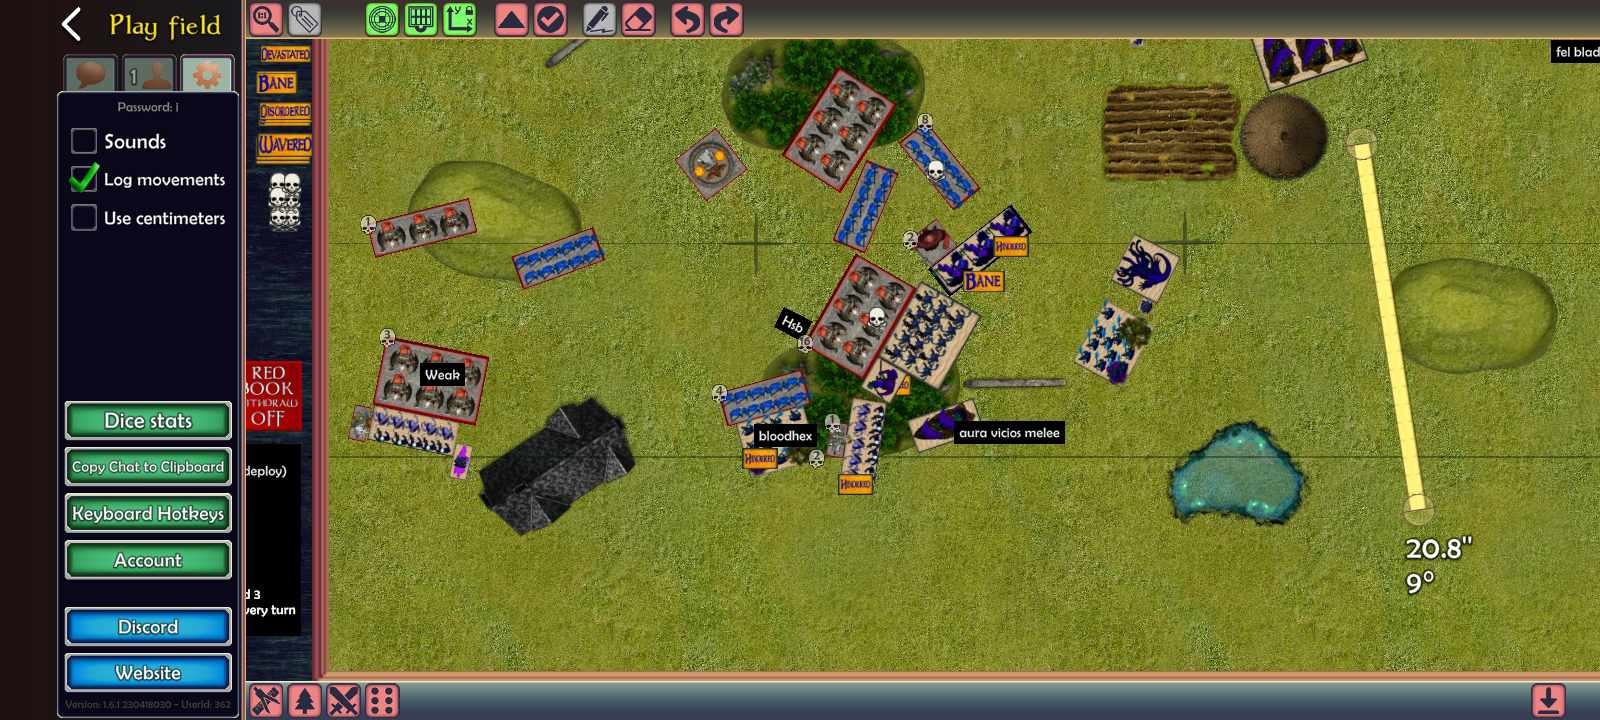
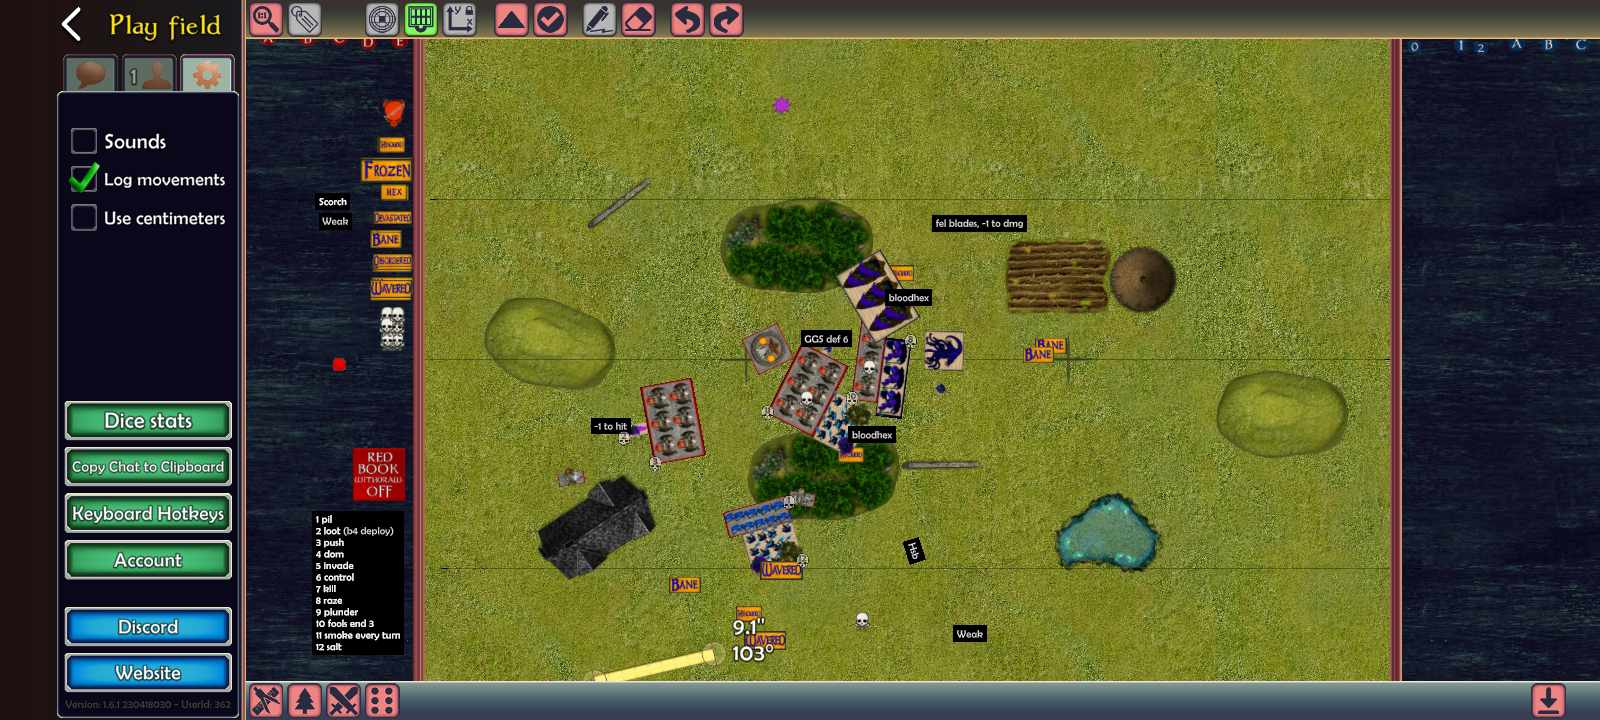
After B1
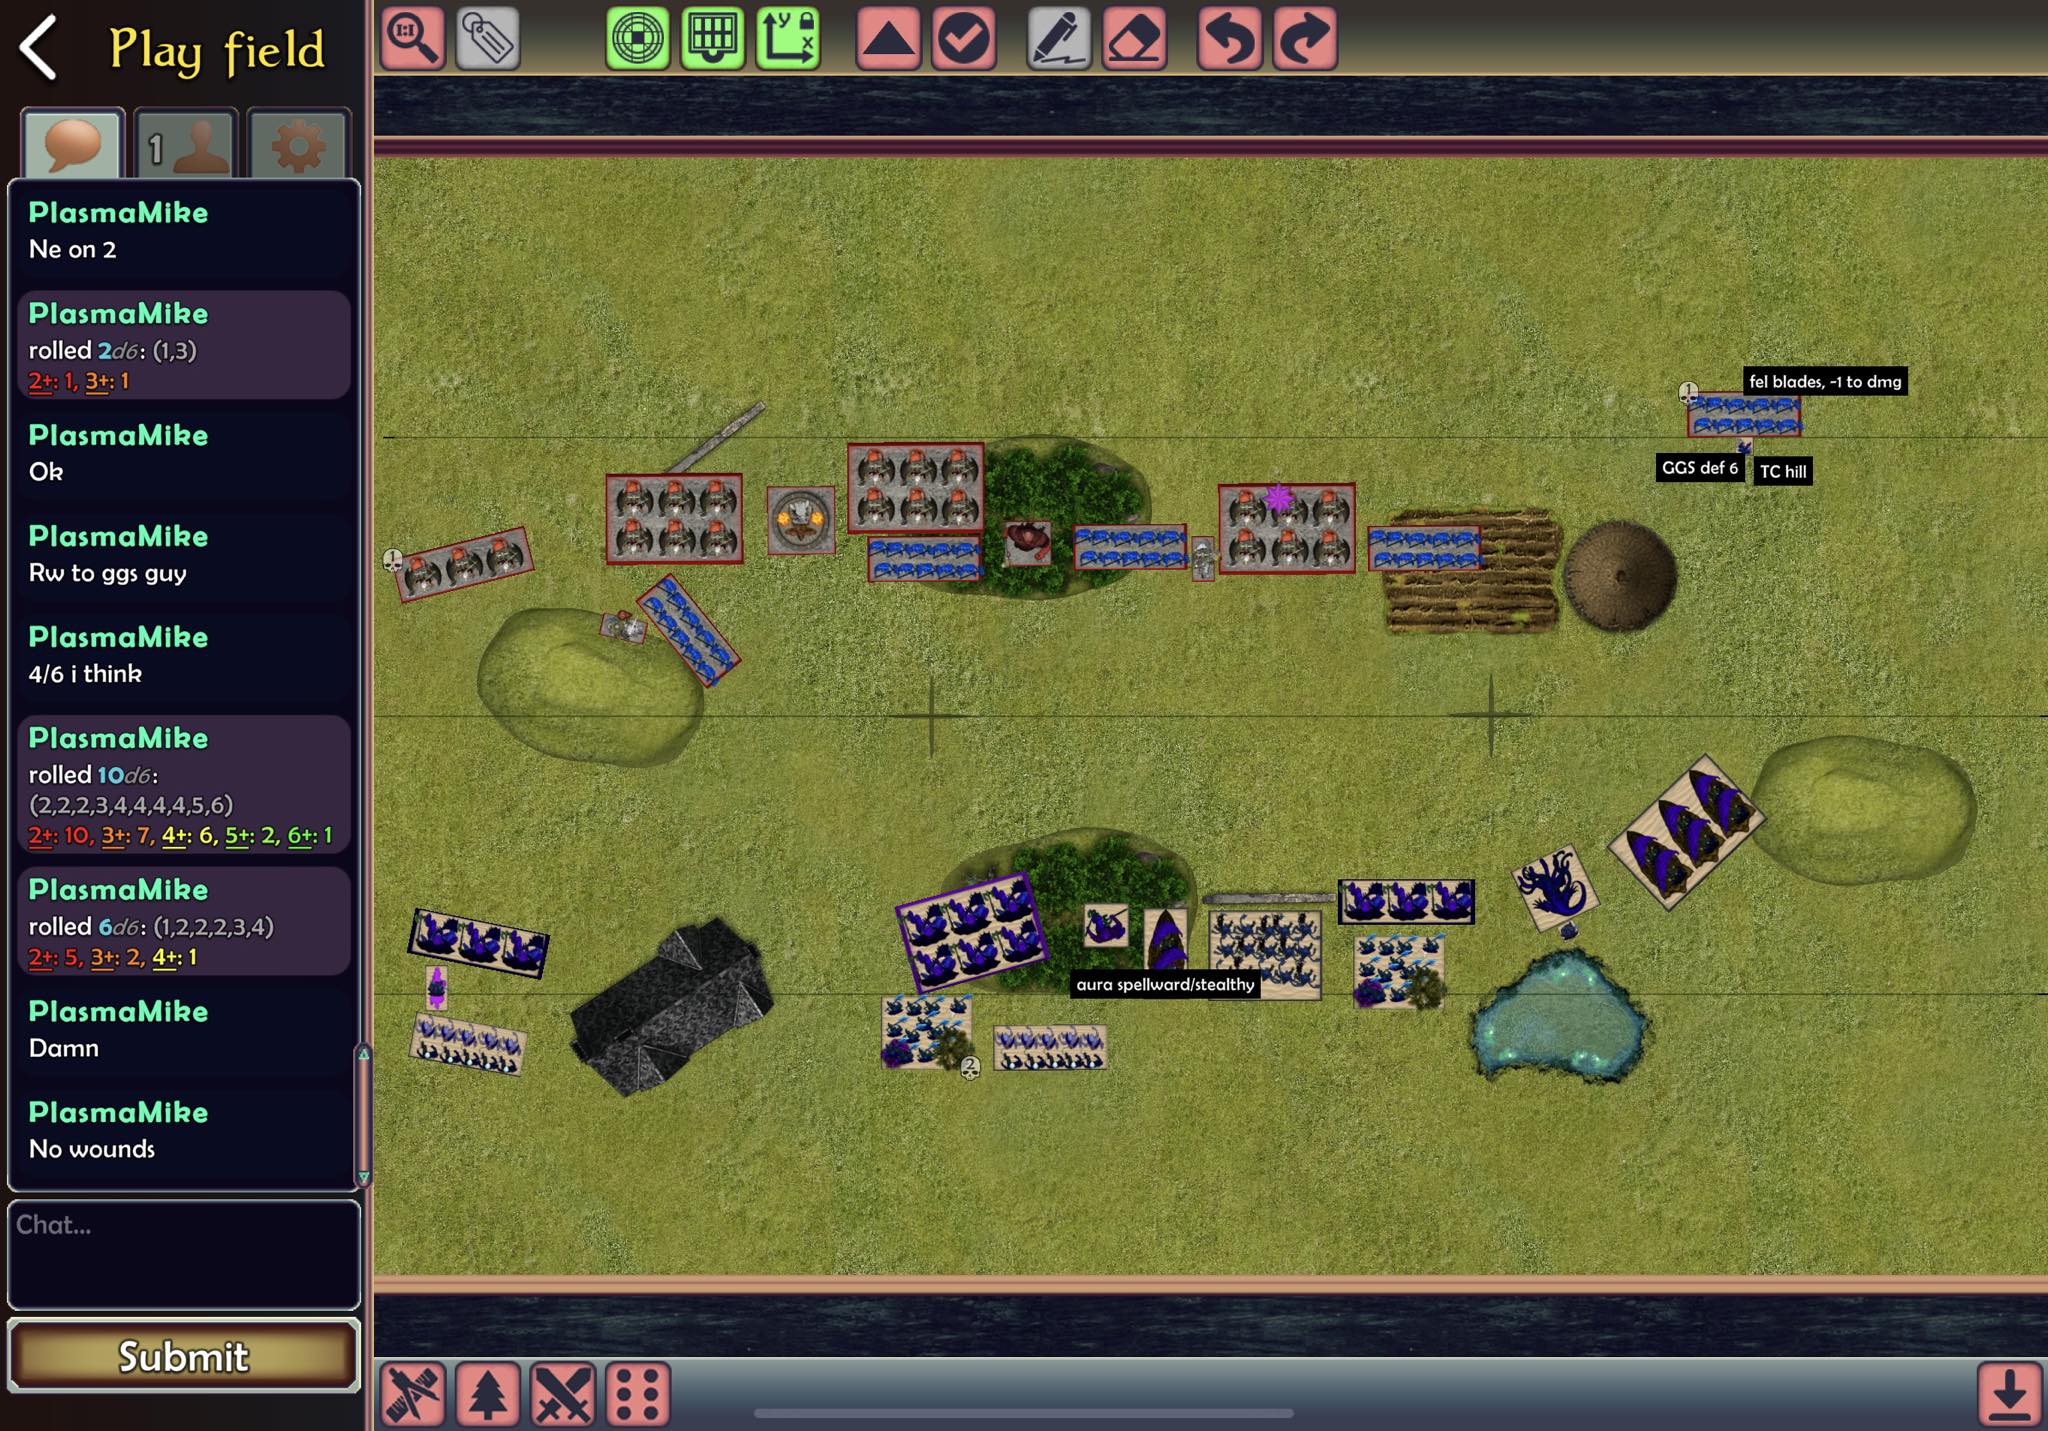
He also moved up carefully, but were now able to get in range for charges. Riftwalkers Countercharge assassin, but did 0 dmg thx to Shield and felblades he dmg me on 6s even with CS 1. This was lucky for me, to still have the ahield intact and more possible uses of the assassin.
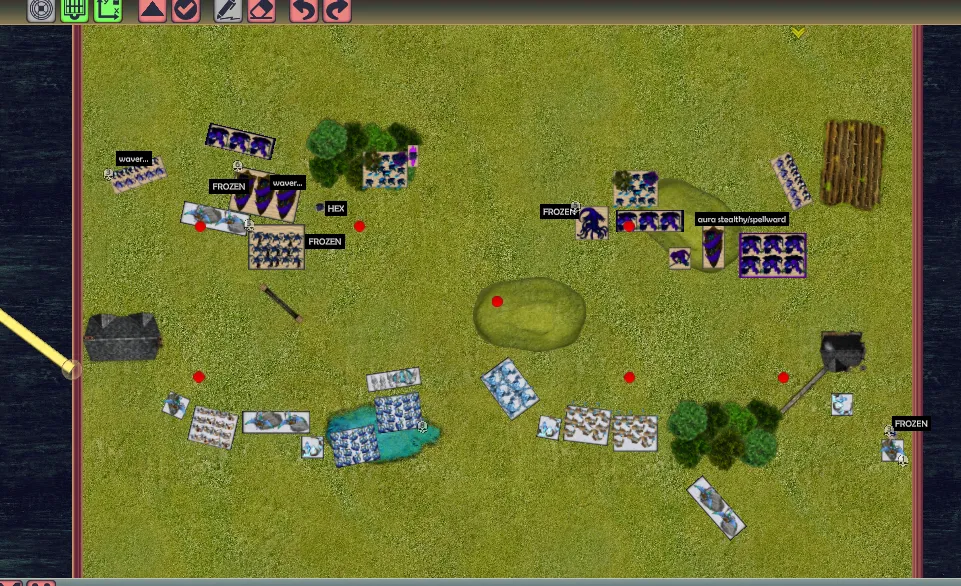
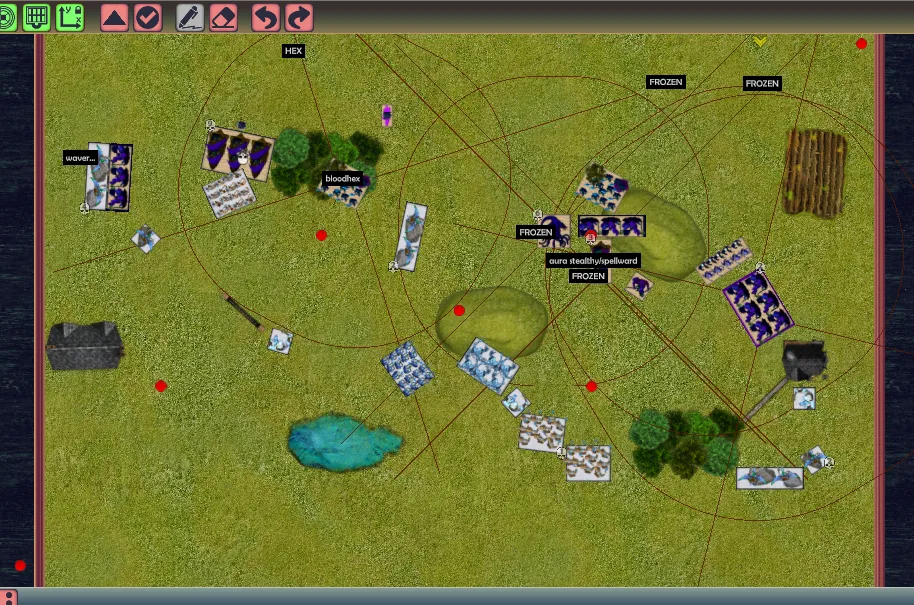
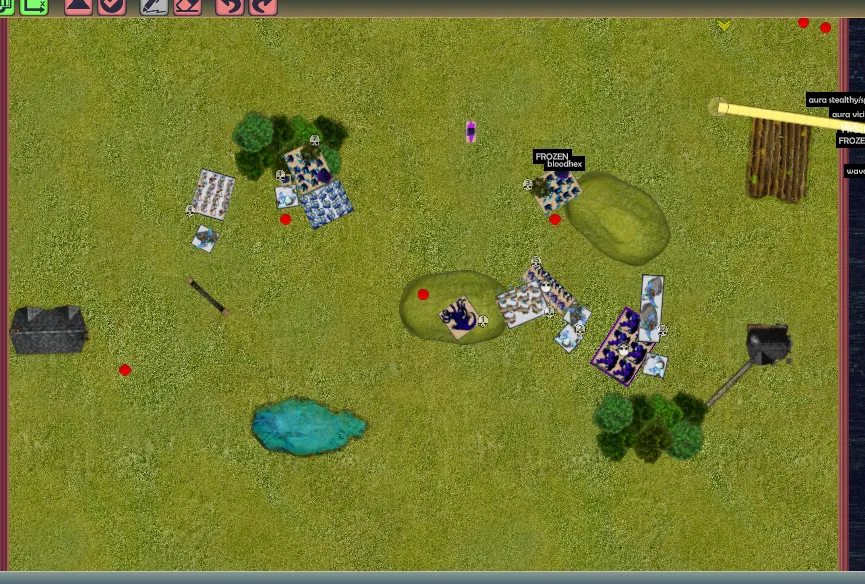
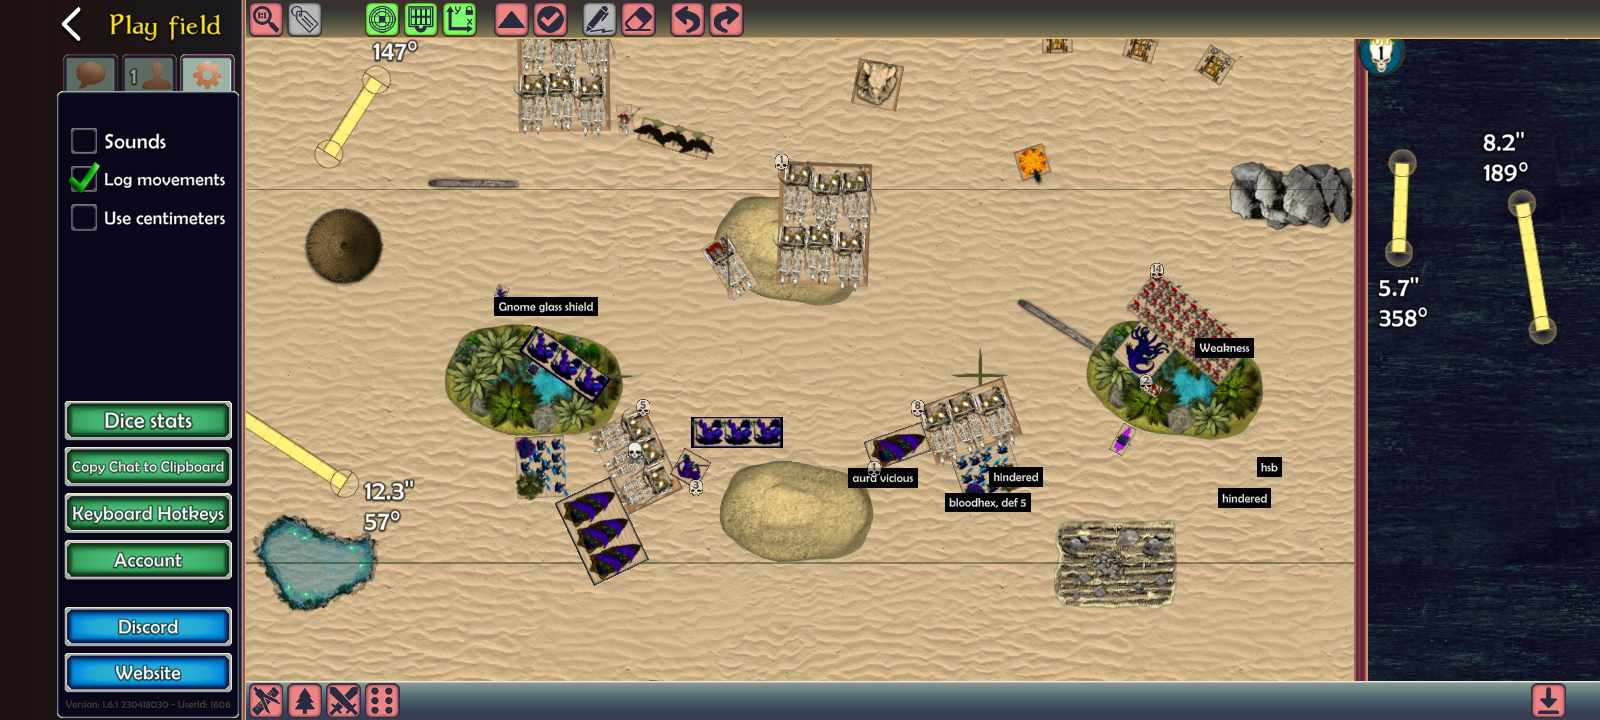
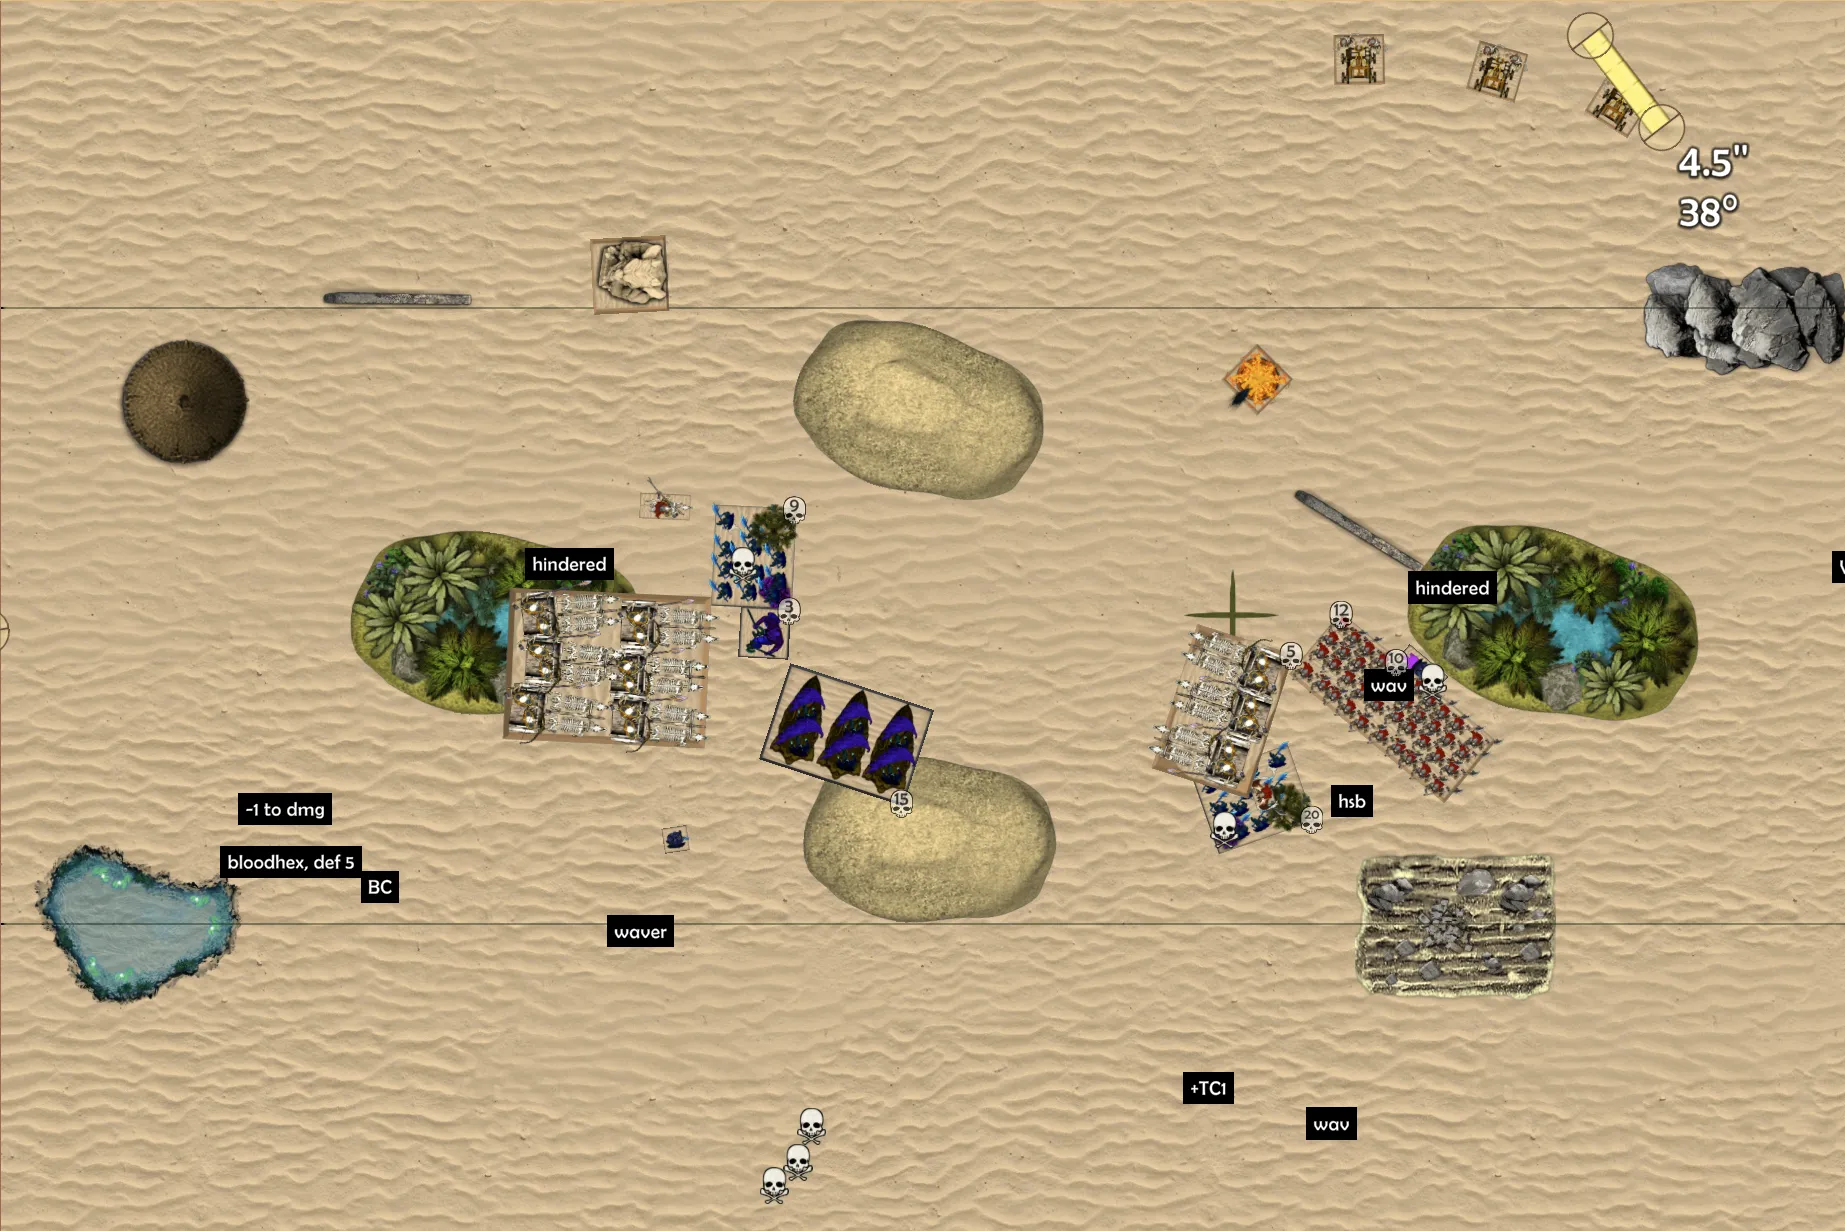
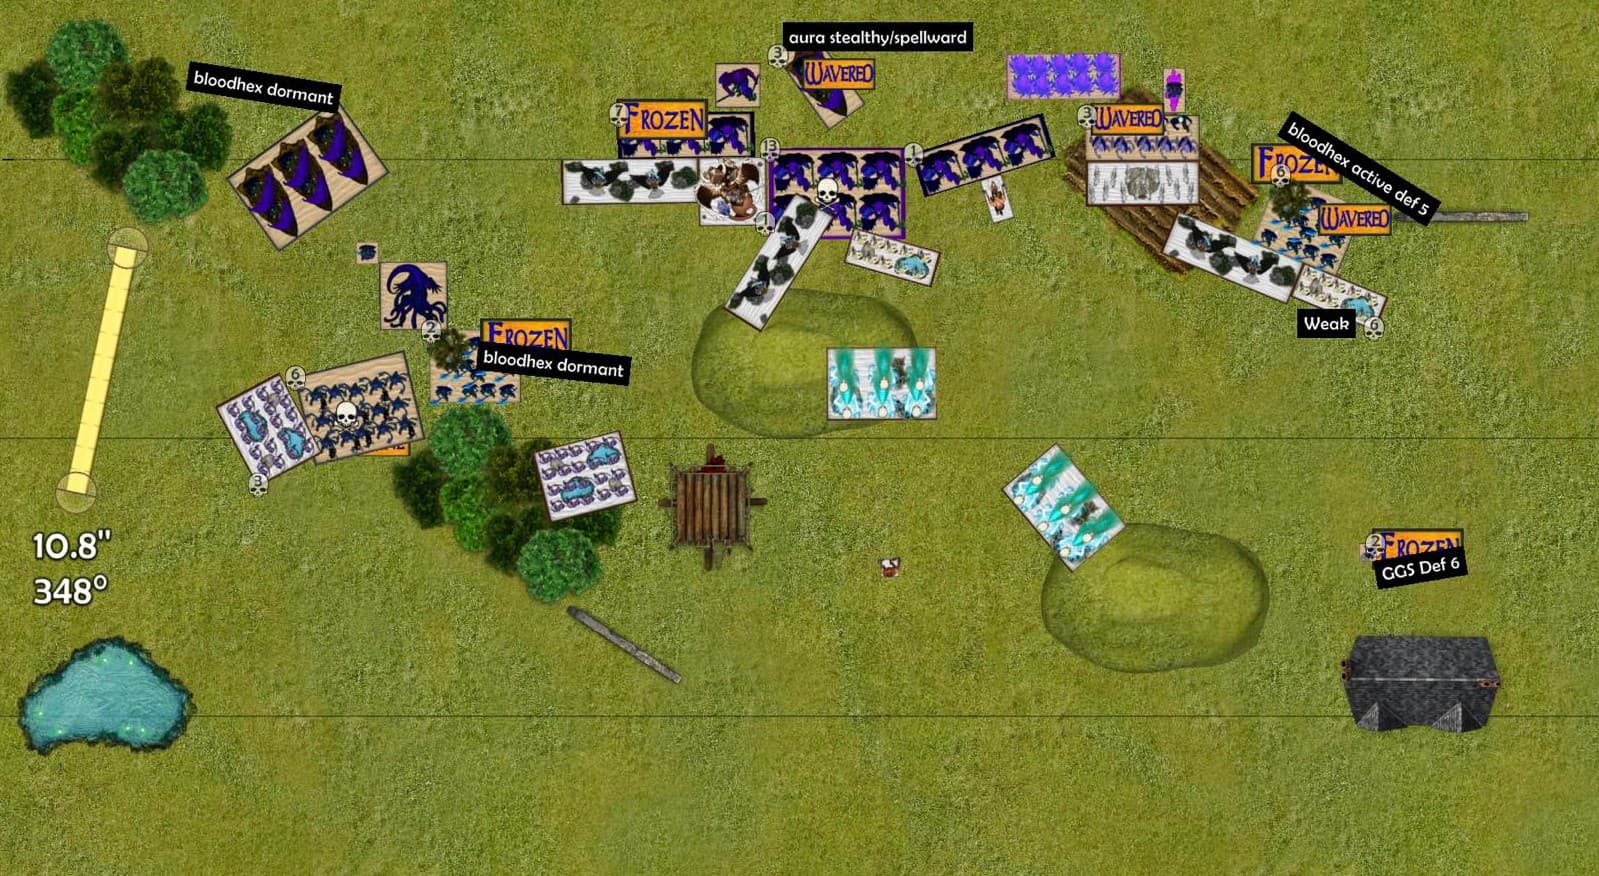
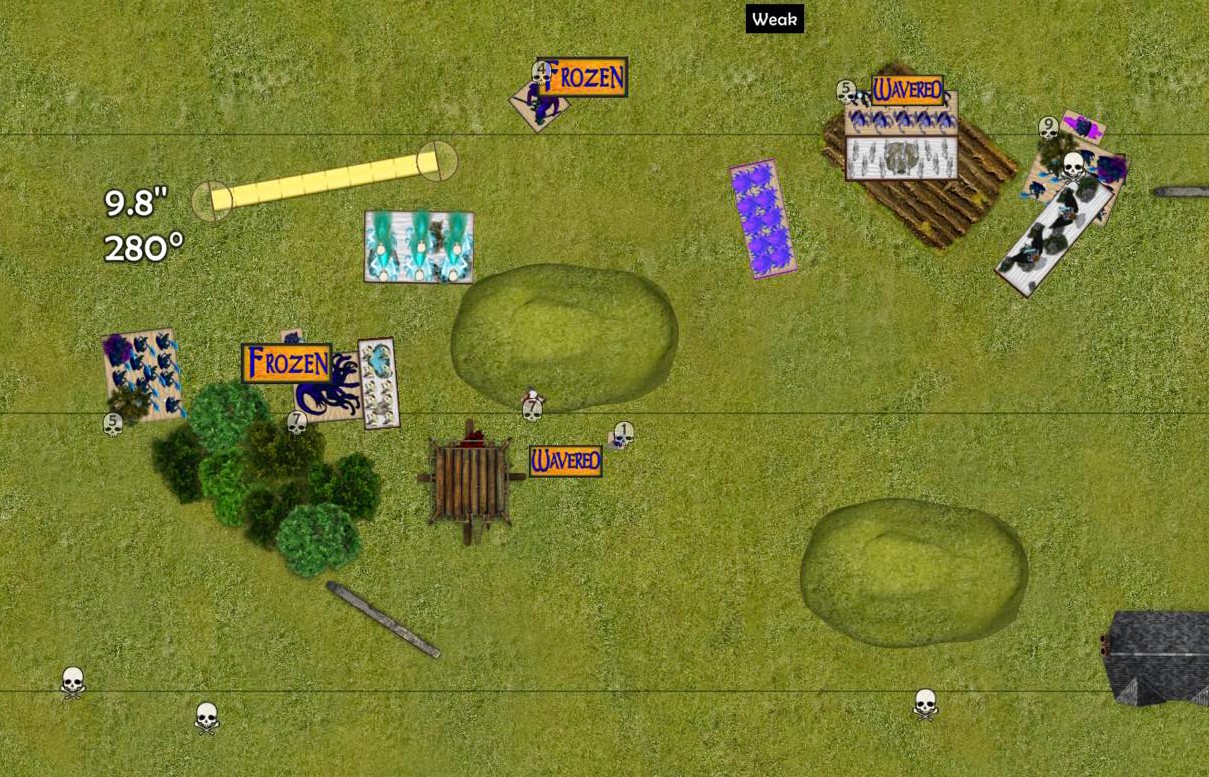
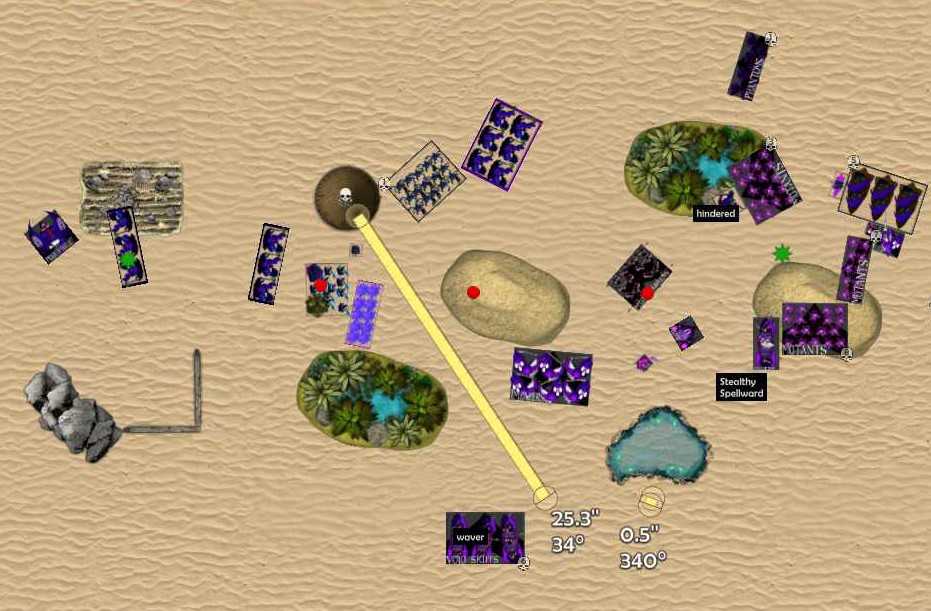
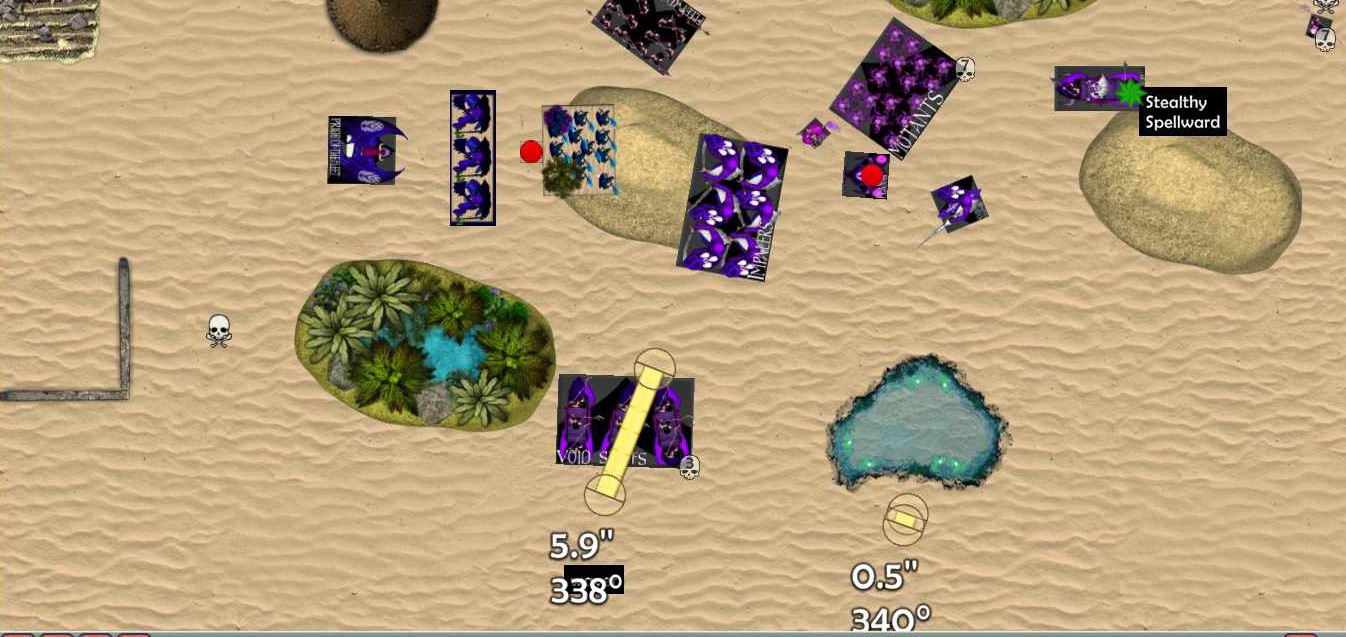
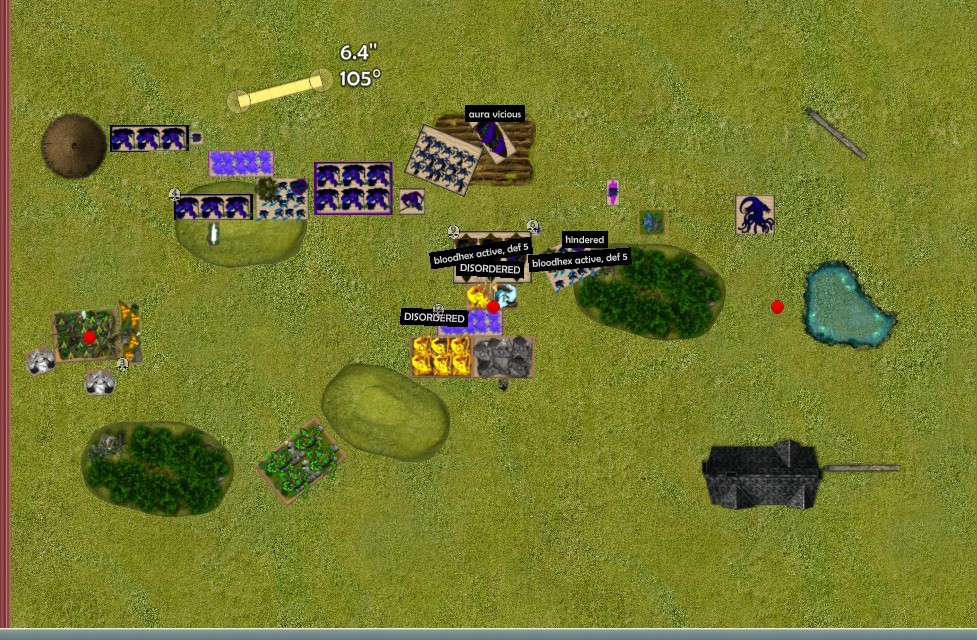
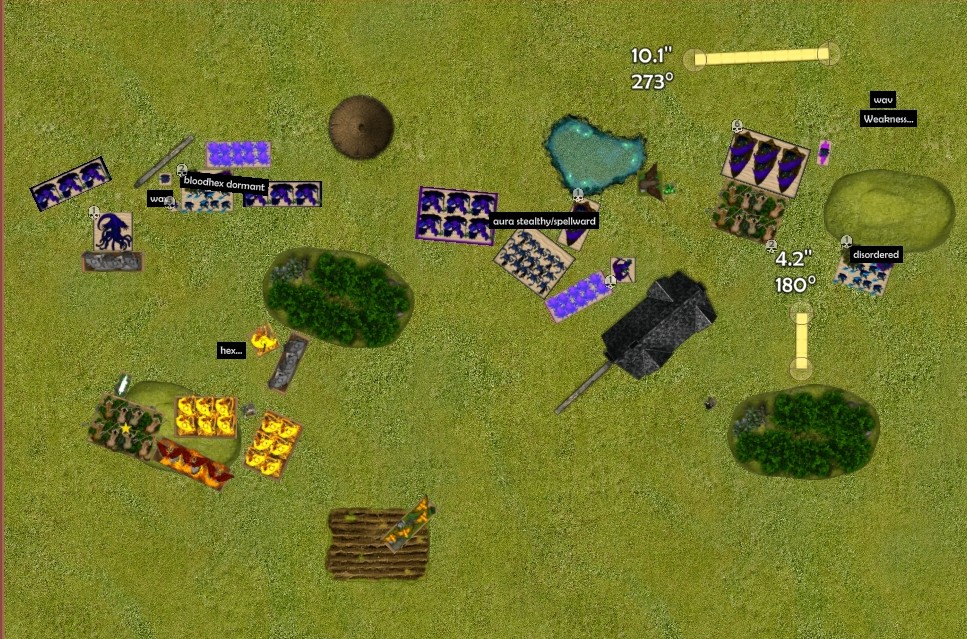
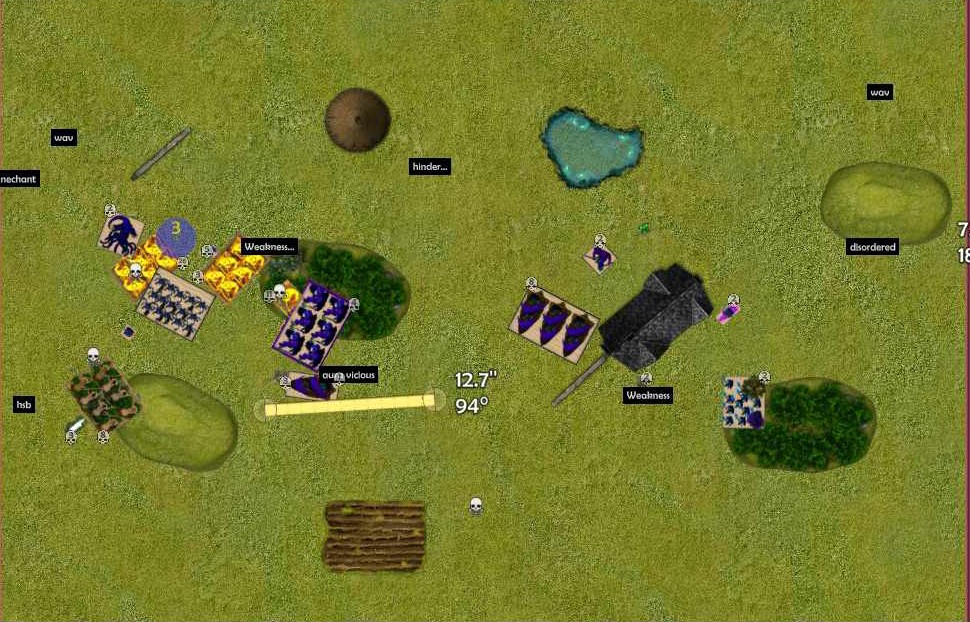
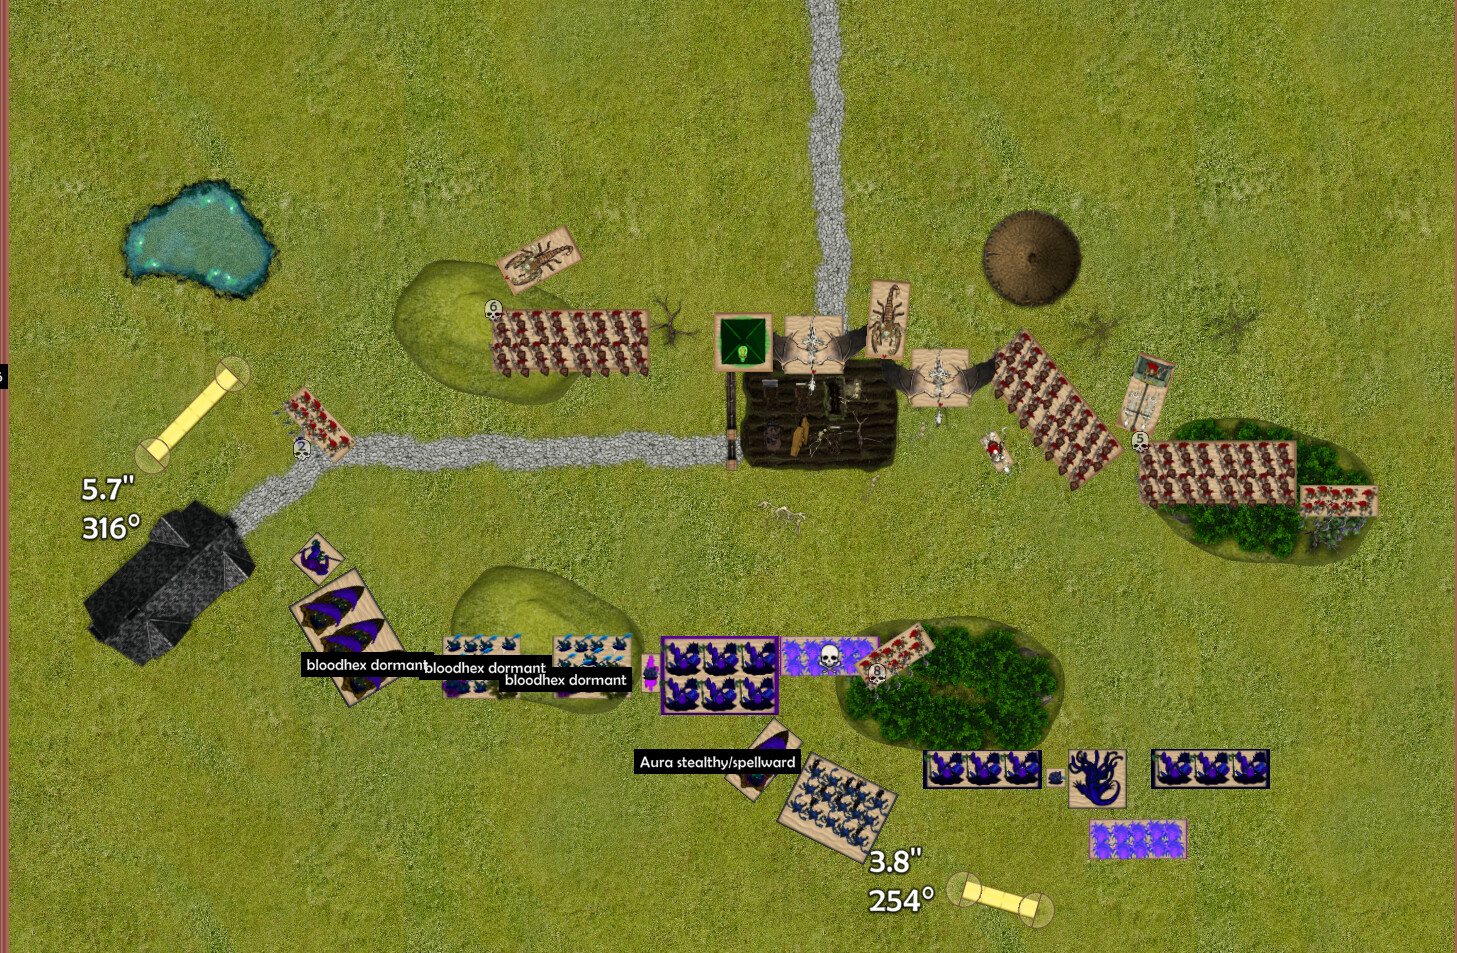
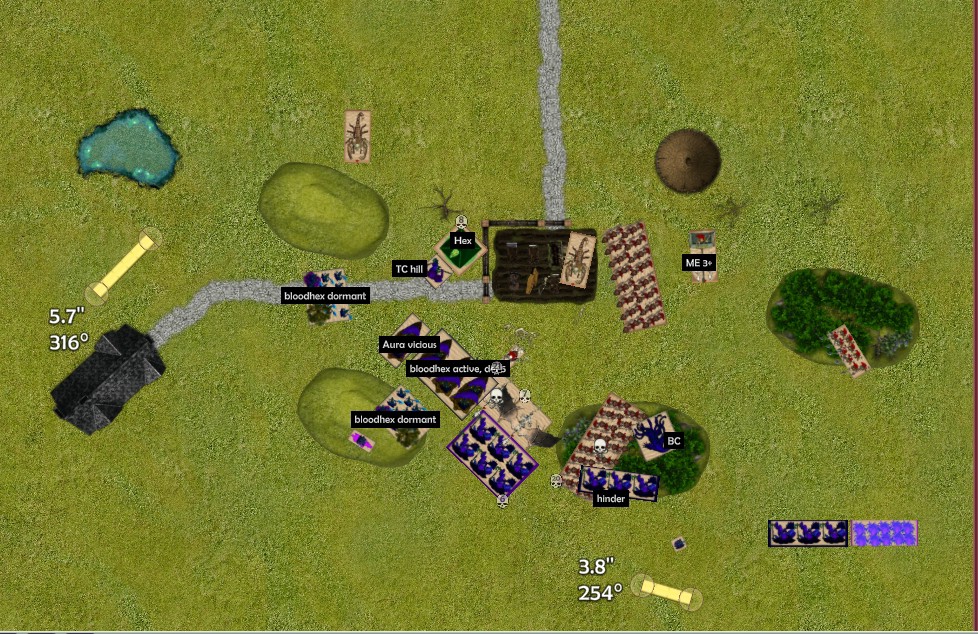
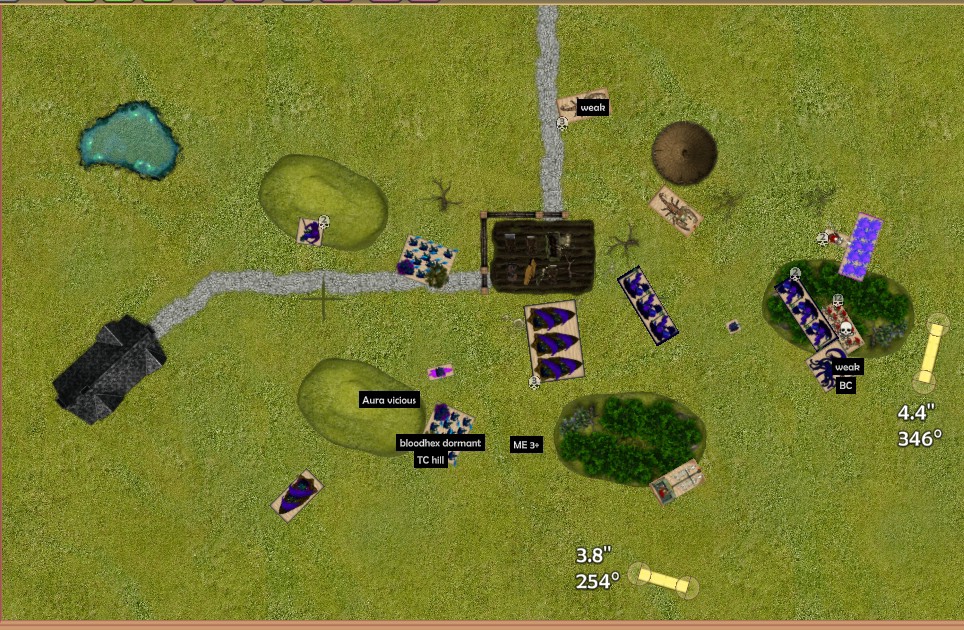
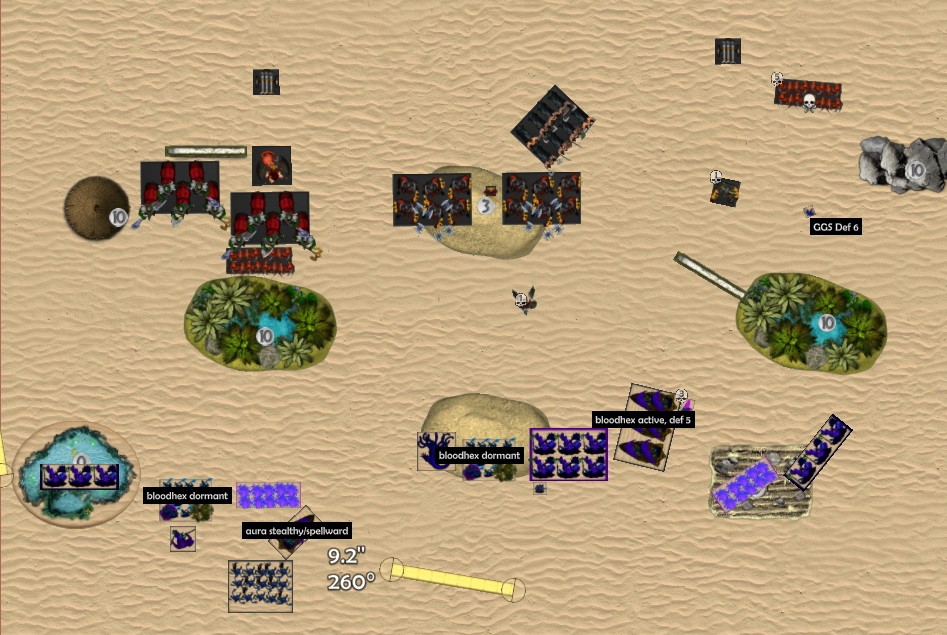
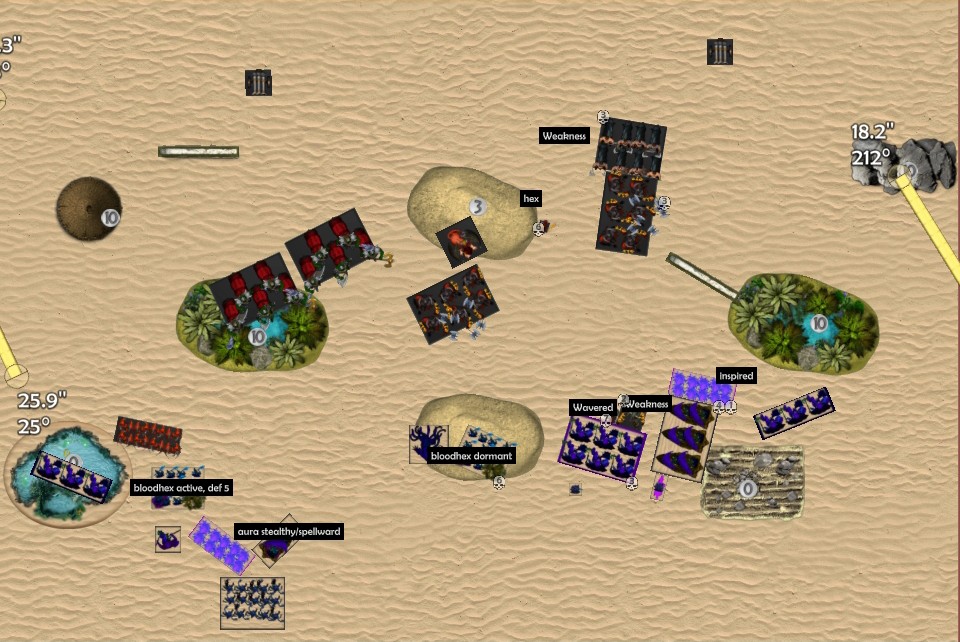
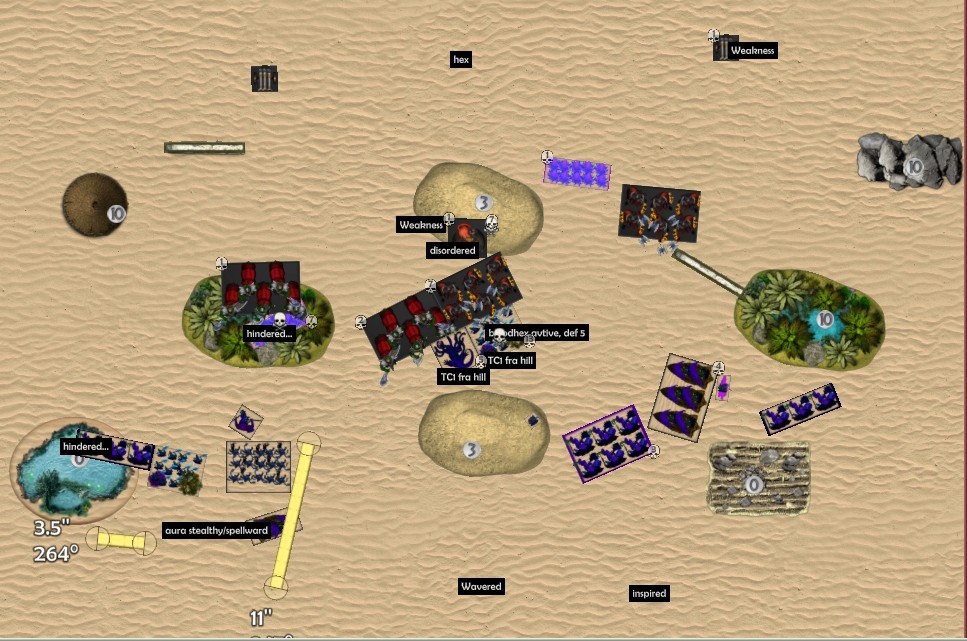
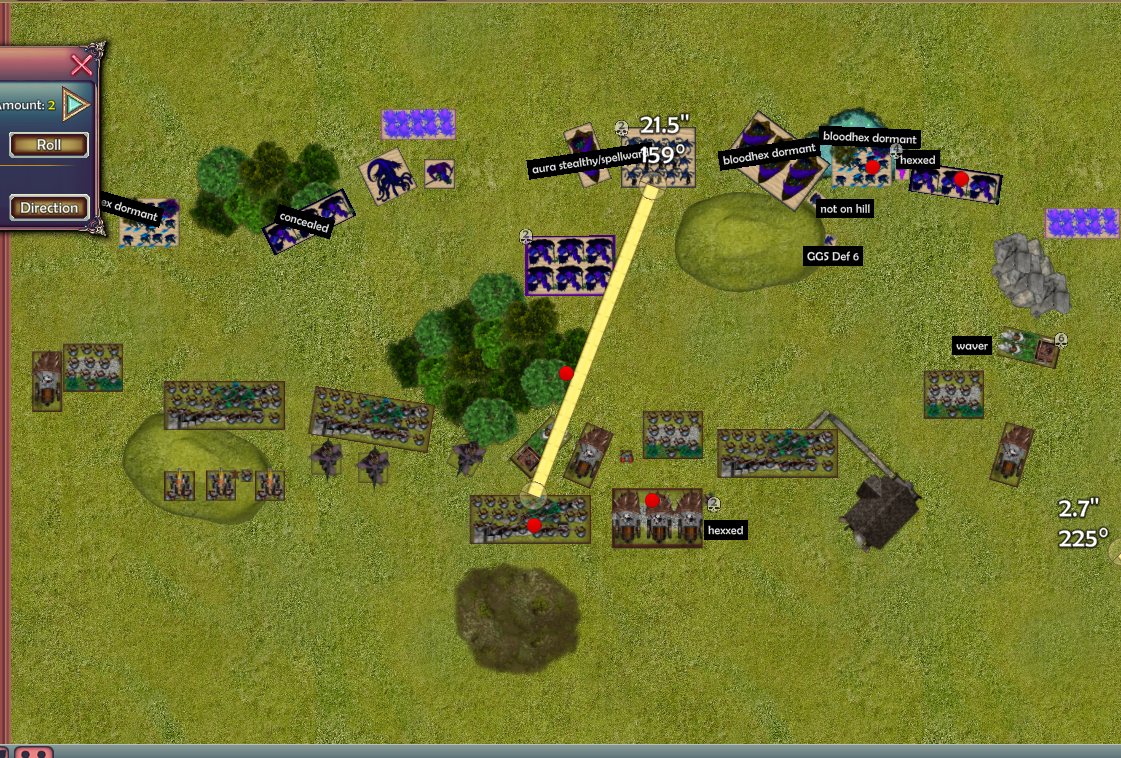
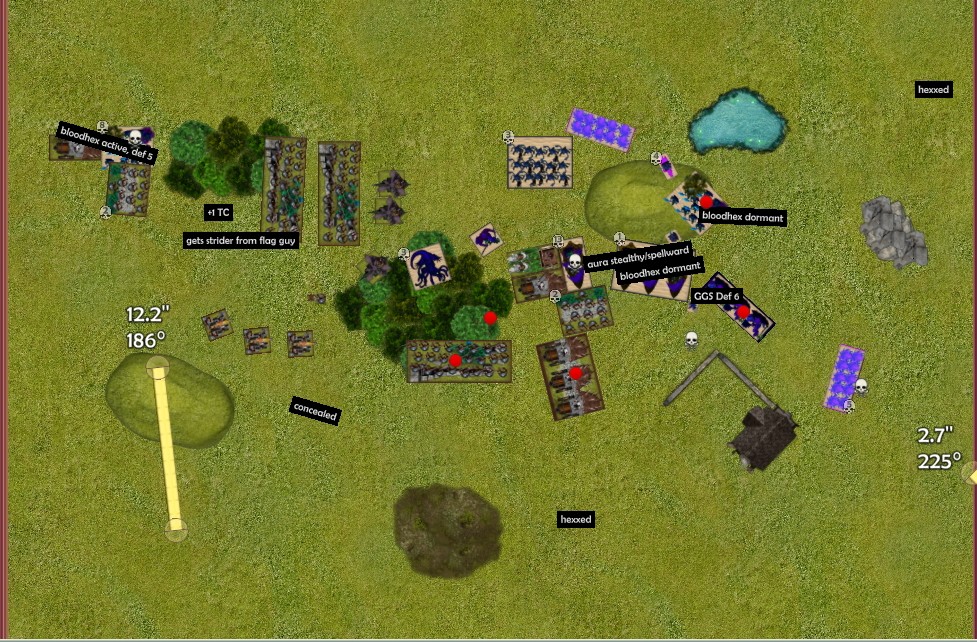
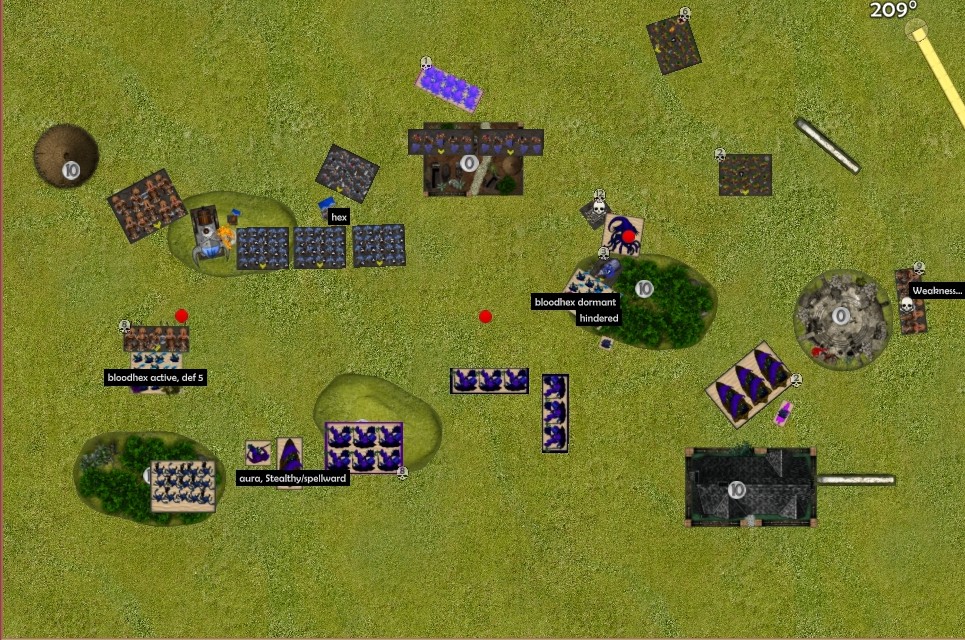
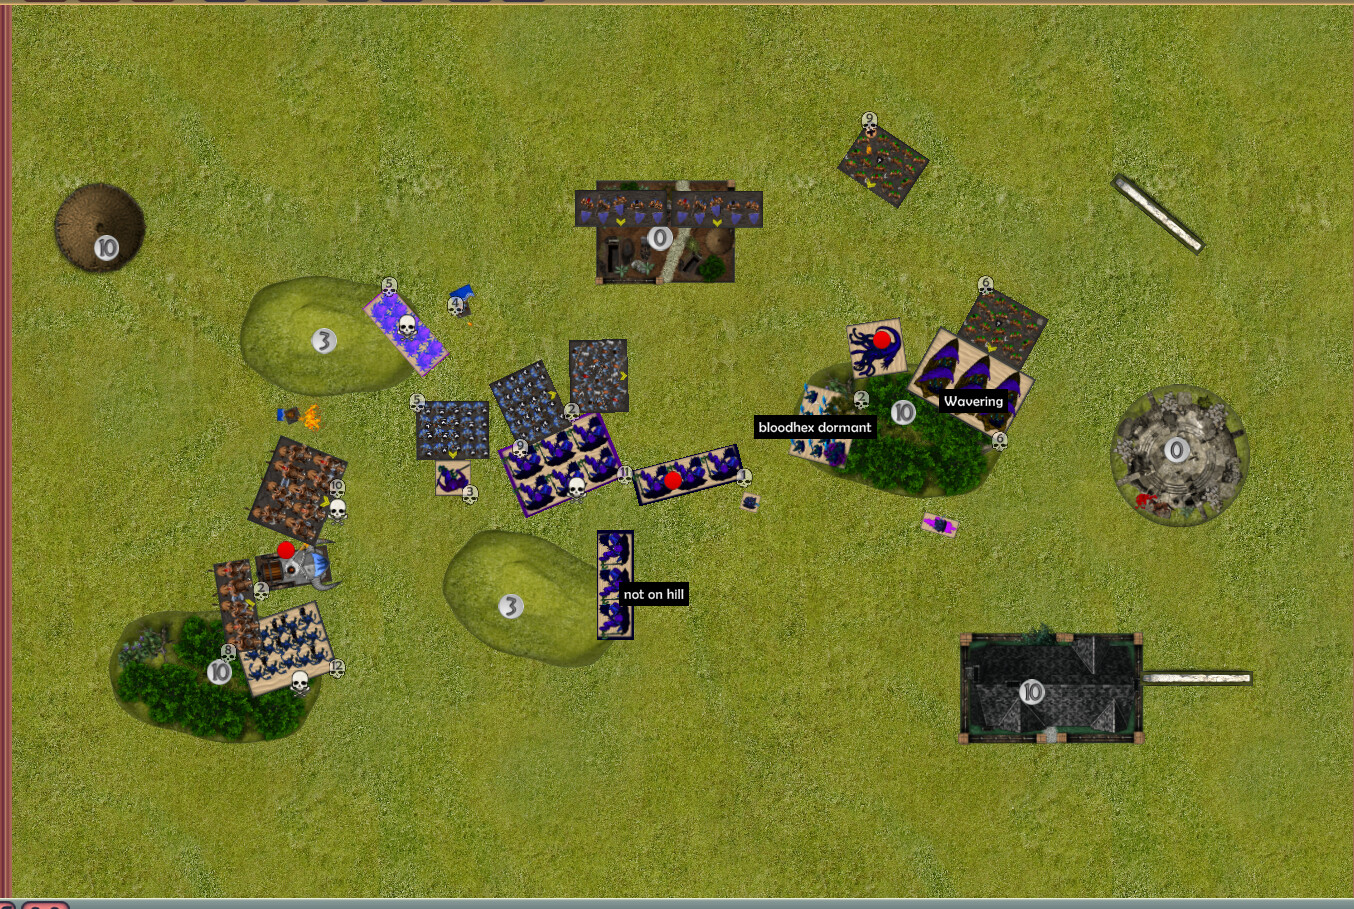
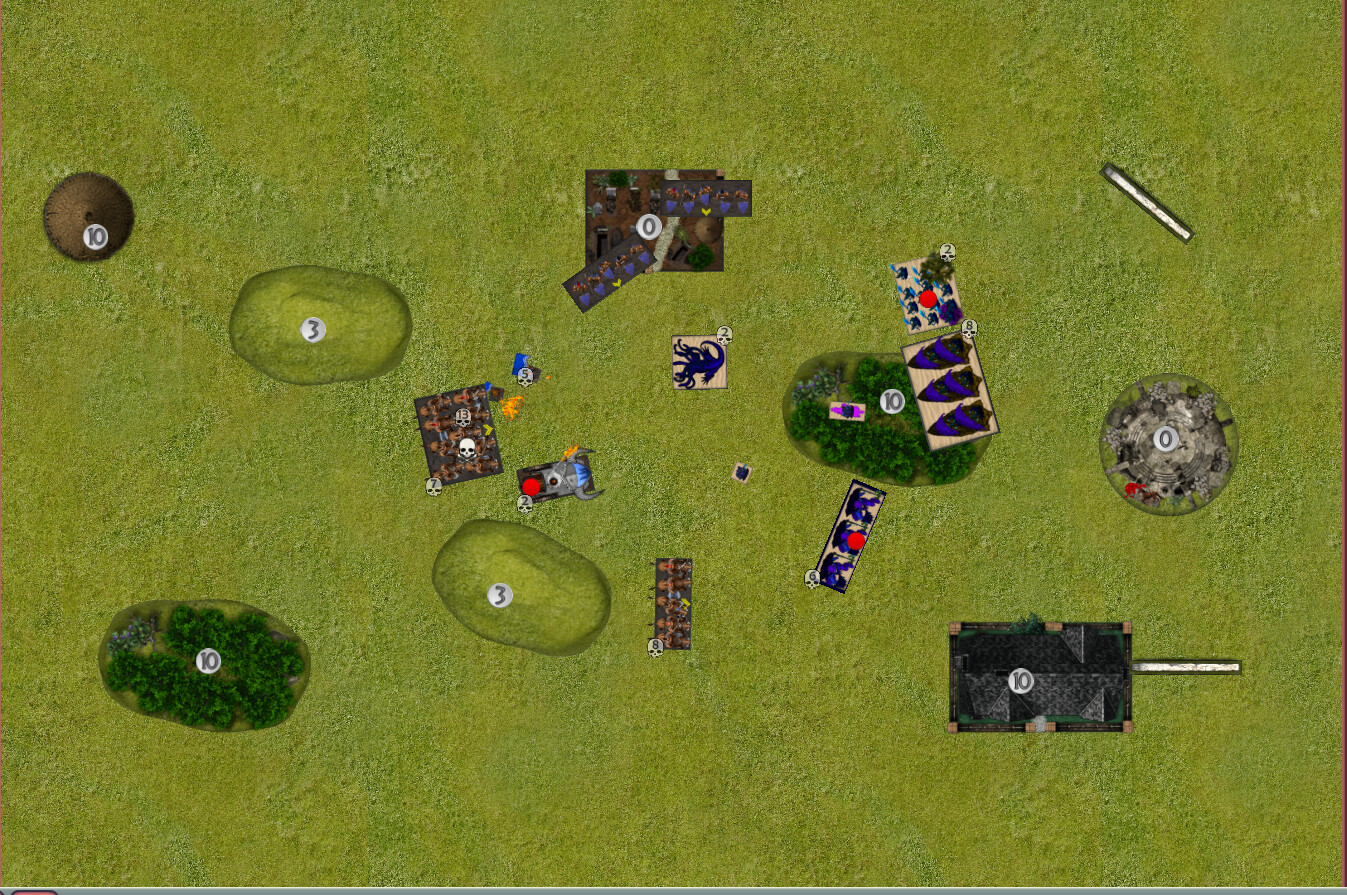
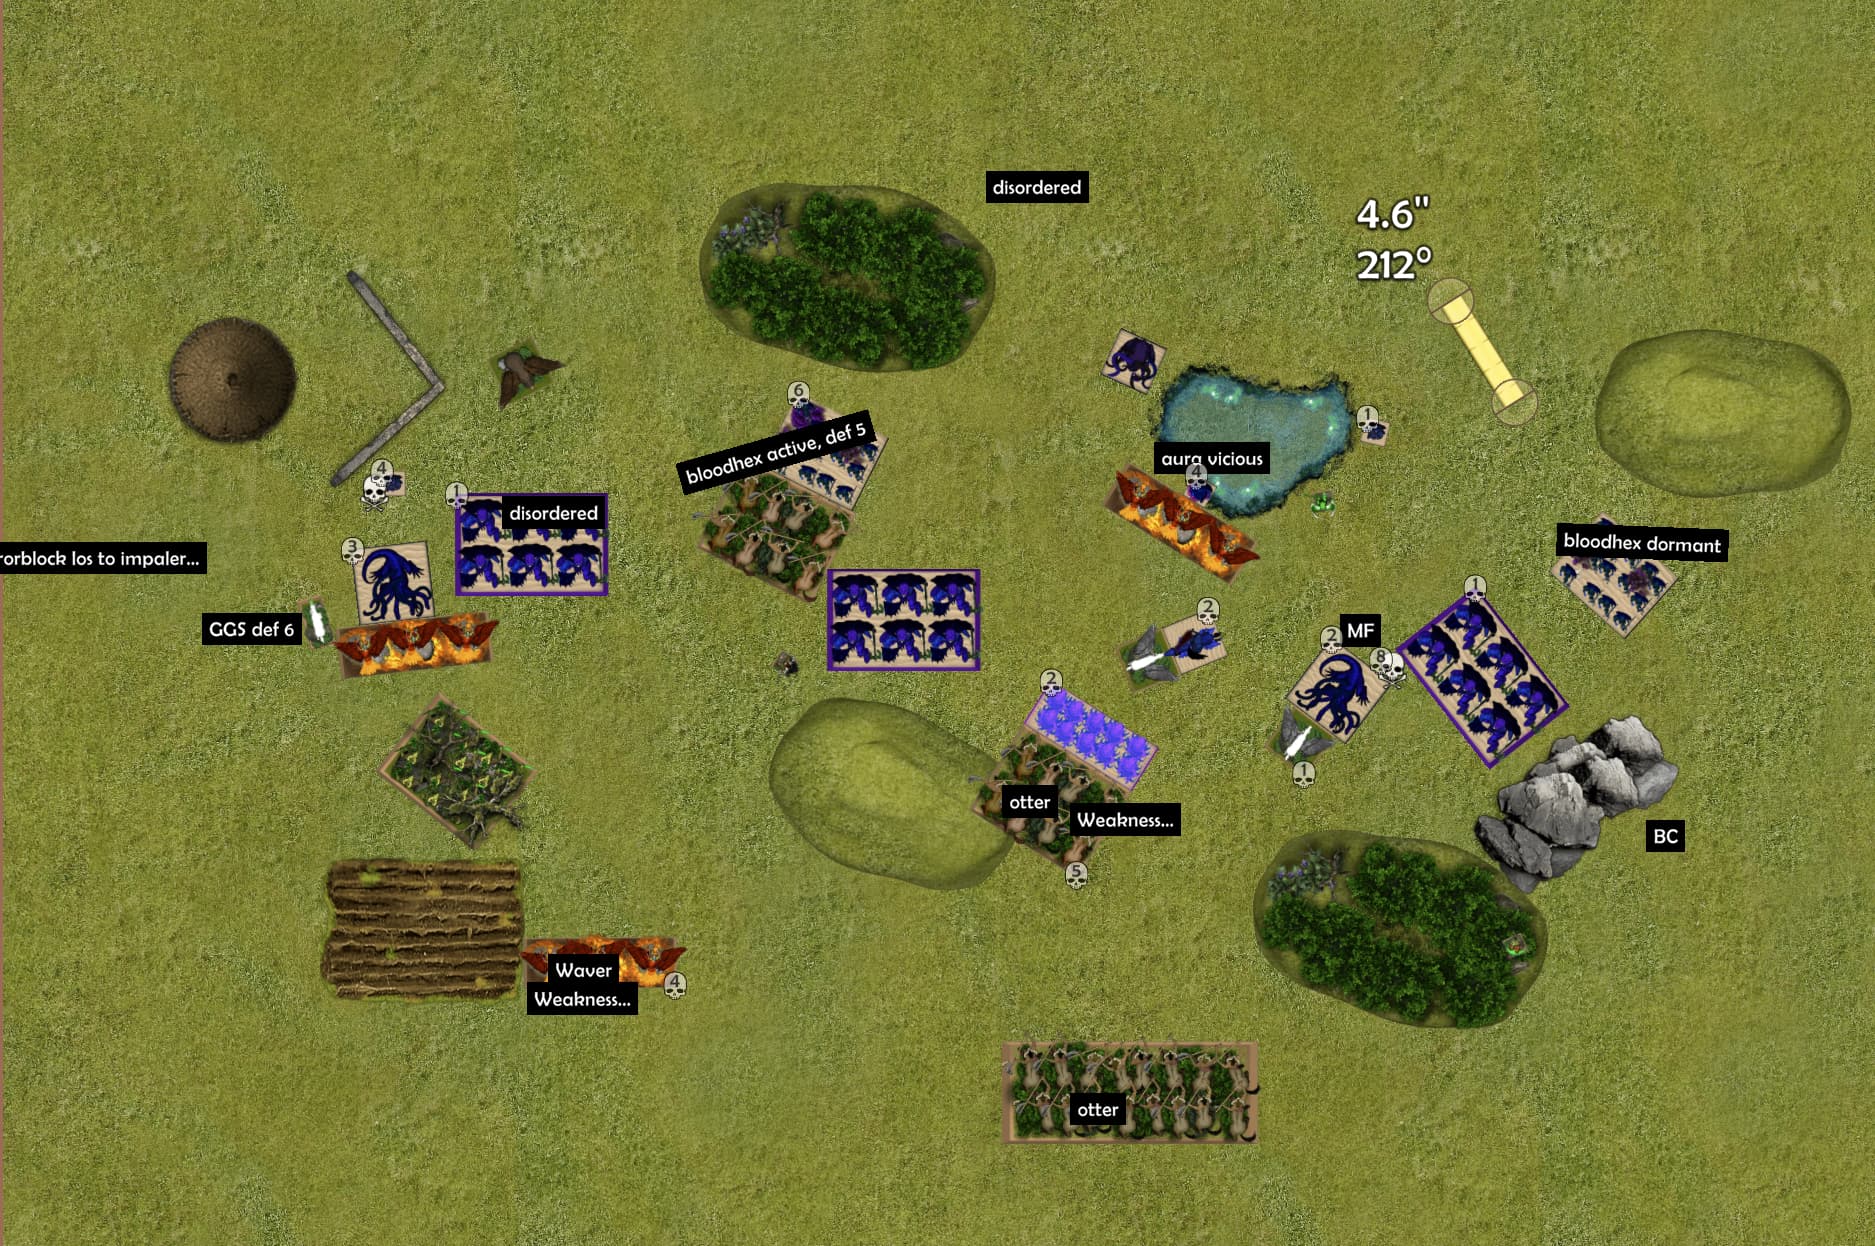
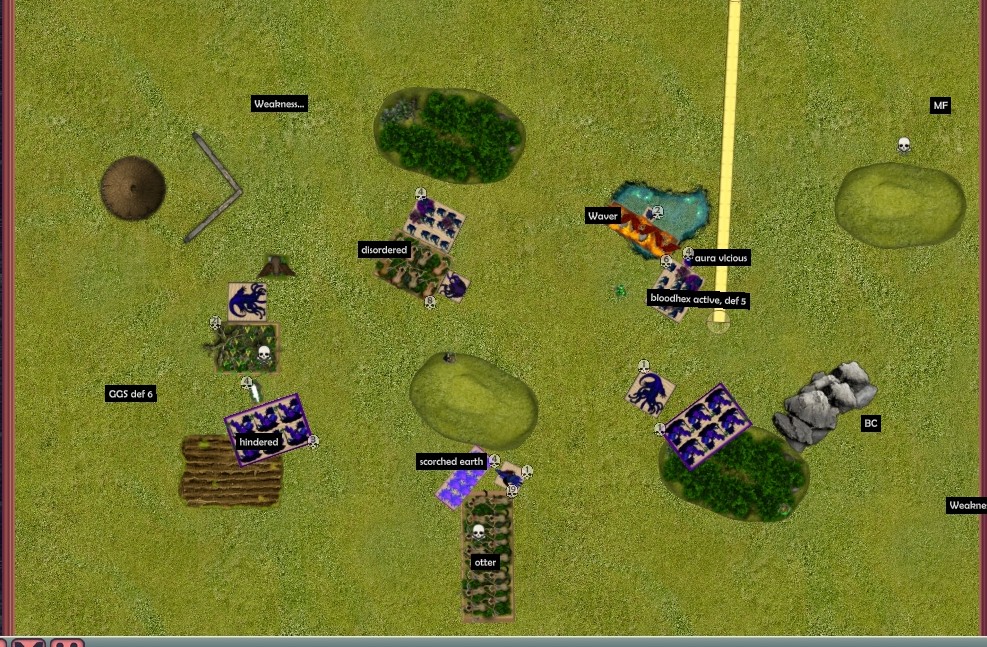
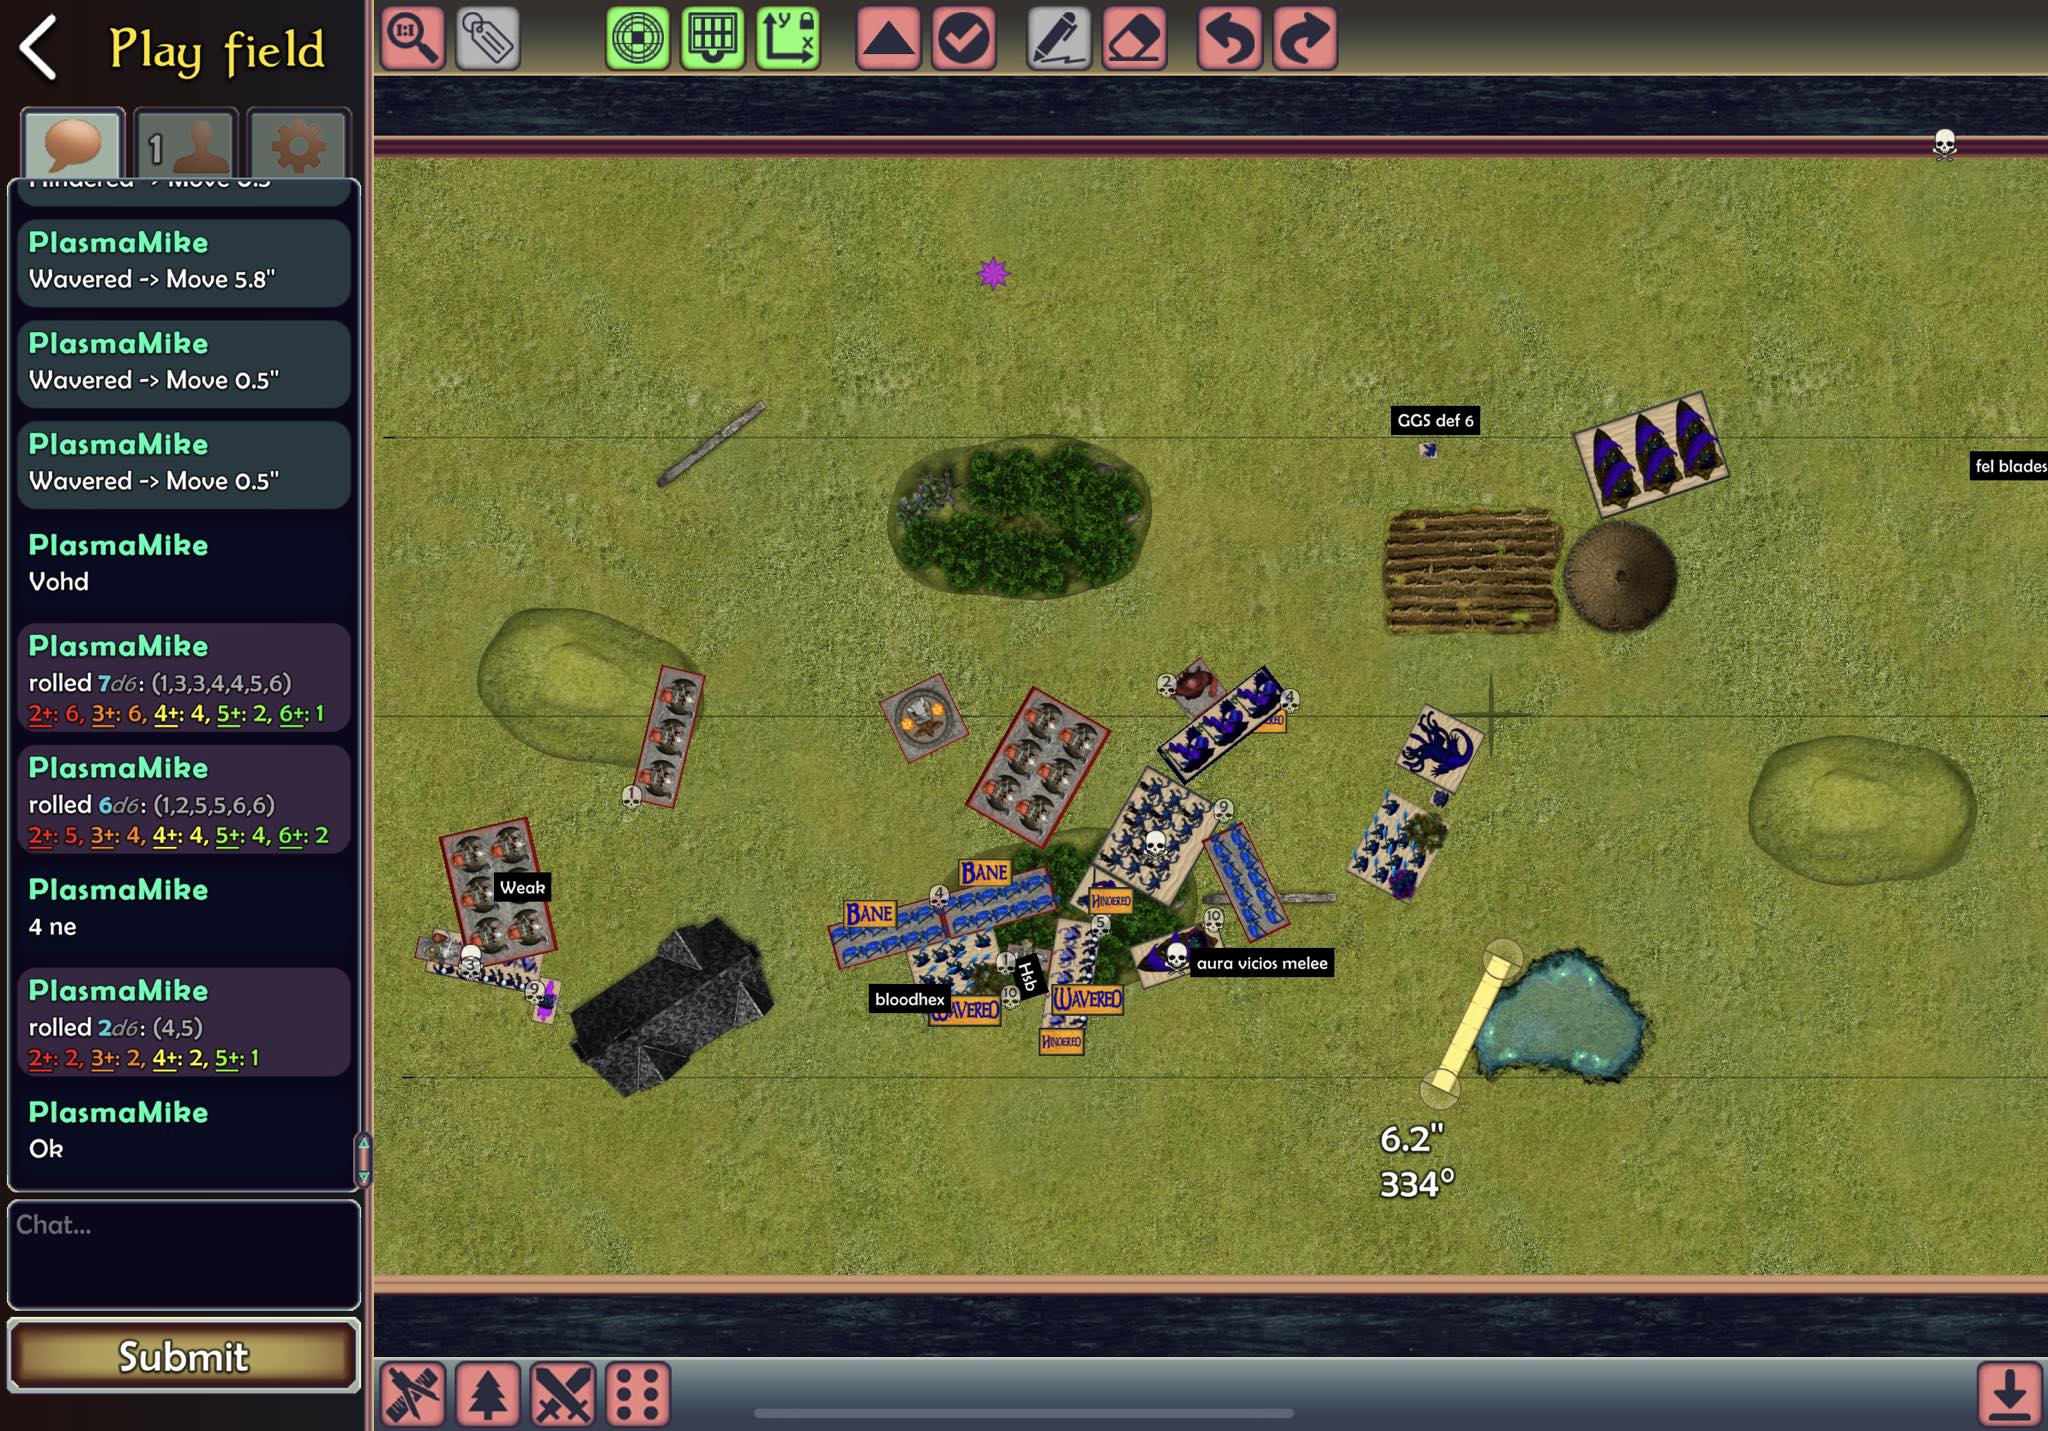
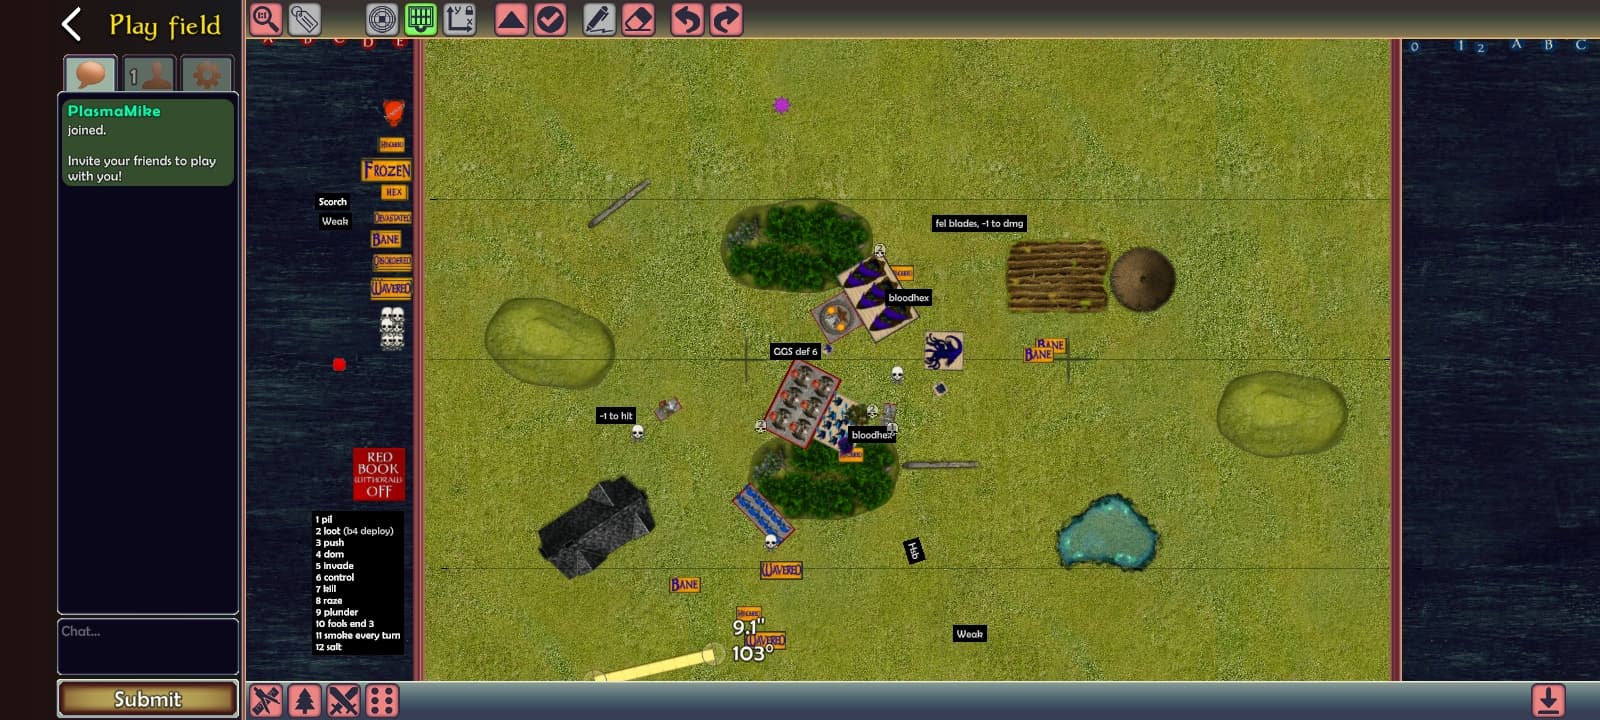
After T2
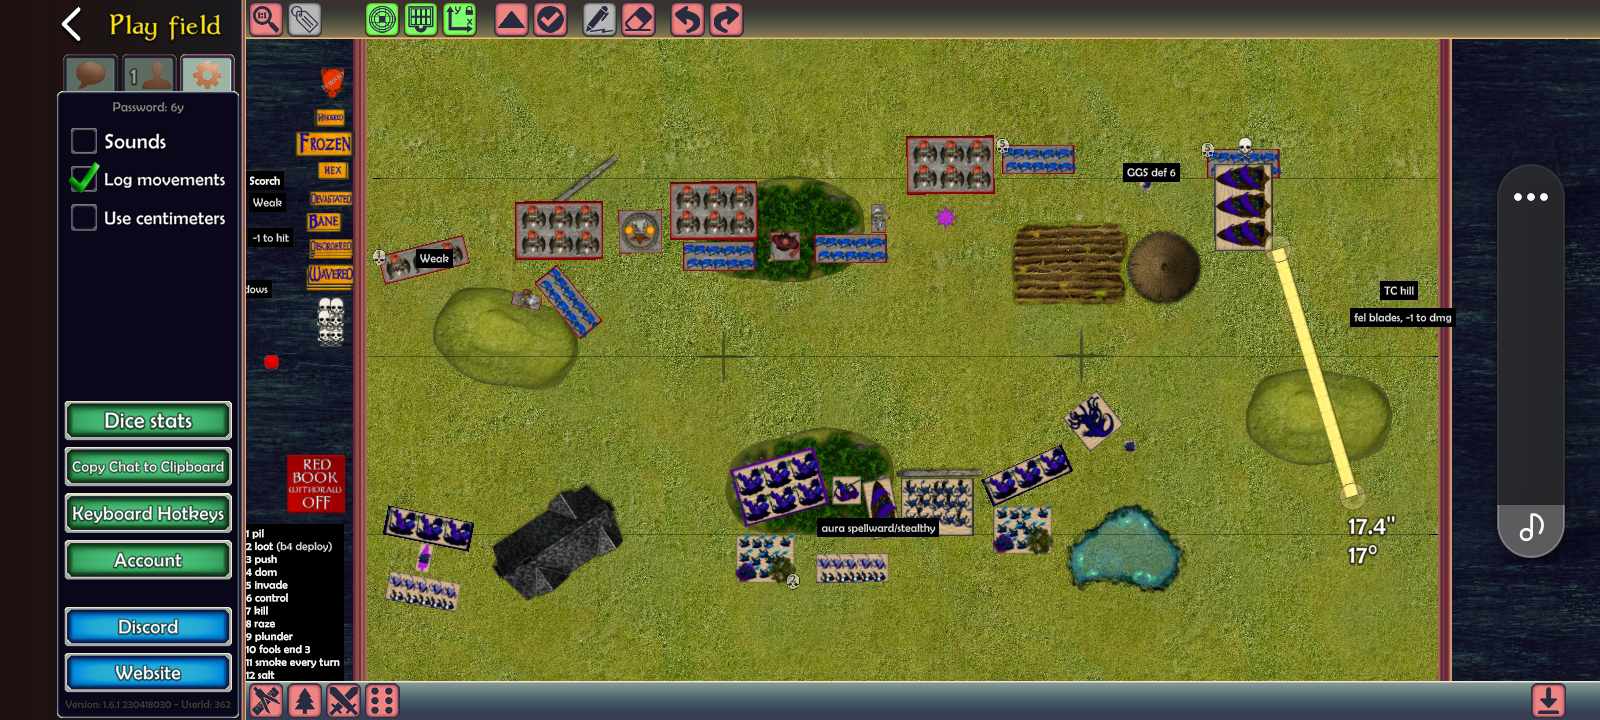
On the right flank, the void skiffs finished off the riftwalkers that struggled against the assassin. Certainly a dilemma here, as the skiffs will be stuck and behind the building after this manouvre, but the riftwalkers had to be dealt with, and skiffs would be more efficient than the assassin. The assassin went towards the centre of the battlefield to shoot at another unit of riftwalkers. They was hiding in the field, but was pushed out La’theal’s windblast to deal dmg and make them easier to hit. You may also notice that the stormbr8nger and helstrikers moved back. This is because I pointed out they were within 15" of my mutants with SP 8(due to item), WC 3. A mistake that is easy to make in a PBEM game, and I thought it unfair to capitalize on it.
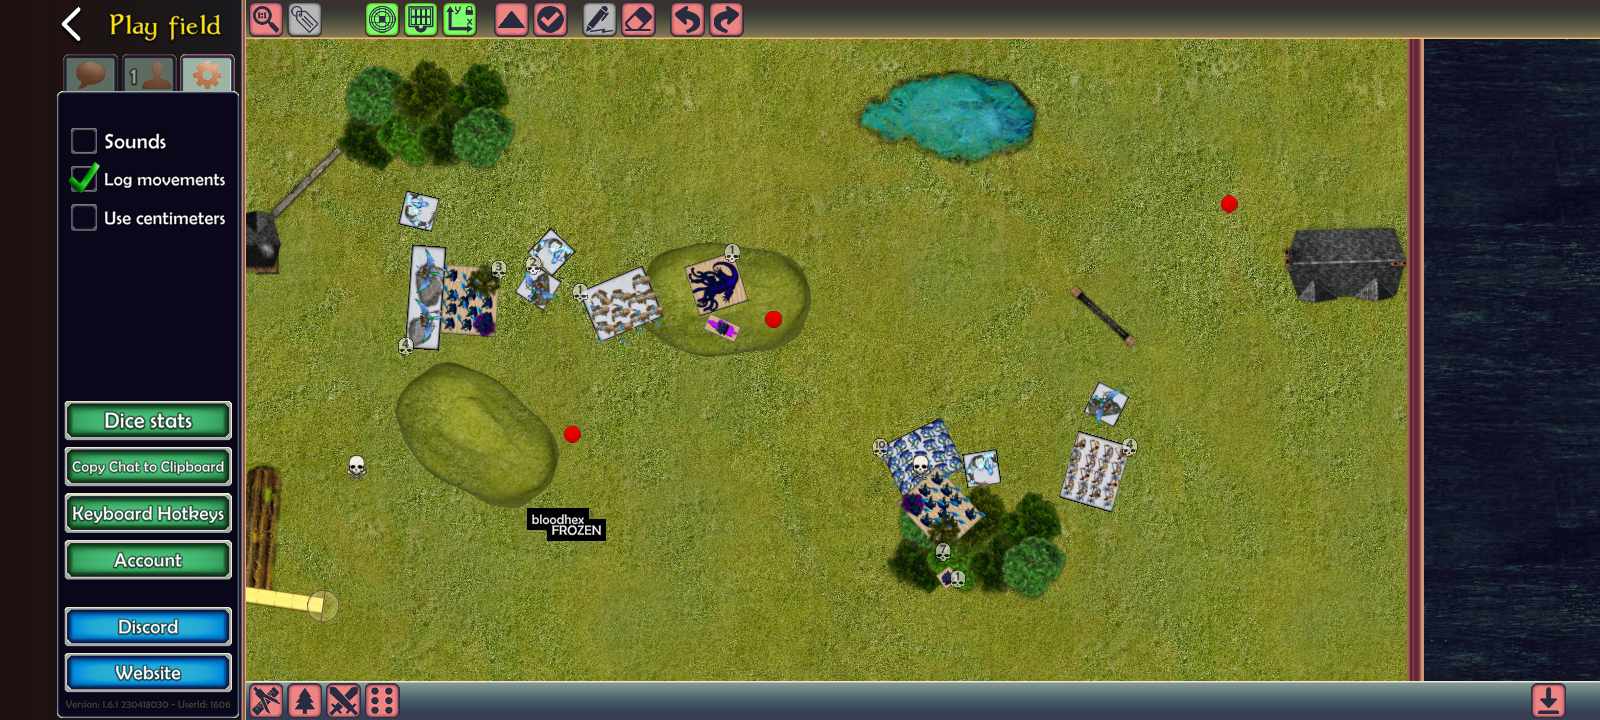
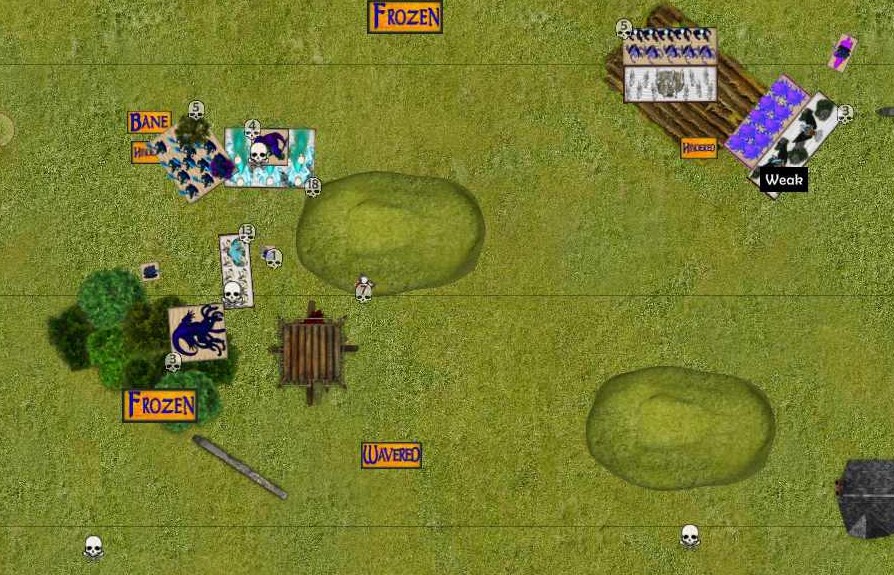
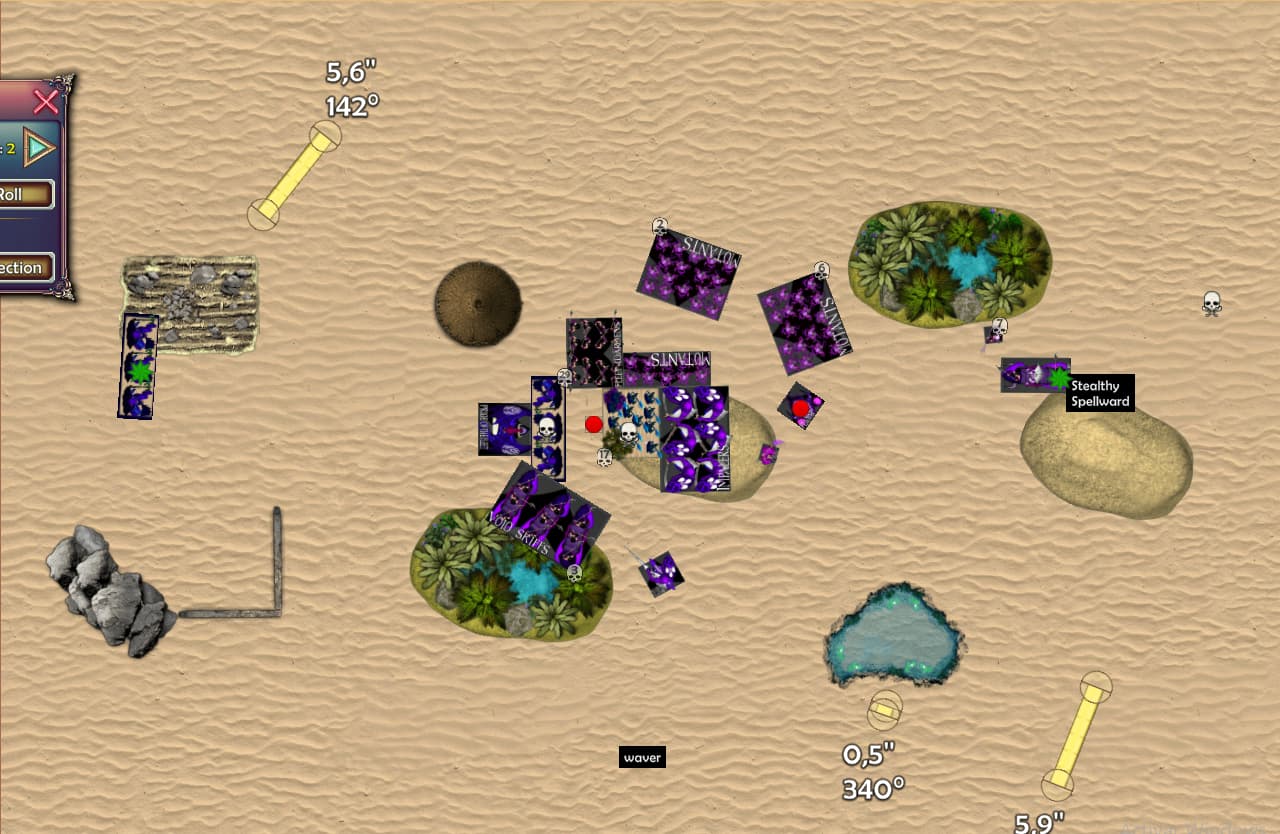
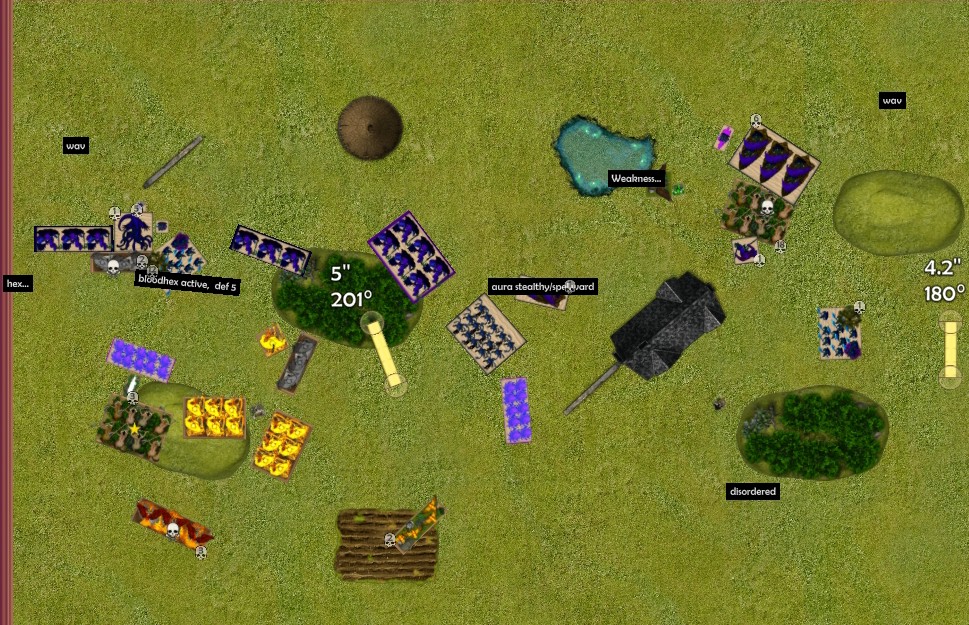
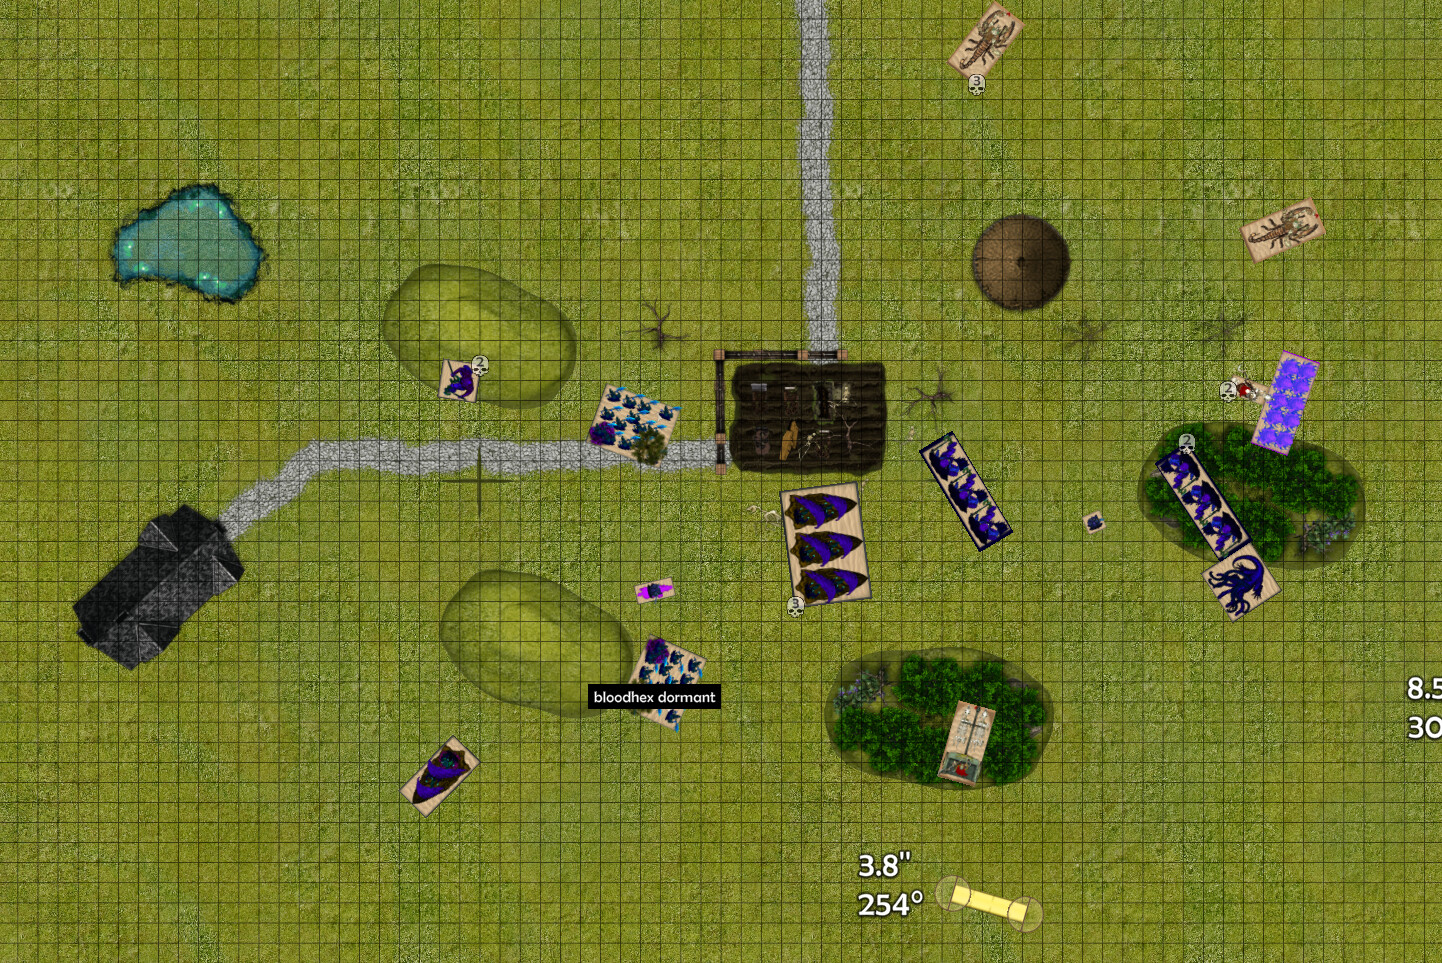
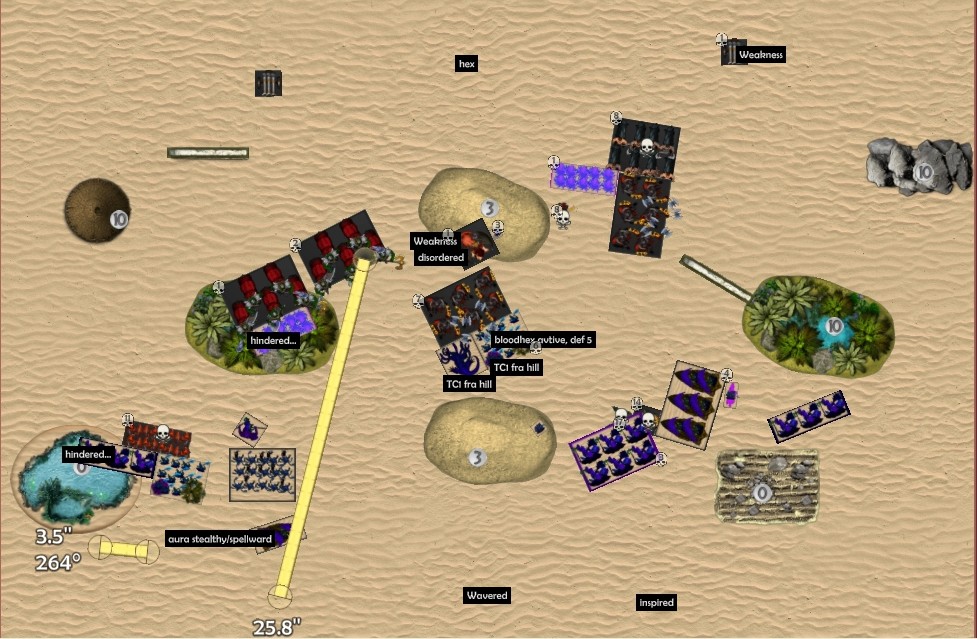
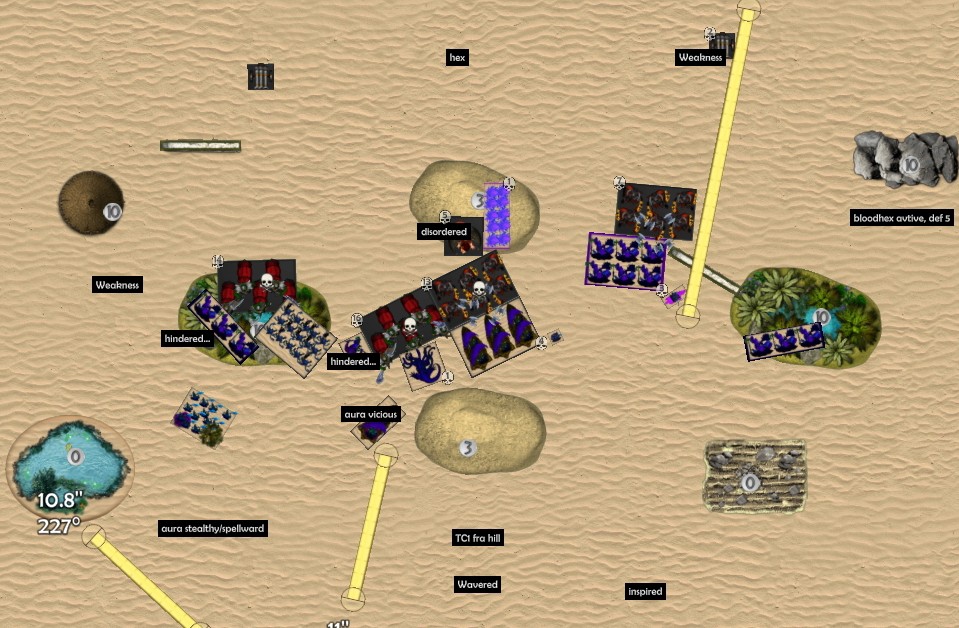
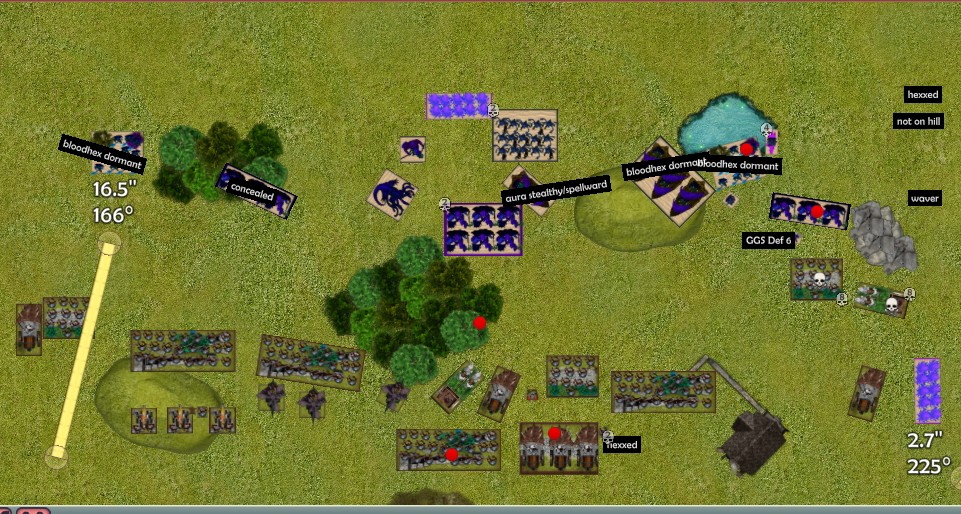
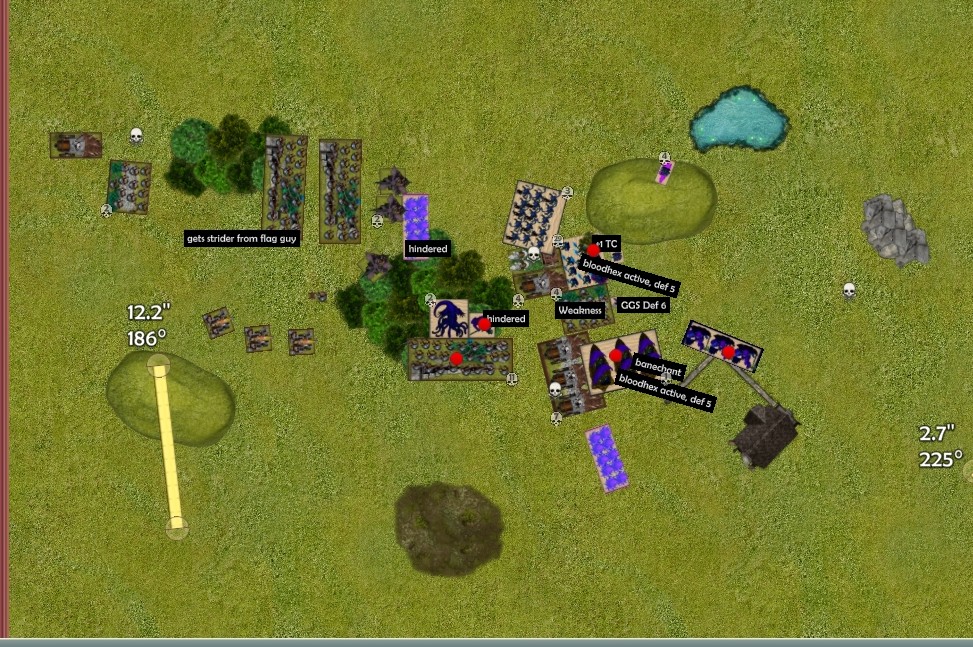
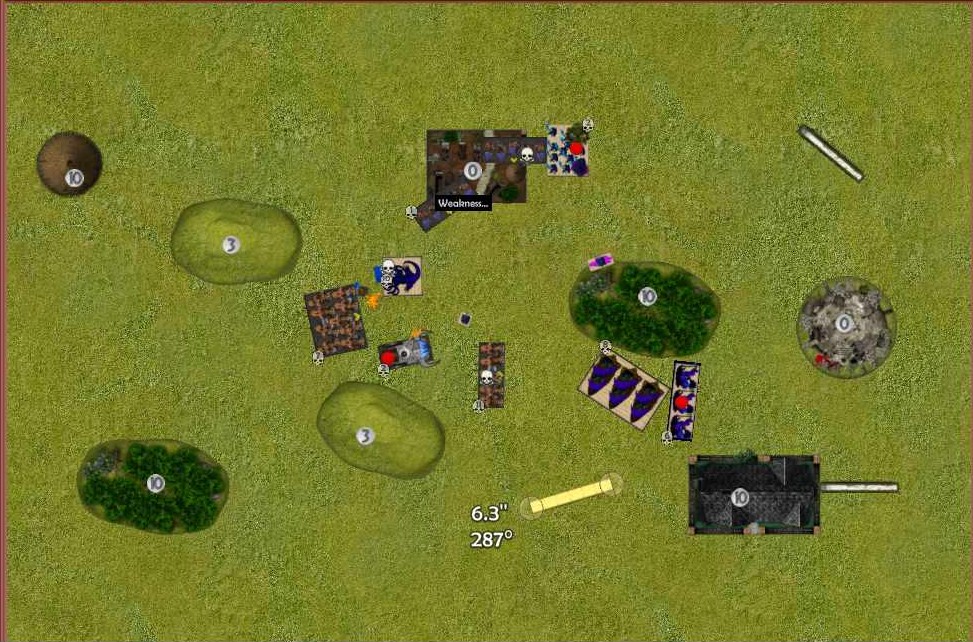
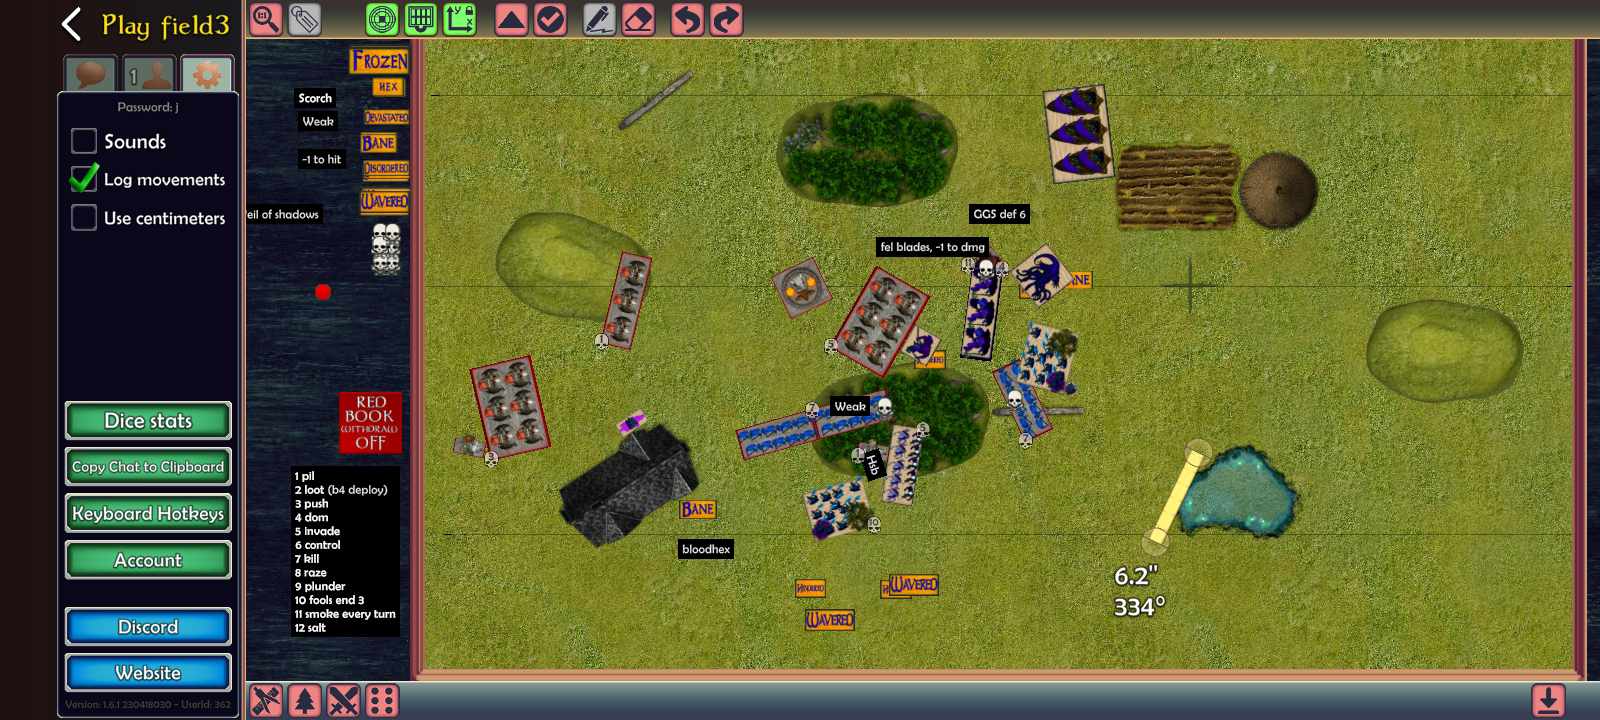
After B2
Time for pain. On the left flank I made a mistake thinking that impaler regiment could survive any charge, but thonaar + helstriker horde was too much. I should rather have placed the wranglers in front and in combination with the builing, block a charge on the impalers. The central impaler horde hiding in forest also got killed, three units charged inn, banechant on helstrikers and hsb on stormbringer was more than they could handle, but I was suprised to see them go down. I have little experience playing against RFO, next game I’ll be even more careful.
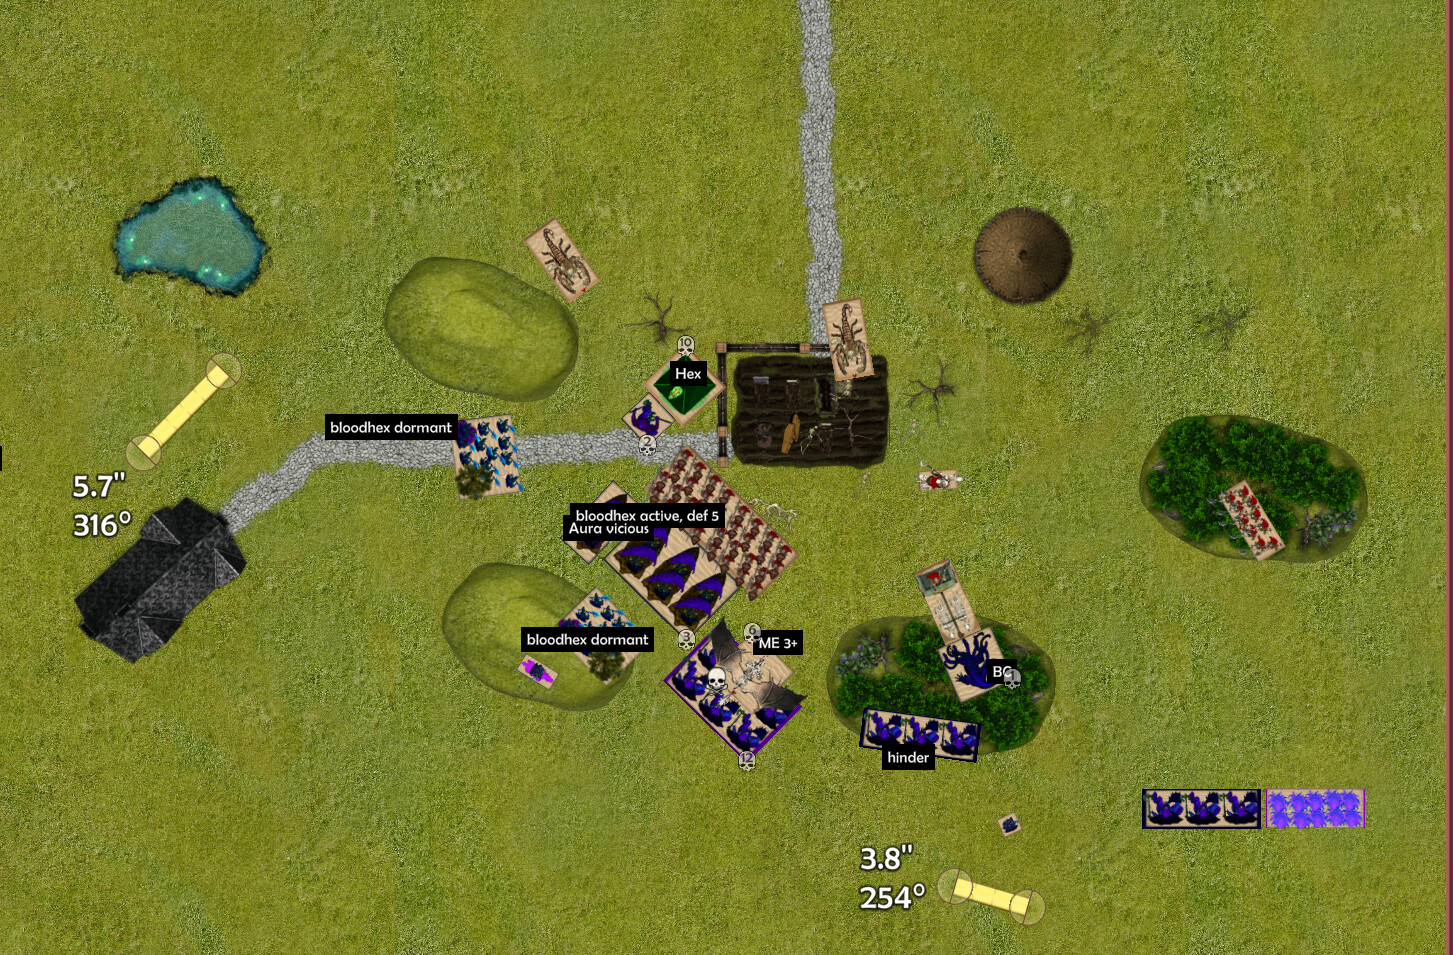
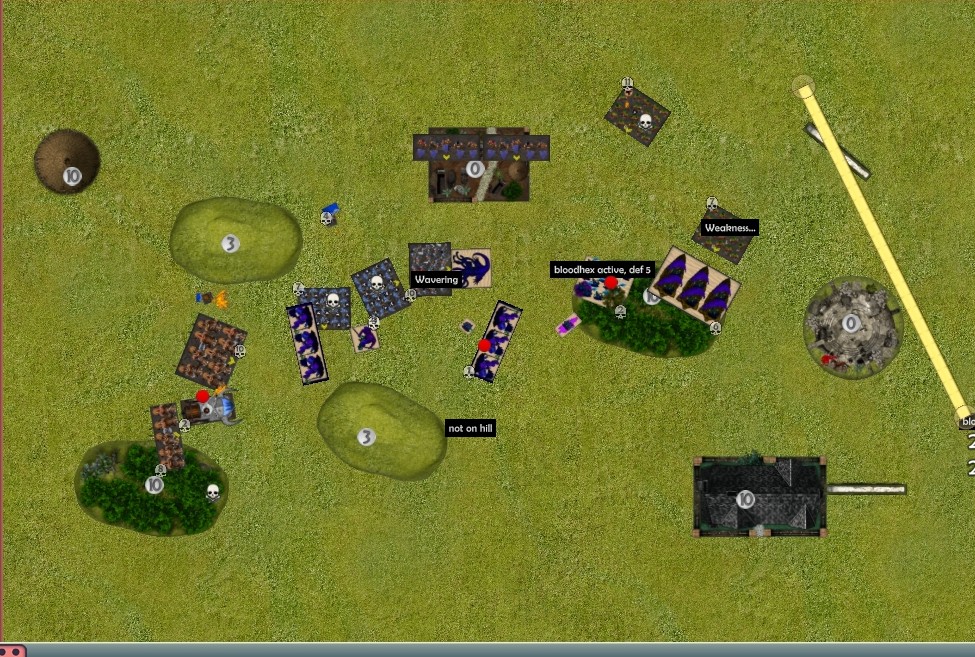
After T3
The weakenes of the skiffs is reveald, as they have to tirn really awkwardly to help shooting on the riftwalkers, turning their front away from everything. Assassin helped as well to bring down the riftwalkers. But was it worth trading a kill for skiffs new position? In the centre, mutants and SB teamed up to kill Helstrikers, fleetwarden did some dmge on riftwalkers, and wranglers did one on stormbringer. Suddenly the forest that was a part of my defence was turn against me, as all my counter punches got hindered. Was it worth it to hide in the forest, when my horde died anyway previous turn? I also positioned my navigator to give many units vicious, and to prevent flank charge from the other helstriker unit, but I firgot to consider all the enemy troops…
On the left flank the wranglers charged helstrikers, nothing else to do, and I positioned the crone to make her unchargable.
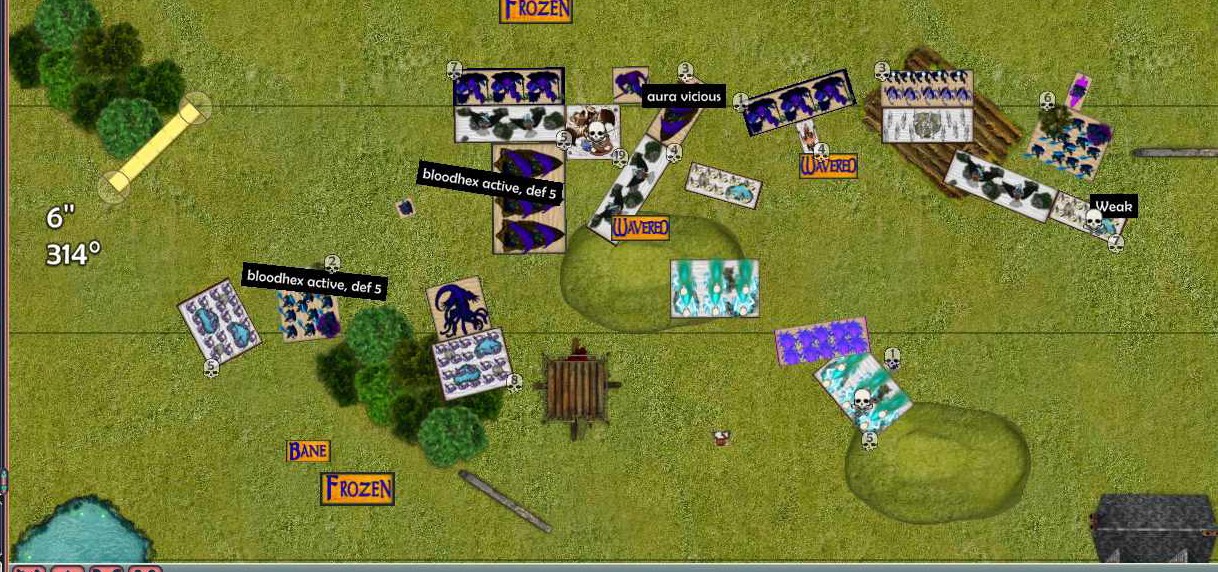
After B3
Three routs and two wavers makes for a pretty strong turn by my opponent. Escpecially losing mutans in one shot by hindered helstrikers, and navigator that didnt expect flank from riftwalkers was a big blow. I think the stormshrine successfully cast 3 BC and one HSB that turn!
After T4
I got a good turn myself, the crone on the left managed to put 3 dmg on already wounded riftwalkers, routing them. Again a difficult decicion, trying to rout the riftwalker unit, VS weakining the helstrikers to try save the Soulbane. Hindered FW routet other RWs, and a triple charge against Vohdler resulted in the third rout.
After B4
A lot of fighting in a chaotic melee; Thonaar just poking the crone, Helstriker horde routed the SB, helstriker regiment go for impaler regiment, riftwalkers failed to rout fleetwardens on 12 dmg, stormbringer finished off the wranglers.
After T5
Skiffs and imapler regiment routs the helstriker regiment, fleetwarden (with good help from assassin) routs another unit while hindered. There was alrrady 4dmg on the helstrikers horde, but I still felt a bit lucky. Cheeky crone tried to ground the other helstriker horde with nothing better to do. I think La theal put BC on fleetwardens. Terror is stuck behind, biding his time…
After B5
The Riftforged Orcs finishes off a few alreadt wounded units, but the helstriker horde didnt manage to rout the fresh fleetwarden regiment. Shrine charges skiffs to ground them and protect helstrikers, but unfortunately, the terror’s time to strike has come.
After B6 (end of game)
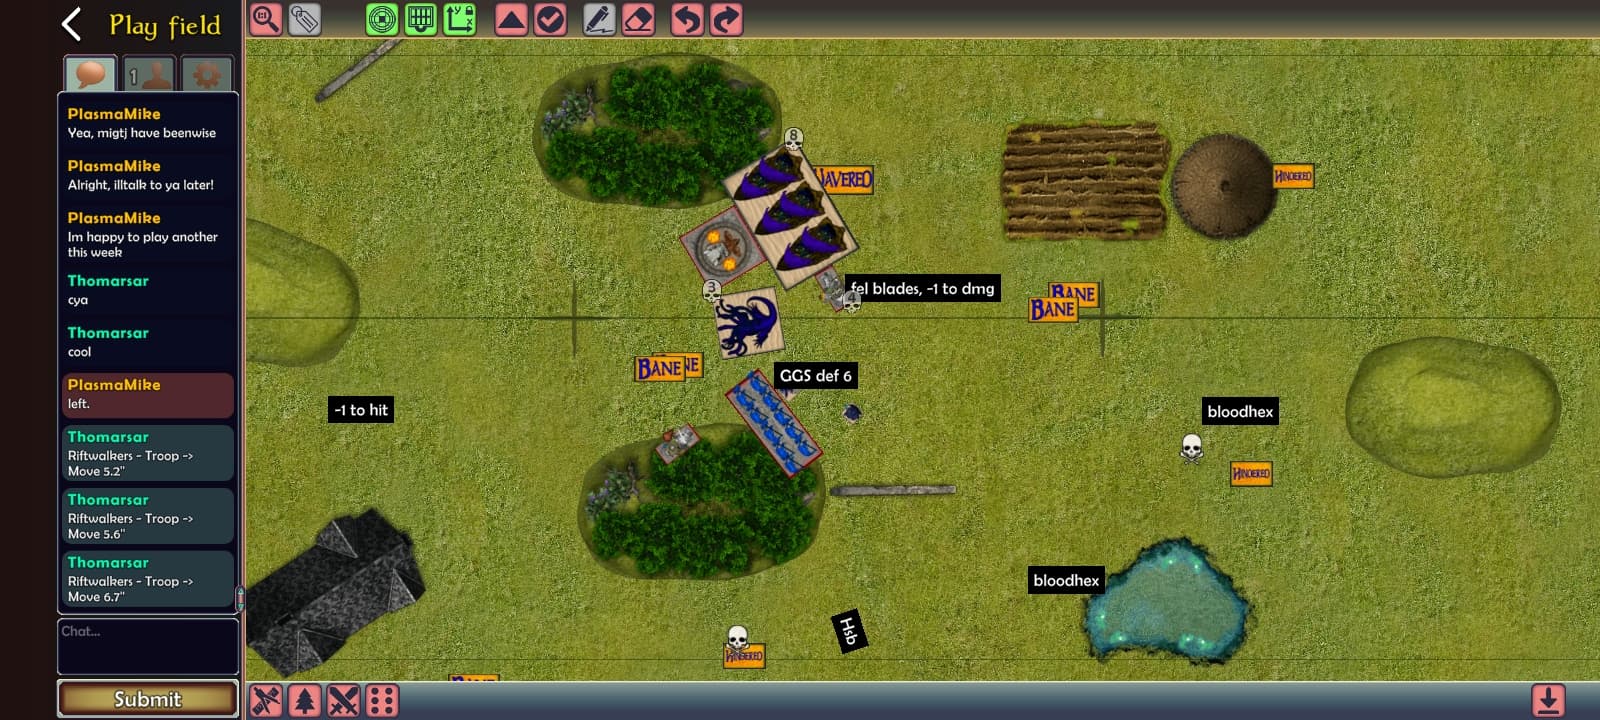
We played the last bit live, so skipped a shot. In T6, the terror flanked the helstrikers and routed the with the help of fleetwardens. In B6 the fleetwardens was killed, but the terror, being US 2 from new rules, still holds the zone. Skiffs survive the combined attacks from anvil and stormbringer, scoring in his centre for 2pts, and actually making the skiffs MVP for this game! Which is a bit funny considering the bit of hate they get. We discussed at end of game, that at some point it mightve been better for Mike to use his superior manouvreability to score, rather thsn try to kill my stuff. Another fun thing I noticed from this game while making the report is that; the three helstriker hordes went in one bye one, and got routed one by one in almost the same spot. It was a real piece trading game in thecentre there.
That is all for my first battle report, game and win eith the new Twilight Kin ![]()